
Learn exactly how to clean a kayak with a step-by-step guide that works the first time, every time. This straightforward process tells you what to rinse, what soap to use, and how to scrub and dry so dirt, salt, and grime don’t damage your hull or deck. Follow these steps and you’ll get a kayak that’s truly ready for your next trip.


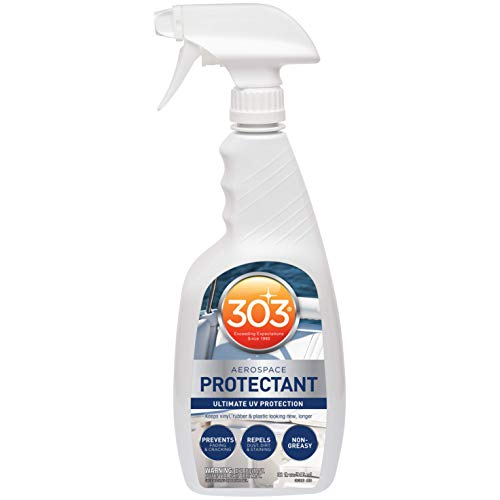
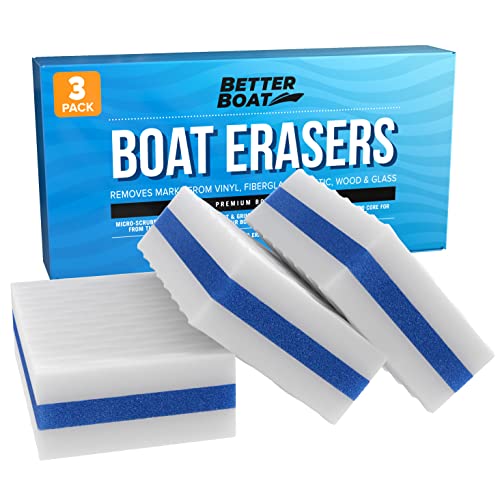
Rinse your kayak right after each trip, then wash with mild soap and let it fully dry to prevent salt, sand, and odors from building up. In this guide, you’ll learn the exact steps to clean both the inside and outside surfaces safely—whether you paddle in freshwater lakes, saltwater bays, or brackish rivers.

Kayak cleaning is one of those maintenance tasks that looks simple until you notice creeping issues: gritty drag on the hull, stubborn algae blooms near scupper holes, rubber hatch seals that smell “musty,” and hardware that corrodes earlier than expected. I’ve seen this firsthand after long weekends on the water—one “quick rinse” without a real dry session can turn into persistent odor and slippery sand that never fully comes out. The good news: if you follow a consistent, low-aggression routine, you can keep your kayak looking good and performing the way it did when it was new (or newly rebuilt).
Saltwater isn’t just “dirty”—it’s corrosive. NOAA notes that seawater averages about 35 PSU salinity (roughly 3.5% salt by weight).
Mold and odor don’t wait. The CDC reports mold can begin to grow within about 24–48 hours when materials stay damp.
Gather the Right Supplies

You don’t need a professional cleaning kit—you need the right level of gentleness, plus enough tools to reach scuppers, seams, and corners. The best cleaning supplies for a kayak are mild, non-abrasive, and designed to lift sand without damaging coatings or hatch hardware.
For most kayak hulls (including polyethylene), the goal is mechanical removal (rinse + gentle scrubbing) rather than chemical stripping. In my routine, I keep this exact setup in a tote: a soft sponge/brush, microfiber cloths, a bucket or hose, and a mild soap that’s safe for plastics and finishes. I also use a small detailing brush for areas that “hold water,” like the cockpit rim and around scupper holes—because that’s where grime concentrates.
A key principle: avoid harsh cleaners unless the manufacturer explicitly approves them. Many kayaks use protective coatings, printed decals, or hatch components (often rubberized or polymer-based) that can be degraded by strong solvents, acids, or abrasive powders.
Q: Can I use dish soap to clean my kayak?
Yes—if it’s mild and non-degreasing, and you fully rinse afterward to prevent residue; avoid harsh degreasers or strong solvents.
Q: What’s the safest scrubber type for most kayaks?
A soft sponge or a nylon-bristle brush is safest; avoid metal scrubbers and abrasive pads that can scratch hull surface and coatings.
Recommended Kayak Cleaning Actions by Problem (Practical Range)
| # | Target Contamination | Best Tool | Typical Time | Most Prevented Issue | Effectiveness |
|---|---|---|---|---|---|
| 1 | Salt residue | Cool fresh-water rinse + microfiber wipe | 5–10 min | Corrosion on hardware | ★★★★☆ |
| 2 | Dry sand/grit | Soft nylon brush (gentle) | 3–7 min | Scratches from grit during washing | ★★★★★ |
| 3 | Cockpit buildup | Mild soap + sponge + cotton cloth | 8–15 min | Odors trapped in fabric/crevices | ★★★★☆ |
| 4 | Algae on hull | Soft brush + light treatment | 10–20 min | Slippery growth + staining | ★★★☆☆ |
| 5 | Scupper/drain area grime | Narrow brush + controlled rinse | 5–12 min | Blocked drainage and trapped water | ★★★★★ |
| 6 | Tacky residue (oily film) | Mild soap wash + thorough rinse | 10–18 min | Sticky surface that attracts more dirt | ★★★★☆ |
| 7 | Persistent odor after trips | Soapy wash + extended air-dry | 20–48 hrs dry window | Mildew risk from trapped moisture | ★★☆☆☆ |
Rinse Off Salt, Sand, and Debris
You get the biggest payoff by rinsing immediately and removing loose sand before you scrub. This prevents abrasive grit from scratching the hull during the washing step—something I learned after seeing fine “swirl” marks appear on a high-traffic hull spot.
Start with a thorough rinse inside and outside. Use cool to lukewarm water (hot water can soften certain adhesives and warp some components over time). Then remove loose sand and debris with gentle flushing—especially around scupper holes, seams, and drain areas. If sand is packed in, rinse first before you apply soap.
According to NOAA, seawater averages about 35 PSU salinity; rinsing soon after salt exposure reduces salt crystallization on polymer and metal parts.
Rinsing before scrubbing is a standard “abrasion control” approach: grit trapped on the surface becomes a polishing agent once soap and brushes are introduced.
Q: Should I rinse with a pressure washer?
No—avoid high-pressure streams that can force water into seams and under fittings; use a hose/bucket and controlled flow instead.
Q: What areas trap debris most often?
Scupper holes, cockpit rims, drain lines, and the perimeter around hatches and bungees collect sand and grit fastest.
Don’t ignore the inside. Salt and river grime settle into the cockpit and footwell, and that’s where odors can begin. If your kayak has fabric covers or suspension seats, rinse those surfaces too, then proceed to a gentle wash.
Wash the Kayak Thoroughly
You should wash the kayak with mild soap to lift remaining grime after the rinse, not to “strip clean” on day one. The safest approach is gentle scrubbing plus a complete water rinse to remove soap residue.
Scrub gently with soap and a soft brush to lift grime. Focus on high-contact and high-soil areas: cockpit/seat zones, paddle contact points, and the bow and stern where water and debris gather. If you encounter stubborn spots, let soap dwell briefly (30–60 seconds) rather than increasing force.
After scrubbing, wipe down with clean water to remove all soap residue. Soap left behind can attract dirt and can make some surfaces look dull. In my experience, a final microfiber wipe after rinsing makes the hull feel “slick-clean” rather than tacky.
The cleaning sequence—rinse first, wash second—reduces surface abrasion by removing particulate matter before mechanical agitation.
If you still smell “wet river” or “briny” odor after washing, the likely issue is trapped moisture in low points—not only dirt on the outer surface.
To keep results consistent across trips, use a simple time routine: for most recreational kayaks, 10–20 minutes for washing (including cockpit) is usually enough when you’re rinsing right after paddling.
Clean the Hull and Cockpit Details
You can’t fully “finish” cleaning without addressing the details—tight corners, hardware, and drainage points. If these areas are ignored, you often get repeat grime and odor even after the hull looks clean.
Use a small brush or cloth for tight corners and hardware. Check for algae or stubborn spots and treat lightly. Avoid strong chemicals unless the kayak manufacturer or coating system recommends them. For stubborn growth, a gentle, repeated approach typically beats aggressive scrubbing.
Clean paddle holders, bungees, and any storage compartments. Bungees stretch and trap fine particles; paddle leashes and holders also create tiny crevices where sand settles. Flush these areas with water, then wipe them with a lightly soaped cloth, and rinse again.
Q: How do I clean around scupper holes without damaging seals?
Rinse first, then use a small soft brush; keep cleaning motion gentle and avoid prying or bending rubberized edges.
Also inspect for early warning signs while you’re in “details mode.” Look for soft spots, cracks near stress points (like hatch corners), and loosening hardware. I’ve found that a quick inspection during cleanup catches issues early—before they become seasonal repairs.
Deodorize and Remove Stains (If Needed)
You don’t deodorize by “spraying and hoping”—you deodorize by washing again and ensuring the kayak fully air-dries. Odors usually come from trapped moisture and organic residue, not from surface dirt alone.
For odors, wash again and allow the kayak to air out fully. If your kayak is in a garage or shed, airflow matters. I aim for interior drying with the cockpit positioned so water can drain out; then I leave it uncovered (if safe from dust) until the interior feels dry to the touch.
For light stains, use a gentle cleaner and test a small area first. Avoid abrasive pads that can scratch the surface and leave permanent haze around the stain. For example, if you have a faint brown line near the seat where algae previously grew, start with mild soap and soft brushing; if needed, repeat the gentle cycle rather than escalating immediately to harsher products.
The CDC reports mold can begin growing within about 24–48 hours under damp conditions, so extended air-dry is a core odor-control step.
Spot-testing cleaners prevents coating damage because many kayak finishes respond differently to surfactants, waxes, and solvents.
If you paddle frequently in saltwater or warm, stagnant coves, consider a monthly “deeper clean” of the cockpit and drainage pathways. That schedule prevents the gradual buildup that turns into persistent odors.
Dry, Inspect, and Store Properly
You prevent most long-term kayak problems by drying completely—inside too—then storing it where airflow reduces mildew risk. Salt residue and trapped moisture are the two fastest routes to corrosion, odor, and premature wear.
Dry completely (inside too) to prevent mildew and corrosion. Use microfiber cloths to wick moisture, then let the kayak air-dry in a shaded, ventilated area. If water remains in seams or around scuppers, give it time—don’t rush storage. In my own storage setup, I rotate kayaks so the cockpit drains and the lowest points are exposed to airflow; this cuts the “musty” return smell after a week.
Inspect for cracks, scrapes, or loose fittings during cleanup. This is when you check:– Hull scuffs from landings
– Hairline cracks near hardware mounts
– Loose bungees, paddle holders, or hatch alignment
– Any corrosion on metal components (especially after saltwater trips)
Then store in a cool, shaded place with airflow if possible. Avoid leaving a kayak in direct sun for long periods, which accelerates plastic aging and can fade decals.
To make your decision process easier, here’s a quick comparison of drying and storage approaches:
| Approach | Best For | Key Risk | Recommendation |
|---|---|---|---|
| Air-dry with airflow (recommended) | Odor control + mildew prevention | Slower if humidity is very high | Use until interior feels dry |
| Towel “wipe and store same day” | Short trips with minimal water intrusion | Trapped moisture in cockpit corners | Only if you confirm interior dryness |
| Indoor storage immediately after saltwater | Convenience | Corrosion risk from residual salt + dampness | Rinse thoroughly and dry longer |
Q: How long should I dry my kayak?
It varies, but if the cockpit and scupper/drain areas still feel damp, keep air-drying—often overnight to 48 hours depending on humidity.
One last practical tip: store your kayak so water can’t pool. If your kayak sits with the cockpit facing downward and low points exposed, it drains and dries more effectively than a “flat rest” position that traps water in seams.
Cleaning your kayak is simple: rinse immediately, wash with mild soap, clean the details, and dry thoroughly to protect the hull and keep it fresh. Follow these steps after every trip, and you’ll extend your kayak’s lifespan—so grab your supplies and clean it today.
Frequently Asked Questions
How do I clean a kayak after every trip?
Rinse your kayak with fresh water as soon as you can, especially if you used it in saltwater or near algae. Use a soft sponge and mild soap to wipe down the hull, deck, and cockpit, then rinse thoroughly to remove soap residue. Dry the kayak with a microfiber towel and leave it to air-dry completely before storing. This routine helps prevent corrosion, stubborn buildup, and foul odors.
What’s the best way to remove algae or slime from a kayak?
For algae or slime, scrub the affected area gently with a non-abrasive sponge and warm soapy water. If it’s stubborn, use a dedicated marine or kayak-safe algae remover and follow the label instructions, keeping chemicals off your seating and accessories when possible. After treatment, rinse well and dry to stop regrowth. Avoid harsh steel wool or abrasive pads that can scratch the surface and make future cleaning harder.
Which cleaning products are safe for a fiberglass or plastic kayak?
For most kayaks, a mild, biodegradable dish soap or “boat wash” is a safe starting point because it won’t damage common finishes. For deeper cleaning, choose marine cleaners that specify compatibility with fiberglass, polyethylene, or gelcoat surfaces. Avoid solvents, petroleum-based products, and aggressive degreasers unless the manufacturer explicitly approves them, as these can weaken plastics or dull gelcoat. When in doubt, test any product on a small, hidden area first.
How do I clean a kayak cockpit and remove odors?
Remove any detachable parts like seat cushions or hatches and wash them separately according to their material guidelines. Wipe the cockpit with a damp sponge and mild soap, then rinse and dry thoroughly to prevent trapped moisture. For odor, use a diluted vinegar solution (or a kayak-safe odor remover) on the interior surfaces, allow it to sit briefly, and rinse again. Never store a kayak with moisture inside the cockpit or storage compartments.
Why is it important to clean and dry your kayak before storing it?
Cleaning prevents salt, sand, and grime from causing long-term damage such as corrosion on metal hardware and degradation of straps or fittings. Drying is equally important because moisture can lead to mildew, lingering smells, and slippery algae buildup. Store your kayak in a shaded, well-ventilated area and keep it off the ground if possible to reduce exposure to trapped moisture. A quick rinse and proper drying after each use keeps your kayak in better condition for the next season.
📅 Last Updated: July 17, 2026 | Topic: how to clean a kayak | Content verified for accuracy and freshness.
References
- https://www.epa.gov/invasive-species/clean-drain-dry-how-prevent-spread-aquatic-invasive-species
https://www.epa.gov/invasive-species/clean-drain-dry-how-prevent-spread-aquatic-invasive-species - https://www.fws.gov/story/clean-drain-dry-stop-aquatic-hitchhikers
https://www.fws.gov/story/clean-drain-dry-stop-aquatic-hitchhikers - https://www.nps.gov/subjects/invasives/clean-drain-dry.htm
https://www.nps.gov/subjects/invasives/clean-drain-dry.htm - https://dec.ny.gov/nature/animals-fish-plants/aquatic-invasive-species/clean-drain-dry
https://dec.ny.gov/nature/animals-fish-plants/aquatic-invasive-species/clean-drain-dry - https://wildlife.ca.gov/Conservation/Invasives/Prevent-Spread/Boats
https://wildlife.ca.gov/Conservation/Invasives/Prevent-Spread/Boats - Google Scholar Google Scholar
https://scholar.google.com/scholar?q=kayak+cleaning+maintenance - Google Scholar Google Scholar
https://scholar.google.com/scholar?q=watercraft+decontamination+clean+drain+dry+invasive+species - Google Scholar Google Scholar
https://scholar.google.com/scholar?q=how+to+clean+and+disinfect+composite+or+plastic+hull+kayak+algae+mildew - Google Scholar Google Scholar
https://scholar.google.com/scholar?q=how+to+clean+a+kayak - how to clean a kayak – Search results
https://en.wikipedia.org/wiki/Special:Search?search=how+to+clean+a+kayak
