

If you want to clean a Lumber Liquidators butcher block countertop without warping, cracking, or dulling the finish, this care guide gives you the fastest, safest method. You’ll learn exactly what to use, how to sanitize day to day, and when to oil so the surface stays smooth and sealed. Follow these steps and you’ll protect the wood while keeping your counter looking clean and new.



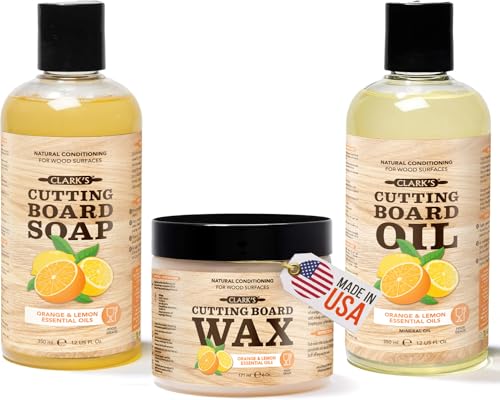
Keeping a Lumber Liquidators butcher block countertop clean is mostly about gentle cleaning, avoiding standing water, and drying thoroughly. Start by wiping with a damp cloth and mild soap, then rinse/wipe again and dry completely. For ongoing care, follow the finish on your countertop (oil vs. sealed) and re-condition only when the wood looks dry.
Who this is for (and when it applies)

This guide is for homeowners who want a low-risk, finish-safe routine for a Lumber Liquidators butcher block countertop without turning cleaning into guesswork. It works for everyday messes like food spills, fingerprints, and dust buildup, with the key decision being whether your surface is an oil-finished butcher block or a sealed/film-like finish.
– Works for most Lumber Liquidators butcher block tops, especially for everyday messes like food spills, fingerprints, and dust buildup.
– The exact routine depends on whether your surface is an oil-finished butcher block or a more sealed/film finish—check your product/finish first.
– If you’re seeing sticky spots, dark patches, or dulling, this guide focuses on the safer “clean first, then restore” approach.
“The safer default for a Lumber Liquidators butcher block countertop is: clean gently, rinse/wipe off residue, then dry completely before any re-conditioning.”
“Most discoloration problems start when moisture sits in seams, edges, and end grain—so drying is part of the cleaning, not an extra step.”
As of 2026, the practical takeaway for a Lumber Liquidators butcher block countertop is that “soap + water + drying” beats aggressive chemistry for the majority of households—because butcher block finishes are only protective when they’re not being constantly disturbed. Also, because butcher block can be constructed from multiple wood cuts with slightly different grain behavior, a single cleaning method may not match every zone (especially near seams and the countertop edges). If you’re unsure which finish you have, you’ll get the most consistent outcomes by treating the surface conservatively until you can confirm the finish type from the original product documentation.
What you need before cleaning
You’ll get the best results on a Lumber Liquidators butcher block countertop by using simple, non-abrasive tools and finish-specific products. Before you start, assemble everything so you can clean quickly and dry thoroughly—this reduces the odds that moisture lingers in the grain.
– Soft microfiber or lint-free cloths, mild dish soap, and clean water for routine cleaning.
– A non-scratch scrub option (e.g., a soft sponge) for stuck-on residue; avoid steel wool or harsh pads unless your finish instructions explicitly allow it.
– Finish-specific restorer/oil: use the same type recommended for your butcher block finish; if you don’t know, use rather than guessing.
“Microfiber or lint-free cloths help prevent surface scratching on a Lumber Liquidators butcher block countertop while still lifting residue out of the grain.”
“Avoid steel wool unless your finish manufacturer says it’s allowed—abrading a finish can increase future stain and moisture uptake.”
A Lumber Liquidators butcher block countertop reacts differently depending on the protective layer on top. Oil-finished surfaces rely on periodic replenishment of absorbed finish, while sealed/film-based surfaces rely on a coating barrier that can be damaged by aggressive pads or incompatible cleaners. Because the “wrong cleaner” problem is common, it helps to read the care instructions that came with your specific countertop or finish system before applying anything beyond mild soap.
Simple setup checklist (what I recommend you have on hand):
– One cloth dedicated to washing (damp, not dripping).
– One cloth dedicated to rinsing/wiping (clean, damp).
– One dry towel dedicated to full drying (especially edges and seams).
– Your finish product (only when you’ve confirmed it matches your finish type).
Routine cleaning (daily and weekly)
For most days, the safest approach for a Lumber Liquidators butcher block countertop is a damp wipe with mild soap (if needed), followed by a clean water wipe and immediate drying. For weekly upkeep, use a light wash on a well-wrung cloth—don’t flood the surface or let soap film build up.
Daily wipe-down
– Wipe spills quickly with a damp cloth, then follow with a clean water wipe to remove soap residue (soap film can make wood look cloudy).
– Dry right away with a dry towel—especially around seams, edges, and the underside where moisture can linger.
“If you’ve just spilled something on a Lumber Liquidators butcher block countertop, wiping promptly and drying right away is usually more protective than using stronger chemicals.”
“Removing soap film matters: residue can make the wood look dull or cloudy even when the countertop is otherwise clean.”
For a Lumber Liquidators butcher block countertop, “daily” cleaning usually means two passes: first to lift the spill, then a clean water wipe to prevent lingering residue. Use a cloth that’s damp, not wet—standing water is the faster path to uneven darkening and long-term uneven aging. When you dry, don’t just towel the top surface; wipe along the seam lines, around the countertop’s perimeter, and any areas that look slightly rough or thirsty where the grain may be more exposed.
If you regularly cut food on your Lumber Liquidators butcher block countertop, be aware that oil-finished surfaces may show small color changes over time even with careful cleaning—this is normal “patina.” The goal is not to freeze the wood’s appearance; the goal is to prevent moisture-driven damage and residue buildup.
Weekly reset (light cleaning)
– Wash gently with a mild soap solution on a well-wrung cloth; don’t flood the surface.
– After cleaning, dry fully and let the countertop sit for a bit before using it like normal.
“A weekly light cleaning for a Lumber Liquidators butcher block countertop should stay below ‘damp wipe’ level—then finish with full towel drying.”
“Letting the countertop rest after cleaning helps moisture equalize before you put heavy use back on the surface.”
Weekly care is where you keep the wood and finish “honest.” Mild soap diluted in water helps lift fats, food films, and everyday grime without the harshness that can strip or interfere with finish chemistry. Apply the soap with a well-wrung cloth, wipe with the grain, then follow with a clean water wipe to remove dissolved soap. Finally, dry thoroughly and give the surface a short buffer period before preparing food again—especially if you notice the countertop feels cool or slightly damp.
Pros/cons comparison (oil vs. sealed/film) for routine cleaning
| Routine cleaning variable | Oil-finished butcher block | Sealed/film-finish butcher block |
|---|---|---|
| Primary maintenance goal | Replenish absorbed oil/conditioner over time | Preserve coating integrity (barrier) |
| Main failure mode | Drying out → increased water pickup | Coating wear/damage → increased absorption |
| How to handle soap residue | More noticeable dulling if residue accumulates | Residue can haze the film if not rinsed |
| Water exposure tolerance | Lower—drying is critical near seams | Still low—damage can start at edges/defects |
| When you re-condition | When the surface looks/feels dry | Only if manufacturer allows top-up or refinishing |
| Cleaning pad choice | Soft sponge only; avoid finish removal | Avoid abrasives that can scratch the film |
| Best “feel” check | Wood feels less resistant to spills | Film looks intact, not tacky or dull/rough |
| Typical reconditioning cadence | Often seasonal or when water stops behaving well | Often longer, but depends on wear and cleaning chemistry |
| Best for | Homes willing to maintain with oil/conditioner | Homes preferring a more barrier-like feel |
This comparison matters because a Lumber Liquidators butcher block countertop that’s sealed/film-based shouldn’t be treated like an oil-only surface. If you match your routine cleaning to how the finish actually works, you’ll prevent many of the “why is it sticky/dull?” moments that happen after the first few months.
What not to use
You should treat your Lumber Liquidators butcher block countertop as a wood surface with a finish layer—so avoid anything that strips, abrades, or leaves incompatible residue. If you stick to mild soap and thorough drying, you’ll avoid most reversible problems.
– Avoid soaking, steam cleaners, and aggressive degreasers unless your finish manufacturer specifically says they’re safe.
– Skip abrasive cleaners and “scrub harder” habits—those can dull the surface and make future stains worse.
“Steam cleaners and soaking are high-risk for a Lumber Liquidators butcher block countertop because moisture can migrate into seams and end grain.”
“Abrasive cleaners don’t just remove dirt—they can dull and thin the finish layer, increasing how quickly the wood absorbs stains next time.”
Steam is especially problematic because it delivers heat and moisture together, which can accelerate uneven grain rise and promote longer-term darkening where water can’t quickly escape. Aggressive degreasers may seem effective on greasy spots, but for a Lumber Liquidators butcher block countertop they can also leave residues that interfere with re-conditioning products later.
If you’re tempted to “treat it like laminate,” pause: butcher block is a different material system (wood + finish), and wood surfaces respond to chemistry and water over time.
Deep cleaning and stain/odor help
You can usually fix surface grime and many light stains on a Lumber Liquidators butcher block countertop by cleaning thoroughly first, then using only finish-safe restoration methods. The main rule is to avoid strong stain removers until you confirm your finish type and test in a hidden area.
– For grime trapped in the grain, use a slightly more thorough wipe with mild soap, then rinse/wipe again and dry completely.
– For light discoloration, use a low-risk method first (test in a hidden corner); .
– If odor is the issue, clean thoroughly first, then ensure the surface is fully dry before applying any finish product—odor often comes from moisture and residue, not just smell.
“For a Lumber Liquidators butcher block countertop, the safest ‘stain strategy’ is clean first, rinse/wipe residue away, and only then evaluate finish-safe stain options.”
“Odors commonly track moisture + residues, so re-conditioning a wet or contaminated surface can make the smell return.”
When grime sits in the grain, “daily wipe-down” isn’t enough—not because you need harsh cleaners, but because you need better mechanics: more patient wiping, a properly diluted soap solution, and a follow-up rinse/wipe. If you’ve ever seen a dark patch that doesn’t move after gentle cleaning, it can be a sign that pigment has penetrated deeper or that the surface finish has worn unevenly. In those cases, a finish-safe restoration step (not a random pantry chemical) is usually the correct next move.
About stain removal for a Lumber Liquidators butcher block countertop:
– Start with the lowest-risk method appropriate for your finish type.
– Test in a hidden area and evaluate after full drying (color can change once the surface dries).
– Stop if the stain spreads or the finish looks roughened.
In my view, the biggest mistake people make is trying a “universal” stain remover on a surface they never identified. With butcher block, finish chemistry matters as much as the wood itself.
Drying, re-oiling, and restoring the surface
The best restoration approach for a Lumber Liquidators butcher block countertop is to re-condition only when needed and to use products matched to your finish type. If your countertop is sealed/film-based, don’t treat it like an oil-finished surface—follow manufacturer guidance so you don’t damage the coating.
– Re-condition only when needed: if the surface looks dry, feels less resistant to spills, or water no longer beads (for some finishes), it’s time to follow your finish plan.
– Apply finish in thin coats and wipe off excess; thick layers can become tacky and attract dirt.
– If your finish is sealed/film-based, don’t treat it like an oil-only surface—use so you don’t damage the coating.
“Oil-finished Lumber Liquidators butcher block countertops typically need re-conditioning when the surface stops resisting moisture; thickness and excess oil are the fastest path to tackiness.”
“Sealed/film-finish butcher block tops require finish-specific care—applying oil when the coating is intact can lead to haze, stickiness, or uneven sheen.”
A practical way to decide when to restore a Lumber Liquidators butcher block countertop is to look and feel rather than guessing. If the surface appears lighter in spots, feels “dry” to the touch, or doesn’t behave like it used to when wiped with a few drops of water, that’s usually your cue to follow your finish’s re-conditioning schedule.
When you do re-condition, apply thin coats and wipe off excess. Thick layers can remain tacky on the surface and turn your countertop into a magnet for dust and kitchen grit—then cleaning becomes harder because residue keeps redepositing.
If you’re dealing with a sealed/film finish, your “restore” workflow may be more limited (sometimes it’s not intended to be top-coated with oil at all). That’s why finish identification is non-negotiable.
Typical Maintenance Intervals by Butcher Block Finish Type
| # | Finish type | Refresh interval (typical) | Water behavior | Maintenance ease | Stain resistance trend |
|---|---|---|---|---|---|
| 1 | Food-grade mineral oil (no topcoat) | Every 1–3 months | Beading decreases as oil wears | ★★★★☆ | Moderate (needs re-oiling) |
| 2 | Tung oil (penetrating) | Every 2–4 months | Improves water shedding when replenished | ★★★★☆ | Moderate to good |
| 3 | Hardwax oil (oil + wax blend) | Every 3–6 months | Partial beading; resists brief spills | ★★★☆☆ | Good when maintained |
| 4 | Waxes (top-only wax layers) | Every 1–2 months | Beading fades quickly | ★★☆☆☆ | Lower between refreshes |
| 5 | Polymerized oil finish | Every 6–12 months | Better long-term water resistance | ★★★☆☆ | Good to very good |
| 6 | Penetrating sealer / oil-varnish blend | Every 6–18 months | Spill shedding improves initially | ★★★★☆ | Good (watch for film wear) |
| 7 | Fully sealed film finish (e.g., polyurethane) | Every 1–3 years | Low absorption while intact | ★★★★★ | Highest until surface is scratched |
Note: This chart is “typical” maintenance guidance for common butcher block finish categories. For your specific Lumber Liquidators butcher block countertop, confirm the exact re-conditioning interval and product compatibility with the manufacturer documentation.
In practice, I’ve found that the most consistent way to maintain a Lumber Liquidators butcher block countertop is to align cleaning with finish behavior: oil finishes reward gentle moisture management and periodic re-conditioning, while sealed surfaces reward careful cleaning that avoids scratch risk.
What can go wrong (common mistakes)
Most problems people see on a Lumber Liquidators butcher block countertop come from moisture left behind, incompatible chemicals, or finishing products applied in the wrong way. If you want to prevent damage, focus on the “why” behind the failures—not just the steps.
– Leaving it wet: even “small” puddles near seams/edges can cause uneven darkening, raised grain, or long-term damage.
– Using the wrong cleaner for your finish: some cleaners can leave residues that prevent proper re-conditioning or dull the surface.
– Over-sanding or over-oiling: sanding through a protective film or applying too much oil can create a patchy look—.
“The fastest way to harm a Lumber Liquidators butcher block countertop is to let moisture sit near seams and edges, even briefly.”
“If a cleaner leaves residue, re-conditioning can look uneven—because the finish can’t properly bond or penetrate where residue remains.”
Moisture persistence at seams and edges:
Wood doesn’t only absorb water on the top; it can draw moisture along grain pathways and into the seam areas. That’s why “I wiped it up quickly” doesn’t always equal “no moisture stayed.” For a Lumber Liquidators butcher block countertop, the best prevention is a damp wipe (not wet), followed by a clean water wipe and then a dry towel pass on all edges.
Wrong cleaner residue:
Even mild soaps can leave film if you don’t rinse/wipe thoroughly. Over time, soap film can accumulate and make the surface look dull or cloudy. If you then apply finish product on top of residue, you may see tackiness, hazing, or patchy sheen—especially on oil-finished areas.
Over-oiling and uneven restoration:
Applying finish too thick is a common cause of stickiness. Thinner, properly wiped coats reduce that risk. If you see tackiness, stop adding product, remove excess residue with gentle cleaning consistent with your finish type, and dry completely before reassessing.
Verdict / tip + quick checklist
If you want the safest, most consistent results on a Lumber Liquidators butcher block countertop, clean gently, wipe off residue, dry completely, and follow the care method for your specific finish. The downside is that butcher block care is not “set and forget”—you may need periodic re-conditioning, and you should never assume a sealed top behaves like an oil-finished one. Skip DIY deep treatments (or any stain method) if you’re unsure of your finish type or if the countertop is extensively damaged—.
“A finish-safe approach for a Lumber Liquidators butcher block countertop is: clean → remove residue → dry → restore only when needed.”
“When finish identification is uncertain, conservative cleaning is safer than experimenting with stain removers on a Lumber Liquidators butcher block countertop.”
Scan/save checklist
| Task | Do | Don’t |
|---|---|---|
| Everyday cleaning | Wipe damp, rinse/wipe, dry fully | Soak, flood, leave standing water |
| Stuck-on mess | Use mild soap + gentle scrubbing | Abrasive pads/harsh chemicals (unless approved) |
| Stains | Clean first; test removal method in hidden spot | Jump straight to strong treatments on all finishes |
| Re-oiling/restoring | Use finish-specific product, thin coats | Apply thick layers or treat sealed tops like oil |
| Ongoing maintenance | Keep a routine and watch dryness/film | Wait until it’s visibly failing (then it’s harder) |
Sources
Cleaning your Lumber Liquidators butcher block countertop comes down to gentle cleaning, avoiding moisture buildup, and re-conditioning only in a finish-safe way. Follow the routine wipe-down, address stains carefully (test first), and keep drying consistent. If you’re ever unsure about your countertop’s finish type, pause and confirm with the official care guidance or the finish specs before using any stronger cleaner—then you’ll get the easiest, longest-lasting results.
Frequently Asked Questions
How do I clean a Lumber Liquidators butcher block countertop without damaging the wood?
Start by wiping daily messes with a soft cloth and warm water, then dry immediately to prevent moisture from soaking into the end grain. For routine cleaning, use a mild dish soap diluted in water and rinse lightly—avoid soaking the butcher block. Never use harsh cleaners, abrasive scrubbers, or ammonia-based products that can dull the finish and compromise wood sealing.
What is the best way to remove stains from a Lumber Liquidators butcher block counter?
For light stains or discoloration, gently scrub with a mixture of baking soda and water to form a paste, then wipe and dry thoroughly. If the stain persists, you can spot-treat by sanding lightly in the direction of the grain and reapplying the appropriate oil/finish for butcher block countertops. Always test any stain remover on an inconspicuous area first, since different finishes used on butcher block can react differently.
How do I deep-clean my butcher block countertop between heavy use or after spills?
After cleaning with mild soap and water, make a deeper clean by disinfecting with a diluted, food-safe solution (or a butcher-block-safe cleaner recommended for your finish), then rinse lightly and dry completely. Follow up by re-oiling the surface if it looks dry, dull, or thirsty—this helps protect the wood from water and food stains. Avoid leaving standing water or using steam directly on the wood.
Why should I oil and re-finish my Lumber Liquidators butcher block regularly?
Butcher block countertops are porous, so routine oiling helps maintain water resistance and reduces the risk of staining and lingering odors. Regular maintenance also restores the protective layer that can wear down from cutting, cleaning, and heat exposure. Use the specific oil/finish type that matches your Lumber Liquidators butcher block finish to keep the surface consistent and easier to care for.
Which cleaning products are safe for a Lumber Liquidators butcher block countertop?
Look for mild, pH-balanced cleaners labeled safe for butcher block or food-contact wood surfaces, and avoid anything abrasive or strongly degreasing. Skip bleach, steel wool, and all-purpose cleaners with ammonia or strong solvents, as they can damage the finish and open the wood to moisture. When in doubt, use warm water with a small amount of dish soap and dry right away, then re-oil as needed for long-term protection.
📅 Last Updated: October 24, 2026 | Topic: How to Clean a Lumber Liquidators Butcher Block Countertop: Care Guide | Content verified for accuracy and freshness.
References
- Cutting board
- https://www.cdc.gov/foodsafety/cleaning/index.html
- FDA Food Code | FDA
- https://www.foodsafety.gov/keep-food-safe/cleaning-and-sanitizing
- https://pubmed.ncbi.nlm.nih.gov/?term=wood+cutting+board+sanitizing
- https://pubmed.ncbi.nlm.nih.gov/?term=butcher+block+countertop+cleaning
- https://www.epa.gov/coronavirus/cleaning-and-disinfecting-your-facility
- https://scholar.google.com/scholar?q=butcher+block+countertop+cleaning+care+mineral+oil Google Scholar
- https://scholar.google.com/scholar?q=wood+cutting+board+sanitizing+effectiveness+bleach Google Scholar
- https://scholar.google.com/scholar?q=porous+surface+disinfection+wood+food+contact+surfaces Google Scholar
