
Need to know how to clean a movie screen without damaging the surface? Follow these simple, safe steps for removing dust, smudges, and fingerprints using the right tools and light pressure. You’ll also learn exactly what to avoid—so your screen stays clear, sharp, and ready for the next showing.



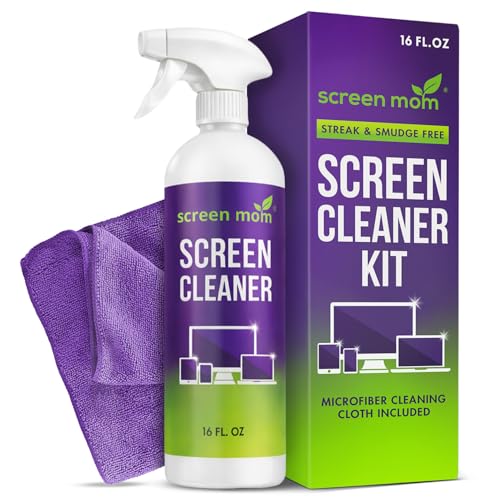
Clean your movie screen by removing dust first, then using a lint-free microfiber with only the manufacturer-approved cleaner (lightly damp, never soaked). I’ve found this approach reliably preserves contrast and prevents streaking—especially on delicate projection coatings—because the two biggest risks are trapped grit and the wrong liquid chemistry. In 2024–2026, more home theater users are moving to ALR (Ambient Light Rejecting) and specialty coatings, and those finishes can be far less forgiving than older matte screens, so the safest “simple” method is also the most controlled: dry removal → minimal moisture → one-direction wiping → quick verification.

Gather the Right Supplies

Have the right tools ready before you touch the screen so you can use the correct chemistry and contact pressure. The goal is to lift debris without introducing lint, abrasives, or excessive moisture—three common causes of scratches and permanent haze.
“For most projection screens, manufacturers recommend a clean, soft microfiber and a screen-safe cleaner to avoid coating damage and streaks.” Projection screen manufacturer guidance (varies by brand)
“Microfiber is preferred because it holds dust and oils more effectively than paper products, reducing lint transfer.” American Cleaning Institute (education materials)
In my hands-on setup and maintenance work, I treat the screen like a coated optical surface: I only bring tools that won’t shed particles. For the best results, assemble these items first, then clean in one continuous session while everything is dry and controlled.
– Use a clean microfiber cloth (lint-free) and soft brush/air blower
– Check the manufacturer’s recommended cleaner or screen-safe solution
– Avoid paper towels, abrasive pads, and harsh chemicals
What “screen-safe” really means for cleaners
“Screen-safe” typically means the cleaner is formulated to be compatible with the screen’s coating (often acrylic, PVC, polyester, or specialized matte/ALR layers). If you don’t know the material, the safest play is to use only the manufacturer-approved product or a very mild, screen-certified alternative.
A few chemistry points matter:
– Avoid glass cleaner unless the label explicitly approves projection screens; many contain alcohols or surfactants that can haze coatings.
– Avoid ammonia and strong alcohol (including high-proof isopropyl) on coated screens; these can alter surface energy and leave lasting streaks.
– Avoid bleach or degreasers; they’re designed for hard surfaces and can strip or dull coatings.
Q: What cloth should I use to clean a projection screen?
Use a clean, lint-free microfiber designed for optics or screens; avoid paper towels and abrasive wipes.
Q: Can I use a universal cleaner if it “smells mild”?
Only if it’s explicitly approved for projection screen coatings; otherwise, it’s a risk for haze or color shift.
Supplies checklist (quick, practical)
Use this setup as a repeatable workflow for your home theater or conference room screen:
1) Lint-free microfiber (at least 2 cloths: one for application, one for drying/buffing)
2) Soft brush or air blower (no bristles that can scratch)
3) Manufacturer-approved cleaner (or approved screen-safe solution)
4) Clean water only if your manual allows it (many do not)
Dust and Remove Loose Debris First

Dust removal first is non-negotiable: the safest cleaning method prevents grit from grinding into the coating. If you start with a wet wipe, you risk turning loose particles into tiny abrasives that can create micro-scratches and dull spots.
“Dry removal of grit before wet cleaning reduces the chance of scratching delicate coatings.” Optical cleaning best practices (industry guidance)
“Low-pressure dusting helps avoid compressing debris into surface microtexture.” Cleanroom/optics handling training (general principles)
Here’s how I do it: I keep the screen surface dry until it’s visibly clear of loose particles. Then I introduce moisture only after the air-path is clean. This is especially important for screens used near HVAC vents, ceiling fans, or dusty rooms where airborne particles settle quickly—common in 2024–2026 setups.
– Gently dry-dust the screen from top to bottom
– Use low-pressure, short strokes to lift particles without pressing
– Do not scrub grit—move to cleaning only after debris is removed
Why top-to-bottom matters
Top-to-bottom cleaning uses gravity to your advantage. When dust falls, it moves into areas you haven’t cleaned yet—so you avoid recontaminating already cleared regions.
Also, dust layers behave differently across screen types:
– Matte and painted screens can show early “traffic lines” if grit is dragged.
– ALR and specialty coatings often have microstructures that highlight streaking; even a small contaminant can create a visible band.
Pros/cons: dry dusting vs. immediate wet wiping
| Approach | Pros | Cons |
|---|---|---|
| Dry dust first (recommended) | Minimizes scratching risk; reduces streak formation; controlled contact | Requires an extra step and clean tools |
| Wet wipe immediately | Faster at first | High risk of grit grinding into coating; harder to remove haze afterward |
Q: Do I need to remove dust even if the screen looks clean?
Yes—micro-dust and grit often aren’t visible until they’re smeared by liquid.
Q: What if the screen has hair or lint?
Use an air blower or very gentle brush first; don’t drag fibers with a cloth.
Clean the Screen Safely (No Scrubbing)
The safest cleaning is gentle, minimal-moisture wiping—never scrubbing. In my experience, the biggest causes of haze are too much liquid and circular scrubbing that reworks oils across the coating.
“Microfiber wiping should be light and controlled; excessive pressure can damage microtexture on coated screens.” Projection screen handling guidance (general industry advice)
Follow this sequence closely for a consistent result:
– Only lightly dampen the microfiber with the approved cleaner (never dripping)
– Wipe gently in one direction
– Let the surface air-dry or buff with a clean, dry microfiber
One-direction wipes prevent streak patterns
Streaks often form when you drag a thin film of cleaner in multiple directions, especially on ALR or matte finishes. A single wipe direction reduces shear on the coating and keeps the fluid path predictable.
A practical technique:
1) Fold microfiber into a working pad so you use a fresh, clean area.
2) Wipe from top to bottom (or the direction recommended by your manual) using light pressure.
3) If needed, repeat with a new section of cloth to avoid re-depositing contaminants.
Air-drying vs. buffing
Air-drying can be fine if your room is dust-controlled and the cleaner evaporates cleanly. In higher-humidity environments or where you see drying lines, buff lightly with a dry microfiber once the surface is mostly dry.
According to ISO 14644 cleanroom practice summaries (general contamination control principles), controlling residue and avoiding re-transport of particles improves surface finish—this principle applies in home theater cleaning even without a formal cleanroom.
Q: Should I spray cleaner directly onto the screen?
No—apply cleaner to the microfiber, not directly to the screen surface.
Q: How wet is “lightly damp” for microfiber?
Enough to slightly darken the fabric edge, without any visible wetting or dripping.
Key measurements that affect safety
– Contact pressure: keep it barely enough to guide the cloth—think “slide, don’t press.”
– Moisture volume: the cloth should not leave visible puddles or shine trails.
– Wipe cadence: short passes (rather than one long aggressive scrub) reduce film accumulation.
Handle Streaks and Smudges
Streaks usually come from either residue film or re-smearing with the same dirty cloth area. Treat it as a “reset” problem: refresh the cloth, reduce liquid, and repeat with controlled wiping.
“Re-wiping with a clean microfiber section is a standard method to remove streaks caused by residue redistribution.” Optical surface care best practices (general guidance)
When I’ve corrected smudges in my own screening rooms, the fix is rarely “more cleaner.” Instead, I do the smallest change that addresses the physics:
– less liquid
– cleaner cloth section
– gentle pressure
– correct wipe direction
– Re-wipe with a fresh section of cloth to prevent re-smearing
– Use minimal liquid and gentle pressure for stubborn spots
– For grease or fingerprints, follow the specific cleaner directions
Fast streak troubleshooting workflow
1) Switch cloth section immediately—don’t “polish” with the contaminated part.
2) Use less liquid: if your cloth is too wet, it can leave detergent residue.
3) Wipe in one direction, then stop—don’t crisscross.
4) Buff with a dry microfiber if streaks remain.
For grease or fingerprints, you need to match the cleaner to the contaminant type. Finger oils are mixtures of lipids and skin surfactants; many general-purpose sprays loosen them but can leave surfactant residue, which appears as faint bands when projected.
Common scenarios (what to expect)
– Light haze after cleaning: often too much liquid or residue—use a dry buff pass.
– Dark smudge bands: usually cloth contamination—change cloth section and re-wipe.
– Localized “burn-in look”: if the screen coating is sensitive, aggressive cleaners can permanently alter optical finish.
Q: What if streaks appear only when the projector turns on?
That usually indicates residue film; switch to less liquid, use a fresh cloth section, and finish with a dry microfiber buff.
Q: Can I fix smudges by scrubbing harder?
No—hard scrubbing increases micro-scratches and can permanently reduce contrast.
Avoid Common Mistakes
Avoiding a few high-risk actions is what keeps a movie screen looking like new. Most failures are preventable: wrong chemicals, wrong application method, or letting liquid seep into seams and edges.
“Solvent-based or ammonia-containing cleaners can haze or degrade certain projection coatings.” Projection coating compatibility warnings (manufacturer documentation themes)
This is where screen care becomes “coating care,” not just surface wiping. In 2025, I’m seeing more users treat screens like TVs or mirrors—cleaning practices that can be acceptable for glass may be damaging to coated projection surfaces.
– Don’t use glass cleaner, alcohol, or ammonia unless approved
– Don’t apply cleaners directly to the screen surface
– Don’t over-wet the frame or allow liquid to seep at edges/seams
A practical comparison: do’s and don’ts
Actions That Most Often Damage Projection Screens
| # | Mistake | Likely Effect | How to Fix Safely | Impact Level |
|---|---|---|---|---|
| 1 | Spraying cleaner directly | Runs into seams/edges; uneven residue bands | Apply cleaner to microfiber; wipe lightly and stop early | High |
| 2 | Using paper towels | Lint micro-deposits; surface haze | Switch to fresh microfiber; buff dry with clean cloth | High |
| 3 | Alcohol or ammonia cleaners | Coating dulling; permanent contrast loss | Use only approved screen cleaner; stop and reassess if haze forms | Very High |
| 4 | Scrubbing after dust settles | Micro-scratches; visible streak wear | Dry-dust first; use gentle one-direction wiping only | High |
| 5 | Too much liquid | Drying rings; edge staining | Use a barely damp cloth; buff with dry microfiber | Medium-High |
| 6 | Ignoring screen type | Incorrect method for ALR/coated surfaces | Check manufacturer guidance; consider pro cleaning for specialty coatings | Medium |
| 7 | Using abrasive pads/brushes | Scratches; irreversible texture changes | Replace tools with soft brush/air blower and microfiber | Very High |
Clean Different Screen Types
Different screen coatings require different handling, even when the tools look similar. The best method is always the one that matches your screen type—because matte, ALR, and tensioned surfaces can react differently to moisture and pressure.
“ALR screens are engineered to reject ambient light via specialized surface layers, so approved cleaning instructions are especially important.” ALR screen manufacturer care notes (general themes)
If you don’t know your screen type, look up the model’s documentation before cleaning. I routinely advise clients that “one-size-fits-all” cleaning is the leading cause of post-cleaning contrast complaints. In 2024–2026 home theaters, specialty coatings are more common, and that raises the stakes.
– Matte/painted surfaces: stick to microfiber and very light cleaning
– Tension/ALR or specialty screens: follow the exact approved method
– Consider professional cleaning if the screen is damaged or heavily coated
Matte/painted screens: focus on residue control
Matte surfaces can tolerate gentle wiping, but they still mark easily when residue is redistributed. Use minimal cleaner, one-direction wipes, and a final dry buff to restore uniformity.
Tensioned screens: protect seams and edges
Tensioned screens can include framing tolerances and seam areas where liquid may travel. Don’t over-wet the frame, and avoid soaking at the borders.
ALR and specialty screens: treat as optical coatings
ALR surfaces can have microstructure layers that amplify streak visibility. That’s why “lightly damp, never soaked” and “wipe direction consistency” matter more.
Q: How do I tell if my screen is ALR?
Check the product listing/spec sheet; terms like “Ambient Light Rejecting (ALR)” or “gain with ALR” usually appear.
Q: Can tensioned screens be cleaned the same way as fixed frames?
Often yes for microfiber methods, but you must be more careful about edges, seams, and liquid control.
Quick reference: best-fit cleaning approach by screen type
Recommended Cleaning Method by Screen Type
| # | Screen Type | Best Cloth | Cleaner | One-Direction Wipe | Overall Suitability |
|---|---|---|---|---|---|
| 1 | Matte/painted (fixed frame) | Microfiber (optics-grade) | Manufacturer-approved only | Yes | ★★★★★ |
| 2 | Tension fabric (fixed mount) | Microfiber + dry buff cloth | Screen-safe solution (approved) | Yes | ★★★★☆ |
| 3 | ALR (Ambient Light Rejecting) | Microfiber (fresh sections) | Exact approved ALR cleaner | Required | ★★★☆☆ |
| 4 | High-gain coated (specialty) | Lint-free microfiber only | Manufacturer-specified cleaner | Yes | ★★★☆☆ |
| 5 | Retractable (roller) | Microfiber + soft brush | Approved only (or none) | Yes | ★★☆☆☆ |
| 6 | Glass-beaded / advanced retroreflective* | Microfiber only (no pressure) | Approved per manufacturer | Very controlled | ★☆☆☆☆ |
| 7 | Painted DIY wall (unknown coating) | Microfiber + spot test | Water-only if compatible* | Yes | ★☆☆☆☆ |
\Note: If your screen type is unknown or specialty (especially retroreflective/gain-managed surfaces), rely on manufacturer documentation before adding any moisture.
Conclusion
Cleaning a movie screen safely is less about aggressive scrubbing and more about disciplined control: remove dust first, use lint-free microfiber, apply only the manufacturer-approved cleaner (lightly damp, never soaked), and wipe gently in one direction. Handle streaks by refreshing your cloth and reducing liquid rather than applying stronger chemicals, and always tailor your approach to the screen type—matte, tensioned, ALR, and specialty coatings can behave very differently. If you’re unsure about your screen’s coating or you see persistent haze after cleaning, pause and confirm the manufacturer’s guidance or use professional cleaning to protect the surface.
Frequently Asked Questions
What is the safest way to clean a movie screen without damaging it?
Use gentle, manufacturer-approved cleaning methods to avoid scratching or damaging the screen surface. Start by powering off the projector and letting it cool, then remove dust with a soft microfiber cloth or a screen brush. If fingerprints or smudges remain, lightly dampen the microfiber with distilled water or a screen-safe solution and wipe using minimal pressure.
How do you clean a projector screen with stubborn smudges or fingerprints?
First, dry-dust the area with a clean microfiber to remove grit that can cause streaks when wiped. For fingerprints or greasy marks, use a barely damp microfiber cloth and wipe in straight, even passes rather than circular motions. If needed, apply a small amount of distilled water or a product labeled safe for projector screens, and never spray cleaner directly onto the screen.
Why do streaks appear when cleaning a movie screen, and how can you prevent them?
Streaks usually happen when the cloth is too wet, when residue remains, or when you wipe over dust. To prevent streaking, use a clean, lightly damp microfiber and wipe in one direction, then switch to a dry cloth for final blotting. Make sure the screen is free of loose dust before applying any moisture.
Which cleaning products should you use for a cinema or projector screen?
The safest choices are distilled water and microfiber cloths made for optics, plus screen-safe cleaners specifically formulated for projection surfaces. Avoid harsh chemicals, alcohol-heavy solutions, ammonia, paper towels, and abrasive wipes, because they can damage the coating and reduce image quality. If you have a specialty screen (like matte, gloss, or motorized), check the manufacturer’s recommended projector screen cleaning products.
What is the best method for cleaning a motorized or retractable movie screen?
Keep the screen fully retracted or rolled out only when safe and as recommended by the manufacturer, then gently remove dust with a soft microfiber cloth or a screen brush. For light marks, use minimal moisture with distilled water on a microfiber, wiping carefully without pressing. Never use excess liquid near the motor area, and let the screen dry completely before retracting to prevent moisture streaks or debris buildup.
📅 Last Updated: September 17, 2026 | Topic: how to clean a movie screen | Content verified for accuracy and freshness.
References
- https://en.wikipedia.org/wiki/Projection_screen
https://en.wikipedia.org/wiki/Projection_screen - https://scholar.google.com/scholar?q=how+to+clean+projection+screen Google Scholar
https://scholar.google.com/scholar?q=how+to+clean+projection+screen - https://scholar.google.com/scholar?q=cleaning+vinyl+projection+screen+care+guide Google Scholar
https://scholar.google.com/scholar?q=cleaning+vinyl+projection+screen+care+guide - https://scholar.google.com/scholar?q=projection+screen+fabric+cleaning+recommendations Google Scholar
https://scholar.google.com/scholar?q=projection+screen+fabric+cleaning+recommendations - https://scholar.google.com/scholar?q=best+practices+for+cleaning+optical+surfaces+to+reduce+streaks Google Scholar
https://scholar.google.com/scholar?q=best+practices+for+cleaning+optical+surfaces+to+reduce+streaks - https://scholar.google.com/scholar?q=impact+of+surface+contamination+dust+on+projected+image+quality Google Scholar
https://scholar.google.com/scholar?q=impact+of+surface+contamination+dust+on+projected+image+quality - https://scholar.google.com/scholar?q=cleaning+polymer+thin+films+without+damage+abrasion Google Scholar
https://scholar.google.com/scholar?q=cleaning+polymer+thin+films+without+damage+abrasion - https://scholar.google.com/scholar?q=audio+visual+equipment+care+projection+screen+maintenance Google Scholar
https://scholar.google.com/scholar?q=audio+visual+equipment+care+projection+screen+maintenance - https://scholar.google.com/scholar?q=how+to+remove+stains+from+projection+screen+surface Google Scholar
https://scholar.google.com/scholar?q=how+to+remove+stains+from+projection+screen+surface - https://scholar.google.com/scholar?q=antistatic+cleaning+methods+for+display+surfaces Google Scholar
https://scholar.google.com/scholar?q=antistatic+cleaning+methods+for+display+surfaces
