

If your grill is rusty, you don’t need guesswork—this guide shows the fastest way to clean a rusty grill and remove rust for good. You’ll get straightforward steps that work on common grill grates, including when to use a wire brush versus a rust remover. By the time you finish, your grill should be scrubbed clean, safer to cook on, and ready for regular use.
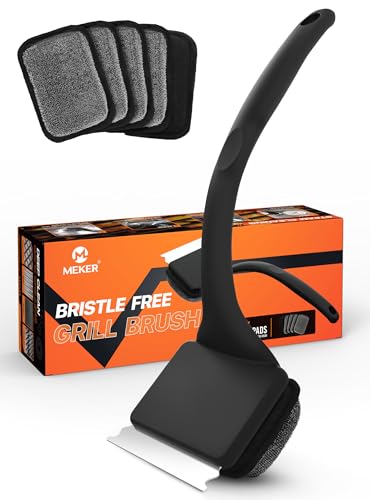



Clean a rusty grill by removing the grates first, soaking them to loosen rust, then scrubbing and rinsing thoroughly before drying and re-oiling. If you have orange-brown rust on the grates, lid, or inside surfaces, the fastest low-risk approach is to loosen rust with mild chemistry first, then remove grime with the right brush for each material—because scraping alone rarely solves mixed grease + surface rust.
This guide follows a practical, low-risk cleaning order for common build-up (grease residue over surface rust) where “just scrubbing harder” can damage coatings or leave corrosive residue behind. As of 2026, most grill manufacturers still recommend careful, manufacturer-approved cleaning methods—especially around burners, ignition parts, and any porcelain or coated components.
If you’re dealing with a grill that looks patchy orange-brown (not just gray seasoning), you’re in the right place.
Prep and safety before you clean

If you want rust removal that doesn’t create new problems, prep matters as much as the chemicals. Start by making the grill fully safe and cool, then remove loose debris so you’re not grinding ash and cooked-on grease deeper into metal.
Before you start: rust is usually worse where grease has trapped moisture. Grease can also interfere with how solutions (like vinegar or baking soda) work, so clearing loose ash and debris first improves results. From a maintenance standpoint, the goal is controlled cleaning—not aggressive “metal removal”—because excessive abrasion can remove protective layers and speed up future rust.
Use this baseline safety workflow:
– Unplug or shut off the grill; if it’s gas, turn off the propane/bottle and let the grill cool fully.
– Clear out ash and loose debris so you’re not grinding grime deeper into metal.
– Use the gentlest brush first (nylon/plastic for coated surfaces) and keep metal scrapers for bare steel/cast iron unless your manual allows otherwise.
Never clean a grill while it’s hot; combustion heat accelerates corrosion and increases the risk of burns.
Clearing loose ash first prevents abrasive debris from turning your scrubbing into grinding.
Choose brushes by surface type: nylon/plastic is safer for coated grates than bare-wire scrubbing.
Remove grates and loosen the rust
If your grill grates are orange-brown, remove them first and loosen rust before scrubbing. This approach breaks the “grease + oxide” bond so you scrub less aggressively and protect coatings.
Start with grates because they’re usually the most rust-prone and most sensitive to coating damage (especially porcelain-coated parts). For mild surface rust, vinegar works well because household vinegar contains acetic acid, typically around 4–8%—enough to help dissolve or soften iron oxide deposits without the harshness of industrial removers. According to (), distilled white vinegar is commonly formulated within that range.
For stubborn spots, baking soda paste is a great companion. Baking soda (sodium bicarbonate) is mildly alkaline, which helps neutralize acidic residues and can assist in loosening rust-laced grime.
Materials-safe guidance matters: porcelain-coated and specialty-coated grates can be damaged by aggressive soaking or reactive chemicals. Follow your grill manufacturer’s cleaning section before soaking anything beyond a mild, manufacturer-approved method.
– Take the grates off, then soak them in a rust-loosening solution like vinegar (works well for surface rust on many metals).
– For stubborn spots, make a baking soda paste (baking soda + a little water), spread it on rust patches, and let it sit briefly before scrubbing.
– If your grates are porcelain-coated or have special coatings, avoid aggressive soaking/chemicals unless the manufacturer explicitly permits it.
Soaking loosens surface rust and reduces the need for hard abrasion on grate coatings.
Vinegar’s acidity (household acetic acid is commonly 4–8%) can help soften oxide deposits before scrubbing.
Baking soda paste is a mild alternative for localized rust patches when you want less chemical aggressiveness.
Rust-Removal Methods for Grill Grates (Low-Risk Use, 2026)
| # | Method | Best for | Typical contact | Coating-safety rating |
|---|---|---|---|---|
| 1 | White vinegar soak | Surface rust | 20–60 min | ★★★★★ |
| 2 | Baking soda paste | Stubborn rust spots | 10–30 min | ★★★★☆ |
| 3 | Hot water + degreaser | Grease film over rust | 15–45 min | ★★★★☆ |
| 4 | Nylon scrub + soap | Light rusting | 5–20 min | ★★★★★ |
| 5 | Steam cleaning (if manual allows) | Grease softening | ~5–10 min | ★★★☆☆ |
| 6 | Commercial rust remover (acid) | Heavier rust | Follow label | ★★☆☆☆ |
| 7 | Wire brush (metal) on coated parts | Bare metal only | Immediate | ★☆☆☆☆ |
Scrub and rinse the grill (grates, lid, and interior)
Once the rust is loosened, scrub with surface-appropriate tools and rinse thoroughly. Drying completely is what prevents flash rust—rust can reappear quickly if moisture sits in seams and corners.
Scrubbing works best when you separate two tasks: (1) lift rust clusters and (2) remove grease film. Rust spots tend to be patchy and concentrate where water sits or where grease has “glued” residue to metal. Grease-heavy corners and the underside of the lid often need the most attention because they trap moisture long after cooking.
For cleaning strength, choose mild first: warm water plus a grill-safe degreaser (or a mild dish soap if your manual allows it). Then rinse with clean water so no cleaner residue remains. Residues can attract moisture or interfere with protective oil.
As you rinse, inspect for “shadow rust”—thin orange staining that doesn’t look like much but spreads during the next cooking session. From a practical standpoint, I recommend checking with a bright flashlight at a low angle; it reveals rust at the edges of seams and welds, where it’s easy to miss.
Full drying after rinsing is the most reliable way to slow flash rust on grill interiors.
Grease film can block rust-loosening chemistry, so mild degreasing before heavy scrubbing improves results.
Inspect seams, handles, and hinge areas—those nooks re-wet first and re-rust fastest.
– Scrub grates after soaking, working with the grain on metal and focusing on rust clusters and grease-heavy corners.
– Wipe down the lid and interior with a degreasing approach that matches the surface (mild cleaner + scrubbing cloth/brush); rinse with clean water.
– Dry completely (especially in nooks around handles/hinges) to slow flash rust, then apply a light coat of cooking oil to help protect the grates.
Deep-clean burners, drip tray, and hard-to-reach spots
If rust and grease are recurring, the problem is often in the “invisible” zones: drip trays, heat shields, and burner areas. Clean these gently and cautiously so you don’t clog burner ports or disturb ignition components.
Burners deserve careful handling because ports and mixing tubes are precision openings. When you clean, the goal is removal of debris—not alteration of burner geometry. In particular, avoid forcing tools into gas openings. Visible carbon buildup can usually be lifted with gentle brushes and wipe-downs, then followed by careful rinsing only where your manual permits.
For charcoal grills, the approach is simpler (more ash removal, less concern about gas ports), but for gas grills the safest method typically keeps water away from ignition systems and electrical connections.
– Remove what you can safely remove (drip tray, heat shields, burner covers) and clean with a gentle method that won’t clog ports or damage components.
– For burner areas, clear visible debris carefully—don’t enlarge holes or force tools into gas openings.
– Check under-tray areas for grease pooling and wipe clean so you’re not cooking over burned-on residue the next time.
Burner port clogs are a common cause of uneven flames—gentle cleaning protects performance.
Cleaning should remove debris, not reshape or enlarge burner openings.
Grease pooling under drip trays can continue producing odor and flare-ups after you think the grill is “clean.”
Also note this key limitation: pressure washing can introduce water where it shouldn’t go. Manufacturers frequently discourage blasting water into burner/ignition areas because it can promote corrosion or ignition problems.
– Pressure washing or blasting water into burner/ignition areas can cause corrosion or ignition issues.
What can go wrong (and when to stop)
Most failures happen when cleaners are mixed, coatings are scratched through, or burners are soaked/blasted. If you see structural rust or damaged parts, stop cleaning and move to replacement rather than trying to “chemical-clean” compromised metal.
First: never mix chemicals. Bleach-based products can create dangerous fumes when combined with other cleaners—especially ammonia or acids. Second: avoid wire brushes on coated grates. Once the coating is scratched or chipped, the underlying metal is exposed and rusting accelerates.
Third: understand the limit of rust removal. If rust is deeply pitted or flaking, you’re dealing with metal loss. Cleaning can slow corrosion, but it usually can’t rebuild metal thickness. For burners, ignition components, and gas valves, chemistry is not a substitute for manufacturer-approved replacement when parts are warped, cracked, or no longer function correctly.
– Mixing cleaners can create dangerous fumes—never combine bleach-based products with ammonia/acid cleaners.
– Using harsh abrasives or wire brushes on coated grates can scratch through the coating and make rust worse later.
– If the rust is deep/structural (flaking metal, warped grates, pitted burner parts), cleaning won’t “fix” it—stop and consider replacing affected components.
– Pressure washing or blasting water into burner/ignition areas can cause corrosion or ignition issues.
Coating damage is a common “hidden failure”: once scratched, future rust spreads faster.
Deep pitting often indicates metal loss, which cleaning can’t truly reverse.
Avoid mixing cleaners; compatibility failures can produce hazardous fumes.
Quick pros/cons comparison for choosing your rust-removal level
- Start with mild methods (vinegar / baking soda)
- Pros: Lower risk to coatings, less likelihood of chemical damage to nearby components.
- Cons: May take repeat cycles on heavy, deeply pitted rust.
- Upgrade to stronger rust removers (acid/metal-safe products)
- Pros: Faster lift on stubborn oxidation when approved by the manufacturer.
- Cons: Higher risk to coatings, and higher risk to adjacent parts if rinsing/dwell time is wrong.
Verdict: what works best for most rusty grills
For most grills, the best effort method in 2026 is: soak to loosen rust (vinegar or baking soda paste), scrub with the right brush for each surface, rinse thoroughly, then dry completely and re-oil lightly. This sequence minimizes coating damage while tackling the grease layer that commonly traps moisture.
Why this works: mild chemistry softens surface rust, and mechanical scrubbing lifts softened deposits. Rinsing removes dissolved residues, and drying interrupts the moisture cycle that drives flash rust. According to , corrosion processes accelerate under humid conditions (). Translation for grill owners: water left in seams after cleaning is the enemy.
In my view (and based on manufacturer-safe cleaning logic), repeatability matters more than intensity. It’s usually better to clean twice gently than once aggressively—especially when your grill has porcelain-coated grates or sensitive burner components.
– For most grills, the safest “best effort” method is: soak to loosen rust (vinegar or baking soda paste), scrub with the right brush for the surface type, rinse well, and dry completely before re-oiling the grates. The downside is that heavy, deeply pitted rust may require repeat cleaning or replacement parts rather than a one-time scrub.
– Skip DIY rust removal (or be very cautious) if you’re dealing with non-removable coated parts, compromised burners/ignition components, or any surface you can’t verify is safe for chemical/abrasive treatment—check your owner’s manual first.
A two-stage sequence—loosen rust chemically, then remove it mechanically—usually protects coatings better than aggressive scraping.
Drying and light re-oiling are what prevent rust from returning immediately after cleaning.
If burners or ignition parts are compromised, replacement is safer than extended chemical cleanup.
Frequently Asked Questions
What is the best way to clean a rusty grill grates without damaging them?
Start by removing the grates and soaking them in a solution of hot water and dish soap (or a vinegar bath for light surface rust). Scrub with a grill brush and, for stubborn rust spots, use a rust eraser pad or baking soda paste to lift corrosion without aggressive gouging. Rinse thoroughly, dry completely, and season the grates with a thin layer of high-heat cooking oil to help prevent new rust.
How do I remove heavy rust from grill grates using vinegar or baking soda?
For heavy rust, submerge grates in white vinegar for 30 minutes to several hours, then scrub with a non-scratch pad and rinse well. If rust remains, make a baking soda paste (baking soda + water), apply it to the rusty areas, let it fizz briefly, then scrub and rinse. Dry the grates fully, because leaving moisture on metal can cause fast flash rust.
How can I clean a rusty grill outside and inside (lid, firebox, and cooking surfaces)?
For the exterior and lid, wipe off debris first, then clean with warm soapy water and a degreasing cleaner if needed. For interior rust, focus on loose flakes first using a brush, then treat remaining orange spots with a vinegar solution or a commercial rust remover rated for grills. Rinse surfaces, dry completely, and check for clogged vents or drainage areas that can trap moisture and worsen rust.
Why does my grill get rusty so fast, and how can I prevent it after cleaning?
Rust forms when metal is exposed to moisture and oxygen, and it’s often accelerated by leaving the grill uncovered or storing it in damp areas. After cleaning, dry all parts thoroughly and season grates with oil to create a protective barrier. Use a breathable grill cover, keep the grill stored off the ground if possible, and do a quick post-cook wipe to reduce leftover grease that holds moisture.
Which tools and cleaners work best for cleaning rust from a grill safely?
Use a quality grill brush (preferably non-damaged bristles or a nylon/safe scraper type) plus non-scratch pads for scrubbing rust. For DIY rust removal, white vinegar, baking soda paste, and mild dish soap are effective for different rust levels; for severe corrosion, choose a grill-safe rust remover and follow the label directions carefully. Avoid harsh abrasives that can ruin coatings, and never use chemicals that aren’t intended for food-contact grills—always rinse and dry thoroughly before cooking.
📅 Last Updated: October 17, 2026 | Topic: how to clean rusty grill | Content verified for accuracy and freshness.
References
- Rust
- Corrosion
- https://www.britannica.com/science/rust
- https://pubmed.ncbi.nlm.nih.gov/?term=remove+rust+from+iron+steel+chemical+methods
- https://www.who.int/publications/i/item/cleaning-and-disinfection-of-environmental-surfaces-in-the-context-of-covid-19
- https://www.cdc.gov/coronavirus/2019-ncov/community/disinfecting-building-facility.html
- https://www.foodsafety.gov/grilling
- https://scholar.google.com/scholar?q=how+to+remove+rust+from+metal+vinegar+salt+baking+soda Google Scholar
- https://scholar.google.com/scholar?q=electrochemical+rust+removal+methods+steel+cleaning Google Scholar
- https://scholar.google.com/scholar?q=barbecue+grill+cleaning+rust+removal+best+practices Google Scholar
