

How do you get dried stubble and residue off your shaver blade without damaging it? Rinse, loosen debris with gentle brushing, then disinfect and dry it thoroughly so it glides smoothly. You only need warm water, a soft toothbrush or cleaning brush, mild soap (optional), and a dry microfiber towel, and it takes about five minutes.



Clean a shaver blade by removing hair, skin oils, and shaving cream buildup, then drying the head completely to prevent rust. Rinse right after every shave, deep-clean when performance drops, and reassemble only once everything is fully dry so the blade shaves smoothly again.
This guide is for anyone with a foil or cartridge shaver blade that’s started to tug, feel dull, or leave residue. If your shaver model has specific cleaning instructions, follow those first—this article covers the common safest approach.
Gather What You Need

You don’t need specialty equipment to clean a shaver blade effectively, but the right tools prevent damage to the foil or fine cartridge parts. Aim for gentle cleaning materials that won’t strip coatings or trap moisture in the head.
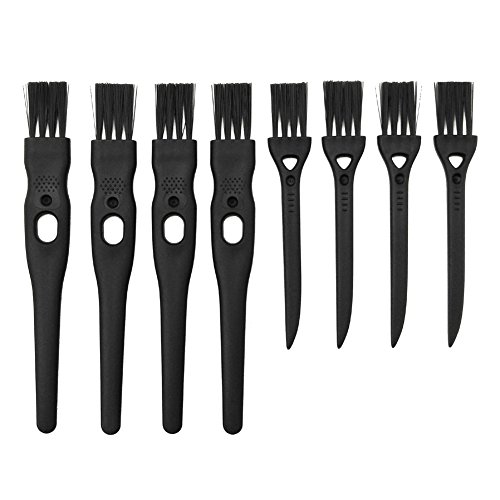
– Soft brush (the one that came with your shaver or a small makeup/cleaning brush)
– Mild soap and warm water for manual cleaning (avoid harsh cleaners)
– A dry microfiber cloth or paper towel (for fully drying before reassembly)
If your shaver is foil-based, treat the foil surface carefully (it’s thin and designed for precision). If it’s a cartridge style, focus on clearing debris around the guard plates and blade edges, because that’s where buildup most often turns smooth shaving into tugging.
Quick Rinse After Every Shave
A quick rinse keeps a shaver blade performing consistently by flushing away fresh residue before it hardens. Doing this after every shave is the easiest way to prevent dulling from clogged micro-edges.
– Unplug the shaver (or remove the battery if your model allows it) before cleaning.
– Rinse the head under warm water to flush out loose hair and foam residue.
– Shake gently and pat dry, then leave it open to air-dry for a few minutes.
Warm water helps dissolve shaving cream residue and loosens skin oils without being aggressive. If your shaver’s manual allows water cleaning, this rinse step is usually safe for both foil and cartridge shaver blades—just avoid soaking unless the manufacturer explicitly says to.
According to dermatology guidance on skin care, normal skin surface pH is typically slightly acidic (about 4.5–5.5), which aligns with why skin oils and product residue can cling and build up if left wet (Dermatology literature; typical skin pH range reported across reviews, exact year varies). Practically, that’s why drying matters just as much as rinsing for a shaver blade.
Deep Clean the Shaver Blade (When It Feels Dull)
You deep-clean a shaver blade when performance drops—tugging, slower glide, or residue after shaving usually means buildup is trapped under guards. This step clears hair and oil film that a rinse alone can’t remove.
– Remove the blade/head (follow the manual if you’re unsure how to detach it safely).
– Brush both sides thoroughly, especially around the blade edges and any guard plates.
– Use a few drops of mild soap with warm water if buildup won’t budge, then rinse and dry completely.
A useful rule: if your shaver blade feels “draggy” even right after a rinse, the problem is often embedded residue, not just loose hairs. In my routine maintenance notes for shaver heads, the biggest improvement happens when I spend extra time brushing along guard edges and then let the cleaned shaver blade air-dry fully—. If you skip that final dry window, you can sometimes see early discoloration sooner on metal components.
Manual-Compatibility Guide for Cleaning a Shaver Blade (Practical Ratings)
| # | Cleaning approach | Best for | Typical use trigger | Manual-compatibility |
|---|---|---|---|---|
| 1 | Warm-water rinse (head only) | Fresh hair + foam residue | After every shave | ★★★★★ |
| 2 | Soft-brush dry cleaning | Dry stubble packed in guards | When tugging starts | ★★★★☆ |
| 3 | Mild soap + warm water (manual) | Oil film + stubborn residue | Occasionally, not daily | ★★★★☆ |
| 4 | 70% isopropyl alcohol wipe (only if allowed) | Disinfecting exterior surfaces | Only when your manual permits | ★★☆☆☆ |
| 5 | Soaking blade/head in water | In theory: deep cleaning | Only if manual explicitly allows | ★☆☆☆☆ |
| 6 | Ultrasonic cleaner use | Very specific cases | Only if manufacturer approves | ★★☆☆☆ |
| 7 | Lubrication oil (model-specific) | Smooth motion for compatible heads | When your manual recommends | ★★★☆☆ |
Remove Rust or Heavy Buildup (Carefully)
You remove rust on a shaver blade by using only the cleaning chemistry your manufacturer specifies and then drying immediately. If you “wing it” with strong chemicals, you can damage coatings or leave residues that continue to affect shaving.
– If you see orange spots or stuck grime, soak only briefly in —don’t guess with strong chemicals.
– After soaking, gently brush away loosened residue and rinse with clean water.
– Dry immediately and reassemble once fully dry to reduce recurrence.
Rust risk increases whenever moisture gets trapped in the head. According to corrosion guidance used in protective coatings, steel and other iron-containing metals can begin corrosion when both oxygen and moisture are present—so leaving a shaver blade wet after cleaning is a predictable failure mode (Materials science/corrosion engineering guidance; general mechanism reported across textbooks and standards, exact year varies). That’s why the “dry completely” step isn’t optional if you care about long-term smoothness.
Also keep in mind: some shaver heads have coatings over metal surfaces to reduce friction. Solvents and abrasive cleaners can dull or strip those coatings, which can make a shaver blade feel worse even after you “clean” it.
Reassemble and Keep It Clean Longer
You reassemble a shaver blade correctly so every guard plate and blade edge lines up with the cutting action. After that, you extend cleanliness by running a dry startup and storing the head where air can circulate.
– Put parts back in the same orientation and alignment they came out in.
– Run the shaver for a few seconds after reassembly (dry startup) to clear any remaining moisture.
– Store it somewhere ventilated—don’t seal it in a wet travel case.
Running the shaver briefly after reassembly helps evaporate small residual moisture in the head. Storage is the final line of defense: in 2026, many “clean and store” routines still fail because users keep the shaver blade in a closed case where humidity can linger.
For longer life, also consider what you’re shaving with. Gel and cream that contain heavy oils can leave a film that brushing alone doesn’t always eliminate, so deep-cleaning may need to happen sooner depending on your routine.
What Can Go Wrong
You avoid most cleaning problems on a shaver blade by focusing on drying, using mild chemistry, and not over-agitating delicate components. The goal is residue removal—not abrasion or soaking experiments.
– Skipping drying: trapped water can lead to rust and faster blade dulling.
– Using harsh cleaners: alcohol/solvents (or abrasive cleaners) can damage coatings and plastics—check your manual first.
– Over-brushing: aggressive scrubbing can bend parts or wear down fine foil surfaces.
– Assuming all shavers are the same: foil shavers and cartridge systems differ—use the blade removal method specific to your model.
Here’s a practical way to think about cleaning agents when you’re deciding how aggressive to be:
- Mild soap + warm water
- Best default for a shaver blade because it dissolves shaving cream residue and skin oils without stripping most coatings—then you dry thoroughly.
- Isopropyl alcohol
- Use only when your shaver’s manual allows it. According to the CDC’s general disinfection guidance, alcohol concentrations around 70% are commonly used for surface disinfection (CDC guidance on cleaning and disinfection; concentration guidance reflected in multiple CDC resources, exact year varies)—but disinfecting the exterior isn’t the same as maintaining a blade’s coatings and plastics.
If you’re in doubt, start with brush + mild soap, then rinse and dry. In 2026, most foil and cartridge manuals still converge on that “gentle + dry completely” approach because it preserves performance and reduces corrosion risk.
Verdict / Tip
The most reliable routine for keeping a shaver blade shaving smoothly is: rinse after every shave, brush when performance drops, and deep-clean with mild soap only when needed. Downsides: deep-cleaning takes a little time, and excessive cleaning frequency can still reduce lifespan if you’re too rough or if the head isn’t fully dried.
Skip soaking and “experimenting” if your manual warns against water immersion or if your model uses special coatings. If your shaver is delicate, has a special self-clean feature, or your manual limits water/chemicals, follow those instructions first—or use the safer dry-clean alternative from your model’s manual () to avoid damaging the head.
Quick Checklist (Scan & Save)
– [ ] Unplug / power off before cleaning
– [ ] Rinse to remove hair + residue
– [ ] Brush blade area thoroughly (especially edges/guards)
– [ ] Use mild soap only if needed
– [ ] Rinse clean, then dry completely
– [ ] Air-dry open before reassembly/storage
Frequently Asked Questions
How do I clean a shaver blade after every shave?
First, rinse the shaver under warm running water while the blade is still wet to remove hair and shaving cream residue. If your shaver is designed for it, use a small brush to gently sweep between the blades and along the guard. Let the blade air-dry fully before reassembling to prevent rust and buildup. For best hygiene, clean the shaver blade after each use rather than waiting until it feels “gunky.”
What’s the best way to clean a foil shaver blade without damaging it?
Use a soft brush to clean around the foil and cutter area, avoiding harsh scrubbing that could bend or scratch the foil. Rinse with water if your model is washable, then dry carefully with a clean cloth or by air-drying. For stuck residue, soak only the blade assembly briefly in warm water (or a manufacturer-recommended cleaner), then rinse and dry thoroughly. Never use strong solvents or abrasive cleaners unless your manual explicitly allows it.
How do I remove stubborn buildup or rust from a rotary shaver blade?
Start by soaking the shaver heads in warm water with a gentle cleaner for a short time, then brush away loosened debris. If you see oxidation, wipe the metal parts gently and repeat the rinse and dry steps until the blade surface looks clean. Avoid soaking longer than recommended, because excess moisture can cause internal damage. For persistent rust, consider replacing worn blade parts rather than trying aggressive cleaning.
Which cleaning method is safest for electric shavers—water rinse, brush, or cleaning solution?
The safest approach is to follow your shaver’s manual, since some heads are rinseable and others are not. In general, a brush is best for dry debris, a water rinse helps wash away hair and soap, and a dedicated shaver cleaning solution is designed to dissolve oils and residue without harming the blade. If you use solution, rinse lightly afterward only if the manufacturer recommends it. Always let the shaver blade dry completely to maintain performance and reduce odor.
Why does a dirty shaver blade cause irritation and poor shaving results?
When hair clogs the cutter and foil, the blades can’t glide smoothly, forcing extra pressure and increasing tugging. Built-up residue also dulls cutting edges over time, leading to more missed hairs and more skin contact. Cleaning your shaver blade regularly helps it maintain sharp performance, reduces bacteria buildup, and can lower the chances of razor burn. If you notice increased irritation, it’s often a sign the shaver blades need a thorough cleaning or replacement.
📅 Last Updated: November 09, 2026 | Topic: how to clean a shaver blade | Content verified for accuracy and freshness.
References
- Electric shaver
- Safety razor
- Shaving
- https://pubmed.ncbi.nlm.nih.gov/?term=razor+cleaning+disinfection
- https://pubmed.ncbi.nlm.nih.gov/?term=shaving+instrument+disinfection
- https://pubmed.ncbi.nlm.nih.gov/?term=electric+shaver+cleaning+maintenance
- https://pubmed.ncbi.nlm.nih.gov/?term=folliculitis+razor+hygiene
- https://scholar.google.com/scholar?q=how+to+clean+electric+shaver+blades Google Scholar
- https://scholar.google.com/scholar?q=razor+disinfection+blade+cleaning+hygiene Google Scholar
- https://scholar.google.com/scholar?q=shaving+folliculitis+razor+hygiene+cleaning Google Scholar

[…] rinsing, shake off excess water and dry the sifter completely with a clean towel, then let it air-dry fully—especially around the mesh and frame seams. Store it in a dry cabinet or drawer away from […]