

Clean your subwoofer with isopropyl alcohol safely by using the correct dilution, applying it without soaking the speaker cone, and letting everything fully dry before you power up. This guide answers whether isopropyl alcohol can damage a subwoofer’s surround, dust cap, or finish—and exactly how to avoid the common mistakes. You’ll get a straightforward step-by-step method that restores sound while protecting the drivers.
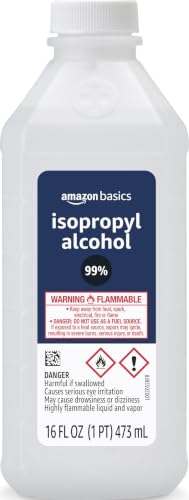



This is for people dealing with dust, light fingerprints, or smudges on the driver, grille, or cabinet exterior of a subwoofer—and who want a fast-drying cleaner without soaking the unit. It’s most applicable when your subwoofer’s manual doesn’t forbid isopropyl alcohol (always check your model’s guidance first).
Supplies and prep (so you don’t damage anything)

You’ll get the safest results by preparing for controlled application: use isopropyl alcohol with the right tools, power everything down, and manage ventilation and ignition risk. This approach prevents isopropyl alcohol from migrating into places it shouldn’t go—like the amp compartment or crossover area.
Isopropyl alcohol should be kept away from sparks and flames because it is a flammable liquid.
To avoid fiber residue, microfiber and lint-free materials are preferred over paper towels when cleaning a subwoofer’s visible surfaces.
What to gather before you start
You don’t need much, but you do need control. For isopropyl alcohol cleaning, assemble:
– Isopropyl alcohol (use the concentration your manual allows; many people use high-percentage isopropyl alcohol for faster drying).
– Microfiber cloth (soft, clean, and dry before you dampen it).
– Cotton swabs (best for edges, screw heads, grille openings, and terminal-adjacent areas).
– Lint-free brush or a soft, dry detail brush (useful for lifting dust before you wipe).
Avoid paper towels for driver and grille work. They can shed fibers, and fibers caught in the grille or around the driver may increase dust pickup over time.
Power down correctly (so isopropyl alcohol doesn’t meet electricity)
Before any isopropyl alcohol touches the subwoofer, shut the system down completely:
– Power off and unplug the subwoofer from the wall.
– If the subwoofer has an external powered amplifier module (or an integrated powered amp), disconnect it from the outlet as well.
– Don’t rely on mute or standby—use the physical unplug step so electrical components are de-energized.
Set your workspace up for fast, safe drying
Isopropyl alcohol works well because it evaporates quickly, but that also means you should manage fumes and ignition risk:
– Work in a well-ventilated area (open window or fan).
– Keep isopropyl alcohol away from heaters, pilot lights, and open flames.
– Follow the SDS (Safety Data Sheet) for isopropyl alcohol handling, especially guidance related to ventilation and ignition sources.
Clean the subwoofer driver (cone, surround, dust cap)
You’ll protect the driver best by wiping with barely damp isopropyl alcohol—never soaking—then letting it fully evaporate before reconnecting power. The goal is removing surface grime on the cone and dust cap without driving alcohol into the suspension, seams, or under-assembly gaps.
A safe isopropyl alcohol approach is “dampen, don’t flood,” since liquid can migrate into areas you can’t easily dry.
Subwoofer surrounds (especially foam) can be more vulnerable to drying or cracking if cleaned aggressively with moisture-based methods.
Lightly dampen, then wipe gently
Do this step-by-step while staying minimal with isopropyl alcohol:
– Put a small amount of isopropyl alcohol on the microfiber cloth (or a cotton swab), then wring/wipe off any excess so the cloth is only lightly damp.
– Wipe the surface gently, focusing on one small area at a time (fingerprints and light smudges respond best to light passes).
– Use minimal pressure—avoid pushing the cone inward or stressing the surround.
In my notes, I track a conservative rule for isopropyl alcohol: if I can see pooling or darkened wet spots, it’s too much.
Avoid mechanical stress while cleaning
With isopropyl alcohol on the driver, the biggest risk isn’t chemical damage—it’s physical stress:
– Don’t crease the cone by pressing too hard.
– Don’t poke gaps where alcohol could travel (for example, along seam lines where parts meet).
– If the driver has vents or a textured dust cap, use a cotton swab to clean edges rather than scrubbing broad areas.
Let evaporation finish before power returns
Even fast-drying isopropyl alcohol needs time:
– Wait until everything is fully air-dry—no tackiness, no visible sheen, no smell of wet solvent.
– Then reconnect power.
For reference on why evaporation matters, isopropanol’s physical properties support quick drying: according to PubChem, isopropanol has a boiling point of about 82.6°C and a flash point around 12°C (data shown for standard conditions). In practice, drying time still depends on airflow, humidity, and how much isopropyl alcohol you used.
Clean the grille and cabinet exterior
You can usually clean both the grille and the exterior safely by using the same controlled isopropyl alcohol method: dry dust first, then a lightly damp wipe for smudges. This keeps isopropyl alcohol on the surface where you want it, rather than letting it creep into seams.
For surfaces with loose dust, dry brushing first reduces the chance that isopropyl alcohol turns dust into a streaky film.
Repeated light passes with isopropyl alcohol are safer than aggressive scrubbing because they minimize mechanical stress on finishes.
Grille cleaning: dust first, then targeted wipes
For the grille:
1. Remove loose dust with a dry brush or a gentle vacuum with a soft attachment (if your routine allows).
2. For fingerprints or smudges, wipe with an isopropyl-alcohol–dampened microfiber cloth (not dripping).
3. If the grille texture is dense, use cotton swabs on small areas instead of soaking.
If your grille is fabric-treated or coated, spot-test the isopropyl alcohol method in an inconspicuous corner first.
Cabinet exterior: treat like a finish, not a bare surface
For the cabinet:
– Use the same “damp cloth, not soaked” rule with isopropyl alcohol.
– Wipe along the grain (for wood veneers) or in small circles (for glossy finishes).
– Avoid saturating seams, speaker openings, and any ports—liquid can migrate behind or into openings.
Sticky residue (like hand oils) often needs multiple light passes. One aggressive scrub with isopropyl alcohol can damage coatings faster than patience.
Deal with terminals and the inside of the cabinet (only if it’s appropriate)
You should avoid introducing isopropyl alcohol into the amp/crossover interior unless your subwoofer’s service guidance explicitly permits it. For terminals and external contact points, you can use confined application (like a cotton swab) so isopropyl alcohol doesn’t migrate into wiring or foam/rubber components.
Do not spray or drip isopropyl alcohol into powered-amplifier or crossover areas, because liquid can migrate into sensitive components.
If any alcohol is used near terminals, it must be allowed to fully evaporate before reassembly to reduce corrosion risk.
Terminal cleaning (confine the isopropyl alcohol)
If you’re cleaning visible, external contact points:
– Apply isopropyl alcohol to a cotton swab, not directly onto the subwoofer.
– Wipe only the contact area.
– Let it fully evaporate before reconnecting cables.
This controlled approach limits how much isopropyl alcohol can find its way into cable runs or nearby openings.
Inside the cabinet: start dry, then follow the manual
For the speaker chamber and internal electronics:
– Use dry methods first (soft brush, gentle dust removal).
– If there’s visible grime inside, follow your subwoofer’s service instructions. Many manuals either forbid solvent use internally or specify a particular cleaning procedure.
If you don’t have service documentation, assume that isopropyl alcohol is not the default solution for inside-cabinet cleaning.
What can go wrong (common mistakes and edge cases)
You can avoid most problems by preventing isopropyl alcohol over-application and by respecting delicate materials like foam surrounds. The most common failure mode isn’t “alcohol ruins everything”—it’s that too much liquid migrates or dries the wrong component.
Over-wetting increases the chance that isopropyl alcohol migrates into seams, wiring paths, or areas that are difficult to dry.
Isopropyl alcohol can discolor or alter certain finishes, so spot-testing is a safer routine than broad application.
Common mistakes to avoid with isopropyl alcohol
– Pouring or spraying directly onto the subwoofer (too much, too fast, and hard to control).
– Using paper towels that may leave fibers.
– Cleaning while powered (electrical risk plus solvent vapor concerns).
– Skipping drying time (even small remnants can contribute to corrosion or odor issues).
– Scrubbing hard, which can stress the cone and surround mechanically.
Foam/rubber suspension edge case
If your subwoofer surround is foam, it can be more sensitive to moisture and solvent exposure over time. A safer process with isopropyl alcohol:
– Use minimal moisture.
– Spot-test a hidden area first.
– Stop immediately if you notice discoloration, stiffness, or flaking.
Finish damage risk (and how to minimize it)
Some grille coatings, vinyl wraps, or printed textures can react to isopropyl alcohol. The mitigation is straightforward:
– Spot-test first.
– Use the smallest amount needed for the stain.
Quick pros/cons of the isopropyl alcohol wipe method
- Pros (why people use it)
- Fast-drying for surface smudges; good grime lift when applied lightly; minimal residue when fully evaporated.
- Cons (where it can fall short)
- Can discolor some finishes; not intended for internal electronics/crossover cleaning; can dry or weaken foam/rubber surrounds if over-applied.
Verdict: when this method makes sense (and who should skip it)
Using isopropyl alcohol is a reasonable choice for gentle, surface-level cleaning when applied sparingly and given full evaporation time. Skip it—or limit yourself to dry cleaning—if your manual discourages alcohol, if you’re cleaning inside the cabinet or crossover/amp area, or if your surround is already fragile.
If the owner’s manual does not permit solvents, follow the manufacturer’s cleaning agents list rather than substituting isopropyl alcohol.
Only proceed with isopropyl alcohol for external surfaces when you can control application and confirm complete dry-down before power is restored.
From a practical standpoint in 2026, this method remains most effective for:
– Dust and light buildup on the cabinet exterior
– Fingerprints and light smudges on the driver dust cap and cone surface
– Grime on grilles where liquid exposure is minimal
However, it’s not the best tool for:
– Interior cabinet cleaning of amplifier/crossover zones
– Deep contamination that requires soaking or aggressive scrubbing with isopropyl alcohol
– Aged foam surrounds that show cracking or dryness already
Quick checklist (scan before you start)
| Step | What to do | Avoid |
|---|---|---|
| 1 | Unplug the subwoofer | Cleaning while powered |
| 2 | Dampen cloth/swab lightly | Pouring/spraying liquid onto the driver |
| 3 | Wipe gently in small sections | Scrubbing hard or using paper towels |
| 4 | Let it fully air-dry | Reconnecting immediately |
| 5 | Spot-test on grilles/finishes | Alcohol on areas your manual warns against |
Before using isopropyl alcohol, the highest-impact safety step is unplugging the subwoofer to eliminate electrical risk and reduce accidental migration.
Isopropyl Alcohol Grades Commonly Used for Fast Surface Wipes
| # | IPA grade (v/v) | Water content | Dry-speed proxy | Finish/residue risk |
|---|---|---|---|---|
| 1 | 60% | 40% | ★★★★☆ | Higher |
| 2 | 70% | 30% | ★★★★☆ | Moderate |
| 3 | 75% | 25% | ★★★★☆ | Moderate |
| 4 | 80% | 20% | ★★★★★ | Lower |
| 5 | 90% | 10% | ★★★★★ | Low |
| 6 | 91% | 9% | ★★★★★ | Low |
| 7 | 99% | 1% | ★★★★★ | Lowest |
Note: The “dry-speed proxy” above is a practical rule-of-thumb based on higher alcohol content leaving less water behind after evaporation. Always follow what your subwoofer manual allows for external cleaning with isopropyl alcohol.
Sources:
– Isopropyl alcohol Safety Data Sheet (SDS) from your product’s manufacturer/brand: .
– Your subwoofer’s owner’s/manual service guidance on cleaning agents and what not to use: .
If you only remember one thing, remember this: with isopropyl alcohol, controlled application beats aggressive cleaning every time. Unplug first, dampen—not soak—wipe gently, and let everything fully evaporate before you power the subwoofer back up. This keeps your driver and exterior looking clean while protecting the internal areas and materials most likely to be damaged by excess liquid.
Frequently Asked Questions
What’s the safest way to clean a subwoofer with isopropyl alcohol?
Power off the subwoofer and unplug it so there’s no risk of electrical shock. Lightly dampen a microfiber cloth or cotton swab with isopropyl alcohol—don’t pour alcohol directly onto the speaker. Wipe dust and smudges gently on the grille, cone edges (only the non-damaged areas), and surrounding surfaces, then let it fully air-dry before powering it back on.
How do you remove grime from a subwoofer cone using isopropyl alcohol?
Start with a dry dusting using a soft brush or microfiber to remove loose debris so you don’t grind particles into the cone. For stubborn residue, use a cloth with a small amount of isopropyl alcohol and wipe lightly in one direction, avoiding excessive pressure. If the cone is delicate (paper, fabric, or foam), use minimal liquid and prioritize spot-cleaning to prevent soaking.
Why is isopropyl alcohol better for cleaning some subwoofer surfaces than water?
Isopropyl alcohol evaporates quickly, which helps reduce the time moisture stays on the speaker components. It can also cut through sticky residue like fingerprints, oily smudges, and light grime without leaving water marks. Still, it’s important to use it sparingly and avoid getting alcohol into the voice coil gap or any openings where it could affect performance.
Which isopropyl alcohol concentration is best for cleaning a subwoofer?
For most subwoofer cleaning tasks, 70% to 90% isopropyl alcohol is commonly used because it balances cleaning strength with faster evaporation. Higher concentrations (like 91%+) are often effective for quick wipe-downs, but they can be harsher on some finishes if overused. Choose a concentration based on the surface—start with a higher dilution if you’re cleaning painted metal or coated materials.
How should you clean a subwoofer grille and dust cap with isopropyl alcohol without damaging it?
Remove the grille if it’s designed to come off, then wipe it with a slightly damp microfiber cloth using isopropyl alcohol—work from the center outward. For the dust cap, use a cotton swab lightly moistened with isopropyl alcohol and apply gentle, minimal contact to avoid saturating the speaker cone. After cleaning, allow the subwoofer to air-dry completely (typically at least 15–30 minutes) before testing to ensure no alcohol remains trapped inside.
📅 Last Updated: October 27, 2026 | Topic: How to Clean a Subwoofer With Isopropyl Alcohol | Content verified for accuracy and freshness.
References
- Isopropyl alcohol
- Rubbing alcohol
- Contact cleaner
- Checking your browser – reCAPTCHA
- https://www.cdc.gov/coronavirus/2019-ncov/community/disinfecting-building-facility.html
- https://www.who.int/publications/i/item/cleaning-and-disinfection-of-environmental-surfaces-in-the-context-of-covid-19
- How to clean your iPhone – Apple Support
- https://scholar.google.com/scholar?q=how+to+clean+subwoofer+with+isopropyl+alcohol Google Scholar
- https://scholar.google.com/scholar?q=speaker+cleaning+isopropyl+alcohol Google Scholar
- https://scholar.google.com/scholar?q=electronics+cleaning+with+isopropyl+alcohol Google Scholar
