

A Weber kettle grill can build up baked-on grease and ash that reduces heat efficiency when you only rinse the exterior or clean the grates occasionally. A thorough clean is straightforward and usually takes about 45 to 60 minutes, working from the grates to the lid and bowl once the grill is fully cool. Have a wire brush or scraper, soapy water, paper towels, and a mild degreaser ready, and you will be able to cook on a clean surface.
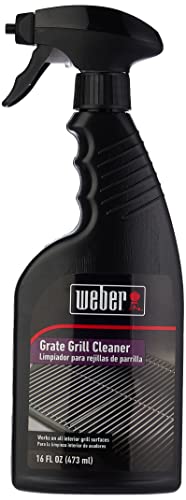


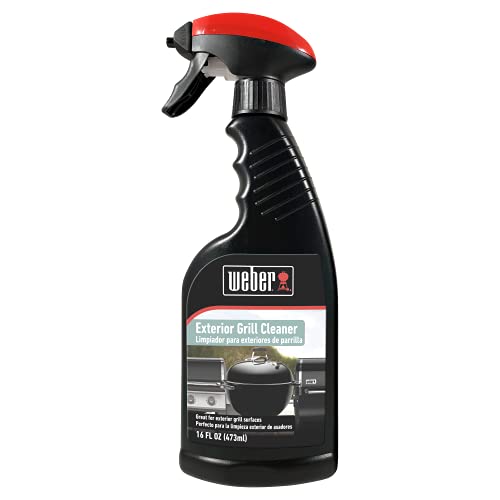
Clean your Weber kettle grill by cooling it completely, brushing and washing the grates, scraping the charcoal bowl and interior, and then drying everything so moisture can’t turn into rust or smoke on your next cook. Start with airflow-safe ash removal and controlled degreasing, not aggressive scrubbing, and finish by protecting the grill (a proper cover matters more than most people think).
A clean Weber kettle grill is mainly about removing ash and grease, then scrubbing and drying so nothing rusts or smolders next cook. This guide walks you through what to clean first (grates and interior), what to avoid, and how to finish with a quick coat/protection so your next fire starts clean.
If you use your kettle for regular grilling—especially with fatty meats—you’ll likely deal with grease buildup and ash residue. This is for owners who want a repeatable routine without damaging enamel, airflow parts, or the charcoal bowl.
Gather the right tools (and what to skip)

If you want a repeatable clean that doesn’t damage enamel, gather the right tools first—then you’ll spend less time forcing stuck-on grease. The goal is to remove ash and grease thoroughly while keeping the porcelain-enameled surfaces intact.
– Use a grill brush, a scraper, a bucket or spray bottle, dish soap/degreaser, and clean cloths/paper towels.
– Skip wire brushes on delicate surfaces if you’re worried about scratching enamel; replace worn bristles to avoid loose fibers.
– Have a vacuum/ash tool ready to handle cooled ash safely.
From a practical standpoint, I’ve found that the “right” tool setup reduces rework: a scraper handles heavy, baked-on residue, while a brush does the finish work. If you’re missing anything, you’ll usually compensate by pressing harder—which is exactly how enamel gets rougher and grime sticks faster.
Before you start, remember a safety reality: charcoal and ash can stay hot for a long time. According to the U.S. Fire Administration, charcoal and coals can remain hot up to 24 hours after you stop grilling ([U.S. Fire Administration]). That’s why the routine starts with cooling, not cleaning.
7 Must-Have Steps/Tools for a Grease-Free Weber Kettle Clean
| # | Step/Tool | Targets | When to use | Impact rating |
|---|---|---|---|---|
| 1 | Grill brush | Loose food residue | After most cooks | ★★★★★ |
| 2 | Scraper | Baked-on grease | When brushing won’t lift it | ★★★★☆ |
| 3 | Ash tool/vacuum | Airflow restriction | After ash cools | ★★★★★ |
| 4 | Dish soap / degreaser | Fat/oil film | Deep clean sessions | ★★★★☆ |
| 5 | Bucket/spray bottle | Controlled rinsing | When you wipe + rinse | ★★★☆☆ |
| 6 | Cloths + paper towels | Rinse residue removal | Always after degreasing | ★★★★★ |
| 7 | Outdoor cover | Moisture prevention | When stored outside | ★★★★☆ |
Quick brush-material sanity check
If you’re choosing between brush types, here’s the tradeoff in plain terms:
| Option | Best for | Main risk | Recommendation |
|---|---|---|---|
| Porcelain-safe nylon brush | Routine grate cleanup | Slower on heavy grease | Use regularly; don’t skip washing/drying |
| Scraper (plastic or metal) | Thick, baked-on residue | Scratches if overused | Use light pressure; focus on buildup, not enamel |
| Wire brush | Stubborn residue | Loose bristles + scratches | Avoid on enamel if you’re concerned about surface damage |
Clean the cooking grates first
Cleaning the cooking grates first reduces the chance that grease and ash smear across the interior later. If you start with the bowl and walls, you often drag residue back onto the grates during reassembly.
– Remove grates when they’re cool enough to handle, then brush off loose debris.
– Soak/scrub with warm water and dish soap (or ) to lift baked-on residue.
– Dry fully before putting them back to reduce flash corrosion.
For most Weber kettle grates (porcelain-enameled or chrome-plated depending on model), the physics is straightforward: heat burns oils onto metal; soap and warm water loosen those oils; and drying prevents “flash rust,” the quick oxidation that can show up when damp steel sits in air.
From a process standpoint, I treat this as two passes:
1) Mechanical removal (brush + initial scrape) to get the easy residue off.
2) Chemical lift (warm soapy water or a degreaser applied sparingly) to tackle the sticky film you can’t see.
If you’re dealing with significant grease—common after fatty meats—soaking helps more than repeated dry scrubbing. Let the grates sit long enough that soap can penetrate the grime (time varies by buildup; ).
Degrease and wipe the inside of the kettle
Once the grates are clean, the inside is your next highest-impact area because grease and drippings cause most of the “smoke later” problem. This step keeps your next start-up cleaner and helps prevent flare-ups from old fat.
– Scrape loose buildup from the charcoal bowl and interior walls, then wipe with a damp cloth.
– For stubborn spots, apply degreaser sparingly, scrub gently, and rinse/wipe clean.
– Don’t flood the air vents—keep cleaning controlled so residue doesn’t run where it shouldn’t.
Start with dry scraping of the charcoal bowl and the sides. Then switch to wiping with a damp cloth so you’re controlling where residue goes. Grease is slippery; if you soak the interior heavily, you can create a messy runoff path that lands in places you can’t easily reach.
A model-specific detail matters here: Weber kettles depend on airflow for combustion. If you push degreaser or water into the vent areas, you can leave residue behind that burns off next time. That’s why “controlled cleaning” beats “deep soaking” for kettle interiors.
If you use a degreaser, choose one that’s appropriate for grill surfaces and follow the label. If you want an easy rule: apply sparingly, scrub gently, then wipe clean. When in doubt, less chemical and more wiping is usually safer for enamel and surrounding components.
Take care of the ash, bottom, and vents
Ash and grease are the two major blockers of consistent airflow, so this step protects both performance and cleanliness. When airflow is restricted, your fire can smolder instead of burning cleanly.
– Empty ash into a metal container only after everything is fully cool.
– Brush and wipe the bottom area, then check the vents for clogs (ash/grease can restrict airflow).
– If parts look gummed up, use a damp cloth and gentle scraping rather than harsh metal-forcing.
Because charcoal heat can linger, use a metal container and wait until ash is cool to the touch. According to the U.S. Fire Administration, charcoal/coals can stay hot up to 24 hours ([U.S. Fire Administration]). That safety window isn’t optional—especially if you store the kettle shortly after grilling.
Next, focus on vents. Restricted vents can cause:
– weaker draft,
– longer preheating,
– more soot accumulation,
– and “stale smoke” odors from smoldering old residue.
When you check vents, do it visually and gently. If something feels stuck, use damp wiping and light scraping. Forcing can bend internal parts or damage alignment, which affects how the kettle regulates temperature.
Practical note on grate size and airflow
Weber’s Original Kettle “22-inch” class is commonly built around a 57 cm / 22.5-inch cooking diameter ([Weber product specifications]). That size is large enough that ash patterns and grease streaks are noticeable—so cleaning the bottom and vents reliably can make a visible difference in next-cook evenness.
Rinse, dry, and protect for next time
This is the finishing step that prevents rust, odor, and smoke from leftover cleaner or moisture. If you skip drying or storage protection, you’ll often undo the benefits of the scrub.
– Wipe away soap/degreaser residue so it doesn’t turn into odor or smoke later.
– Let the kettle air-dry completely with the lid open.
– Consider a light protective step if your grill stays outdoors (covering is the big win)—.
Rinsing and drying aren’t just “tidy up.” Soap residue can become tacky when heated, and moisture inside the bowl or near screws can contribute to rust. Keep the final stage simple:
1) Wipe/rinse until the cloth no longer picks up residue.
2) Air-dry with the lid open until no dampness remains.
For outdoor storage, covering is usually the biggest factor. I recommend a breathable, fitted cover (often heavy-duty vinyl or polyester fabric designed for grills) with good drainage so water doesn’t pool on the lid or corners. A cover that traps moisture can backfire—so prioritize fit and ventilation.
If you apply any protective step (some owners use a light heat-safe spray or thin oil on metal surfaces), do it sparingly and only on parts where it won’t create additional burning residue. When in doubt, skip the “extra product” and lean on thorough drying plus proper covering.
What can go wrong (and how to avoid it)
Most cleaning problems come from rushing or using the wrong force on the wrong surface. A careful routine prevents enamel damage, keeps vents clear, and stops moisture from turning into corrosion.
– Scrubbing while hot can warp parts or make residue smear—clean only after cooling.
– Over-scraping enamel can create rough spots where grime sticks faster—use gentle pressure on coated surfaces.
– Leaving moisture inside can lead to rust, especially on screws, fasteners, and vent components.
– If vents stay clogged after cleaning, don’t force them—disassemble only if your model’s manual supports it (see ).
A common failure mode is “it looked clean enough, so we closed it up.” If you store the kettle while parts are still damp, you’re inviting rust that appears days later—right where you can least reach during cleaning.
If you’re unsure which components are removable on your exact model, use Weber’s official documentation. Find your manual by model number on Weber’s support pages (search by “Weber kettle model number manual”) and follow the disassembly guidance before you start pulling vent assemblies apart.
Finally, don’t pressure wash a kettle. Excess water can enter seams and joints, leaving moisture trapped. Usually, wiping and controlled rinsing is safer.
Verdict: Use this routine if you want a cleaner burn (skip if…)
This step-by-step approach works well for most Weber kettle owners because it targets the main “smoke and rust” culprits: ash, grease, and trapped moisture. The downside is it’s not a 5-minute job—expect extra time for baked-on grease and thorough drying.
Skip this routine (or get model-specific guidance first) if your kettle has damaged enamel, missing/warped parts, or you’re unsure which components are removable on your exact model. If you see flaking porcelain enamel, deep pitting, or warped vent hardware, aggressive cleaning can make those issues worse—focus on inspection and replacement guidance from Weber.
Quick checklist (scan/save)
– [ ] Grill fully cool; lid and grates removed
– [ ] Brush/scrape grates; wash and dry
– [ ] Scrape/vipe interior and charcoal bowl
– [ ] Empty ash properly; clean bottom area
– [ ] Clear vents (gently)
– [ ] Wipe/rinse residue; air-dry completely
– [ ] Reassemble; cover for storage
Frequently Asked Questions
How do I clean a Weber kettle grill after every cook?
Let the Weber kettle cool, then scrape the cooking grates with a grill brush while they’re warm. Empty the ash from the bottom bowl, remove and clean the ash catcher if your model has one, and wipe out grease drippings with a damp paper towel. For best results, close the lid and do a quick burn-off of stuck-on food before a deeper cleaning.
What’s the best way to clean Weber kettle cooking grates and remove grease?
Remove the grates and soak them in hot water with degreasing dish soap or a grill-safe cleaner for 15–30 minutes. Scrub with a non-metal brush or scouring pad, then rinse thoroughly and dry completely to prevent rust. If grease is baked on, heat the grates again briefly and repeat the scrape-and-soak process for Weber kettle grill grates.
How do I clean the Weber kettle lid and exterior without damaging the finish?
Use warm water and a mild dish detergent on a soft cloth or sponge, then rinse and dry. Avoid abrasive pads and harsh chemicals that can strip paint or porcelain, especially on enameled or painted Weber kettle parts. For stubborn smudges, apply a gentle degreaser to the cloth first rather than spraying directly onto the grill surface.
Why is it important to clean the inside bottom bowl and ash catcher of a Weber kettle?
Grease and ash buildup can increase smoke, create uneven airflow, and make it harder to maintain consistent charcoal temperature. Cleaning the bottom bowl and ash catcher reduces flare-ups caused by leftover drippings and prevents corrosion from ash moisture. A quick empty and wipe-out after each grilling season (or more often as needed) keeps your Weber kettle performing at its best.
Which tools and cleaners work best for deep-cleaning a Weber kettle grill?
Use a sturdy grill brush for grates, a putty knife or scraper for loose debris, and microfiber towels for wiping surfaces. For deeper cleaning, choose a grill-safe degreaser and a gentle cleaner suitable for porcelain/painted metal, and avoid chlorine-based or overly abrasive products. If your Weber kettle has heavy buildup, consider performing a short high-heat burn-off before scrubbing to make grease removal easier.
📅 Last Updated: November 09, 2026 | Topic: how to clean a weber kettle | Content verified for accuracy and freshness.
References
- Site Offline
- Weber.com
- Site Offline
- https://www.cdc.gov/foodsafety/keep-food-safe/cleaning.html
- https://www.foodsafety.gov/food-safety-basics/sanitation
- Barbecue grill
- Cleaning
- https://scholar.google.com/scholar?q=how+to+clean+a+weber+kettle+grill Google Scholar
- https://scholar.google.com/scholar?q=charcoal+grill+grate+cleaning+methods Google Scholar
- https://scholar.google.com/scholar?q=grill+cleaning+food+safety+sanitizing+heat Google Scholar
