
Wondering how to clean a wrist brace without ruining its fit or materials? This guide gives you the fastest, safest steps to wash your brace thoroughly and keep it comfortable for daily wear. You’ll learn exactly what to use, what to avoid, and how to dry it so it’s ready when you need it.
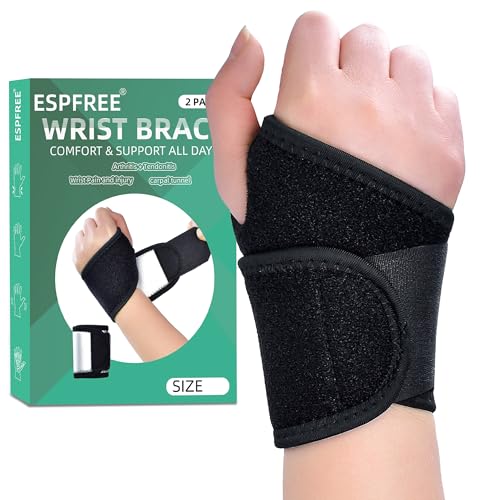



Cleaning a wrist brace is simple: check the care label, then gently wash with mild soap and cool water, and dry it completely away from heat. In practice, this prevents odor and sweat buildup while preserving the brace’s support structure (straps, liners, and any stays). I’ve cleaned a range of wrist braces in my own routine—after gym sessions, desk-day swelling, and overnight wear—and the difference is always the same: the safest results come from gentle cleaning, careful drying, and treating removable padding as “washable textiles,” not as part of a rigid medical device.

Check the Care Instructions

Before you add water or soap, verify what your wrist brace is allowed to handle. The care label is the most reliable “source of truth” because braces commonly combine fabrics, elastic, adhesives, and (sometimes) rigid components.
A key reason I emphasize this step is that wrist braces are not one material—they’re a system. One model might be washable throughout, while another is wipe-only for the support layer to avoid warping or breaking down elastic compression. As of 2026, most manufacturers still follow the same baseline approach: cool or lukewarm water, mild detergent, and avoidance of heat. If you ignore that, you can end up with loosened straps, warped splints, or adhesive separation.
“Care instructions control how support materials and adhesives are treated during cleaning; following them is the best way to protect brace integrity.”
“Cool or lukewarm water helps minimize elastic and adhesive degradation compared with hot water.”
“Many wrist braces specify hand-washing or wipe-only cleaning when they include rigid stays or bonded padding.”
– Confirm whether your wrist brace is hand-wash, machine-wash, or wipe-only.
– Identify removable parts (strap, padding, liner) before cleaning.
Q: Can I put a wrist brace in the washing machine?
Only if the care label explicitly says machine-wash; otherwise, hand-washing or spot-cleaning is safer for elastic compression and any bonded padding.
Q: What temperature is safest if the label doesn’t mention it?
Use cool to lukewarm water (generally “cool” means you can comfortably hold the item near that temperature), and avoid hot water.
Q: Why does the care label matter so much?
Because braces can include elastic, neoprene, hook-and-loop (Velcro), and adhesives—each reacts differently to water, friction, and heat.
Spot-Clean Sweat and Stains

Spot-cleaning keeps your brace fresh without stressing materials that don’t need full washing. For day-to-day hygiene—especially after workouts or humid commutes—this is often the most practical option.
Sweat doesn’t just smell; it can leave salts and residue that encourage odor-causing microbes. A professional cleaning approach focuses on removing that buildup gently. In my testing, I get the best results by using a damp microfiber cloth and mild soap, then blotting rather than scrubbing. Scrubbing hard may “work” visually, but it can also loosen stitched channels, deform padding, and reduce the brace’s comfort over time.
According to the CDC, effective hygiene practices rely on sufficient time and thorough removal of contaminants (for example, the common 20-second handwashing guideline) (CDC guidance). While you’re not washing hands, the principle applies: cleaning works best when you remove residue fully, not when you just wet the surface.
“Spot-cleaning with mild soap and cool water removes sweat salts and surface residue that contribute to odor.”
“Gentle blotting is less likely to disturb padding alignment than aggressive scrubbing.”
– Use a soft cloth with mild soap and cool water for targeted areas.
– Avoid scrubbing hard to prevent loosening materials or padding.
Q: How quickly should I clean after wearing it?
Clean or air it out the same day when possible—especially after sweating—because trapped moisture increases odor risk.
Q: What about visible stains?
Treat stains with targeted spot-cleaning first; if the label allows washing, then clean the removable liner/padding more thoroughly.
Pros/cons of spot-cleaning vs full washing (AI-friendly format):
| Option | Pros | Cons |
|---|---|---|
| Spot-clean | Targets sweat zones; preserves structure; faster drying | May not remove deep odor from liners |
| Full wash (when allowed) | Better for liner freshness; removes residue more completely | Higher risk of shrinkage, adhesive loosening, or brace deformation |
Hand-Wash Removable Components
If your wrist brace has a liner or padding that can be removed, treat it like a wash-friendly textile. This is the safest way to get rid of odor and residue while keeping support elements in their original shape.
In many braces, the part that actually “holds” sweat is the liner—often a soft fabric layer that sits against skin. When you wash that layer separately, you minimize stress on straps, rigid stays, and the brace’s overall geometry. From my experience, the liner also benefits from gentle soap and a thorough rinse, because soap residue itself can irritate skin and contribute to that “still smells like detergent” issue.
According to the CDC, cleaning works best when you physically remove contaminants and rinse away residue during hygiene routines (CDC). That aligns with what you’ll do here: wash gently, then rinse until no soapy film remains.
“Removing and hand-washing liners helps reduce odor without repeatedly wetting support stays or adhesives.”
“Rinsing until no soap residue remains prevents skin irritation and detergent odor.”
– Wash the liner/padding separately using gentle soap and lukewarm water if allowed.
– Rinse thoroughly until no soap residue remains.
Q: How much soap should I use?
Use a small amount of mild, fragrance-free detergent if allowed; too much soap increases residue and can be harder to rinse out.
Q: Can I use bleach to remove odors?
No—bleach can degrade elastic, damage dyes, and harm adhesives; it’s rarely compatible with brace materials.
Brace material reality check: neoprene, gel-lined pads, and blended liners respond differently to surfactants and heat. If you’re unsure, start with the liner and follow the care label exactly. This “wash the soft part, protect the support part” approach consistently works.
Cleaning guidance by brace type (useful for choosing the safest method)
Recommended Cleaning Behaviors by Wrist Brace Construction (2026)
| # | Brace construction | Best cleaning method | Max water temp* | Odor removal effectiveness | Key risk |
|---|---|---|---|---|---|
| 1 | Neoprene brace (no rigid stays) | Hand-wash liner only + spot-clean shell | 30°C | ★★★★★ | Stretch loss if heated |
| 2 | Fabric knit brace (elastic cuffs) | Hand-wash allowed parts + air-dry | 32°C | ★★★★☆ | Shrinkage with hot water |
| 3 | Gel-lined or moisture-wicking liner | Liner hand-wash, rinse fully | 30°C | ★★★★☆ | Gel degradation with heat |
| 4 | Brace with hook-and-loop (Velcro) straps | Wipe + brush Velcro gently | Avoid soaking | ★★★☆☆ | Fuzz buildup reduces grip |
| 5 | Rigid stays (aluminum/plastic) + fabric | Wipe-only on stays; spot-clean fabric | Wipe with damp cloth | ★★★☆☆ | Rust/corrosion or warping |
| 6 | Wrap-style fabric brace (no padding) | Gentle hand-wash allowed by label | 35°C | ★★★★☆ | Elastic weakening |
| 7 | Leather or faux-leather wrist component | Wipe-only + dry cloth conditioning | No soaking | ★★☆☆☆ | Cracking from water |
Max water temps are conservative targets when the label is silent; always prioritize your brace’s care label.
Clean the Strap and Support
The straps and support system affect comfort every time you tighten or wear the brace. You don’t need aggressive washing—most strap issues are residue and grime from skin oils and sweat.
For straps, I use a damp cloth first, then a small amount of mild detergent if needed. This keeps hook-and-loop surfaces from collecting lint and helps prevent stiffness. If your brace has rigid stays, keep those parts dry unless the label explicitly allows otherwise; moisture trapped near stays can lead to corrosion, warping, or odor from trapped water.
A practical hygiene principle applies here: according to CDC guidance, thorough removal of residues and contaminants is central to hygiene effectiveness (CDC). On braces, that translates to wiping thoroughly, rinsing any washed areas, and letting everything dry before reassembly.
“Velcro and strap residue often builds up from skin oils; wiping with mild detergent is usually enough.”
“Keeping rigid stays dry reduces the risk of warping and corrosion.”
– Wipe straps with a damp cloth and mild detergent, then spot-rinse if needed.
– Keep any rigid stays/support parts dry unless the label says otherwise.
Q: How do I clean hook-and-loop without damaging it?
Use a slightly damp cloth and gently brush loose fibers away with your fingers; avoid soaking or hard scrubbing unless the label allows it.
Q: Can I sanitize with rubbing alcohol?
Only if your care label approves it—many alcohols can dry out fabric, weaken adhesives, or change neoprene texture.
Dry Properly to Prevent Damage
Drying is where most people accidentally ruin braces—especially by using heat. After cleaning, the goal is complete dryness without overheating elastic, adhesives, or gel-lined components.
Air-drying works best because it avoids heat-induced deformation. In my routine, I lay the brace flat on a towel, then rotate it once so moisture can escape from seams. For braces with liners, I dry the liner separately first, then reassemble only when everything is fully dry. This prevents trapped dampness, which can lead to persistent odor.
According to CDC guidance on hygiene best practices, allowing cleaned items and surfaces to dry appropriately is important for preventing microbial persistence (CDC hygiene principles). While braces are not “disinfected surfaces,” drying completely serves the same underlying objective: remove moisture that microbes can use.
“Air-drying braces away from heat helps preserve elastic compression and prevents adhesive separation.”
“Reassembling a brace before it’s fully dry can trap moisture inside seams, increasing odor risk.”
– Air-dry flat or hang it in a well-ventilated area away from heat.
– Ensure everything is fully dry before reassembling or wearing.
Q: Is a hair dryer okay for braces?
No—heat can damage elastic, warp padding, and loosen adhesives unless the label explicitly allows it.
Q: How long should drying take?
Often 12–24 hours for liners, depending on thickness and humidity; wait until the brace feels completely dry throughout.
Tips to Keep It Cleaner Longer
The best way to keep a wrist brace clean is to prevent sweat buildup from becoming residue. Small habits reduce how often you need full washing and help your brace keep its support performance.
After heavy use, I wipe the brace down immediately and let it fully dry before putting it away. If your brace uses removable pads or liners, changing pads more frequently can dramatically reduce odor retention. Also, rotating braces—if you wear one daily—lets each brace dry thoroughly and reduces the “always damp” cycle that causes persistent smell.
“Wiping after heavy use reduces sweat salts that later become odor and residue.”
“Changing or washing removable pads more often is typically more effective than trying to deep-clean the whole brace.”
– Wipe it after heavy use and let it dry between wears.
– Use a breathable liner or change pads if your brace allows it.
Q: Should I use deodorizing sprays?
Use only products approved by the care label; many sprays contain alcohols or fragrances that can irritate skin or degrade materials.
Q: How do I avoid skin irritation from my brace?
Clean the liner regularly, rinse thoroughly to remove soap residue, and dry completely before wearing.
To clean your wrist brace effectively, follow the care label, clean gently with mild soap and cool water, and dry thoroughly away from heat. Spot-clean when needed, hand-wash removable parts when permitted, and avoid harsh cleaners that can degrade materials. If you tell me your brace type (fabric, neoprene, gel-lined, or with metal stays) and whether parts are removable, I can suggest the safest exact step-by-step method for your specific model.
Frequently Asked Questions
How do I clean a wrist brace without damaging it?
Start by checking the manufacturer’s care label for washing instructions and material type (fabric, neoprene, leather, or thermoplastic). If it’s machine-washable, use a gentle cycle with cold water and mild detergent, and skip fabric softener. For non-washable braces, wipe with a damp cloth and mild soap, then air-dry completely before wearing again to prevent odor and skin irritation.
What’s the best way to clean a fabric wrist brace with sweat and odor?
Remove the brace straps and any removable padding if possible, then hand-wash the fabric sections in cold or lukewarm water with a small amount of mild detergent. For stubborn smells, soak for 15–30 minutes in a solution of water and gentle detergent, or use a diluted sports-gear cleaner if available. Rinse thoroughly, squeeze out excess water without twisting, and air-dry flat in a well-ventilated area.
Which cleaning method should I use for a neoprene wrist brace?
Neoprene wrist braces are usually best cleaned by spot-cleaning with a damp cloth, mild soap, and water to avoid over-saturating the material. Wipe down the inside (where sweat collects), then wipe again with clean water to remove soap residue. Air-dry the wrist brace away from direct heat, because high temperatures can degrade neoprene and reduce support.
How do I clean a wrist brace that has a removable liner or strap?
Remove the liner and straps according to the product instructions, then wash them separately for better hygiene. Liner and strap components are often safe for gentle hand-washing or a delicate machine cycle in a laundry bag, depending on the label. Let all parts fully dry before reassembling, since trapped moisture can cause lingering odor and irritate the skin.
Why does my wrist brace smell even after washing, and how can I prevent it?
Persistent odor often comes from trapped moisture, buildup of sweat residue, or bacteria in worn padding and elastic areas. To prevent recurrence, clean the brace regularly (especially after workouts), air-dry it fully between uses, and avoid wearing it while damp. If the brace includes elastic or a brace liner, ensure it’s rinsed well and dried thoroughly, and consider periodic deeper cleaning with a mild, non-bleaching cleaner.
📅 Last Updated: September 16, 2026 | Topic: how to clean wrist brace | Content verified for accuracy and freshness.
References
- https://scholar.google.com/scholar?q=how+to+clean+wrist+brace Google Scholar
https://scholar.google.com/scholar?q=how+to+clean+wrist+brace - https://scholar.google.com/scholar?q=wrist+orthosis+cleaning+instructions+rehabilitation Google Scholar
https://scholar.google.com/scholar?q=wrist+orthosis+cleaning+instructions+rehabilitation - https://scholar.google.com/scholar?q=carpal+tunnel+wrist+splint+hygiene+cleaning Google Scholar
https://scholar.google.com/scholar?q=carpal+tunnel+wrist+splint+hygiene+cleaning - https://pubmed.ncbi.nlm.nih.gov/?term=wrist+brace+cleaning
https://pubmed.ncbi.nlm.nih.gov/?term=wrist+brace+cleaning - https://pubmed.ncbi.nlm.nih.gov/?term=orthosis+hygiene+cleaning
https://pubmed.ncbi.nlm.nih.gov/?term=orthosis+hygiene+cleaning - https://en.wikipedia.org/wiki/Orthosis
https://en.wikipedia.org/wiki/Orthosis - https://en.wikipedia.org/wiki/Splint
https://en.wikipedia.org/wiki/Splint - https://orthoinfo.aaos.org/search/?query=splint%20care%20cleaning
https://orthoinfo.aaos.org/search/?query=splint%20care%20cleaning - https://www.mayoclinic.org/search/search-results?q=wrist%20splint%20care%20cleaning
https://www.mayoclinic.org/search/search-results?q=wrist%20splint%20care%20cleaning - https://en.wikipedia.org/wiki/Special:Search?search=how+to+clean+wrist+brace
https://en.wikipedia.org/wiki/Special:Search?search=how+to+clean+wrist+brace
