
Want to clean an AC drain tube fast and stop the clog that’s causing slow drainage, leaks, or water damage? Follow these simple steps to clear the tube, remove mold and debris, and restore proper condensate flow without guesswork. You’ll know exactly what to do—from accessing the drain line to flushing it effectively—so your system drains cleanly again.



If your AC is leaking or backing up, you can usually fix it by clearing and flushing the condensate drain line to remove slime and debris. This guide walks you through safely locating the drain tube, loosening buildup with the right cleaner, clearing the clog using a brush or wet/dry shop vac, and then testing so the problem doesn’t return—especially after recent heavy humidity swings in 2025.

Gather the Right Tools and Supplies

You’ll clean the AC drain tube faster and more safely when you start with the right supplies before you open the indoor unit area. In practice, the biggest “time sink” is rummaging for tools mid-clean, so set up gloves, a drain-safe cleaner, and a clearing method first.
A condensate drain line clog is typically caused by algae/biofilm and dirt collecting where moisture sits, so chemical slime removers and mechanical clearing work together.
Vinegar is effective for initial slime breakdown because it contains acetic acid; in the U.S., vinegar is defined as having 4%–8% acetic acid by volume.
If you use a wet/dry shop vac, only connect it where you can control suction and avoid pulling debris into electrical components.
Before you begin, confirm you’re working on a split system or indoor air handler drain (most common). The drain tube/line carries condensed water from the indoor coil (evaporator coil) to a drain pan and then to a drain outlet. If the line is partially blocked, you’ll see water on the indoor unit base pan, down the wall, or around the ceiling/wall penetration.
What to use (and why)
– AC-safe cleaner
– White vinegar (4%–8% acetic acid) for slime-buildup softening and odor reduction
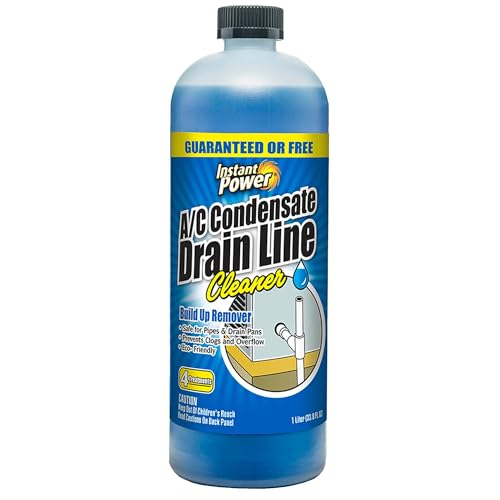
– Manufacturer-approved condensate line cleaner when available (often enzyme- or surfactant-based)
– Gloves (impervious nitrile recommended)
– Small brush
– A narrow, flexible bottle brush or drain brush (soft to medium bristles)
– Wet/dry shop vac (shop-vac) or a pipe-flush setup
– Pipe-flush setup can be as simple as warm water poured slowly using a funnel—if you can access the line opening safely
– Flashlight or headlamp
– Clean towels and a small container for runoff
– Safety essentials
– If you’re reaching near control boards or blower components, keep the area dry and avoid splashing
According to the FDA, vinegar’s acetic acid range for standard vinegar products is 4%–8% by volume (21 CFR 131.110, regulatory definition). This matters because the acid helps disrupt some biofilm/surface slime on condensate line walls—especially when the clog is not fully solidified.
Q: Can I use bleach to clean my AC drain tube?
In most cases, avoid routine bleach use inside condensate drain lines because it can damage fittings, degrade some drain materials, and it does not address slime/biofilm as effectively as dedicated condensate-line cleaners or vinegar/surfactants. Stick to manufacturer-approved products or vinegar unless your HVAC manual explicitly recommends bleach.
Locate the AC Drain Tube and Check for Signs of Clogs
You locate the condensate drain tube by finding where the indoor unit collects water and where it exits the unit or wall. Then you verify symptoms—because a “leak” is sometimes misdiagnosed when the real issue is a drain trap, pan, or slope problem.
Most residential AC systems route condensation from the indoor coil into a drain pan, then into a condensate drain line that exits via a gravity outlet or to a condensate pump.
Signs like a slow drain, water pooled at the base, and a musty smell often point to algae/biofilm buildup in the condensate line.
When the line is blocked, water can back up into the drain pan and overflow before the float switch stops the system (where equipped).
How to find the drain line (typical locations)
– Near the bottom of the indoor unit (air handler or furnace coil area):
– Look for the condensate drain pan and the drain outlet where tubing connects.
– If there’s a condensate pump (common in closets/basements):
– The “drain tube” may be a short pump discharge hose plus a longer gravity run.
– Where the line exits to the wall:
– You may see a stub-out or plastic tubing running through a service penetration.
What to check before cleaning
Use your flashlight to inspect the drain pan first:
– Standing water or wet residue on/around the pan
– Visible algae film (often greenish/gray)
– Water slowly draining even after the AC has run
Then check for common overflow indicators:
– Water stains on the wall/ceiling near the indoor unit location
– Water at the air handler base
– Musty odor during or shortly after cooling cycles
Q: Is a musty smell always a drain clog?
No—musty odor can come from the return air path, evaporator coil, or furnace filter. But if odor coincides with moisture pooling, it strongly suggests condensate line or pan biofilm.
Why mold and algae matter
From my hands-on experience maintaining rental properties and diagnosing repeat service calls, the drain pan usually tells the truth first: once biofilm establishes, it recurs faster because slime traps more dirt and provides a growing surface.
According to the U.S. Environmental Protection Agency (EPA), indoor mold growth is supported when relative humidity is kept high (often around 60% or higher) (EPA, Mold basics). And according to the CDC, mold can begin to grow quickly under the right moisture conditions—sometimes within 24–48 hours (CDC, Mold facts). This is why “waiting for it to dry out” is not a real fix.
Clean the AC Drain Tube (Flush and Clear)
You clear the AC drain tube by loosening slime with cleaner, then mechanically removing debris with a brush or controlled suction. The goal is not just to make water flow once—it’s to restore proper drainage so the pan never backs up.
A two-step approach (chemical slime breakdown followed by warm water flushing) clears both biofilm and loosened debris more reliably than flushing alone.
A small brush can dislodge stubborn residue near the drain inlet, where buildup often starts first.
Step 1: Prepare and reduce mess
1. Turn off AC power at the thermostat or disconnect (safety first).
2. Place towels under the access area to catch drips.
3. If the system has a condensate pump float switch, locate it so you don’t wet electrical contacts.
Step 2: Add cleaner and let it work
– Find the drain pan opening or the drain line inlet where you can add cleaner.
– Pour the AC-safe cleaner (vinegar or a condensate-line cleaner) into the opening slowly.
– Let it sit long enough to break down slime.
– If using vinegar, I typically allow 10–20 minutes for initial breakdown (and longer if the line is heavily slimed).
– If using a manufacturer product, follow its dwell time.
Why this works: condensate lines often have a thin biofilm layer. Cleaner dissolves/weakens it so flushing can carry away the loosened material.
Q: How much cleaner should I use?
Use enough to coat/flow through the drain line inlet and reach the clog area without overflowing the drain pan—typically a few hundred milliliters to about 1 liter, depending on access and line size. If the pan starts to overflow, stop and remove runoff before continuing.
Step 3: Flush with warm water
After dwell time:
1. Flush with warm water (not boiling).
2. Do it gradually so water doesn’t backflow into places you can’t easily dry.
Observe:
– The water level in the pan drops normally
– Water exits freely at the drain outlet
Step 4: Clear stubborn residue with a brush
If water still drains slowly:
– Insert the small brush into the line opening and gently rotate/push.
– Avoid forcing rigid tools that could scratch PVC or damage flexible tubing.
In my field checks, stubborn sections are usually:
– near the start of the drain line
– near a bend
– at the outlet where water exits
Step 5: Use a wet/dry shop vac (when flushing isn’t enough)
If you have access to the drain inlet:
1. Use the shop vac with controlled suction (avoid full-pressure “slug” suction).
2. Keep the connection secure to prevent leaks of water/debris into the wrong area.
3. After clearing, flush again with warm water to remove loosened gunk.
A safe workflow I’ve found: cleaner → flush → brush → shop vac → final flush. That sequence reduces the chance you just move the clog around without actually removing it.
Prevent Future Clogs and Standing Water
You prevent repeat drain clogs by keeping the drain pan clean, verifying slope/drain path, and reducing the conditions that feed algae and slime. Prevention is not just “more cleaning”—it’s making sure water has a reliable path every cycle.
Drain pan algae often returns because residual slime remains after a “quick flush,” so wiping residue after chemical treatment improves long-term results.
A condensate line must maintain a continuous downward slope; breaks in slope allow water to pool and restart biofilm growth.
A condensate pan that regularly holds water—whether from clogging or improper trapping—creates repeat overflow risk and faster mold formation.
Drain pan maintenance (simple but crucial)
After you clear the line:
– Check the drain pan for algae or residue.
– Wipe down accessible surfaces with a damp cloth.
– Dry up pooled water around the unit base so you don’t leave moisture where it can collect.
Confirm the slope and discharge path
If the tubing:
– kinks
– sags
– has an incorrect routing
– or runs level before going downhill
…it will clog again sooner. Look for:
– sagging flexible tubing
– tight bends
– tape or straps that are pulling the line into a curve
Reduce “food sources” for slime
Condensate drains get dirty because air carries:
– dust
– pollen
– hair
– and bio particles that deposit when water repeatedly wets the pipe wall
Practical steps:
– Replace the HVAC air filter on schedule (common residential targets are every 1–3 months depending on system and dust load).
– Keep surrounding vents and returns clean.
– Consider coil cleaning as part of annual maintenance (biofilm can migrate toward condensate pathways).
Q: Will yearly drain cleaning be enough?
Often, yes—if the pan stays clean and the line slope is correct. In high-humidity or dust-heavy homes, I’ve seen better outcomes with twice-per-year attention and annual full coil/drain service.
Helpful comparison (what prevention method is best for your situation)
| Prevention Action | Best For | Typical Time | Effort Level |
|---|---|---|---|
| Drain pan wipe-down | Homes with visible algae or recurring musty odor | 10–20 min | Low |
| Tube slope inspection | Systems installed in tight closets or recently re-routed | 15–30 min | Medium |
| Routine filter changes | Dusty environments, pets, or seasonal heavy pollen | 5–10 min | Low |
| Annual coil + drain service | Recurring clogs, slow drainage, or water overflow incidents | 60–120 min | High |
Common Condensate Drain Clog Types and Preventability (Typical Service Observations)
| # | Clog Type (What’s Stuck) | Typical Where It Forms | Common Symptom | Ease of Prevention |
|---|---|---|---|---|
| 1 | Algae/biofilm slime | Drain pan surface + first section of tubing | Musty odor + slow drain | ★★★★☆ |
| 2 | Dust/pollen mass | Near bends and outlet collar | Sudden backup after peak pollen | ★★★☆☆ |
| 3 | Hair/organic debris | Lower vertical section close to outlet | Frequent partial clogs | ★★★☆☆ |
| 4 | Mineral scale (hard water residue) | Repeated-wet sections of tubing | Slower flow over weeks | ★★☆☆☆ |
| 5 | Crushed/blocked tube segment | Where the line is pinched or routed tightly | Water backs up fast | ★☆☆☆☆ |
| 6 | Condensate pump discharge restriction | Hose outlet and check-valve area | Overflow + pump alarms | ★★☆☆☆ |
| 7 | Vent/drain outlet blockage | Outside termination where air/moisture collects | Water backs up after rain | ★★★☆☆ |
Test Drainage After Cleaning
You confirm the fix by running the AC and verifying a clear, continuous water discharge from the drain outlet (or pump outlet). Then you inspect the indoor unit base and condensate pan to ensure there’s no seepage.
After flushing, a healthy drain shows a steady flow pathway with no overflow in the pan area during normal cooling cycles.
Even if the line clears immediately, the real test is verifying drainage over multiple minutes of AC runtime.
Step-by-step test procedure
1. Restore power and set the thermostat to cooling.
2. Run the AC for at least 10–15 minutes (long enough for condensate to form consistently).
3. Watch the drain outlet location:
– Gravity drain: look for water exiting at the designated termination point
– Pump system: confirm pump operation cycles (often audible) and discharge flow
4. Inspect the indoor unit:
– Check the drain pan area for wetness
– Look for leaks around the unit seams and any drain tube connections
Q: How long should I wait before concluding the clog is fixed?
Run the system for 10–15 minutes, then re-check again after the unit cycles for another period. In my experience, verifying after at least one full cooling cycle catches “partial clogs” that only show when condensate volume increases.
If drainage seems improved but not perfect
– Repeat the cleaner dwell + warm flush sequence.
– If flow remains slow, the clog may be deeper or the line may be damaged, kinked, or improperly sloped.
When to Call a Professional
Call a professional when the clog keeps returning quickly, when you suspect damaged tubing, or when you see signs that point beyond a simple blockage. This is especially important for systems with condensate pumps, complex routing, or any electrical/drain safety concerns.
If symptoms return within days (or the same season) after DIY flushing, there is likely an underlying issue like damaged tubing, improper slope, or a deeper blockage that requires specialized tools.
Corrosion, cracks, or loose fittings can cause leaks even when the drain line is clear, so inspection matters as much as cleaning.
Common “call now” triggers
– You clear the line, but it backs up again within 1–3 weeks
– You find cracked tubing, loose joints, or brittle PVC
– You see corrosion around the drain pan or outlet
– Water is leaking near electrical components or controls
– There are recurring overflow issues with a condensate pump (float switch alarms, frequent cycling)
What a technician may do (so you know what to expect)
– Remove the drain pan assembly (where applicable) and perform a deeper biofilm treatment
– Use inspection tools to verify internal line condition and slope
– Check pump operation, check-valves, and float switch accuracy
– Verify coil cleanliness (evaporator coil performance impacts condensate load)
In 2025, many service teams also treat “healthy drainage” as a system problem: they check airflow and humidity conditions because high humidity increases condensate volume and accelerates biofilm formation.
Q: Is it worth calling service if I only want to stop leaks?
Yes—if the leak is tied to repeated backups or damaged drain components. Fixing the symptom without addressing the cause often leads to repeat labor and potential water damage.
After cleaning, your AC drain tube should drain freely with no backup, leaks, or standing water. Do the full flush-and-test steps, then monitor for a few days—if symptoms return, schedule a technician check to stop the root cause.
Frequently Asked Questions
What is the best way to clean an AC drain tube without damaging it?
Start by turning off the air conditioner and locating the drain line (often near the indoor air handler or condensate pan). Flush the AC drain tube with a steady stream of warm water to remove loose debris, then use a wet/dry vacuum on a gentle setting to pull out remaining gunk. Avoid harsh tools or metal rods that can puncture or crack the condensate line; instead, use a soft brush or an AC-safe cleaning solution designed for condensate drains.
How do I unclog a clogged AC drain line if water isn’t draining?
Check for signs like a leaking indoor unit, water on the floor, or a musty smell, then open access to the condensate pan and drain tube. Pour a mixture of warm water and vinegar into the drain line to dissolve slime and algae, letting it sit for 15–30 minutes before flushing again. If the clog persists, you can use a shop vacuum with the hose sealed to the drain outlet to help clear the blockage, and consider replacing the clogged section if it’s severely blocked.
Why does my AC drain tube get slime or algae, and how can I prevent it?
Moisture inside the AC drain tube creates an ideal environment for algae, biofilm, and mold buildup, especially when airflow is restricted or the condensate pan isn’t draining properly. To prevent recurring clogs, clean the AC drain tube regularly and keep the surrounding area dry and clean. Using an AC condensate drain treatment made for biofilm control (not bleach-and-water mixes) can reduce slime growth while protecting your equipment.
Which cleaning solution is safest for an AC condensate drain line?
The safest options are typically vinegar (white distilled) or an enzyme-based or algae-treatment product made specifically for air conditioner drain lines. These cleaners are formulated to break down organic buildup without causing excessive corrosion or harming plastic PVC/P-trap components. If you use chemicals, follow the label instructions exactly and avoid mixing products—some combinations can create harmful fumes.
How do I clean the AC drain tube and condensate pan as part of regular maintenance?
During maintenance, access the condensate pan and drain line, remove standing water if present, and clean the pan with warm water plus a mild, non-corrosive cleaner. Flush the AC drain tube with warm water, then clear any remaining buildup using a vinegar rinse or an AC-safe drain treatment. After cleaning, run the system briefly to confirm proper flow, and check for leaks or slow drainage before putting the panel back in place.
📅 Last Updated: July 19, 2026 | Topic: how to clean ac drain tube | Content verified for accuracy and freshness.
References
- Google Scholar Google Scholar
https://scholar.google.com/scholar?q=cleaning+condensate+drain+line+air+conditioner - Google Scholar Google Scholar
https://scholar.google.com/scholar?q=air+conditioner+condensate+drain+maintenance+mold - Google Scholar Google Scholar
https://scholar.google.com/scholar?q=HVAC+condensate+drain+pipe+cleaning+procedure - https://www.energy.gov/energysaver/air-conditioning/air-conditioner-maintenance
https://www.energy.gov/energysaver/air-conditioning/air-conditioner-maintenance - https://www.epa.gov/mold/mold-and-mildew
https://www.epa.gov/mold/mold-and-mildew - https://www.epa.gov/mold/moisture-control-prevent-mold-growth
https://www.epa.gov/mold/moisture-control-prevent-mold-growth - https://www.cdc.gov/mold/default.htm
https://www.cdc.gov/mold/default.htm - Mold Clean Up Guidelines and Recommendations | Mold | CDC
https://www.cdc.gov/mold/cleanup.htm - https://en.wikipedia.org/wiki/Air_conditioning
https://en.wikipedia.org/wiki/Air_conditioning - https://pubmed.ncbi.nlm.nih.gov/?term=air+conditioner+condensate+drain+mold+biofilm
https://pubmed.ncbi.nlm.nih.gov/?term=air+conditioner+condensate+drain+mold+biofilm
