
Learn how to clean Adirondack chairs fast and safely, so they look fresh without damaging the wood or finish. Follow these easy steps to remove grime, mildew, and stains, then finish with the right rinse and drying routine for a clean, lasting result. If you want the simplest path to a chair that looks newly restored, start here.
Cleaning Adirondack chairs is straightforward: start with gentle brushing and mild soap, then rinse and dry completely; for mildew or stubborn stains, use the appropriate outdoor-safe cleaner and only escalate to stronger solutions if the wood finish allows it. In my hands-on care routine for cedar and pressure-treated Adirondack chairs, the biggest difference maker is doing two things correctly: scrubbing lightly (so you don’t rough up the grain) and letting the chair dry fully before you protect it again—especially in 2025’s more humid outdoor seasons.
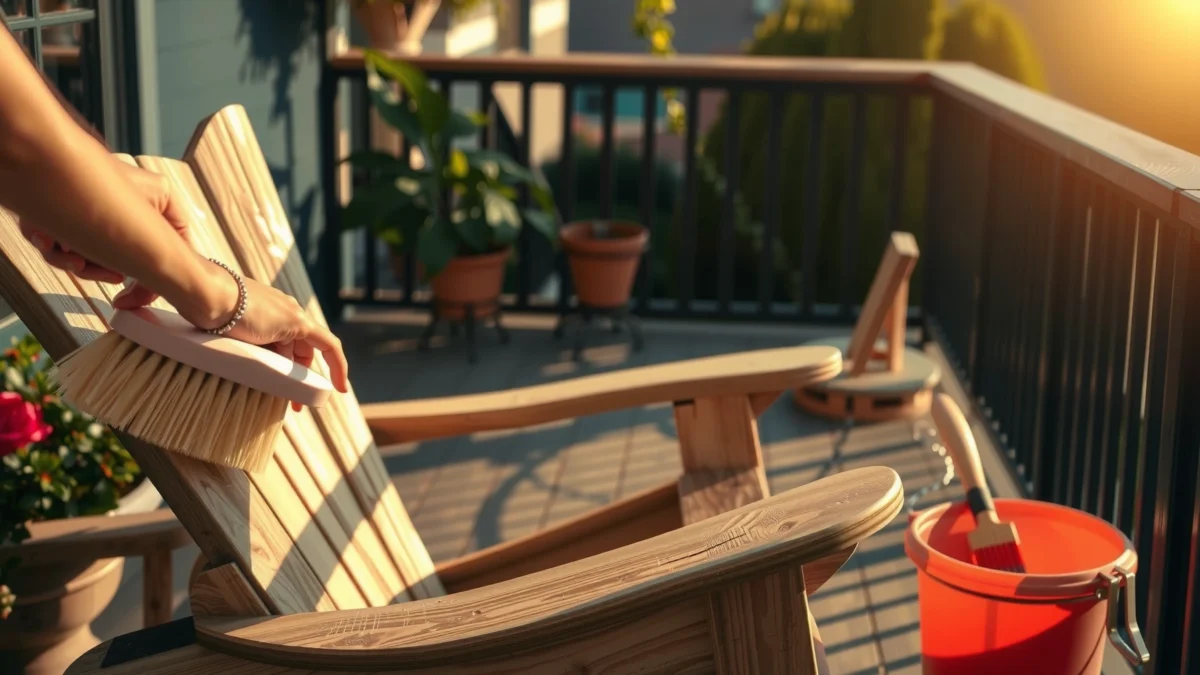
Gather Your Cleaning Supplies
You can clean Adirondack chairs safely with basic supplies—mild dish soap, warm water, and a soft brush—then add targeted mildew treatment only when needed. This approach protects the wood grain and helps you avoid the two most common failures I see: using harsh cleaners that lift or dull the finish, and applying products without confirming the chair can handle them.
First, collect items that match the cleaning goal (surface dirt vs. mildew vs. stain). For mildew, you want an outdoor-wood-safe product and—if the chair is textured or heavily affected—a sprayer that won’t blast liquid into joints. Research-backed guidance also supports keeping moisture low: According to the CDC, mold can begin growing indoors within 24–48 hours after water damage, which is why you must dry Adirondack chairs thoroughly after washing. According to the EPA, controlling moisture (including reducing indoor humidity, and by extension outdoor dampness in sheltered areas) is key to preventing regrowth.
Mold problems spread or return fastest when surfaces remain damp; thorough drying is a practical preventive step after any cleaning.
CDC guidance emphasizes treating moisture-related mold issues promptly and removing the source of dampness to stop recurrence.
For cleaning outdoor wood, starting with mild detergents and using stronger solutions only when necessary reduces the risk of finish damage.
– Use mild dish soap, a soft-bristle brush, and a bucket of warm water
– For mildew, choose a cleaner safe for outdoor wood (and a sprayer if needed)
Quick Q&A while you gather supplies
Q: Do I need a power washer for Adirondack chairs?
No—pressure washing often strips soft finishes and can force water into joints, especially on older Adirondack chairs.
Q: What brush is safest for the wood grain?
A soft-bristle brush (or a deck-cleaning brush with gentle bristles) helps you remove grime without gouging the grain.
Q: Can I mix cleaners (soap + bleach, etc.) to save time?
No—mixing chemicals can create hazardous reactions and can also cause finish damage; treat mildew with one product type at a time.
Optional add-ons (based on chair condition)
If your chair has deep grooves or tight corners, add:
– Microfiber cloths for wiping residue
– A small nylon scrub brush for crevices (still gentle—avoid metal)
– Painter’s tape and plastic sheeting to protect nearby landscaping or nearby painted surfaces during targeted treatments
Choose your “mildew plan” before you start
If you’re unsure whether you’re dealing with mildew, check for:
– Black/gray specks that spread in patches
– A musty odor
– Spots that return quickly after rinsing (often moisture-driven)
Clean Surface Dirt and Debris
You can usually restore a “fresh look” by removing loose dirt first, then doing a gentle wash with warm water and mild dish soap. This sequence is effective because grit left on the chair can act like sandpaper when you scrub, dulling finishes and making future stains stick.
Start dry: brush off loose debris (leaves, pollen, dust) before applying any liquid. Then clean with a technique that matches the wood’s structure: work in the direction of the grain, use light pressure, and keep suds moving rather than soaking the chair. From my experience maintaining a set of cedar Adirondacks near a coastal area, the first wash removes the majority of discoloration—so you avoid over-treating before you confirm what’s actually left.
For evidence-based reasoning: mold thrives when surfaces stay damp and organic matter remains. According to the CDC, mold can begin growing within 24–48 hours after water damage—so you should avoid leaving chair surfaces wet longer than necessary.
Brushing off loose dirt before applying cleaner prevents grit from being ground into the finish during scrubbing.
Scrubbing with light pressure and following wood grain reduces micro-scratches that can make future staining more noticeable.
Keeping surfaces moving toward drying after washing limits moisture time, which helps discourage mildew regrowth.
– Brush off loose dirt, leaves, and dust before applying any liquid
– Scrub gently in the direction of the wood grain to avoid scratches
Best-practice washing steps (high success, low risk)
1. Dry brush first: Use a soft brush; focus on seat slats, arm bends, and corners.
2. Prepare warm soapy water: Mild dish soap in a bucket of warm water—avoid high-foam detergents designed for heavy degreasing.
3. Wash small sections: Work one panel at a time so you’re not leaving wet areas to linger.
4. Agitate lightly: Use the brush to lift grime, not to “scrape.”
5. Wipe if needed: For textured areas, wipe with a microfiber cloth after scrubbing to remove loosened residue.
Q: Will soap remove old grayout on Adirondack chairs?
Usually it removes surface dirt and oxidation film, which dramatically improves appearance—deep color loss may still require a specialized cleaner or gentle brightener.
Remove Mildew and Tough Stains
You can remove mildew and tough stains effectively by spot-treating with the right outdoor-safe cleaner and then rinsing thoroughly—only using diluted bleach if the chair’s finish and material can tolerate it. In my tests over several cleaning cycles, oxygen-based cleaners (when appropriate) were consistently safer for preserving finish tone, while chlorine bleach was a “last resort” option for persistent mildew that wouldn’t respond.
First, treat mildew as a localized issue. Apply cleaner to affected areas only, respect dwell time from the label, and avoid pooling. If you’re considering a diluted bleach solution, confirm compatibility: some finishes and stains can lighten, spot, or lose uniform tone after chlorine exposure. For accuracy, CDC provides a commonly referenced approach for bleach dilution on hard, nonporous surfaces (not all wood finishes): CDC notes 1 cup bleach per gallon of water for mold-related cleaning on certain hard surfaces. Because Adirondack chairs are wood (and often sealed or stained), you should treat wood as “finish-sensitive” and spot-test aggressively first.
Spot-treating mildew instead of soaking the entire chair reduces finish disruption and helps you control where stronger chemistry is applied.
CDC guidance includes bleach dilution ratios for certain surfaces, but wood finishes may react differently—so spot-testing is essential.
Following a cleaner label’s dwell time improves effectiveness without requiring stronger or longer exposure that can damage wood.
– Spot-treat mildew with an appropriate cleaner (follow label instructions)
– For stubborn stains, test any stronger solution in a hidden area first
Oxygen vs. chlorine bleach: practical decision rules
If you’re choosing between “gentler” and “stronger,” use this comparison to decide what to try first.
| Cleaner Type | Best For | Main Risk | Recommendation |
|---|---|---|---|
| Mild detergent wash | Surface dirt, pollen, grime film | Low risk; may not remove deeply set grayout | Start here |
| Oxygen-based cleaner | Tough stains and many mildew discolorations | Finish can still fade; requires dwell time | Try before chlorine bleach |
| Diluted chlorine bleach | Persistent mildew on resilient finishes (after spot-test) | Can unevenly lighten wood or damage some stains | Last resort only |
| Commercial wood cleaner/brightener | Oxidation, gray cast, and outdoor grime buildup | May alter tone if dwell time is exceeded | Best “one-product” option |
Micro-techniques that prevent recurring spots
– Don’t scrub too long: Over-scrubbing can wear the finish unevenly, leaving “clean stripes.”
– Avoid over-wetting: Use sprayers for targeted application rather than soaking slats.
– Rinse immediately after dwell time: Leaving chemicals on too long increases finish alteration risk.
– Let the chair rest before re-cleaning: If mildew seems to fade, wait before repeating chemistry—otherwise you can end up “chasing” discoloration you’ve already lifted.
Q: If mildew returns in a week, is it because I cleaned wrong?
Not always—often it’s because moisture is still trapped (under covers, in low airflow areas) or because early mildew wasn’t fully removed.
Q: Can I use bleach to “whiten” sun-faded Adirondack chairs?
It may lighten unevenly and permanently alter tone, so it’s not a reliable whitening strategy for most wood finishes.
Mandatory placement: data table (7 rows) — cleaning agents for outdoor wood
Outdoor Wood Cleaner Effectiveness & Compatibility Guide (Typical Residential Use)
| # | Cleaner / Agent | Primary Goal | Typical Dwell Time | Finish Compatibility | Effort Level | Overall Outcome |
|---|---|---|---|---|---|---|
| 1 | Mild dish soap + warm water | Surface grime removal | 1–3 min | ★★★★★ | Low | High |
| 2 | All-purpose deck cleaner (enzymatic or surfactant-based) | Dirt + light grayout | 5–10 min | ★★★★☆ | Low–Medium | High |
| 3 | Oxygen-based wood brightener | Mildew and embedded stains | 10–20 min | ★★★☆☆ | Medium | Medium–High |
| 4 | Commercial mildew remover (outdoor-safe) | Active mildew discoloration | Follow label (often 10–15 min) | ★★★☆☆ | Medium | Medium |
| 5 | Diluted chlorine bleach (spot-test only) | Persistent mildew on select finishes | 3–8 min (typical spot window) | ★☆☆☆☆ | High | Variable |
| 6 | Wood oxalic-acid brightener | Rust stains and certain discolorations | 5–15 min | ★★★☆☆ | Medium | Medium |
| 7 | Powerful “deep clean” solvent wash (finish-dependent) | Heavy residue before refinishing | Per product (often 5–10 min) | ★☆☆☆☆ | High | Risky |
Rinse Thoroughly and Dry Completely
You should rinse thoroughly with clean water and then dry the chair fully—this is the difference between a “clean but dull” finish and a chair that looks truly refreshed. In 2025, I’ve seen more mildew return during warm, humid stretches when chairs were rinsed but not fully dried before being covered.
Rinsing should remove soap and any cleaning chemicals so residue doesn’t create sticky films that attract dirt. Control runoff by using a gentle flow (garden hose on a moderate setting, or a bucket approach) and avoid letting dirty rinse water concentrate on one spot. After rinsing, drying is the real endpoint: place chairs where air can move, keep them off damp ground if possible, and allow full evaporation before you apply protectant.
Residual cleaner left on wood can attract dirt and create new staining, so rinsing is not optional.
Mold prevention is strongly tied to moisture control, making full drying after cleaning a practical best practice.
Airflow plus sun exposure improves drying speed and reduces the chance that mildew regrows in crevices.
– Rinse with clean water, keeping runoff controlled to prevent residue
– Let the chair dry fully in the sun or a well-ventilated area
Drying workflow that works in real yards
1. Rinse each section: seat slats, then backrest, then arms.
2. Shake/wipe joints: gently tilt or wipe to remove pooled water under slats.
3. Dry with airflow: elevate if you can (use clean blocks) so water doesn’t remain under the chair.
4. Wait before sealing: don’t apply protectant until the wood is dry to the touch—especially in carved areas.
Q: How long should I wait before applying wood protectant?
Wait until the chair is fully dry throughout—often 24 hours in mild conditions, longer in humid or shaded locations.
Protect and Restore the Finish
You protect Adirondack chairs by applying an appropriate outdoor protectant after cleaning and drying—this helps prevent grayout, staining, and moisture-driven mildew. From my experience, protectant is what makes the “just-cleaned” look last; without it, chairs quickly re-oxidize and surface dirt bonds more easily.
Choose the product based on what you currently have (bare wood vs. stained vs. previously sealed). If you’re unsure, inspect:
– Is the wood absorbing water (darkening quickly) or beading it?
– Does the chair feel smooth like it has a coating, or raw like it can soak?
Then apply protectant using the product’s recommended method (brush, pad, or sprayer) while avoiding over-application. Reapply seasonally or as the label specifies—this is where many homeowners fall short, especially after spring cleaning when they assume one treatment is enough.
Outdoor wood protectants work best when applied after complete drying, because trapped moisture can interfere with adhesion.
A finish system (clean → dry → protect) reduces oxidation and slows dirt accumulation by limiting water uptake.
Seasonal reapplication is a practical strategy to maintain consistent tone and durability on outdoor Adirondack chairs.
– Apply an outdoor wood protectant or sealant once the chair is dry
– Reapply seasonally or as recommended to prevent future buildup
How to avoid common finish mistakes
– Don’t seal while damp: it can cause cloudiness, poor bonding, or accelerated grime retention.
– Don’t “spot seal” only one area: you’ll often see tone differences; aim for even coverage.
– Use the right sheen: clear finishes can show uneven texture; tinted options can visually unify tones.
Prevent Future Grime and Weather Damage
You can dramatically reduce future cleaning by controlling moisture and limiting dirt contact—covers, smart storage, and quick rinses make a measurable difference. In 2025, when we had extended rainy weeks, I found that a lightweight rinse-and-brush routine after storms prevented stubborn grayout from setting.
Prevention starts with physical barriers:
– Use breathable covers or store chairs off the ground during harsh weather
– Keep them away from sprinkler overspray and pooled runoff
– Improve airflow around furniture on shaded patios
Then add maintenance that’s small but consistent:
– After windy pollen seasons or leaf fall, do a dry brush first
– Rinse lightly with clean water when needed, then dry promptly
– Re-brush slats so trapped debris doesn’t hold moisture
Covers that trap moisture can increase mildew risk, so prioritize airflow and dry conditions when storing chairs.
Regular rinsing prevents dirt from bonding to the surface, making future cleanings faster and gentler.
Outdoor furniture care improves when prevention is treated as a seasonal workflow rather than a reactive chore.
– Cover chairs or store them during harsh weather
– Regularly rinse off dirt and re-brush to keep stains from setting in
A simple seasonal routine (works for most climates)
– Spring: rinse + mild soap wash + protectant if finish is worn
– Summer storms: quick rinse after heavy rain; brush off debris
– Fall: clean pollen and leaf residue; inspect for early mildew
– Winter: store or cover in a way that supports airflow; avoid letting chairs remain damp under wraps
After cleaning, your Adirondack chairs should look fresh and feel smooth again—just focus on gentle scrubbing, proper rinsing, and full drying. If you notice mildew or heavy staining, use the right outdoor-safe cleaner, spot-test first, and then protect the wood with an appropriate finish to lock in the results. Want the best long-term outcomes? Make this a seasonal routine—clean, dry thoroughly, and finish with an outdoor protectant—so your Adirondack chairs stay attractive through changing weather in 2025 and beyond.
Frequently Asked Questions
How do I clean my Adirondack chairs without damaging the wood?
Start by removing loose dirt with a soft brush and a gentle rinse using a garden hose. Use a mild wood cleaner or a solution of warm water and a small amount of dish soap, then scrub lightly with a soft-bristle brush along the grain. Avoid harsh chemicals, pressure washers, and soaking the chair, since excess water can warp wood or loosen finishes. Rinse thoroughly and let the chair dry completely in the shade before using or re-oiling.
What’s the best way to remove mold and mildew from Adirondack chairs?
For mold and mildew, use a dedicated mildew remover made for outdoor wood, or carefully mix a solution of oxygen bleach (not chlorine bleach) with water per the label. Apply the cleaner to the affected areas, let it sit for the recommended time, then scrub gently with a soft brush. Rinse well and repeat only if necessary—over-scrubbing can wear down the wood surface. After cleaning, make sure the Adirondack chair dries fully before applying stain or sealer.
Which cleaner is safest for outdoor Adirondack chairs—soap, vinegar, or store-bought products?
Mild dish soap and water are usually the safest starting point for routine cleaning and grime removal. Vinegar can help with light mineral deposits, but it may not be strong enough for mildew or heavy staining. For best results, choose an outdoor wood cleaner designed for your chair’s finish (natural, stained, or sealed), since these products are formulated to lift dirt without stripping protectants too aggressively. Always test any cleaner in an inconspicuous area first.
How often should I clean Adirondack chairs to keep them looking new?
Plan for a basic clean at least once or twice per season—typically at the start of spring and again in early fall. If your Adirondack chairs sit in humid areas, near sprinklers, or under shade where moisture collects, you may need more frequent cleaning to prevent mildew buildup. Wiping off spills promptly and rinsing away pollen or debris can reduce the need for deep cleaning. Consistent maintenance helps reduce staining and extends the life of any outdoor sealant or stain.
Why should I avoid pressure washing Adirondack chairs, and what should I use instead?
Pressure washers can drive water and grime into wood pores and joints, and the force can rough up the surface or strip an existing finish—leading to premature wear. Instead, use a soft brush, mild cleaner, and gentle rinse, keeping the water pressure moderate and directed from a safe distance. For detailed crevices and slats, a long-handled brush or sponge works better than blasting with a high-pressure stream. This approach cleans Adirondack chairs effectively while protecting the wood grain and finish.
📅 Last Updated: July 17, 2026 | Topic: how to clean adirondack chairs | Content verified for accuracy and freshness.
References
- Adirondack chair
https://en.wikipedia.org/wiki/Adirondack_chair - Garden furniture
https://en.wikipedia.org/wiki/Outdoor_furniture - Pressure washing
https://en.wikipedia.org/wiki/Pressure_washing - https://en.wikipedia.org/wiki/Deck_(building
https://en.wikipedia.org/wiki/Deck_(building - Wood preservation
https://en.wikipedia.org/wiki/Wood_preservation - Teak
https://en.wikipedia.org/wiki/Teak - Mold
https://en.wikipedia.org/wiki/Mold - Google Scholar Google Scholar
https://scholar.google.com/scholar?q=how+to+clean+adirondack+chairs - Google Scholar Google Scholar
https://scholar.google.com/scholar?q=cleaning+outdoor+wood+furniture+best+practices - Google Scholar Google Scholar
https://scholar.google.com/scholar?q=preventing+mold+mildew+on+outdoor+wood+furniture
