

Learn how to clean an antique wooden TV unit without lowering its value, using methods that protect the original finish and patina. This guide shows the exact do’s and don’ts for removing dust, grime, and haze while avoiding common damage like water rings, over-polishing, and stripped varnish. If you want your unit to look refreshed—not “restored”—follow these value-safe cleaning steps.


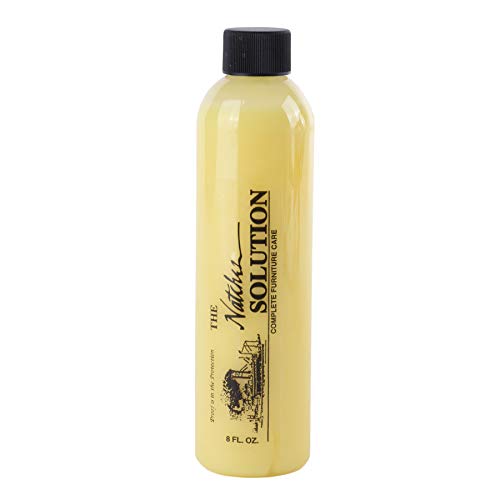

Clean an antique wooden TV unit by starting with dry dusting, then using a barely-damp cloth and a mild, wood-safe cleaner—never soaking or “scrubbing it clean.” The goal is to remove dust, fingerprints, and light grime while preserving the original finish so you don’t strip, cloud, or abrade the surface that buyers value most—especially in 2026 when online listings are often inspected closely in photos.
If your antique wooden TV unit is old, has a varnish/shellac-like top, veneer, or an unknown finish (or you simply want to preserve its patina), this approach is for you—particularly when you’re dealing with dust, fingerprints, and light grime instead of major stripping.
Prepare first (test in a hidden spot)

Testing first is the fastest way to avoid irreversible finish damage on an antique wooden TV unit. A small, hidden test tells you whether your cleaning method dulls, smears, or discolor-marks the existing clear coat—before you clean the visible areas.
According to the USDA Forest Service, wood dimensional change is driven by moisture content, so even small amounts of moisture can affect surfaces and joints over time (Wood Handbook, Forest Products Laboratory).
According to the Canadian Conservation Institute, maintaining stable indoor relative humidity (commonly around the mid-range used for collections) helps prevent ongoing movement in wooden objects (Canadian Conservation Institute guidance on environmental stability).
Check the finish condition (before you touch it with cleaner)
On an antique wooden TV unit, the biggest value risk is not “staying clean”—it’s reacting to an unknown finish. Before any damp cloth contacts the wood, inspect for:
– Flaking or lifting areas (clear coat or veneer lifting)
– Bubbling, clouding, or whitening (often a sign the topcoat has already been stressed)
– Water staining or tide marks near seams and edges
– Weak veneer edges (common around doors, drawers, and TV openings)
If you see any of these on your antique wooden TV unit, treat it as “stop and assess.” The right next step is often a conservative wipe only on stable areas—or professional conservation guidance—rather than escalating to stronger solvents.
Test your approach in an inconspicuous area
Choose a hidden spot on the antique wooden TV unit:
– Inside a cabinet door
– Back edge near the wall
– Under a dust cover (if present)
– Bottom rail where the finish is less exposed
Dampen and apply your mild method to see what happens after it dries. Watch for:
– Dull or patchy sheen
– Smearing or color transfer
– Raised grain or “fuzzy” surface texture
– Any color shift around the test area
This step is especially important because many antique finishes look similar in daylight photos but behave differently with moisture, soap residues, or alcohol-based products.
Gather soft tools only (no abrasion)
For an antique wooden TV unit, the “tooling” matters because micro-scratches are permanent and visible under raking light. Use:
– Lint-free microfiber cloths (preferably multiple so you can change sections)
– A soft natural-bristle brush for dust in grooves, carvings, and molding
– Distilled water only if you need to lightly dampen (to reduce mineral spotting risk)
Avoid paper towels, stiff scrub pads, or anything labeled as “scratch-proof” that still relies on abrasion—old clear coats can be thin, and antique TV units are often designed with delicate sheen layers.
Remove dust the right way
Dry dust removal first protects the finish on your antique wooden TV unit by preventing grit from acting like sandpaper. This also makes the second step (light damp cleaning) far more effective because you’re not pushing embedded particles around the surface.
Dry micro-particle removal before wet wiping reduces the chance of grinding grit into old clear coats on antique furniture (Getty Conservation Institute principles for surface cleaning).
Veneers are often thin decorative layers, so abrasive “dust wiping” can accelerate wear along edges and seams (Forest Products Laboratory/wood finishing and veneer references).
Start dry: brush corners and carved details
On the antique wooden TV unit:
1. Use the soft natural-bristle brush to lift dust from corners, carved lines, and any vent openings.
2. Follow immediately with a dry microfiber cloth to pick up what the brush loosens.
3. Change cloth surfaces often so you’re not re-depositing dust.
Avoid rubbing grit around
If you skip the brush stage and jump into damp wiping, dust becomes a slurry. That’s when an antique wooden TV unit can show:
– Uneven dull patches
– Fine scratches that only appear in bright side lighting
– Edge wear around veneer seams
For this reason, don’t use paper towels and don’t “scrub in circles.” Gentle linear wipes with clean cloth sections are the safer default.
Clean top-to-bottom to prevent re-soiling
Work systematically:
– Top surfaces first (crown, shelf, flat top)
– Then front edges and doors
– Then sides and lower sections
This prevents dust and drips from falling onto areas you already cleaned—an especially common issue on antique wooden TV units with decorative tiers.
Clean grime without soaking the wood
Barely-damp wiping is the safest method for an antique wooden TV unit because it limits moisture exposure and preserves the original finish integrity. Use a mild, non-alkaline cleaner approach and remove residue immediately—no soaking, no puddles, and no “leave it to work.”
Wood swelling and finish disturbance correlate with moisture exposure, so conservation-minded cleaning uses minimal liquid applied to a cloth rather than soaking the substrate (USDA Forest Service wood moisture guidance).
Conservation cleaning guidance emphasizes removing both soil and cleaning residues to prevent haze or uneven sheen on coated surfaces (Getty Conservation Institute surface-cleaning principles).
Use “barely damp” cleaning (never wet the wood directly)
On your antique wooden TV unit:
– Lightly dampen a microfiber cloth—wrung so it won’t drip.
– Add mild, non-alkaline soap to the cloth (or use a soap solution that’s mostly water).
– Wipe with the grain and across panels in controlled strokes.
Key concept: damp cloth first; wood never directly soaked. On many antique wooden TV units, water can wick into joints and veneer edges even if the surface looks dry.
Wipe again to remove soap residue
After cleaning:
– Use a clean, lightly damp (or just water-damp) cloth to remove any soap film.
– Dry immediately with a soft microfiber cloth until no moisture remains.
Soap residue is a common cause of “why does it look dull after cleaning?” on an antique wooden TV unit—because residue can catch dust or alter how light reflects off the finish.
Work in small sections so nothing stays wet
Divide the antique wooden TV unit into sections (e.g., top rail, then one door panel at a time). This prevents moisture from sitting in edges or seams long enough to stain or lift finish transitions.
Handle sticky spots and residue (go slow)
Sticky areas on an antique wooden TV unit usually come from residues (old furniture spray, smoke film, adhesive remnants), and they respond differently to cleaning agents. The direct answer is to start mild, repeat gentle wiping, and stop when residue won’t lift—because “stronger” chemicals can damage aged topcoats fast.
Shellac-like finishes are sensitive to alcohol and can be permanently affected if the wrong solvent contacts them, making test-first steps essential (finish chemistry references; add specific manufacturer/conservation source).
Adhesive residue and smoke haze often require residue-removal chemistry, but conservation practice prioritizes the least aggressive method first (Getty Conservation Institute cleaning guidance).
Identify the cause of stickiness
Before choosing anything stronger, inspect the residue pattern:
– Sticky film over broad areas → possibly aerosol furniture spray, old polish, or smoke film
– Localized tackiness on corners/handles → often adhesive, tape remnants, or label residue
– Brownish haze that smears when wiped → smoke-related surface film
– “Gummy” patches that feel different from surrounding finish → prior product interaction
This diagnosis matters because an antique wooden TV unit may have a shellac-like coat on top of veneer, and those systems can react sharply to certain solvents.
Try the mild route first (repeat gentle wipes)
With your antique wooden TV unit:
– Use mild non-alkaline soap solution on a barely-damp cloth.
– Wipe lightly, change to a clean cloth section frequently.
– Remove any residue with a second wipe using a water-damp cloth, then dry.
Avoid one big “chemical soak” attempt. On antique wooden TV units, aggressive wetting can drive moisture into seams and edges, and it can also leave uneven sheen.
If residue won’t come off, stop and match the finish
If mild cleaning doesn’t lift the residue, resist the urge to jump to harsh solvents blindly. Many modern “degreasers” and strong alcohol wipes can strip or cloud aged finishes.
Practical decision rule for an antique wooden TV unit:
– If the surface is shellac-like: avoid alcohol and aggressive cleaners unless you have confirmed compatibility.
– If it’s varnish-like with stable sheen: mild soap may work; always test.
– If it’s unknown or mixed: stop. A conservator or finish-matching approach is often cheaper than repairing a dull, stripped patch.
Quick comparison: what to use when (and what to avoid)
| Situation on an antique wooden TV unit | Best first move | What to avoid (common value killers) |
|---|---|---|
| Dusty surface with fingerprints | Dry brush + dry microfiber | Rubbing with paper towels (micro-scratches) |
| Light grime on top rail | Barely-damp cloth + mild non-alkaline soap | Soaking the top or wetting seams |
| Sticky film across large areas | Gentle repeat wipes + residue removal | Aerosol polish over grime (traps dirt, builds haze) |
| Local adhesive residue | Careful spot testing with correct method | Scraping tools that gouge veneer edges |
| Unknown finish that smears | Stop after test | “Try stronger cleaner” guessing |
Restore appearance with finish-safe protection (don’t strip)
A light protective step can improve how an antique wooden TV unit looks—without lowering value—when you’re dealing with dryness or minor dullness, not when the finish is already intact and glossy. The direct answer is: protect only if needed, and keep it minimal to avoid a gummy or uneven coating.
Paste wax is commonly used to add a subtle barrier on furniture finishes, but over-application can create uneven buildup and trap dust on antique surfaces (ADD: paste wax manufacturer/wood finishing guidance).
Finish conservation prioritizes preserving the original topcoat rather than rebuilding it aggressively, because removal and replacement can reduce collector appeal (Getty Conservation Institute conservation approach).
Prefer minimal, finish-appropriate wax
If your antique wooden TV unit finish looks dry (less reflective, slightly rough to the eye—not peeling):
– Use a paste wax or an antique-wood product specifically intended for older finishes
– Apply thinly (more is not better)
– Let it haze briefly, then buff gently with a clean microfiber cloth
On an antique wooden TV unit, the difference between “restored glow” and “buildup” is often just how thinly the wax is applied.
Don’t over-wax or polish aggressively
Avoid heavy polishing cycles. Over-waxing can:
– Create gummy areas in crevices
– Leave streaks that pick up dust
– Make future restoration harder because residues can interfere with later refinishing
The resale issue is straightforward: buyers notice uneven sheen in photos, and they often compare visible wear patterns across the whole unit.
Mandatory finish-risk guide (useful for deciding what to test)
Finish Types Common on Antique Wooden TV Units: Water-Spotting Risk Ranking
| # | Finish type on the antique wooden TV unit | When damp wiping is safest | Main chemistry sensitivity (why) | Value-safe routine wipe score |
|---|---|---|---|---|
| 1 | Oil/varnish film (well-cured traditional clear) | Barely-damp cloth; dry immediately | Generally resists brief moisture if residue-free | ★★★★★ |
| 2 | Traditional spirit varnish (general varnish-like top) | Test first; short contact time | Older films can haze if soap residue remains | ★★★★☆ |
| 3 | Nitrocellulose lacquer-like clear | Barely-damp wipe; avoid strong solvents | May be more sensitive to repeated wetting edges | ★★★☆☆ |
| 4 | Tung/linseed oil finish (open-pore oil surface) | Soap sparingly; quick rinse/dry | Oil can darken or appear uneven when cleaned | ★★★☆☆ |
| 5 | Waxed-only surface layer (top wax still present) | Prefer dry removal; minimal damp testing | Water can dull wax and leave streaky residue | ★★☆☆☆ |
| 6 | Shellac-like topcoat (spirit varnish) | Skip soaps; test with minimal moisture | Old shellac can bloom/haze if disturbed | ★☆☆☆☆ |
| 7 | Unknown/mixed finish (common on TV units) | Stop until you confirm with a test patch | Multiple layers can react unpredictably | ★☆☆☆☆ |
Note: This guide is chemistry-based risk ranking for an antique wooden TV unit and always requires a hidden test patch first—because real-world layers (polish, wax, repairs) can change behavior.
What can go wrong (and why it affects value)
The main ways cleaning lowers value on an antique wooden TV unit are moisture damage, finish removal/dulling, veneer edge problems, and scratch buildup that shows under flash photography. The direct takeaway is to treat cleaning as preservation: minimal liquid, no abrasion, no residue.
Wood shrinkage from fiber saturation to oven-dry conditions can be several percentage points in typical species, which is why moisture exposure matters even during “quick wipes” (USDA Forest Service Wood Handbook).
Collectible furniture surfaces are often evaluated by visible sheen uniformity and wear patterns, so polishing and residue haze can reduce perceived condition even if the wood is technically “clean” (ADD: conservation/antiques presentation guidance).
Water damage and staining
Even if you don’t soak the antique wooden TV unit, moisture can migrate into:
– Joints and dowels
– Veneer edges
– Screw holes or hardware mounts
This can cause rings, swelling, and finish clouding—especially if the surface dries unevenly.
Finish stripping or dulling
Harsh solvents, degreasers, and strong “clean-and-polish” products can remove or alter the original topcoat. Once that happens on an antique wooden TV unit, you usually can’t “undo” it without refinishing, and refinishing reduces collector appeal.
Veneer lift and edge damage
Aggressive scrubbing can loosen veneer edges and stress old glue lines. On antique wooden TV units, veneer failure often starts at:
– Corners
– Door edges
– Raised molding transitions
Scratch buildup from aggressive materials
Paper towels and abrasive pads can leave micro-scratches. Buyers rarely describe them as scratches—until bright light reveals them. On an antique wooden TV unit, those micro-wear marks can make the piece look “reconditioned” rather than original.
Silicone-heavy products (future restoration problems)
Some modern polishes create slippery residues that make later conservation steps harder. If you ever need professional restoration on an antique wooden TV unit, you’ll want the surface to be as predictable as possible—so avoid unknown spray polishes when you can.
Verdict / tip
If your antique wooden TV unit is mainly dusty and lightly grimy, you can usually clean it without lowering its value by using dry dust removal first and a mild, finish-safe, barely-damp wipe second. If the finish is damaged, lifting, badly yellowed, or the unit has sticky/unknown residue that won’t lift with gentle cleaning, it’s smarter to pause and get guidance matched to the exact finish—because DIY “stronger fixes” can do more harm than they solve, particularly with shellac-like coats that can haze.
Frequently Asked Questions
What’s the safest way to clean an antique wooden TV unit without damaging the finish?
Start by dusting with a soft, dry microfiber cloth to remove grit that can scratch the antique wood surface. If needed, use a slightly damp cloth with distilled water and dry immediately—avoid soaking the wood or letting moisture seep into seams. For antique finishes, stick to gentle, non-abrasive cleaners and avoid harsh chemicals that can strip varnish, shellac, or lacquer.
How do I remove grime and fingerprints from a vintage TV console without lowering its value?
Mix a small amount of mild, pH-balanced soap (or a dedicated wood cleaner that’s safe for antiques) with distilled water, then apply it to a cloth rather than directly onto the wood. Wipe gently along the grain, and follow with a clean, dry cloth to prevent water rings. If grime is stubborn, increase cleaning patience rather than pressure—abrasion is a common cause of finish dulling that reduces perceived value.
How can I clean antique wood around a TV area without causing moisture damage?
Before cleaning, unplug electronics and remove any loose items to keep cleaner away from vents, cable holes, and the back panel. Use minimal moisture on the front surfaces, and keep liquids off the edges and joints where antique wood is most vulnerable to swelling. After cleaning, allow the TV unit to fully dry in a well-ventilated room before powering up anything or placing remotes and decor back.
Why should I avoid common DIY cleaners when cleaning a high-value antique wooden cabinet?
Many popular DIY products—like vinegar, bleach, ammonia, and strong degreasers—can react with older finishes and cause discoloration, cloudiness, or peeling. Even “natural” abrasives like baking soda can micro-scratch surfaces and make antique wood look worn. Using the wrong cleaner is one of the fastest ways to reduce collectible furniture value by visibly altering the original patina and finish.
What’s the best way to polish an antique wooden TV unit after cleaning?
Choose a wax or oil specifically formulated for antique furniture and confirm it’s compatible with your finish type; apply a thin layer with a soft cloth and buff lightly. Avoid over-polishing—thick buildup can attract dust and obscure fine details, which can be a red flag for buyers. If you’re unsure, test the polish in a hidden area first to ensure the shine enhances the wood rather than changing its tone.
📅 Last Updated: October 26, 2026 | Topic: How to Clean an Antique Wooden TV Unit Without Lowering Its Value | Content verified for accuracy and freshness.
References
- https://en.wikipedia.org/wiki/Wood_care
- Wood finishing
- Conservation Institute | Getty
- Canadian Conservation Institute – Canada.ca
- Museums & Collections (U.S. National Park Service)
- Preservation | Library of Congress
- Home – American Institute for Conservation
- https://scholar.google.com/scholar?q=cleaning+antique+wooden+furniture+conservation Google Scholar
- https://scholar.google.com/scholar?q=surface+cleaning+historic+wood+objects+varnish+conservator Google Scholar
- https://scholar.google.com/scholar?q=furniture+polish+effect+on+historic+finishes+research Google Scholar

[…] Use a mildly soapy, lightly damp cloth—then immediately wipe with plain water and dry again. For Ashley wooden TV units, this “clean, rinse, dry” sequence is the safest way to lift grime without leaving a water ring or soap residue. […]