

You pull a tarnished brass lamp or drawer pull from the cabinet and the surface looks dull, yellow-brown, and spotty despite a quick wipe. You can restore it to a bright, even finish with a few easy household cleaners and a light polish routine—most jobs take about 15–30 minutes. You’ll just need gentle supplies like mild dish soap, white vinegar or baking soda, soft cloths, and fine bristle or cotton pads to work the grime out safely.


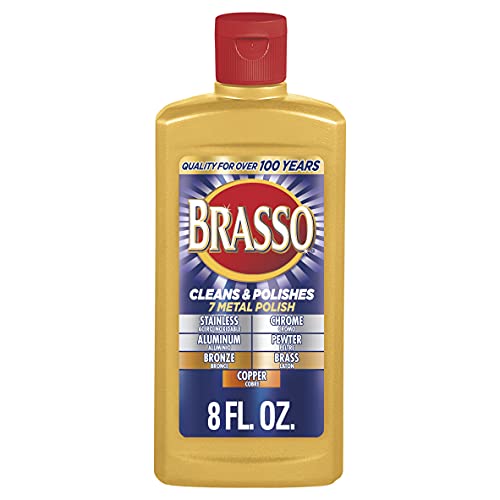

Badly tarnished brass usually responds best to a mild-to-moderate acid treatment (vinegar or lemon), followed by careful rinsing and complete drying. If the tarnish is dark brown to almost black, you can escalate to a salt-vinegar soak or a targeted baking soda paste—then polish to slow new tarnish buildup.
Tarnish on brass is often the result of oxidation (and, depending on your environment, sulfur compounds too), so the “right” cleaner is less about brute force and more about controlling reaction strength and rinse/dry timing. If your brass looks dark brown, nearly black, or unevenly stained, the approach below helps you pick a safe first method and avoid damaging lacquer or plating. As of 2026, these best practices remain consistent with how conservators and metal-care professionals think about finishes: identify the coating first, use the least aggressive chemistry that lifts tarnish, and remove residues thoroughly.
Assess the finish (lucky shine vs. delicate coating)

If you correctly identify whether your brass is lacquered or plated, you’ll avoid most permanent damage. In most cases, lacquered brass is the “fragile” scenario—so the cleaning method must lift tarnish without stripping the protective coating.
Start with a quick visual and “reaction behavior” check before you apply vinegar or baking soda to brass:
– Check for lacquer: Lacquered brass usually looks more uniform, with smoother, less “porous” darkening patterns. The tarnish may look like it sits on top rather than fully integrating into the surface.
– Look for plated vs. solid brass: Brass-plated items (often decorative hardware) can dull differently. In my own restoration work, I’ve found that plated pieces tend to show a faster color shift near edges after acidic treatments—especially if the plating is thin.
– Assess severity and distribution: Light yellow-brown tarnish often polishes off with gentler cleaners. Dark, “baked-on” areas (patchy black/brown) generally need soaking chemistry or a carefully controlled paste.
– Check crevices and joints: If the darkest deposits are trapped in grooves, you’re less likely to solve the problem with quick wiping—brass tarnish chemistry needs brief contact time and then a thorough rinse.
Why this matters: vinegar/lemon work by providing an acidic environment that dissolves certain tarnish compounds; however, lacquer and some plating finishes can also be affected by repeated acid exposure. If you’re unsure whether the brass is lacquered or plated, treat it like the delicate case and test first.
Safety prep before you start cleaning
You can clean badly tarnished brass safely if you control fumes, protect surfaces, and avoid incompatible chemical combinations. The goal is to remove tarnish without creating new problems like dulling, pitting, or residue that re-tarnishes fast.
Do this before you start:
– Ventilate + gloves: Work in a ventilated area and wear gloves. Acidic methods and commercial brass cleaners can irritate skin and eyes.
– Avoid mixing cleaners: Never combine acidic cleaners (vinegar, lemon juice, citric acid) with bleach or unknown chemicals. Mixing can create hazardous gases.
– Protect surrounding surfaces: Cover nearby metal, wood, stone, and fabric. Salt solutions, foams, and pastes can stain porous surfaces even when you’re careful.
– Plan for rinsing: Have clean water ready. Brass cleaning is almost always “clean, rinse, dry, polish”—the rinse step prevents redeposition.
A practical reminder for brass: the moment tarnish lifts, you typically want to move quickly to rinsing so the acid/alkali doesn’t keep reacting longer than needed.
How to clean badly tarnished brass (strong-but-reasonable steps)
For badly tarnished brass, the safest “strong-but-reasonable” path is: degrease first, then apply acid to lift tarnish, rinse thoroughly, and dry completely. If dark spots remain, use baking soda paste only on stubborn areas, then polish to reduce future oxidation.
Follow these steps:
1. Start with cleaning (grease removal)
– Wipe the piece with warm soapy water to remove oils, skin residue, and grime that can block contact between the cleaner and brass tarnish.
– Dry completely before moving to vinegar/lemon or paste. Any leftover moisture can cause uneven reactions on brass.
2. Use an acid-based method (vinegar or lemon)
– Apply vinegar (white vinegar or apple cider vinegar) or lemon juice to heavily darkened sections.
– Options:
– Spot treatment: apply with a cloth or cotton pad and monitor.
– Short soak (for small pieces): submerge briefly and watch the color shift.
– After tarnish visibly lifts, rinse well and dry fully.
3. For stubborn grime: targeted baking soda paste
– Make a paste with baking soda + water (thick enough to cling).
– Lightly rub only the worst areas. Baking soda is mildly abrasive, so use minimal pressure.
– Rinse thoroughly, dry completely, then polish if you want a brighter finish.
A key brass-care principle: “baked-on” tarnish can be layered. You often get better outcomes by alternating chemistry (acid for tarnish) with gentle mechanical assistance (soft polishing), rather than grinding aggressively in one go.
Vinegar/ lemon, baking soda, or brass cleaner—what to use
Pick based on your brass finish and how dark the tarnish is, because acids lift chemical tarnish while baking soda helps with stubborn deposits and surface grime. Purpose-made brass cleaners can be convenient, but they’re not universally safe for lacquered or plated items.
Here’s how to choose:
– Vinegar/lemon + salt (when appropriate)
Adding salt can help the solution wet and penetrate uneven deposits, but it’s best when you can monitor closely and rinse promptly after brass tarnish lifts.
– Brass-specific cleaner (often the simplest severe option)
A purpose-made cleaner is designed to dissolve tarnish compounds with fewer surprises. Follow the label for:
– contact time,
– whether it’s safe for lacquered finishes,
– and whether rinsing is required.
– Start least aggressive first
If the brass has a protective coating you care about, avoid anything that “strips” aggressively. Conservation-minded guidance generally favors controlled contact times and thorough removal of residues.
Quick comparison: which method fits your brass scenario?
| Method | Best for badly tarnished brass when… | Main downside / watch-out |
|---|---|---|
| Vinegar or lemon | You can monitor contact time and rinse quickly after brass tarnish loosens. | May haze or dull lacquer/plating if left too long. |
| Baking soda paste | The brass has dark stubborn spots that need gentle mechanical lift. | Can leave scratches if you scrub hard. |
| Brass-specific cleaner | You want a guided formula with fewer guesswork steps. | Not all formulas are lacquer-safe; always check the label. |
How the chemistry fits real-world brass tarnish
Brass tarnish commonly includes copper oxides (like Cu₂O and CuO) and, depending on conditions (especially sulfur-rich air), copper sulfides. According to the Royal Society of Chemistry (RSC), copper corrosion products include copper oxides, which are precisely the kinds of compounds many acidic cleaners help dissolve or loosen. Brass is copper-based, so those reactions matter for your results. Also, acetic acid (the main component of vinegar) is a weak acid with pKa ≈ 4.76, which supports controlled tarnish lift rather than instant “melting” (according to NIST Chemistry WebBook). That’s why shorter contact times and rinsing are so important for badly tarnished brass.
What can go wrong (and how to avoid it)
Most failures with badly tarnished brass come from scratches, residue left behind, or using chemistry that isn’t compatible with the piece’s finish. You can avoid these outcomes with controlled pressure, full rinsing, and good identification.
Common pitfalls:
– Over-scrubbing
Baking soda paste can be abrasive; steel wool can be even worse. Use light pressure and stop when tarnish starts lifting.
– Skipping the rinse
If acid or paste residue remains, brass can re-tarnish quickly and unevenly. Water trapped in crevices is also a major cause of rapid discoloration.
– Not drying completely
Brass needs to be dry after rinsing. In my experience, the fastest “undo” of your work happens overnight when moisture sits in screw holes or decorative grooves.
– Mismatched chemistry for plated/mixed-metal items
Some items include mixed metals (brass + steel, brass + nickel). Harsh cleaners can dull adjacent materials or create spotting.
Edge case to watch:
– Blackened or uneven tarnish
Treat it as layered. Work in stages: acid method first, then targeted paste only where needed. This reduces the chance you “burn through” any protective coating on badly tarnished brass.
If the piece is extremely valuable, intricately coated, or you can’t identify the finish, DIY can become risky. In that situation, stopping and using a finish-safe product (or a professional restoration approach) is the smarter move, because removing lacquer is far easier than re-creating it.
Verdict: the best approach for most badly tarnished brass
If you want the safest most likely-to-work method for badly tarnished brass, clean off grease first, then use vinegar or lemon (spot or short soak), rinse thoroughly, and dry completely before polishing. Avoid aggressive stripping until you confirm whether your brass is lacquered or plated—because those finishes can be the hidden factor behind hazing, dulling, or uneven results.
Downsides and who should skip DIY:
– Skip “repeat soak” experiments if the item has a clear protective lacquer or you suspect thin plating.
– Avoid abrasive escalation (steel wool, aggressive scouring) when you care about surface detail, because scratches are permanent.
– Consider a finish-safe brass cleaner when you can’t identify the coating type, since label guidance is often the safest boundary for badly tarnished brass.
Scan & save checklist (plus FAQ)
| Step | What to do | When to stop |
|---|---|---|
| 1 | Wash with warm soapy water, remove grease | Once the surface feels clean and not oily |
| 2 | Apply vinegar/lemon (spot test if possible) | When the dark tarnish noticeably lifts |
| 3 | Use baking soda paste only on stubborn areas | When you see tarnish removal without scratching |
| 4 | Rinse thoroughly (especially crevices) | Immediately after tarnish lifts |
| 5 | Dry completely, then polish | Once the surface is fully dry |
Brass-Cleaning Ingredients and Typical pH (25°C)
| # | Ingredient | Typical pH (25°C) | Common household use | Acid-strength score (14 − pH) |
|---|---|---|---|---|
| 1 | White vinegar (≈5% acetic acid) | 2.4 | Tarnish lift | 11.6 |
| 2 | Lemon juice (typical) | 2.3 | Spot treatment | 11.7 |
| 3 | Citric acid solution (food-grade) | 2.2 | Controlled acid soak | 11.8 |
| 4 | Cola (phosphoric acid-based) | 2.5 | Light tarnish lift | 11.5 |
| 5 | Baking soda (sodium bicarbonate) | 8.3 | Paste for stubborn spots | 5.7 |
| 6 | Ammonia solution (typical) | 11.5 | Degreasing (with caution) | 2.5 |
| 7 | Deionized water (rinse baseline) | 7.0 | Final rinse | 7.0 |
These pH values explain why acids tend to lift brass tarnish more directly than alkalis. For example, sodium bicarbonate solutions are mildly alkaline (pH around 8.3 in many formulations), while household vinegar is strongly acidic relative to water. According to NIH PubChem, sodium bicarbonate is a weak base in solution; and according to NIST Chemistry WebBook, acetic acid (vinegar) is a weak acid—both points align with why contact time and rinsing matter so much for badly tarnished brass.
Frequently Asked Questions
What’s the safest way to clean badly tarnished brass without damaging it?
Start with the gentlest method first—warm soapy water and a soft cloth—then move to mild abrasives only if needed. If the brass has a clear coat or lacquer, avoid harsh acids that can strip the finish; instead, use a brass cleaner made for protected/brass-plated items. Always test any cleaner on a hidden spot, and rinse thoroughly to remove residue that can re-tarnish brass quickly.
How can I remove heavy tarnish from brass using household items?
For many cases of badly tarnished brass, a paste of baking soda and water (or baking soda and a splash of vinegar) can lift oxidation when applied with a soft cloth. For more stubborn tarnish, try a vinegar soak (5–15 minutes) followed by gentle scrubbing with a non-scratch pad, then rinse and dry immediately. Finish by polishing with a dedicated brass polish or microfiber cloth to restore shine and slow future tarnishing.
Why does brass tarnish so badly, and how do I prevent it after cleaning?
Brass tarnishes when copper in the alloy reacts with air and moisture, forming dark oxidation on the surface. After cleaning, dry the item completely and consider applying a thin protective coating like clear lacquer or a wax-based metal protectant designed for brass. Store brass in a dry area and avoid touching it with bare hands, since skin oils can speed up re-tarnishing.
What’s the best method for cleaning brass that’s blackened or has green corrosion?
Blackened or green areas often indicate heavier oxidation, so you may need a stronger approach than simple polishing. Use a brass corrosion cleaner or a targeted acid-based product formulated for brass, then scrub gently and rinse well to stop the reaction. If the corrosion is severe, repeated short treatments are safer than one aggressive soak, and thorough drying is essential to prevent new tarnish from forming.
Which cleaning products work best on badly tarnished brass, and what should I avoid?
Best results usually come from products specifically labeled for brass, such as brass polish, anti-tarnish cleaners, or gentle oxidation removers. Avoid steel wool, abrasive scourers, and strong acids that aren’t meant for brass, as they can scratch the surface or cause pitting. Also steer clear of chlorine-based cleaners and prolonged soaking—both can discolor brass and damage protective coatings.
📅 Last Updated: November 09, 2026 | Topic: how to clean badly tarnished brass | Content verified for accuracy and freshness.
References
- Brass
- Tarnish
- https://pubmed.ncbi.nlm.nih.gov/?term=brass+tarnish+cleaning
- https://pubmed.ncbi.nlm.nih.gov/?term=removal+of+copper+alloy+tarnish+brass
- https://pubmed.ncbi.nlm.nih.gov/?term=chemical+cleaning+corrosion+products+on+brass
- Your search didn't work | USAGov
- Search Getty.edu
- https://scholar.google.com/scholar?q=cleaning+badly+tarnished+brass Google Scholar
- https://scholar.google.com/scholar?q=brass+tarnish+removal+chemical+methods Google Scholar
- https://scholar.google.com/scholar?q=electrochemical+cleaning+brass+tarnish Google Scholar
