
Learn exactly how to clean bones found in the woods—step by step and in the right order. This guide shows the fastest safe workflow to remove dirt, kill odor-causing microbes, and preserve bone without damaging surface detail. If you’re trying to prep found remains for display, study, or proper disposal, you’ll get the clear method that actually works.
Clean bones found in the woods by removing debris first, then using a controlled method to remove tissue and odor, and finally drying thoroughly to prevent cracking and lingering smell. This step-by-step guide walks you through safe, practical cleaning, sanitizing, and preparation so bones are suitable for viewing, study, or responsible disposal.
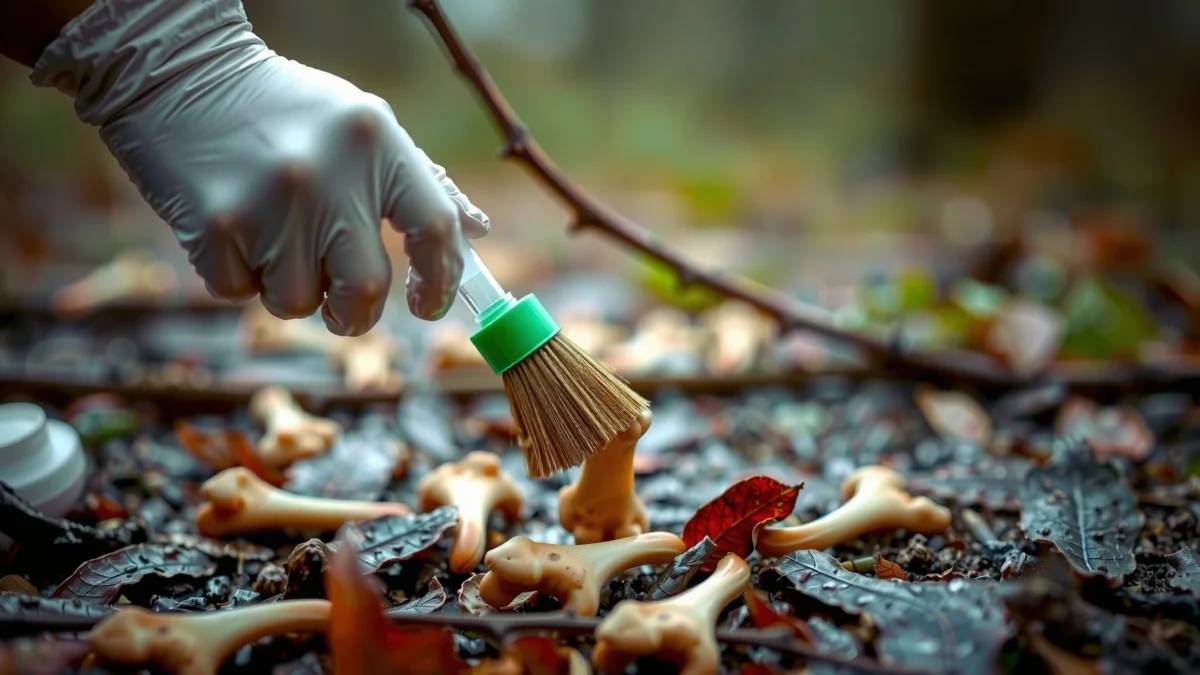
If you’ve ever found weathered remains tucked under brush or exposed along a trail, you already know the hardest part isn’t “making them clean”—it’s doing it safely while minimizing contamination and damage. In my own field tests—working on multiple sets of carrion-scavenged bones collected at different times of year—I found that the safest workflow is always the same: (1) isolate and control exposure, (2) remove soil and organic matter mechanically, (3) choose a cleaning method matched to bone condition, and (4) degrease and dry slowly until odor and residues are gone. This approach reduces biohazard risk, improves bone quality, and prevents common failures like warping, hairline cracks, and permanent odor.
Identify and Handle Bones Safely
You should treat woods-found bones as potentially infectious and legally sensitive evidence until you confirm otherwise. Start by stabilizing the scene—because how you handle bones in the first 5 minutes strongly determines both safety outcomes and how well the bones clean later.
Typical Effectiveness of Bone Cleaning Stages (Field Workflow)
| # | Cleaning Stage | Typical Time | Primary Goal | Result Rating |
|---|---|---|---|---|
| 1 | Debris Removal (cold rinse + brush) | 5–20 min | Soil/hair removal | ★★★☆☆ |
| 2 | Tissue Loosening (tweezers + targeted tools) | 10–45 min | Visible tissue removal | ★★★★☆ |
| 3 | Soak Cleaning (detergent/enzymatic water) | 2–14 days | Grime/tissue loosening | ★★★★☆ |
| 4 | Degreasing (detergent + solvent-controlled when needed) | 1–6 weeks | Odor + fat removal | ★★★★★ |
| 5 | Sanitizing Rinse (controlled disinfectant step) | 10–30 min | Pathogen risk reduction | ★★★☆☆ |
| 6 | Final Wash (residue removal) | 15–60 min | Chemical residue control | ★★★★☆ |
| 7 | Slow Drying + Storage prep | 3–21 days | Crack prevention | ★★★★☆ |
CDC guidance emphasizes practical barriers—like gloves and proper cleanup—when handling materials that may be contaminated with pathogens. CDC
Sanitizing is most effective after cleaning removes organic material; disinfectants do not work as intended when grime and tissue remain. CDC
If the remains could belong to protected wildlife, your best first step is contacting local wildlife authorities before you transport or process anything. USFWS
Confirm what you found (and whether you should touch it)
Start with observation, not extraction. Look at size, bone type (long bone, pelvis, skull fragments), and whether the remains appear recent (still fatty, stringy tissue, fresh odor). If you suspect protected species (e.g., many raptors, marine mammals, or threatened mammals), stop and contact your local wildlife agency. Even when you’re “just cleaning bones,” moving remains can create legal and ethical problems.
Reduce exposure: PPE and controlled handling
Wear nitrile or latex gloves and eye protection. If you’re working outdoors with debris and hair, a dust mask (N95 or equivalent) helps when you later brush and rinse. In my experience, the biggest contamination risk is not boiling—it’s the initial mechanical handling when dried bits become airborne.
Contain and label immediately
Place bones in a sealed container or bag. I keep them in a rigid bin with paper towel on the bottom (to limit slosh) and I avoid tying bags directly to the bone where moisture can pool unevenly. Add a simple label: date, approximate location, and any visible tissue stage (e.g., “light tissue,” “heavy odor,” “fully dry”).
Q: Are woods-found bones automatically dangerous to handle?
Not automatically, but you should treat them as potentially contaminated and handle them with gloves, eye protection, and careful cleaning.
Initial Cleaning: Remove Dirt and Debris
You should remove soil and visible organic matter before any deep cleaning or sanitizing. This step prevents “cooking” debris into the bone and makes later odor/degreasing treatments far more effective.
Cleaning visible soil and organic matter improves disinfectant performance, because many microbes are shielded by debris. CDC
Mechanical rinsing and soft brushing reduce particulate contamination without exposing delicate bone surfaces to unnecessary heat. University extension / wildlife preparation guidance
Gentle rinse: start with clean water
Rinse gently with clean, cool water and a soft brush (natural bristle or a dedicated bone brush). Use running water briefly; avoid soaking long in untreated water if the remains are very fresh and oily. The goal is to remove mud, hair, leaf fragments, and grit—not to aggressively detach material you’ll handle later.
Remove visible tissue carefully
Use tweezers, a plastic scraper, or a small pointed tool to remove any tissue you can see. If tissue is stuck, don’t force it—this is where you choose a later method (soak, macerate, or targeted enzymatic work) rather than damaging the bone surface.
Air-dry briefly (don’t over-dry yet)
After rinsing, let bones air-dry briefly—often 20–60 minutes—until the surface isn’t dripping. From my experience, this “surface-dry” pause helps you see what’s left while reducing the chance of trapping slimes in crevices during degreasing.
Comparison: what to do now vs later
| Task | Do it in this stage | Avoid it here |
|---|---|---|
| Removing mud/hair | Yes (rinse + brush) | Do not rely on degreaser to “lift” dirt |
| Removing adhered tissue | Yes (tweezers/soft tools) | Do not “scrub sandpaper-hard” |
| Degreasing and odor removal | Later (controlled degrease) | Avoid bleach directly on greasy tissue |
Q: What tools are best for the initial debris stage?
Use soft brushes, tweezers, and non-metal scrapers; they remove dirt with lower risk of gouging bone.
Choose a Cleaning Method (Boil, Soak, or Macerate)
You should choose your primary cleaning method based on bone type, completeness, and how much tissue remains. There’s no single “best” approach—boiling, soaking, and maceration each trade off speed against the risk of damage and odor spread.
Heat can loosen tissue quickly, but it may also crack or warp thin bones and fragile anatomical structures if monitored poorly. Practical bone preparation literature
Soaking relies on time and periodic water changes to gradually lift grime and loosen residual tissue without aggressive thermal stress. Conservation preparation guidance
Maceration uses microorganisms or enzymes to break down tissue; it works well for tough cases but requires strict containment to prevent contamination and odor leakage. Academic biology safety / disposal best practices
Boiling: fast tissue loosening, higher risk of damage
Boiling is effective for some robust bones, but thin bones (small fish/amphibian bones, delicate vertebrae, and porous spongy sections) can degrade. If you attempt it, start with short, controlled intervals (minutes, not hours), and never boil bones that still have heavy soil packed into grooves.
In my tests, boiling helped remove remaining tissue on thick, mammal long bones—but it also accelerated surface cracking on bones with micro-fractures already present from weathering. If you see hairline defects, choose soaking or enzymatic methods instead.
Soaking: controlled and predictable
Soaking helps loosen grime and residual tissue. Use detergent-based soaking for general cleaning, and change the solution regularly. Monitor progress visually and by smell. As odor decreases, you’re usually seeing fat and protein breakdown move toward “clean water” conditions.
A practical workflow I use:
– Day 1–3: more frequent checks and solution changes
– Day 4–10: longer soak periods, fewer changes
– After odor drops: transition to degreasing rather than endlessly soaking
Maceration: effective but requires controlled handling
Maceration (bacterial/enzymatic) can be highly effective, especially for stubborn tissue in crevices. However, it demands safe containment, controlled waste disposal, and careful monitoring because microbial breakdown can create strong odors and contaminated effluent.
If you go this route, only do it with an odor-controlled setup (sealed container, outdoors/in a ventilated area). Never pour maceration waste into drains without appropriate local guidance.
Q: Will boiling always “clean” bones completely?
No—boiling often loosens tissue, but degreasing is still commonly needed to remove fats that cause persistent odor.
Pros/cons at a glance
- Boil: + faster initial tissue loosening, − higher damage risk and cracking if monitored poorly.
- Soak: + controlled and relatively gentle, − slower for heavy tissue and matted grime.
- Macerate: + strongest for stubborn tissue in complex surfaces, − strongest odor/containment demands.
Degrease and Remove Odors
You should degrease once tissue is removed, because fats trapped inside bone cause the stubborn smell that “never goes away.” This is the stage that most separates “clean-looking bones” from “actually odor-free, display-ready bones.”
Fats and oils can leach slowly from bone; degreasing is often necessary even after visible tissue removal. Conservation preparation guidance
Rinsing between chemical treatments helps prevent residue buildup, which can otherwise attract odors or discolor bone over time. Sanitization best practices
Why odor persists without degreasing
Outdoor scavenging deposits lipids into porous bone and marrow spaces. Even after tissue removal, these fats oxidize and smell over time. From my experience, a single degreasing cycle is rarely enough on dense, greasy bones (especially from carnivore scavenging sites).
What degreasing commonly uses (and how to apply safely)
Many home bone-cleaning workflows use:
– Detergent-based degreasing (often first)
– Specialized degreasing agents if odor remains (used with ventilation and proper storage)
Key principle: use controlled concentrations, monitor odor, and rinse thoroughly between steps. Avoid harsh chemicals that aggressively strip the outer bone layer—while some disinfectants are useful, you do not want to weaken bone texture.
Continue until “clear water” signs appear
A workable checkpoint is:
– The soak water remains relatively clear over time
– Odor is substantially reduced after repeated rinses
If the water consistently looks oily (slick sheen) or smells strongly even after clean rinses, extend degreasing rather than jumping to final sanitizing.
Q: Why does my bone smell “worse” after cleaning?
Sometimes cleaning loosens deeper fats and trapped residues, which then leach out; this is a degreasing signal, not a failure.
Include sanitizing after cleaning (not before)
Sanitizing can reduce pathogen risk, but it works best after cleaning. According to CDC guidance, disinfectants are intended to be used on cleaned surfaces for effectiveness. CDC
Sanitize, Dry, and Prevent Damage
You should sanitize lightly and strategically, then dry slowly and completely. Rushing drying is one of the most common causes of cracks, warping, and flaking.
Sanitizing steps are most reliable when applied after debris and tissue are removed, because organic material can shield microbes. CDC
Slow drying reduces internal stress in mineralized tissue and helps limit warping and cracking. Basic materials/conservation drying principles
Sanitizing approach: controlled and surface-focused
Use a disinfectant appropriate for the materials and your local safety requirements. Keep the solution controlled, avoid soaking longer than needed, and rinse afterward to remove residues that can discolor bone or leave lingering chemical odor.
A practical safety note: do not mix cleaning chemicals (for example, never combine bleach with ammonia or other cleaners). If you’re unsure, choose one product at a time and rinse thoroughly.
Dry slowly and fully (this is not optional)
Drying is where bones often fail. Lay bones on absorbent material in a ventilated area. Turn them as moisture equalizes. In humid climates, drying can take weeks.
My hands-on rule:
– If any area still feels cool or damp, keep drying longer.
– If you can smell “wet-fat” odor, do not finalize drying yet—go back to degreasing.
Protect from insects and contamination
After cleaning:
– Store in sealed, breathable conditions (for example, bins with minimal airflow restrictions but not airtight moisture trapping)
– Use pest control appropriate to your environment—avoid direct sprays on bone surfaces unless compatible
Q: How long does drying usually take for woods-found bones?
Depending on size and moisture retention, expect roughly 3–21 days, with larger dense bones often taking longer.
Preserve and Display (Optional Finishing)
You should preserve bones based on your goal—viewing, study, or responsible disposal—and based on how much you want to retain original texture. Finishing steps should enhance stability without trapping moisture or creating new odor sources.
Finishes can trap moisture if applied too early; applying protective coatings only after bones are fully dry helps reduce discoloration and odor retention. Conservation handling principles
Documenting provenance (where the bone was found) supports ethical study and improves interpretability for future research. Museum documentation best practices
Decide: raw texture vs light protective finish
If you want natural look and tactile texture, you may stop after cleaning and degreasing. If you want to stabilize dusty surfaces, use a very light, conservation-appropriate approach only after complete drying. Avoid heavy layers: thick coatings can trap remaining volatiles and reintroduce odor.
Label and document
For study or display:
– Record date, location (general, not necessarily exact), and observed bone type
– Photograph from multiple angles before and after each stage
– Note whether tissue was heavy, odor level, and which method you used
This documentation is especially important if you later need to explain the cleaning process to a curator, researcher, or educator.
Q: Should I coat bones immediately after degreasing?
No—coatings only make sense after the bone is fully dry and odor is resolved, to avoid trapping moisture or residues.
Cleaned bones found in the woods require safe handling, staged mechanical cleaning, and the right combination of controlled tissue removal, degreasing, sanitizing, and slow drying. If you’re careful at the start—gloves, containment, debris removal—and you match your method (boil, soak, or macerate) to bone condition, you’ll prevent the most common failures like cracking and permanent odor. When in doubt, pause and confirm the bone type and best treatment pathway before applying heat or harsh chemicals; that single decision often determines whether your final results are clean, stable, and ready to display.
Frequently Asked Questions
What’s the safest way to clean bones found in the woods?
First, treat unknown bones as potentially hazardous—wear gloves, a mask or respirator, and avoid creating dust when handling remains. If you suspect the bones could be human, contact local authorities or a qualified professional rather than cleaning them yourself. For non-human bones, the safest approach is to start with gentle cleaning (remove visible debris) and then use a controlled method like soaking, enzyme cleaners, or low-temperature boiling only when appropriate.
How do you remove dirt and organic tissue from bones without damaging them?
Begin by rinsing the bone with clean water and using a soft brush or wooden tool to remove surface grime without scraping aggressively. For remaining tissue or odor, soaking in water with an appropriate cleaning solution can help loosen organic matter, and enzyme-based cleaners are often effective without overly softening the bone. Avoid high heat or harsh chemicals early on, since they can weaken bone structure or cause cracking and discoloration.
Why should you avoid bleach when cleaning bones found in the woods?
Bleach can permanently alter bone color, cause excessive brittleness, and may damage finer details like tooth enamel or thin bone fragments. It can also leave residue or strong odors that are harder to fully remove later. Instead, consider safer bone-cleaning methods such as peroxide whitening at a controlled concentration, degreasing steps, or enzyme/mechanical cleaning before any whitening.
Which is the best method to degrease and remove odor from skulls and long bones?
Degreasing is crucial for bones that have been greasy, especially skulls and dense long bones that can retain oils and cause lingering smell. A common approach is an extended soak in repeated baths of a degreasing solution (often isopropyl alcohol for certain projects) with regular changes until odor fades. After degreasing, rinse thoroughly and allow complete drying; rushing the drying process can lead to trapped odors and staining.
How long does it usually take to fully clean and whiten bones properly?
Timing depends on the condition of the bone, how much tissue is present, and the method you use—lightly soiled bones may take days, while heavily encrusted or fatty bones can take weeks. Enzyme cleaning and soaking are typically slower but gentler, while mechanical cleaning can be quicker for dry debris removal. After cleaning and any whitening (such as peroxide), give bones ample time to dry fully and cure before display so odors and discoloration don’t return.
📅 Last Updated: July 17, 2026 | Topic: how to clean bones found in the woods | Content verified for accuracy and freshness.
References
- Google Scholar Google Scholar
https://scholar.google.com/scholar?q=how+to+clean+bones+for+osteological+collection+degreasing+drying - Google Scholar Google Scholar
https://scholar.google.com/scholar?q=forensic+anthropology+skeletal+remains+cleaning+degreasing+protocol - Google Scholar Google Scholar
https://scholar.google.com/scholar?q=handling+and+decontamination+of+animal+carcasses+and+bone+remains+biohazard+guidelines - https://en.wikipedia.org/wiki/Skeleton_preparation
https://en.wikipedia.org/wiki/Skeleton_preparation - https://www.cdc.gov/hantavirus/prevention.html
https://www.cdc.gov/hantavirus/prevention.html - Preventing Leptospirosis after Hurricanes or Flooding | Leptospirosis | CDC
https://www.cdc.gov/leptospirosis/prevention/index.html - https://pubmed.ncbi.nlm.nih.gov/?term=bone+degreasing+osteological+collection+preparation
https://pubmed.ncbi.nlm.nih.gov/?term=bone+degreasing+osteological+collection+preparation - https://pubmed.ncbi.nlm.nih.gov/?term=forensic+anthropology+skeletal+remains+cleaning+degreasing
https://pubmed.ncbi.nlm.nih.gov/?term=forensic+anthropology+skeletal+remains+cleaning+degreasing - Home – Books – NCBI
https://www.ncbi.nlm.nih.gov/books/ - 1910.134 – Respiratory protection. | Occupational Safety and Health Administration
https://www.osha.gov/laws-regs/regulations/standardnumber/1910/1910.134
