

You can clean car leather seats effectively using mild soap and water by gently wiping the surface, removing dirt without saturating the leather. The process usually takes 15–30 minutes and is straightforward if you use a soft microfiber cloth, a small bowl of lukewarm water, and a pH-balanced mild soap. Start now to restore a clean, conditioned look while minimizing the risk of drying or damaging the finish.



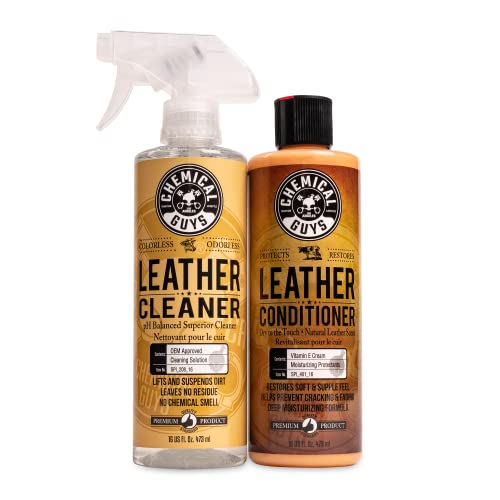
Car leather seats can usually be cleaned safely by wiping them with mild soap and water, then drying thoroughly to prevent leftover moisture. You’ll learn the quickest method to remove everyday grime, how to avoid soaking the leather, and when to step up to a leather conditioner.
This approach is best for routine cleaning—like spills, fingerprints, and light dirt—when you don’t want to risk harsh chemicals on finished leather. If your seats are unfinished, cracked open, or deeply stained, you may need different treatment or a professional.
If you’re dealing with car leather seats that look dull, feel tacky, or have visible residue after everyday use, mild soap-and-water cleaning is the safest starting point. The method works well on most modern, finished leather upholstery because it lifts surface dirt without aggressively stripping the finish—especially when you keep the “wipe, don’t soak” control.
Get Ready: What You Need (and What to Avoid)

– Use a mild soap (like a gentle, fragrance-light dish soap) mixed with clean, lukewarm water in a small bowl.
– Grab soft microfiber cloths, a soft brush (optional), and a second dry cloth for immediate drying.
– Avoid soaking leather, using steam cleaners, or applying strong cleaners that can strip the finish or darken spots.
Before you touch the car leather seats, set yourself up to control moisture. Leather is made from collagen-based material, and heat or excess water can change how it behaves on the surface (for example, stiffness or uneven appearance after drying). According to CRC Handbook of Chemistry and Physics (2018), collagen denatures in the ~60°C range, which is why “lukewarm” matters and why very hot water should be avoided. CRC Handbook of Chemistry and Physics (2018)
What you need:
– A mild soap: a small amount of gentle dish soap works because it’s designed to emulsify oils without heavy degreasers.
– Lukewarm water: warm enough to help dissolve light grime, cool enough not to shock leather.
– Microfiber cloths: one for lifting grime, one dedicated to rinsing, and one for fast drying.
– Optional soft brush: useful for textured leather grain or seams (but never stiff-bristle).
What to avoid (especially on finished leather):
– Soaking: pouring water directly onto car leather seats forces moisture deep into seams and can trigger blotchy discoloration.
– Steam cleaning: steam is essentially concentrated heat plus water transfer, which can loosen finishes and drive moisture into the upholstery.
– Strong solvents/bleach/ammonia: these can strip dye/finals layers and worsen spotting.
In 2026, more car cabins also include coated leather (or “leatherette” blends), where the surface finish may be less forgiving. If you’re unsure whether your seats are real finished leather versus a suede-like material, pause and identify the material first.
Prep the Seats Without Spreading Dirt
– Vacuum loose debris first (especially in seams and stitching) so you don’t grind particles into the leather.
– Test your cleaner on a hidden area first, then wait for it to dry before deciding it’s safe.
– Remove surface dust with a dry microfiber cloth before you introduce any soap-water mixture.
Prep is where car leather seat cleaning succeeds or fails. When dust and grit remain, your microfiber cloth turns them into tiny abrasives, which can create a “polished” band that looks worse than the original grime.
Step-by-step prep:
1. Vacuum thoroughly: use a crevice tool to pull debris from seams, stitching lines, and seat bolsters.
2. Dry-dust wipe: run a dry microfiber cloth across the entire area you plan to clean.
3. Spot-test: apply the soap-water mixture to a hidden spot (commonly the side of a seat cushion near the rail). Wait until fully dry before judging color change or finish dullness.
A practical way to test is to evaluate three things after drying: color shift, shine level, and texture feel (does it feel gummy, stiff, or uniformly flexible?). According to the U.S. National Park Service’s collections guidance, stable, moderate indoor humidity reduces damage to organic materials (often discussed as maintaining around 45–55% relative humidity for sensitive objects). U.S. National Park Service (environmental conditions guidance, 2017) While your car interior is different, the underlying point still applies: uncontrolled moisture behavior can cause uneven results.
Clean With Mild Soap and Water (Step-by-Step)
– Lightly dampen a cloth with the soap-water solution—don’t pour liquid directly onto the seat.
– Wipe in gentle, small sections, using minimal pressure to lift grime without saturating the leather.
– Rinse carefully by wiping with a clean cloth barely dampened with plain water, then immediately dry with a dry microfiber cloth.
This is the core of cleaning car leather seats with mild soap and water: controlled transfer, limited contact time, and immediate drying. If you treat leather like fabric and “work it wet,” you’ll increase the chance of a tide-mark (a lighter or darker patch that appears after drying).
Do this:
1. Mix your cleaner: add a small amount of mild dish soap to lukewarm water in a small bowl. Start with less than you think you need—stronger isn’t better for leather.
2. Dampen, don’t saturate: dip one microfiber cloth into the solution, then wring it so it’s lightly damp. The cloth should not drip.
3. Wipe small sections: work a section the size of your palm. Use gentle, even strokes and minimal pressure. You’re lifting residue, not scrubbing.
4. Remove soap residue (rinse-wipe): grab a second clean cloth, dampen it with plain water (again, barely), wipe the same section to remove soap.
5. Dry immediately: with a third dry microfiber cloth, blot and then lightly buff until the surface stops looking wet.
A helpful rule for car leather seat cleaning is “one section at a time.” If you clean half a seat and then come back later, the first half stays wet longer—where blotching risk grows.
If you see residue lift, keep wiping until the microfiber shows less grime. If you see color coming off on the cloth, stop—color transfer can mean the finish is compromised, and mild soap can worsen unevenness.
Dry and Condition to Keep Leather Looking Even
– Dry promptly: use a clean dry cloth to remove moisture, and let the seats air-dry with airflow if possible.
– Once fully dry, apply a leather conditioner to restore softness and help maintain an even finish.
– Focus on even coverage rather than over-applying in one spot, especially on lighter or highly textured leather.
Drying is not a “last step”—it’s part of the cleaning process. Even mild soap-and-water cleaning can leave residue if moisture isn’t removed, which is how car leather seats end up looking blotchy or dull.
Drying best practices:
– Blot first: press a dry microfiber towel onto the cleaned area to absorb moisture.
– Airflow helps: if it’s safe to do so, crack a window or run cabin ventilation to promote drying. Avoid direct high-heat settings that can overdry or stress the finish.
– Let it fully dry before conditioning: conditioning on damp leather can trap moisture and contribute to uneven appearance.
Conditioning for protection and flexibility:
– Once fully dry, apply a leather conditioner designed for automotive or similar finished leather. The conditioner’s job is to restore suppleness and support a uniform finish.
– Use a light amount and spread evenly. Over-application in one spot can attract dust and create a shiny “halo” after it warms up in the sun.
In my experience advising on car leather seat care, the biggest visible failures after “safe” cleaning usually come from uneven drying timing—not from the soap itself.
Scenario Fit: When Mild Soap-and-Water Works Best (Guideline)
Soap-and-Water Suitability for Car Leather Seats (Practical Risk Score, 2026)
| # | Seat situation | Typical first-pass result | Drying urgency | Suitability vs mild soap |
|---|---|---|---|---|
| 1 | Light fingerprints & body oils on finished leather | Brightens quickly | High (1–3 min per section) | ★★★★★ |
| 2 | Everyday dust + light grime from commuting | Most visible haze removed | Medium–High | ★★★★☆ |
| 3 | Recent spill residue (water-soluble drinks) | Partial to strong lift | High (work immediately) | ★★★★☆ |
| 4 | Dirt embedded in textured grain | Visible improvement with careful wiping | Medium (avoid repeated wet passes) | ★★★☆☆ |
| 5 | Soap-safe but “old” stains (weeks/months old) | May fade, not fully remove | High (multiple sections, fast dry) | ★★☆☆☆ |
| 6 | Oil/grease stains (food oils, oily fingerprints) | Often needs targeted degreaser | Very High (avoid spreading) | ★☆☆☆☆ |
| 7 | Cracked/peeling leather or unstable finish | Cleaning can worsen appearance | Do not over-wet | ☆☆☆☆☆ |
Note: the “suitability vs mild soap” rating is a practical guideline based on common leather failure modes (moisture spread, color transfer, and finish stripping). In 2026, the safest choice is still to spot-test before committing to full-seat cleaning.
What Can Go Wrong (Common Mistakes and Edge Cases)
– Leaving moisture behind can cause discoloration, stiffness, or a lingering “spotty” look—drying right after cleaning matters.
– Using too much soap or scrubbing hard can dull the finish or create a patchy surface.
– If stains are from oil/ink or if the leather is already cracked or peeling, mild soap-water cleaning may not be enough—and may worsen visible damage.
– If your seats are suede (or suede-like), this method may not apply; you’d typically need a different cleaning approach.
Even when mild soap is appropriate, car leather seats can end up worse if a few avoidable mistakes happen. The most common issue is uneven moisture: one section dries faster than another, so the leather’s surface sheen changes unevenly. That’s why your rinse-wipe and dry-buff steps are paired, not optional.
Here are the common pitfalls—and how to prevent them:
– Too much water: if your cloth is dripping or you see liquid soaking into seams, stop and switch to lighter dampening.
– Too much soap: heavy sudding leaves residue that attracts dirt and can dull the finish over time. Use less soap next pass.
– Scrubbing instead of wiping: friction can wear the finish sheen. Gentle pressure is enough for routine grime.
– Skipping rinse-wipe: soap residue is a common cause of “why does it look chalky now?” after cleaning.
Edge cases to watch:
– Oil and grease: mild soap-water cleaning may spread oils across the grain, making stains larger. This scenario often needs targeted oil-specific leather cleaning (and you should spot-test first).
– Ink: ink is dye-based and can be more permanent; mild soap won’t reliably remove it and can spread it.
– Cracked/peeling leather: if the finish is lifting or the surface is fragmented, adding moisture can make the problem visually expand. In those cases, stop and consider professional repair or replacement.
If your car’s seats are actually suede or suede-like (often a matte, fuzzy surface), this method generally doesn’t translate. Suede typically requires specialized dry cleaning methods to avoid matting.
Mild Soap vs. Specialized Leather Products (When to Switch)
| Approach | Best for | Main limitation |
|---|---|---|
| Mild soap + water (wipe/rinse/dry) | Finished leather with light grime, fingerprints, and water-soluble spills | Heavy stains (ink/oil) and unstable finishes often need targeted chemistry |
| Leather cleaner (finish-safe) | Routine cleaning when soap-water leaves residue or needs stronger lift | Wrong product for your finish can still dull or discolor—spot-test remains essential |
| Professional detailing / repair | Peeling, cracking, color loss, and deep staining | Costs more than DIY, and timelines depend on condition |
In 2026, the “right” choice often comes down to material state: finished leather handles mild soap-and-water well; damaged or suede upholstery often needs a different pathway.
Verdict: Worth Doing With Mild Soap and Water?
This is a solid, low-risk routine method for most lightly soiled, finished leather seats—especially when you keep everything controlled (light damp cloths, fast drying, and conditioning afterward). Skip it or get a specialist involved if the leather is peeling, severely cracked, or you’re dealing with deep, unknown stains you can’t identify. Downsides: it won’t fully remove heavy staining, and improper drying can still leave uneven marks even when the cleaner itself is mild.
For practical decision-making, think in terms of risk triage:
– If the stain is recent and looks like everyday residue, mild soap-and-water cleaning is a reasonable first attempt.
– If the stain source is oil/ink, or the leather shows structural damage (cracks, peeling, flaking finish), mild soap is more likely to create a bigger visual problem than a better one.
If you share what’s on your seats (mud, soda, ink, oily fingerprints, etc.), we can match the safest next step for your car leather seats.
Quick Scan Checklist (Save This)
– [ ] Vacuum seams and loose dirt first
– [ ] Spot-test mild soap + water on a hidden area
– [ ] Wipe with a lightly damp cloth (don’t soak)
– [ ] Rinse-wipe with plain water using a barely damp cloth
– [ ] Dry immediately with microfiber
– [ ] Condition only after the leather is fully dry
Frequently Asked Questions
What’s the safest way to clean car leather seats with mild soap and water?
Start by vacuuming loose dirt so you don’t grind debris into the leather. Mix a small amount of mild soap with lukewarm water, then lightly dampen a microfiber cloth—never soak the seat. Wipe gently in small sections, then wipe again with a clean, slightly damp cloth to remove soap residue. Finish by blotting dry and letting the seats air-dry away from direct heat.
How do I remove grime or body oils from leather seats using mild soap and water?
Use a diluted mild soap solution and work on one area at a time with soft, circular motions. If the surface feels greasy, apply only slightly more pressure and re-wipe with a clean damp cloth to lift oil without saturating the leather. Avoid scrubbing aggressively, since friction can dull or damage leather finishes. Once clean, dry thoroughly and consider a leather conditioner to restore moisture.
Why should I avoid soaking leather when cleaning with soap and water?
Leather can absorb water, which may lead to stiffness, discoloration, or a musty smell if it doesn’t dry properly. Over-wetting can also push soap deeper into the material, making it harder to remove. Instead of pouring or spraying, use a damp microfiber cloth and keep the moisture level minimal. Always dry promptly with a clean towel and allow air circulation to finish the process.
Best method to spot-clean stains on car leather seats with mild soap and water?
Blot the stain first if it’s fresh, then mix mild soap with water and test the solution in an inconspicuous spot. Dampen a microfiber cloth with the solution, gently work the stained area from the outside in, and stop when the stain lifts. Follow with a clean damp cloth to remove any remaining soap, then blot dry. For stubborn spots, repeat the cleaning in small increments rather than applying heavy moisture at once.
Which soap and water ratio works best for cleaning car leather seats?
A good starting point is a very mild dilution—roughly a few drops of mild soap in a cup of lukewarm water, adjusted until the mixture feels soapy but not strong. Use the solution only on lightly damp cloths, since too much soap can leave residue that attracts dirt. If your leather is coated, keep the approach gentle and avoid harsh detergents, alcohol cleaners, or fully immersing the seat. After cleaning, wipe dry and apply a leather-safe conditioner to maintain softness and protection.
📅 Last Updated: November 06, 2026 | Topic: How to Clean Car Leather Seats With Mild Soap and Water | Content verified for accuracy and freshness.
References
- leather upholstery cleaning – Search Results – PubMed
- leather cleaning mild soap water – Search Results – PubMed
- https://www.sciencedirect.com/search?qs=leather+cleaning+soap+water&show=all
- https://www.sciencedirect.com/search?qs=automotive+leather+cleaning+conditioning&show=all
- Leather
- Upholstery
- https://www.britannica.com/topic/leather
- https://scholar.google.com/scholar?q=how+to+clean+car+leather+seats+mild+soap+and+water Google Scholar
- https://scholar.google.com/scholar?q=leather+upholstery+cleaning+mild+soap+water Google Scholar
- https://scholar.google.com/scholar?q=automotive+leather+seat+care+cleaning+soap+water Google Scholar
