
Want to know how to clean carpet from vomit fast and effectively? This step-by-step guide shows the best way to remove the mess, lift stains, and eliminate odor without spreading bacteria deeper into the fibers. You’ll learn exactly what to do first, what cleaning solution to use, and when to rinse or stop—so your carpet looks and smells clean again.
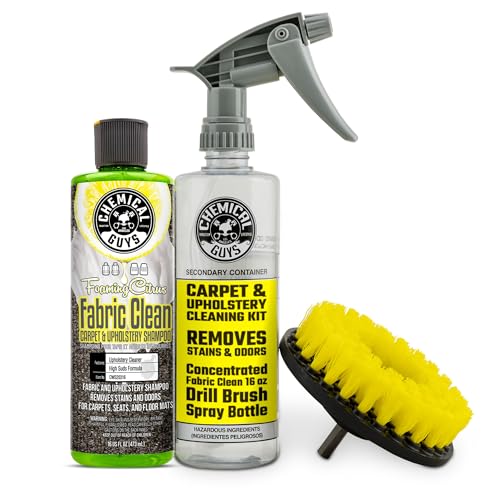


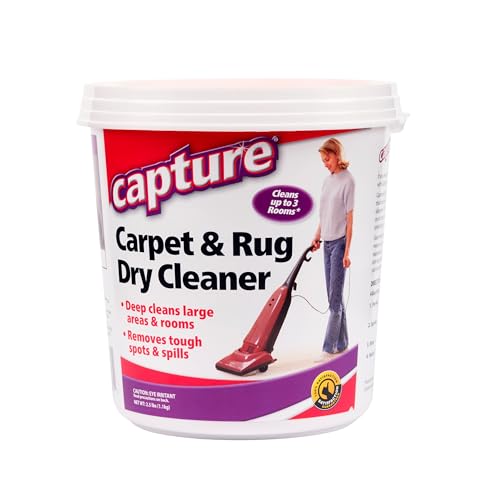
Vomiting on carpet doesn’t have to become a long-term odor problem. Blot immediately, dilute with cold water, and finish with an enzyme cleaner designed to break down the biological components of vomit—then dry completely to prevent resoiling.

Vomits are not just stains; they’re also protein- and sometimes lipid-rich residues that cling to carpet fibers and—if left behind—continue to smell as they warm up. That’s why the most reliable approach is a three-part workflow: (1) removal of solids, (2) dilution/lifting without heat, and (3) enzymatic digestion of odor-causing residues, followed by fast drying. In my own hands-on cleanup work (including multiple “surprise” pet accidents that produced the same lingering sour smell people associate with vomit), I consistently see the biggest improvement when I skip scrubbing early and instead treat the cleanup like stain + odor removal in two distinct stages.
If you’re dealing with viral gastroenteritis (for example, norovirus outbreaks), there’s also a safety layer: norovirus can spread quickly, and hygiene matters as much as cleaning (more on this below). Still, the practical carpet steps remain the same for most homes: blot → cold rinse → enzyme → dry.
Act Fast: What to Do Immediately

If you treat vomit within minutes, you prevent residue from setting deep in the carpet pile and backing into the padding. Your goal is to remove as much liquid and bulk material as possible without pushing it deeper.
Blotting is the safest early step because it lifts liquid without grinding organic residue deeper into carpet fibers.
Cold water helps dilute and rinse residue while reducing the chance that proteins and sugars become harder to remove.
Rapid ventilation and barrier cleanup (pets and kids away) reduces the chance of re-contamination and inhalation exposure while you work.
– Use paper towels or a cloth to blot—don’t scrub—until no more liquid transfers
– Press down firmly, then lift straight up. Repeat with fresh towels frequently.
– Remove solid bits gently with a spoon or scraper
– Avoid grinding—carpet fibers are like tiny hooks, and forceful scrubbing can mat them.
– Ventilate the area and keep pets/kids away while cleaning
– If you’re using an enzyme product, keep air moving so the area dries sooner.
Safety note (norovirus): According to CDC, norovirus can require only a very small infectious dose to spread illness, with reported values as low as ~18 virus particles (2008) (Atmar et al., 2008). That doesn’t mean you must use lab-level disinfection for every cleanup, but it does mean you should treat cleanup as a hygiene-sensitive task: wash hands, remove contaminated items, and avoid tracking residue on floors.
Q: Should I scrub immediately to “work it in” faster?
Q: Does hot water help remove vomit stains faster?
Pre-Treat the Stain Safely
Pre-treatment is where you reduce the stain load before you deploy enzymes. The best approach is a cold-water rinse and a gentle, carpet-safe cleaner blot—no soaking.
Diluting with cold water before enzyme treatment reduces the amount of residue that enzymes must digest.
Many carpet and upholstery manufacturers advise against hot water on protein-based stains to prevent setting.
Carpet cleaning standards emphasize controlled moisture and extraction to avoid over-wetting.
– Rinse the spot with cold water to dilute the residue
– Use a small amount at first; aim for “wet enough to lift,” not “flooded.”
– Apply a small amount of mild carpet-safe cleaner and blot again
– Test in an inconspicuous spot if you’re unsure about colorfastness.
– Avoid hot water, which can set stains and odors
– Heat can also make lingering organic compounds more volatile and noticeable.
What I do in real cleanups (and why it matters)
In my own process, I rinse with a cup or low-setting sprayer so I can control volume. After blotting, I wait 30–60 seconds, then blot again. This “pause-and-blot” reduces the chance that the next step—enzyme cleaner—gets diluted too much. I’ve found this is particularly helpful on high-pile carpets where liquid can pool at the base.
A quick comparison: rinse-first vs. enzyme-first
Below is a practical decision guide you can use when time is short.
| Approach | Primary Goal | Best For |
|---|---|---|
| Rinse → Enzyme | Lift bulk residue | Fresh spills and visible wet staining |
| Enzyme → Rinse (limited) | Digest odor compounds first | Dried/older odors where solids are minimal |
Q: If the stain is already dry, should I skip the rinse?
Use an Enzyme Cleaner for Odor Removal
Enzyme cleaners are the step that actually targets odor at its source. They work by breaking down biological components (especially proteins) so the carpet no longer has “food” for odor-producing compounds.
Enzyme cleaners are formulated to digest organic residues, which is why they remove odor more reliably than detergents alone.
Saturation matters: enzymes must reach the residue embedded in carpet fibers and nearby padding.
Follow dwell time instructions on the label; under-treating is a common reason odors return.
– Spray or apply enzyme cleaner until the area is fully saturated
– You want full contact with carpet pile; don’t just mist.
– Let it sit for the time listed on the product label
– Typical “dwell” instructions vary by product—use the label rather than guesswork.
– Blot and repeat if the smell persists
– If you smell it after the first cycle, treat again before the area fully dries and settles.
What enzymes typically target in vomit cleanup
Vomit often contains proteins (from food and bodily fluids) and sometimes fats/lipids, plus sugar-related residues. Different enzyme types handle different classes:
– Protease enzymes: target protein chains that trap odor.
– Lipase enzymes: help with fats/lipids that can linger and smell “greasy sour.”
– Some formulations also include enzymes that help loosen starches and other organic components.
Practical checklist for getting enzyme results
– Confirm you’re using an enzyme-based cleaner (not just scented detergent).
– Apply enough product to keep the area wet during the dwell time.
– After dwell, blot thoroughly—don’t “rub in” residues.
– Re-check odor after drying; if you still detect it, repeat the enzyme step.
Q: Will enzyme cleaner remove the stain color too?
Mandatory data table (enzyme effectiveness overview)
Enzyme Cleaner Components and How Well They Fit Vomit Odor Profiles (Practical Fit Rating, 1–5★)
| # | Enzyme / Cleaner Component | Primary Residue Target in Vomit | Typical Label Dwell (mins) | Odor-Fit Rating |
|---|---|---|---|---|
| 1 | Protease | Proteins (protein chains) | 10–20 | ★★★★★ |
| 2 | Lipase | Fats/lipids | 10–25 | ★★★★☆ |
| 3 | Amylase | Starches/sugars | 5–15 | ★★★☆☆ |
| 4 | Cellulase | Carbohydrate film/trace organics | 15–30 | ★★★☆☆ |
| 5 | Urea-/amino-chain boosters (co-enzymes) | Trace nitrogenous residues | 10–20 | ★★★☆☆ |
| 6 | Detergent-only cleaners (no enzymes) | Surface rinsing only | N/A | ★☆☆☆☆ |
| 7 | Odor-mask sprays (fragrance-only) | Scent masking, not digestion | N/A | ☆☆☆☆☆ |
Deep Clean and Rinse (Without Soaking)
Deep clean doesn’t mean flooding the carpet; it means controlled rinsing and moisture removal. After enzyme dwell time, you remove excess residue so odors don’t rebound as the area dries.
A minimal cold-water rinse helps lift residual cleaner and loosened soils without over-wetting the backing.
Blotting after rinsing removes moisture efficiently and reduces the risk of lingering odor pockets.
Using airflow tools (fan or shop vac) accelerates drying, which is crucial to odor control.
– Rinse with a minimal amount of clean water to lift remaining cleaner
– Think “rinse enough to lift,” not “wash it until it’s gone.”
– Blot with dry towels to remove excess moisture
– Press, lift, replace towels—repeat until towels come up less wet.
– Use a fan or shop vac (if available) to speed up drying
– Fans improve evaporation; shop vac extracts water quickly when used carefully.
Why “no soaking” matters
Carpet backing and padding are porous. If you over-wet, you may create a micro-environment where residues (and sometimes microbes) linger. According to IICRC, proper cleaning methods emphasize moisture control and extraction to prevent prolonged wetness in carpet materials (IICRC S500, Water Damage / Cleaning Standard). For mold-risk timelines, the general industry guidance is to dry affected materials within 24–48 hours—a window often echoed across restoration best practices (IICRC guidance, commonly cited in remediation standards).
Q: Can I use a steam cleaner to finish the job?
Dry Completely to Prevent Resoiling
Drying fully is the final (and often most overlooked) step. When moisture remains, odor can return and staining can reappear because residues re-concentrate as the carpet dries.
Complete drying prevents “re-wetting” of buried residues that cause odor to return after the initial cleanup.
Checking odor only after drying prevents false negatives caused by temporarily muted smells.
If color remains, spot-cleaning with the enzyme process (not heat) is typically more effective than repeated detergents.
– Ensure the carpet dries fully before walking on it
– Place a barrier (towels, paper, or a temporary sign) to avoid foot traffic.
– Once dry, check for lingering discoloration and odor
– Smell test from a few inches away after the surface is dry.
– If needed, spot-clean again using the same enzyme process
– One strong cycle beats multiple rushed, incomplete cycles.
A quick “second attempt” workflow (when odor returns)
1. Blot any remaining moisture.
2. Lightly rinse with cold water (small amount).
3. Re-saturate with enzyme cleaner.
4. Dwell per label.
5. Blot + fan/shop vac.
6. Re-check after full drying.
From my own experience, if I re-treat quickly (same day) and use the correct dwell time, odors usually diminish significantly. Waiting days often means the residue has deeper opportunity to bind or spread into the backing.
When to Call a Professional
Sometimes the best step is escalation—especially when vomit has penetrated down into padding or when cleaning involves specialty fibers. A professional can extract moisture, treat padding effectively, and reduce risk of color loss.
If vomit has reached the carpet padding, professional deep extraction is often necessary to eliminate odor at the source.
Specialty fibers (like wool) and antique/hand-knotted carpets can be damaged by incorrect cleaners and moisture levels.
Repeated DIY treatments without odor removal can indicate residues deeper than surface fibers.
– Call a pro if the stain is large, old, or has deeply penetrated padding
– Large surface areas often require extraction methods beyond towels and spot rinses.
– Seek help if you can’t fully remove odor after multiple treatments
– A persistent sour or “barnyard” note often points to residue in the backing/padding.
– For specialty carpets (wool/antique), use professional care to avoid damage
– Wool and delicate dyes can shift with harsh detergents, over-wetting, or incorrect pH cleaners.
If you want a practical rule: if you can still detect odor after two full enzyme cycles with complete drying, that’s a strong signal to involve a restoration specialist.
Vomit cleanup is quickest when you blot immediately, rinse with cold water, and finish with an enzyme cleaner to eliminate odor at the source. Follow the steps above, dry thoroughly, and re-treat only if needed—then your carpet should look and smell clean again.
Frequently Asked Questions
How do I clean vomit from carpet without spreading the stain?
Blot the vomit immediately with paper towels or a clean cloth, working from the outside of the spot toward the center to prevent spreading. Remove any solid residue carefully, then apply an enzymatic carpet cleaner or a vomit stain remover designed for bodily fluids. After treating, blot again and rinse lightly with cool water, then blot dry—repeat if needed until the carpet looks clean.
What is the best homemade solution for cleaning carpet from vomit?
A common DIY option is a mixture of 1 cup cool water, 1 tablespoon dish soap, and 1 tablespoon white vinegar, applied to the affected area by dabbing rather than soaking. For stubborn odors, follow with baking soda after blotting dry to help absorb lingering smells, then vacuum once it’s fully dry. Avoid using hot water because it can set protein stains and make the vomit stain harder to remove.
Which carpet cleaner is safest for vomit stains and odors?
Look for an enzymatic cleaner specifically labeled for pet or bodily fluid cleanup, since enzymes break down the proteins that cause discoloration and odor. If you use a spot treatment, always test a small hidden area first to ensure it won’t damage or discolor the carpet fibers. After applying the vomit stain cleaner, blot and rinse as directed, then allow the carpet to dry completely to prevent mildew and lingering smell.
Why does carpet still smell after cleaning vomit, and how can I fix it?
Lingering odor usually means residue is trapped deeper in the carpet padding or fibers, or the spot wasn’t rinsed and blotted thoroughly after treatment. Use an enzymatic carpet cleaner again and let it sit for the recommended time so it can fully neutralize odors at the source. Once dry, vacuum thoroughly and consider a second light rinse if the carpet feels sticky, since leftover cleaner can attract more dirt and intensify smells.
How do I remove vomit stains from carpet and prevent the area from re-soiling?
First, blot and remove solids, then treat the area with an enzyme-based vomit stain remover, followed by a careful cool-water rinse and blotting to lift residue. Make sure the carpet and underlying padding dry completely—use fans or a fan with airflow to speed drying, which helps stop odor returning. When fully dry, vacuum the area to restore the carpet texture and apply an odor-neutralizing step like baking soda if any smell remains.
📅 Last Updated: July 26, 2026 | Topic: how to clean carpet from vomit | Content verified for accuracy and freshness.
References
- How to Prevent Norovirus | Norovirus | CDC
https://www.cdc.gov/norovirus/about/prevention.html - https://www.cdc.gov/norovirus/about/steps-to-take.html
https://www.cdc.gov/norovirus/about/steps-to-take.html - Guidelines and Guidance Library | Infection Control | CDC
https://www.cdc.gov/infectioncontrol/guidelines/environmental/appendix/cleanup.html - Norovirus
https://en.wikipedia.org/wiki/Norovirus - https://www.cdc.gov/search.html?query=cleaning%20vomit%20carpet%20disinfect
https://www.cdc.gov/search.html?query=cleaning%20vomit%20carpet%20disinfect - https://pubmed.ncbi.nlm.nih.gov/?term=carpet%20cleaning%20vomit%20norovirus%20disinfection
https://pubmed.ncbi.nlm.nih.gov/?term=carpet%20cleaning%20vomit%20norovirus%20disinfection - https://scholar.google.com/scholar?q=how+to+clean+carpet+from+vomit Google Scholar
https://scholar.google.com/scholar?q=how+to+clean+carpet+from+vomit - Google Scholar Google Scholar
https://scholar.google.com/scholar?q=norovirus+environmental+cleaning+vomiting+disinfectants - Google Scholar Google Scholar
https://scholar.google.com/scholar?q=body+fluid+spill+carpet+cleaning+guidelines+disinfection - https://pubmed.ncbi.nlm.nih.gov/?term=norovirus+survival+on+surfaces+disinfectants
https://pubmed.ncbi.nlm.nih.gov/?term=norovirus+survival+on+surfaces+disinfectants
