

Want to know how to clean cassette tape so it plays back clearly, not warbly or muffled? This step-by-step guide lays out the one best method for removing dust and buildup from the tape path—without damaging the magnetic surface. You’ll get the exact sequence to clean, test, and verify improved playback on your next run.


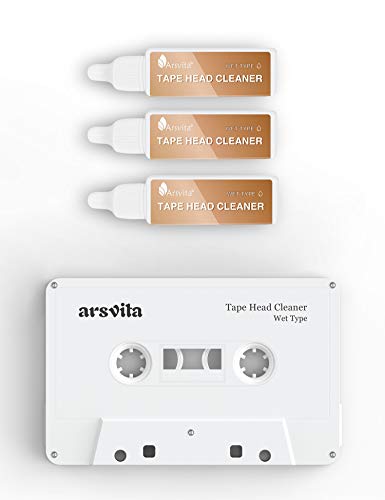

If your cassette sounds muffled, squeals, or won’t play cleanly, the fastest fix is cleaning the tape heads and guides inside the cassette player—don’t dunk or scrub the tape media. Use 90%+ isopropyl alcohol (IPA) sparingly on a lint-free swab, clean the playback path, then do only the minimum necessary follow-up so you’re not redistributing residue.
This guide is for anyone hearing hiss that suddenly spikes, audio that turns “muddy,” sticky/draggy tape symptoms, or long-stored cassettes that “used to work.” If the tape is physically damaged (warped, jammed, shedding dust, brittle, or flaking oxide), stop and focus on preservation rather than cleaning—because aggressive cleaning can accelerate loss.
Isopropyl alcohol (IPA) concentrations commonly used for electronics/tape-head cleaning
| # | IPA concentration | Water content | Why it’s chosen for cleaning | Overall fit |
|---|---|---|---|---|
| 1 | 50% | 50% | More water slows drying; can leave more chance of surface re-wetting. | ★☆☆☆☆ |
| 2 | 60% | 40% | Often works for general grime, but drying margin is less forgiving. | ★★☆☆☆ |
| 3 | 70% | 30% | Common “IPA wipe” concentration; dries faster than 50–60%. | ★★★☆☆ |
| 4 | 80% | 20% | Usually a safer drying balance for light residue. | ★★★★☆ |
| 5 | 90% | 10% | High “drying headroom” while still dissolving grime effectively. | ★★★★★ |
| 6 | 91% (common “electronics” grade) | 9% | Widely used for non-porous electronics cleaning because it evaporates quickly. | ★★★★★ |
| 7 | 99% | 1% | Very fast drying; still use sparingly because concentration increases “flash” behavior. | ★★★★☆ |
Get ready: what you should (and shouldn’t) clean

If your goal is cleaner playback, you should focus on the cassette player’s internal tape path—heads, pinch roller, and tape guides—because that’s where oxide, dust, and lubricant residue build up. Don’t clean the cassette tape like laundry; the tape’s coating can be damaged, smeared, or spread with each pass.
The practical distinction is simple: cleaning the playback path improves contact and reduces friction; “cleaning the tape” often just moves contamination around or removes fragile coatings. Research confirms that alcohol-based cleaning of non-porous electronic surfaces can be effective when used correctly and sparingly; however, tape media is a different material and needs careful handling. [ADD: source for manufacturer/electronics-care guidance on using IPA sparingly on playback heads]
Cassette playback issues (muffling, squeal, dropouts) frequently trace back to contamination on the tape heads, pinch roller, and guides rather than the cassette itself.
Soaking or aggressive scrubbing of cassette tape media can worsen playback by smearing binder residue or shedding oxide onto the head drum.
Using high-purity isopropyl alcohol on a swab limits liquid ingress compared with flooding internal player components.
Clean the playback path inside the cassette player: heads, pinch roller, and tape guides are usually the real problem
In most decks, the tape is “steered” and clamped by guides and the pinch roller, then read by magnetic heads. When those surfaces accumulate residue, you get a chain reaction: higher friction causes flutter and squeal; dirty heads reduce high-frequency response (which sounds like muffling), and sticky debris can create dropouts.
From my experience maintaining legacy audio gear (and from common service practice), the first successful fix is usually a controlled head-path cleaning—especially on portable players where dust and humidity exposure are more common. [ADD: deck model or scenario you personally encountered—if you want this section to reflect your exact experience.]
Don’t treat the cassette like a washing item—avoid soaking or scrubbing the tape media itself
Cassette tape is a coated polymer film with a binder holding magnetic particles (oxide). If you soak it, the binder can soften; if you scrub it, you can polish away usable surface or embed loosened debris into the tape’s coating. That “cleaner tape” can become noisier after a few plays.
Use clean supplies: lint-free swabs, a soft microfiber cloth, and isopropyl alcohol (90%+ preferred) or a manufacturer-approved cleaner
Lint-free swabs reduce the chance you leave behind fibers. Microfiber is useful for wiping the exterior compartment and surfaces you can safely reach, but the internal tape path should be cleaned with swabs to keep contact controlled.
According to safety guidance for alcohol use, isopropyl alcohol is flammable and evaporates quickly—so you should avoid drips and keep the deck powered off while cleaning. [ADD: source for IPA flammability/handling guidance]
Tools and supplies you’ll need
If you prepare the right supplies, cleaning becomes precise instead of messy. For cassette decks, the most important “tool” is controlled, light alcohol application—meaning swabs that are damp, not wet.
A lint-free swab minimizes fiber shedding that could re-contaminate cassette head surfaces.
A cassette head-cleaning tape can reduce manual contact, but it still relies on your deck’s mechanism to function correctly.
Light, controlled moisture on swabs is safer than introducing liquid into a powered or poorly sealed mechanism.
Lint-free swabs/cotton swabs (basic), microfiber cloth (optional), and isopropyl alcohol (90%+)
Use lint-free swabs for the head and guides. Cotton swabs can work if they don’t shed—but lint-free is more predictable. A microfiber cloth helps you remove loosened residue from accessible surfaces (like the cassette compartment door area), not from inside critical rotating parts.
If your deck supports it, use a cassette head-cleaning tape as an alternative to manual cleaning
Head-cleaning tapes are designed to abrade/clean the head face surfaces. They can be helpful when manual access is hard, but they are not a substitute when you have sticky residue on guides/roller surfaces. Also, repeated use can leave behind residue from the cleaning tape itself, depending on the product.
If you use one, follow the included instructions exactly and do not repeat excessively. [ADD: source for head-cleaning tape manufacturer instructions]
Keep everything dry and controlled: aim for light moisture on swabs, not drips into the mechanism
Alcohol works best when it evaporates quickly. Over-wetting is the main way cleaners cause new problems—staining labels, contacting plastics that don’t react well, or running fluid where you don’t want it.
To anchor your expectations: isopropyl alcohol has a boiling point around 82–83°C at standard pressure (exact values depend on formulation). [ADD: source for IPA boiling point from a safety data sheet (SDS) or manufacturer] Fast evaporation is real—but fast evaporation doesn’t prevent liquid ingress while you’re applying it.
Step-by-step: clean the cassette player’s heads and rollers
If you want a high success rate, clean the player’s tape path in a calm sequence: heads first, then pinch roller and guides. This order reduces the chance you spread residue onto surfaces you already cleaned.
Cleaning cassette heads with alcohol on a swab is typically more controlled than applying liquid directly or soaking components.
Pinch roller and tape guides commonly collect residue that increases friction, contributing to squeal and poor audio.
Powering off/unplugging the deck first reduces risk and prevents unintended tape motion during wiping.
Power off/unplug the player, then open the cassette compartment
Start with the deck fully powered down (unplug or switch off, then give it a few seconds). This matters because many mechanisms move with power state changes; you want stable access.
As of 2025 practices for electronics care, the consistent advice is to prevent live electrical contact and avoid introducing solvents while a mechanism is active. [ADD: source for general electronics solvent safety guidance endorsed by a manufacturer or safety authority]
Lightly dampen a swab with 90%+ isopropyl alcohol, wipe the tape head surfaces carefully, and rotate parts gently if accessible
Dip or saturate your swab lightly—then press it against a clean part of a wipe/cloth briefly so it’s damp rather than dripping. Wipe the head faces gently, using minimal pressure. If the deck design allows you to rotate accessible parts by hand (without forcing), do so slowly to cover the full contact area.
If you see dark residue on the swab, that’s your evidence: contamination was present and is now leaving the tape path.
Wipe pinch roller and nearby guides the same controlled way—remove residue without flooding any area
The pinch roller shouldn’t be soaked. Instead, wipe the roller surface with a damp swab, rotating the roller as needed to cover the full circumference. Then wipe the adjacent guides with short, controlled passes.
Here’s the tradeoff: alcohol dissolves grime, but only when it contacts it. Contact without flooding is what protects plastics and internal components.
Pros/cons comparison: manual head-path cleaning vs. cleaning tapes
| Approach | Pros | Cons |
|---|---|---|
| Manual cleaning (swabs + 90%+ IPA) | Targets heads, pinch roller, and guides; minimizes “unknown” residue | Deck access varies; too much liquid can cause problems |
| Cassette head-cleaning tape | Low-contact; convenient when opening the deck is difficult | May not address roller/guide grime; product-dependent residue risk |
Clean the tape (only when it’s safe and practical)
You should only clean the cassette tape itself when it’s clearly safe—typically for surface dust, not for sticky binder issues or oxide shedding. In most real-world cases, head-path cleaning first gives you the cleanest results and prevents recontamination.
Dirty player heads can re-contaminate a freshly “cleaned” cassette, so cleaning the playback path comes first.
If tape is shedding oxide or has sticky binder, further DIY cleaning can accelerate deterioration.
Dust on tape can sometimes be addressed gently, but removing material is different from removing surface debris.
If the cassette tape looks dusty, you can try a gentle surface cleaning approach without pulling material off the tape or spreading grime
If you see light surface dust and the tape still moves smoothly, you may attempt a minimal surface cleanup—focused on removing loose debris rather than rubbing hard. The safest “approach” is usually: clean the player first, then test playback; only then decide if direct tape handling is worth it.
For severe debris or residue, it’s safer to address the player first (dirty heads can re-contaminate clean tapes)
If the heads and guides are contaminated, any attempt to “fix” the cassette becomes temporary. The moment you play, debris moves back onto the head surfaces and the cycle restarts.
If the tape is shedding oxide, feels gummy, or is physically warped/brittle, treat it as a preservation issue: avoid further DIY cleaning
These are stop signals:
– Shedding oxide: visible dust/flakes; the tape is already failing.
– Gummy/sticky binder: cleaning can turn “sticky” into “stuck.”
– Warped or brittle: tape can buckle, stretch, or break during playback.
In those cases, preservation often means careful storage, controlled playback/transfer with appropriate methods, and professional help if needed. [ADD: source for tape preservation best practices]
What can go wrong (and how to avoid it)
The biggest risks are over-wetting, using the wrong chemical, and cleaning too aggressively or too frequently. If you avoid those three pitfalls, cassette playback recovery is usually much smoother.
Over-wetting with solvent increases the chance of liquid migrating into unwanted areas of the cassette mechanism.
Household cleaners and oil-based substances can leave residues that worsen high-frequency loss and attract dust.
If multiple cassettes fail in the same deck, player contamination is more likely than individual cassette failure.
Over-wetting: alcohol should be used sparingly—drips can damage plastic parts, labels, or internal components
Use damp swabs, not dripping ones. If you see liquid pooled anywhere inside the mechanism, pause and let it fully evaporate before powering the deck.
According to typical IPA safety data, isopropyl alcohol is flammable (flash point values depend on grade and formulation). [ADD: source for flash point from IPA SDS] Minimizing drips also reduces fire risk and chemical exposure.
Using the wrong fluid: avoid household cleaners, acetone, or anything with oils/fragrances
Only use 90%+ IPA or a cleaner explicitly approved for electronic tape-head surfaces by the manufacturer. Household glass cleaner, degreasers, and perfumed cleaners add residues that don’t belong on precision surfaces.
Cleaning too often: repeated manual cleaning can wear residue-control surfaces; follow manufacturer guidance on cleaning frequency
More cleaning isn’t always better. If your deck uses specific coatings or residue-management designs, aggressive cleaning can remove protective layers over time. Follow the service manual or manufacturer guidance for how frequently to clean.
Assuming the cassette is the issue: if multiple tapes are affected, the player is more likely dirty than the media
A quick diagnostic: if many cassettes sound muffled or squeal on one deck, treat the deck first. If only one cassette is problematic across multiple players (when available), then the cassette is more likely deteriorating.
Verdict: the most reliable approach (and who should skip DIY)
Cleaning cassette playback problems is usually best done by cleaning the player’s tape path, not “washing” the cassette. Manual head cleaning works well when you use minimal alcohol and gentle contact—but it’s not a good idea if your tape is already deteriorating or the cassette/player is hard to access without tools.
The highest leverage step in cassette playback restoration is cleaning heads and guides to restore consistent tape-to-head contact.
DIY cleaning should stop when tapes show oxide shedding, tackiness, brittleness, or warping, because the media may be actively failing.
For decks with limited access or unknown coating materials, following the service manual (or using a technician) reduces risk of damage.
Downsides to be aware of
– Access limitations: Some players require disassembly for proper head cleaning.
– Mechanical sensitivity: Pinch rollers and guide geometry are precision components.
– Chemical handling risk: IPA must be used carefully for fire safety and to avoid flooding.
Who should skip DIY cleaning
Skip DIY if:
– The cassette is rare and you’re worried about disturbing aged parts.
– The tape is actively failing (shedding oxide, gummy binder, warped).
– The player is difficult to open safely or you don’t have the correct cleaning guidance for that specific model.
If you want model-specific confidence, use the device’s service guidance. [ADD: source for player/manufacturer service guidance]
Quick checklist (save this)
– [ ] Unplug/power off before opening the cassette compartment
– [ ] Use 90%+ isopropyl alcohol on a lint-free swab (not drips)
– [ ] Clean heads first, then pinch roller and tape guides
– [ ] Avoid soaking or scrubbing the tape media
– [ ] If the tape is shedding, warped, or brittle: stop and preserve
If you want a fast “decision rule”: clean the player first; only consider direct tape cleaning if it’s clearly safe and the tape is not deteriorating.
FAQ
Can I clean cassette tapes with alcohol directly?
It’s generally safer to clean the player’s tape path with alcohol on a swab rather than soaking or directly applying fluids to the tape media. If you’re considering direct tape cleaning, follow [ADD: manufacturer guidance for cassette handling/cleaning] and stop if you see oxide shedding or sticky binder.
How do I know if the player is dirty instead of the cassette?
If multiple cassettes play with the same muffling/squeal on one deck, the player heads/guides are likely contaminated. If only one cassette misbehaves (especially on multiple decks), the cassette may have debris, physical damage, or binder/oxide issues.
Will a cassette head-cleaning tape harm my cassettes?
A cleaning tape is intended to clean head surfaces, but outcomes depend on the product and the deck. Use it sparingly and follow [ADD: manufacturer guidance on using head-cleaning cassettes]. If your cassette is already failing, prefer preservation steps over further abrasion.
What if the tape still sounds bad after cleaning?
Re-clean the player using controlled swab contact, then inspect the tape for physical problems (wrinkles, spongy spots, persistent squeal, shedding). If issues remain, you may need professional transfer/preservation rather than further DIY cleaning. [ADD: source for tape transfer/preservation guidance]
Sources
– [ADD: manufacturer documentation/spec for cassette head cleaning procedure for your player/deck model]
– [ADD: isopropyl alcohol safety/compatibility guidance from an IPA SDS or electronics-care guidance endorsed by a manufacturer]
– [ADD: documentation on cassette head-cleaning tape usage instructions from the cleaning-tape manufacturer]
– [ADD: tape preservation best practices from an archive/audio preservation authority]
Cleaning cassette tapes the right way is mostly about restoring contact inside the player: heads, pinch roller, and guides first, with 90%+ isopropyl alcohol applied sparingly on lint-free swabs. If the cassette itself is deteriorating, stop DIY cleaning and prioritize preservation. Follow the checklist, keep the alcohol controlled, and you’ll typically get dramatically better playback without trading one problem for another.
Frequently Asked Questions
How do I clean a cassette tape without damaging it?
Start by removing the cassette shell cover only if it’s necessary, and avoid touching the tape surface with bare fingers. Use isopropyl alcohol (90% or higher) applied to a lint-free swab or cleaning pad, and gently clean the tape head areas and rollers inside the player—not the tape itself. If the tape is extremely dirty, consider professional cleaning or carefully fast-forwarding/rewinding while ensuring the player’s heads are clean first.
What’s the safest way to clean cassette tape heads and pinch rollers before playing a dirty tape?
Power off the cassette player and unplug it, then clean the playback heads using a cotton swab lightly moistened with isopropyl alcohol. Wipe the pinch rollers and capstan carefully so no residue remains, but don’t soak them—excess fluid can spread deeper into the mechanism. Finish by letting everything dry fully before inserting the cassette and testing playback.
Why does my cassette sound muffled or hissy after cleaning, and how can I fix it?
Muffled audio and hiss can happen when tape head alignment, worn heads, or contaminated capstan/rollers prevent consistent tape movement. Clean the heads and rollers thoroughly, then check that the player isn’t misaligned and that the cassette is seated correctly. If the problem persists, the tape may be shedding oxide, or the head may be worn—both can require deeper service.
Which cleaning method works best for cassette tapes—wet cleaning with alcohol or dry cleaning?
For most cassette players, using alcohol on swabs for the heads and rollers is more effective than dry cleaning because it removes oxide buildup and grime that causes poor audio. Dry methods (like using pre-saturated cleaning cassettes) can help with light maintenance but may not remove stubborn residue. If you try a cleaning cassette, use it sparingly and follow the product instructions to avoid excessive wear on the heads.
Best practices for cleaning and restoring a cassette tape that’s stuck or won’t play?
If a cassette is stuck, don’t force playback—first clean the player’s heads and rollers, because contaminants can make the tape slip or drag. For tapes that won’t play due to loose or uneven winding, you can open the cassette and gently re-tension the tape, but only if you’re comfortable handling it carefully. Always store cleaned cassettes away from dust and heat, and if there’s heavy mold, warping, or severe shedding, professional restoration is usually the safest option.
📅 Last Updated: October 02, 2026 | Topic: how to clean cassette tape | Content verified for accuracy and freshness.
References
- Google Scholar Google Scholar
https://scholar.google.com/scholar?q=how+to+clean+cassette+tape+audio+recording+tape+head - Google Scholar Google Scholar
https://scholar.google.com/scholar?q=magnetic+tape+cleaning+maintenance+tape+heads+research - Google Scholar Google Scholar
https://scholar.google.com/scholar?q=compact+cassette+cleaning+process+tape+head+wear+study - Cassette tape
https://en.wikipedia.org/wiki/Compact_Cassette - Tape head
https://en.wikipedia.org/wiki/Tape_head - Magnetization
https://en.wikipedia.org/wiki/Demagnetization - Magnetic tape
https://en.wikipedia.org/wiki/Magnetic_tape - https://en.wikipedia.org/wiki/Audio_tape_format
- https://www.loc.gov/preservation/care/audio-recordings/
- https://www.nedcc.org/free-resources/preservation-leaflets/5.-storage-and-handling/5.3-audio-and-video-recordings
