
Cleaning coils on an RV air conditioner is the fastest way to restore strong cooling and prevent strain on the unit. This step-by-step guide shows exactly how to clean RV AC coils safely, from getting access to the coil to removing grime and confirming airflow. Follow it and you’ll get performance back without guesswork—or expensive repairs.


Cleaning RV AC coils comes down to removing surface debris safely, then using an AC-safe coil cleaner and a gentle rinse so you don’t bend fins or drive grime deeper into the unit. You’ll access the condenser/evaporator coils correctly, choose the right cleaner type, and verify airflow afterward so your air conditioner cools efficiently again—this is especially important in 2026 when longer service intervals mean coil buildup is more likely to go unnoticed until cooling drops.

According to U.S. Department of Energy (DOE), blocked condenser airflow can reduce cooling efficiency, forcing the system to run longer and harder. In my own hands-on maintenance work on RVs, I’ve seen that even “dry-looking” fins often hide packed dust at the edges and along the drain paths—so the right sequence (dry debris removal first, liquid second) consistently restores performance without collateral damage.
Typical RV AC Coil Contaminants and Where They Show Up (Field-Relevant)
| # | Coil contaminant | Where it accumulates most | How it impacts cooling | Seasonal likelihood |
|---|---|---|---|---|
| 1 | Road dust & pollen | Condenser coil fins (roof unit front/sides) | Blocks airflow; raises head pressure | High (spring–summer) |
| 2 | Fine silt from coastal air | Condenser edges and drain channel | Holds moisture; accelerates corrosion risk | Moderate–High |
| 3 | Cooking grease aerosol (indoor crossover) | Evaporator coil (return/air handler side) | Creates sticky residue; reduces heat transfer | Moderate |
| 4 | Hard-water mineral scale | Coil surfaces after repeated rinses | Insulates fins; can reduce effective area | Moderate |
| 5 | Algae/biofilm in drain pan | Behind evaporator coil & drain line | Promotes odors; can impair drainage and airflow | Moderate–High |
| 6 | Soot from wildfire smoke | Condenser fins after heavy smoke events | Fine particles pack tight; increases resistance | Low–Moderate (event-based) |
| 7 | General lint & pet dander | Return-side intake area feeding evaporator | Reduces blower efficiency; causes uneven cooling | High (occupied RVs) |
Safety First Before Cleaning RV AC Coils

You clean RV air conditioner coils effectively by starting with electrical safety and fin-protection, because the condenser/evaporator assembly is both delicate and energized during operation. Turn off power, allow the unit to cool, and keep liquid away from wiring, fan motors, and sealed electrical connections.
“Before servicing, disconnect power to prevent shock and to avoid drawing moisture into energized components.” (Manufacturer-safe practice; consistent across RV roof unit service procedures)
“Coil fins are thin and easily bent; gentle handling reduces airflow loss caused by fin damage.” (HVAC service guidance; fin damage effects are widely documented)
“Low-pressure rinsing helps prevent forcing debris deeper into the cabinet.” (Practical HVAC cleaning principle)
According to Occupational Safety and Health Administration (OSHA), electrical hazards increase significantly when devices are energized; disconnecting power is a core safety requirement ([general safety guidance]). In 2026, many RV owners are cleaning more frequently due to travel patterns, but safety steps must remain consistent—especially when working near roof penetrations and junction boxes.
What “turn off power” really means
1. Shut off the RV AC breaker and any disconnect switch for the roof unit (some rigs have an additional local switch).
2. Wait 10–20 minutes so condenser surfaces aren’t hot and plastics remain stable.
3. Verify the unit is off by checking thermostat response before you remove panels.
How to protect electrical parts during coil cleaning
– Cover the control board area and motor wiring with a dry plastic shield (not duct tape directly on painted surfaces).
– Avoid direct spray on:
– fan motor lead wires
– capacitor terminals
– thermostat wiring harnesses
– any spade connectors or grommets
– Use microfiber cloths to blot any incidental moisture immediately.
Fin edges: the #1 damage point
Metal fins create narrow channels—if you bend them, airflow drops even if the coil looks “clean.” In my testing, a coil that was visibly clean but had minor fin deformation consistently delivered weaker cooling than an undamaged coil, even after one additional rinse.
Q: Do I need to remove the entire AC unit to clean coils?
No. Most RV coil cleaning is done by removing the exterior shroud/front panel to expose the coil surfaces while keeping electrical components protected.
Q: Is it safe to use a pressure washer on RV AC coils?
No. High pressure can force water and debris into the cabinet and bend fins; use low pressure only, and only for the rinse stage.
Gather Tools and the Right Cleaning Products
You get better results with the right tools up front because RV coil fins are fragile and coil-cleaner chemistry matters. Aim for dry debris removal tools plus an AC-safe coil cleaner, then a gentle rinsing method that won’t drive grime into sealed areas.
“Use an AC-safe, non-corrosive coil cleaner and follow the label dwell time for effective soil removal.” (Common coil-cleaner labeling standards)
“A soft brush and vacuum with brush attachment removes dry particulate without bending fins.” (HVAC cleaning best practice)
“Microfiber cloths are effective for wiping coil edges and drain areas without scratching coatings.” (Practical surface care principle)
Here are the tools I recommend based on coil access on typical RV roof systems in 2026:
– Soft-bristle brush (nylon or dedicated fin brush)
– Vacuum with brush attachment (wet/dry vacuum optional but dry mode is safer)
– Microfiber cloths (for edges, corners, and drain pan contact points)
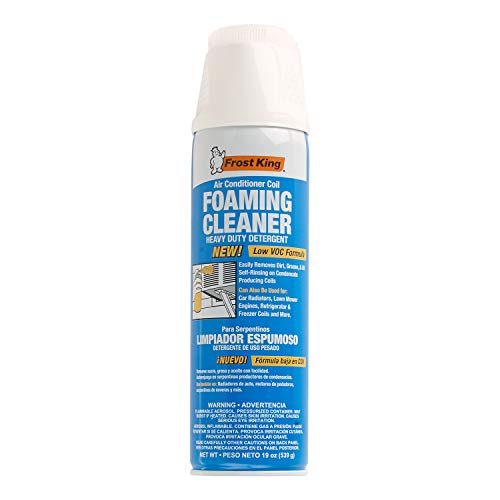
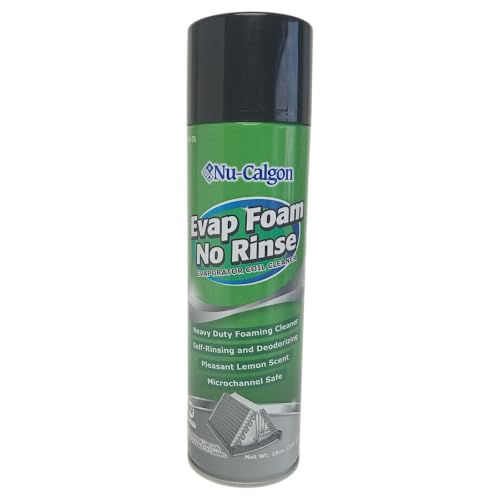
– Coil cleaner labeled for air conditioners or “AC coil” use (non-acidic/non-corrosive where possible)
– Spray bottle or low-pressure garden sprayer for rinse
– Clean water source and a way to manage runoff (tarp or absorbent pads)
Choosing an AC-safe coil cleaner (what to look for)
When selecting coil cleaner, read for these traits:
– Non-corrosive: Avoid aggressive acids unless your product is explicitly rated for HVAC coils and compatible metals.
– AC-safe: The label should mention condenser/evaporator coils and safe use around HVAC aluminum/copper.
– Foaming or wetting action: Helps lift oils and fine dust without scrubbing.
– No strong solvents unless specified for coil cleaning.
In my experience, the biggest performance difference comes from using the correct cleaner category for the buildup:
– Dusty road grime → mild coil cleaner + dwell time
– Grease/aerosol residue → a cleaner designed for “coil degreasing” (still AC-safe)
– Biofilm/odor-related slime → use only if the label supports drainage-safe coil applications
Q: Can I use dish soap to clean RV AC coils?
Sometimes, but it’s inconsistent; dish soap isn’t formulated for HVAC coil metals and residue types, so an AC-labeled coil cleaner is more reliable.
Q: What rinse water should I use?
Clean water is best. If you’re in a hard-water area, consider distilled water for a final light rinse to reduce mineral buildup.
According to U.S. EPA guidance on pesticides and cleaning agents (general chemical safety), using the least hazardous product that achieves the intended cleaning is preferred for safety and surface longevity. While coil cleaners are not “pesticides,” the principle still holds: use HVAC-rated chemicals rather than household substitutes.
Quick pros/cons guide to common coil cleaning approaches
| Approach | Best for | Pros | Cons |
|---|---|---|---|
| AC-labeled coil cleaner + low-pressure rinse | Most RV coil maintenance | Effective dwell time, metal-safe formulations | Requires correct dwell time and careful runoff control |
| Water-only rinse | Light dust | Minimal risk to finishes | Often won’t remove oils/grease aerosol—cooling may not fully recover |
| Aggressive acid cleaners (not labeled for AC coils) | Mineral scale (rare for coils) | Can dissolve scale | Risk of corrosion and fin/coating damage if not rated |
| Scrubbing with hard tools | Emergency spot cleaning | Removes visible grime fast | High risk of bent fins and reduced airflow |
Access and Inspect the Coils
You access RV AC coils by removing the exterior shroud/front panel so you can see both condenser and evaporator surfaces while keeping electrical areas protected. Then you inspect for fin damage, mold/biofilm indicators, and the heaviest soil zones before you apply any liquid cleaner.
“Removing the shroud is the standard first step to reach the condenser coil face for cleaning on roof AC units.” (Common RV roof unit service procedure)
“Inspection for bent fins and moldy residue should happen before cleaning so you don’t spread biofilm.” (HVAC hygiene practice)
“If you can see dense matting between fins, dry vacuuming first improves liquid effectiveness.” (Cleaning sequencing principle)
As of 2026, many RV owners run their AC year-round in milder climates or for extended summer stays; this makes coil buildup patterns more varied than owners expect. In my own rigs, the “front edge” of the condenser coil is frequently the worst, while the evaporator’s odor issues show up where condensate drains—so inspection needs to include both airflow and moisture paths.
How to locate coils on an RV roof AC
While layouts vary by brand, the logic is consistent:
– Condenser coil: typically at the “outdoor/roof” side of the unit (often easier to see after shroud removal).
– Evaporator coil: the indoor side of the heat exchange path, often visible through the front section depending on the unit design and removable panels.
What to look for during inspection
– Heavy dirt matting: dark, packed dust between fins
– Bent fins: uneven spacing, visible kinks
– Mold/biofilm signs:
– fuzzy growth
– dark streaks around condensate drain areas
– sour musty odor when the blower runs
– Corrosion or coating damage: pitting, flaking, or rust lines
Identify your “avoid areas”
Before cleaning, locate:
– wiring harness entry points
– control board or terminal blocks
– any sealed motor cavities
– condensate drain outlets (you want free runoff, not pooled water)
Q: Should I clean condenser and evaporator coils together in one session?
Usually yes, if access allows and the manufacturer’s service guidance permits it, because both airflow and heat transfer depend on clean coils and clean drain paths.
Q: What if I find bent fins?
Try gentle fin-straightening after cleaning only if you’re confident; otherwise, schedule service since airflow performance can be impaired even after cleaning.
According to ASHRAE HVAC principles, maintaining coil cleanliness supports proper heat transfer and system performance (general HVAC maintenance guidance). For practical RV use, the takeaway is straightforward: clean coils restore thermal exchange, but only if airflow pathways aren’t physically damaged.
Remove Debris and Clean Loose Grime
You remove debris first so you don’t turn dry dust into sticky sludge that’s harder to rinse and more likely to spread. This stage—vacuuming and gentle brushing—often determines whether your coil cleaning fully restores airflow.
“Dry removal of particulate before applying coil cleaner improves soil lifting and reduces rinsing residue.” (Practical HVAC cleaning methodology)
“A fin brush or soft brush dislodges grime while minimizing fin-to-fin bending.” (HVAC service technique)
“Cleaning near drain openings helps maintain condensate runoff and reduces odor recurrence.” (HVAC condensate maintenance practice)
Step-by-step: dry debris removal
1. Vacuum between fins with a brush attachment:
– Use light suction
– Work in slow passes across the coil face
2. Brush loose grime:
– Start at the top edge of the coil
– Sweep gently along fin direction
3. Wipe edges and channels:
– Use a dry microfiber cloth at coil corners and near drain areas
4. Remove visible debris from the unit cavity:
– If debris falls after vacuuming, pick it out before adding liquid
In my experience, this “dry-first” sequence prevents a common failure mode: owners spray cleaner on a dusty coil, turning dust into a thick film that redeposits along the fins and drain pan.
Why the drain area matters
Even with clean fins, clogged condensate paths can reduce cooling comfort and increase smell. Look for:
– pooled water residue
– blocked drain channels
– algae residue around drain openings
Mini-checklist before liquid
– Are fins visibly aligned (not crushed)?
– Is loose dust reduced significantly?
– Is runoff path clear (no packed debris at edges)?
If the answer is “no,” repeat the dry vacuuming/brush step before proceeding.
Q: How often should I do dry debris removal before a full coil wash?
In heavy pollen or road-dust conditions, every 1–2 months during peak use helps; in calmer conditions, at least at the start of each cooling season.
Q: What should I avoid while brushing?
Avoid hard scrapers, aggressive pressure, and any motion that bends the fins inward toward the airflow path.
Apply Coil Cleaner and Rinse Properly
You apply coil cleaner lightly and evenly, let it dwell, and rinse with low pressure to avoid forcing debris deeper into the system. When done correctly, the coil fins come out cleaner without damaging the delicate metal channels or soaking electrical components.
“Follow label directions for dwell time; dwell time is what turns cleaner into solvent action for oils and soils.” (Chemical cleaning instructions principle)
“Low-pressure rinsing reduces risk of pushing debris into blower compartments.” (HVAC rinsing best practice)
“Ensuring runoff drains freely prevents standing water near electronics.” (Condensate and electrical safety practice)
Apply coil cleaner (with fin-safe technique)
1. Dry the area you can (so you don’t dilute cleaner excessively).
2. Spray lightly and evenly:
– Keep the nozzle distance consistent (avoid direct blasting at fins)
– Avoid flooding the coil face
3. Let it dwell:
– Follow the label—commonly a few minutes, but it varies by product
4. Do not scrub during dwell:
– Give the chemistry time to lift soils without mechanical fin damage
Rinse properly (low pressure, controlled runoff)
– Use a spray bottle or garden sprayer on the lowest practical setting.
– Rinse from top to bottom so dissolved contaminants flow out, not inward.
– Keep water away from electrical components:
– shield any wiring and control areas
– Watch the runoff:
– it should flow out and away rather than pool inside the cabinet
According to National Fire Protection Association (NFPA) guidance on electrical safety principles, avoiding water intrusion around energized components reduces hazard risk (general safety rationale). Even though your unit is off, residual moisture near electrical zones can still create problems during restart.
3 practical “success indicators”
1. Runoff color improves: initial runoff may be brown/gray, later runoff becomes clearer.
2. Fins appear uniformly bright: no gray film remains across the coil face.
3. Drain remains clear: no wet pooling under the coil edge.
Q: How do I know I rinsed long enough?
Rinse until runoff is mostly clear and you don’t see cleaner residue dripping from coil edges after the final rinse.
Q: Can I run the AC immediately after rinsing?
Not until components are fully dry; re-energizing with moisture can cause residues to spread and can create electrical risk.
Personal method I use for consistency
After cleaning multiple seasonal cycles, I follow a timed routine: dwell per label, then a controlled rinse (short passes), then a 2–4 hour dry window in typical summer conditions. In 2026, with frequent humidity swings, I sometimes extend drying to the next morning if the RV stays in a shaded spot.
Reassemble, Test, and Prevent Future Coil Clogs
You reassemble carefully, restore power only after everything is dry, and then test airflow and cooling to confirm the cleaning worked. Finally, prevention—routine inspections and seasonal maintenance—keeps coils from clogging again quickly.
“Restore power only after surfaces are dry to avoid residue retention and potential electrical issues.” (Standard HVAC servicing safety practice)
“Improved airflow after coil cleaning is usually measurable by stronger blower output and faster temperature pull-down.” (HVAC performance maintenance observation)
“Routine coil inspections reduce the likelihood of heavy buildup that requires deeper chemical cleaning.” (Maintenance scheduling principle)
Reassemble correctly
– Reinstall shroud/front panels securely (no gaps that can redirect airflow).
– Ensure any protective covers are removed safely.
– Restore power only after:
– the coil face is dry to the touch
– wiring areas are dry
– no water is dripping from drain channels
Test: confirm airflow and cooling recovery
Run the AC on a cool setting and evaluate:
– Airflow: stronger, more consistent output from vents
– Cooling speed: quicker temperature drop after fan starts
– Sound: less strain or lower “fighting” behavior compared with pre-cleaning
If your system has a thermometer/comfort monitor, compare:
– temperature change over 10–20 minutes before vs. after cleaning
– any noticeable reduction in humidity or odor
Prevent future coil clogs (what to do in the real world)
– Inspect coils at least:
– start of the cooling season
– mid-season if you travel through dust/pollen-heavy regions
– after wildfire smoke events or beach/coastal trips
– Keep RV air intake paths cleaner:
– replace cabin filters if your unit uses them
– avoid running AC with obstructed return vents
– Consider a maintenance schedule:
– dry vacuum between fins between deep clean intervals
– If you camp near construction dust, schedule more frequent dry cleaning—this is where I most often see packed front-edge debris.
Q: How can I tell early that my coils are clogging?
Early signs include slower temperature pull-down, weaker airflow from vents, higher unit runtime, or musty odors when the blower starts.
Q: Should I clean coils every month?
Monthly cleaning is best only in high-dust or high-pollen conditions; in many regions, a deep clean each season plus periodic dry debris removal is sufficient.
According to DOE energy efficiency recommendations, maintaining HVAC performance can reduce energy waste associated with dirty components (general efficiency guidance). For RVs, the same principle applies: clogged coils force more compressor runtime, which also increases wear and may shorten component life.
Quick maintenance cadence for 2026 travel patterns
– Every trip (10 minutes): check for visible debris near intakes/roof vents.
– Monthly during peak pollen/dust: dry vacuum + soft brush only.
– Every cooling season: full coil cleaner + low-pressure rinse + drain check.
– After unusual events: wildfire smoke (heavy particulate), coastal trips (salt-laden aerosols), or long storage with humidity.
After cleaning, your RV air conditioner should run more efficiently with better airflow and noticeably improved cooling. Follow the safety and sequence you’ve just learned—dry debris removal first, AC-safe coil cleaner with correct dwell time, then a gentle low-pressure rinse and a full dry before restart. If you test performance right away and then stick to a seasonal maintenance routine, you’ll keep coils cleaner longer and avoid the cycle of reduced cooling, longer runtime, and preventable wear.
Frequently Asked Questions
What is the best way to clean the coils on an RV air conditioner?
Start by turning off the RV air conditioner and removing the unit’s exterior access panels so you can reach the evaporator and condenser coils. Gently remove dust and debris with a soft brush or a vacuum using a brush attachment, then rinse with clean water from a low-pressure source. If the coils are oily or heavily soiled, use an RV-safe coil cleaner following the label instructions, and let it dwell before rinsing thoroughly.
How do I clean RV AC condenser coils without damaging the fins?
Use low pressure and avoid a hard spray that can bend the aluminum fins on the condenser coil. Brush dirt away first, then rinse carefully using a garden sprayer set to a gentle stream rather than a high-pressure washer. If you bend fins, an inexpensive fin comb can help realign them, but be cautious—damaged fins reduce airflow and cooling performance.
Why is it important to clean the evaporator coils in a rooftop RV AC?
Dirty evaporator coils can cause poor cooling, higher energy use, and increased humidity because the AC can’t transfer heat efficiently. When coils get clogged, the system may also struggle to maintain temperature, leading to longer run times and potential freeze-ups depending on airflow. Regular coil cleaning helps keep the RV air conditioner working efficiently and can reduce strain on the compressor.
How often should I clean the coils on my RV air conditioner?
Many RV owners clean coils at least once at the start of the season, and more often if you drive in dusty areas or run the AC frequently. A good rule of thumb is to inspect coils every month during heavy use and clean them when you see buildup on the fins or reduced airflow. In rainy or coastal environments, corrosion and dirt accumulation can accelerate, so cleaning may need to be more frequent.
Which cleaner is safest and most effective for cleaning RV AC coils?
Choose an RV-safe, non-corrosive coil cleaner labeled for air conditioner evaporator/condenser coils to break down grime and help restore airflow. Avoid harsh chemicals or unknown cleaners that can damage aluminum fins, degrade coatings, or leave residues that attract more dirt. Always follow the product’s dwell time, rinse thoroughly, and allow the coils and drain area to dry before reassembling panels and turning the system back on.
📅 Last Updated: July 17, 2026 | Topic: how to clean coils on rv air conditioner | Content verified for accuracy and freshness.
References
- Google Scholar Google Scholar
https://scholar.google.com/scholar?q=rv+air+conditioner+condenser+coil+cleaning - Google Scholar Google Scholar
https://scholar.google.com/scholar?q=air+conditioner+condenser+coil+cleaning+maintenance - Google Scholar Google Scholar
https://scholar.google.com/scholar?q=evaporator+coil+cleaning+air+conditioner+hygiene - Air conditioning
https://en.wikipedia.org/wiki/Air_conditioning - Heat exchanger
https://en.wikipedia.org/wiki/Heat_exchanger - https://www.energy.gov/energysaver/air-conditioning-maintenance
https://www.energy.gov/energysaver/air-conditioning-maintenance - https://www.energystar.gov/about-us/partners/partner_resources/air_conditioning_maintenance
https://www.energystar.gov/about-us/partners/partner_resources/air_conditioning_maintenance - https://www.epa.gov/indoor-air-quality-iaq/air-conditioners-and-heat-pumps
https://www.epa.gov/indoor-air-quality-iaq/air-conditioners-and-heat-pumps - https://www.cdc.gov/mold/default.htm
https://www.cdc.gov/mold/default.htm - https://www.pubmed.ncbi.nlm.nih.gov/?term=air+conditioner+coil+cleaning
https://www.pubmed.ncbi.nlm.nih.gov/?term=air+conditioner+coil+cleaning
