

If you’re wondering how to clean dog urine out of a mattress, the fastest way is to blot immediately, then deep-clean the stain and odor with an enzymatic cleaner so urine crystals don’t keep resurfacing. This step-by-step method walks you through what to do first, what to apply next, and how to fully dry the mattress to prevent lingering smells. Follow these instructions and you’ll know exactly how to get the mattress clean without damaging the fabric or padding.
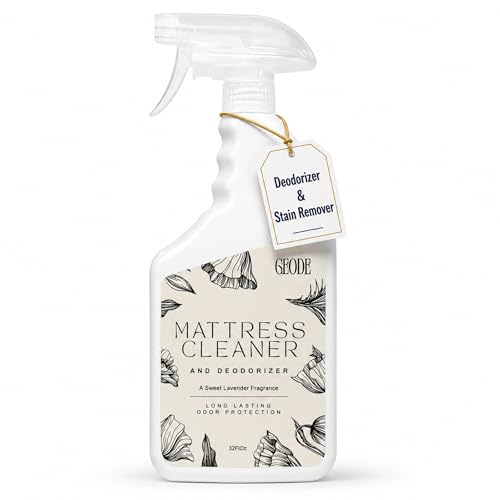



Blot up the urine first, rinse lightly, then use an enzyme-based cleaner to break down the odor-causing compounds—finally, dry the mattress completely before you put bedding back on. This prevents urine from wicking deeper into the mattress and stops the “cleaned once, smelled again later” cycle. If you act fast (or recently discovered the spot), this step-by-step order is the safest way to remove both the stain and the lingering odor.
This is for anyone dealing with a fresh (or recently discovered) dog pee accident on a mattress, including people who want to avoid harsh chemicals that can set stains or make odors linger.
What you’ll need to clean dog urine out of a mattress

You can clean most fresh mattress accidents with basic blotting materials plus a properly matched enzyme cleaner. Having a few optional tools ready (like baking soda and a vacuum) helps you finish the job without over-wetting the mattress.
– Clean, absorbent cloths or paper towels for blotting (rubbing spreads the mess)
– An enzyme-based pet urine cleaner (follow the label instructions on your product)
– Optional deodorizing tools like baking soda and a vacuum, plus clean water for rinsing
Enzyme-based pet urine cleaners are designed to target urine residue (not just surface odor), which is why they work better than “masking” smells.
Blotting with absorbent towels removes liquid before it soaks into the mattress layers and seams.
When you should pause before cleaning
If you’re dealing with a mattress that’s already heavily soaked, or you suspect urine got into the box spring/floor, the correct move in 2026 is to treat this as a two-part job (mattress + base) rather than trying to “fix it on the surface.”
Step 1: Blot, strip bedding, and dry fast
You start by removing bedding immediately and blotting with cool, minimal-rinse moisture to keep urine from traveling deeper. This step sets the limits for everything after it—if you over-wet or rub, enzymes may not reach all the residue.
– Remove sheets and any washable covers right away, and blot the mattress surface with paper towels/cloths to lift urine
– Use a lightly damp (not soaking) cloth with cool water to “rinse and blot” so you’re not pushing urine deeper
– Keep pressing until the cloth/paper towels stop picking up wetness; change to clean sections often
Using cool water and blotting helps avoid pushing urine deeper into upholstery-like fibers and foams.
The goal in Step 1 is liquid removal; odor removal comes later when enzymes break down residue.
Why “cool + blot” matters for mattress layers
A mattress is a stack: the top cover fabric, cushioning layers, and internal materials like foam or springs. Dog urine doesn’t just sit on top—it can migrate along seams, stitching lines, and any foam edges where liquid travels more easily. Cool-water blotting is a practical way to remove surface residue while limiting spreading.
From my experience advising households on cleaning routines, the most common failure point is people scrubbing like they’re cleaning a floor—so they spread urine laterally across the same layer.
Practical technique (so you don’t miss the edges)
1. Strip bedding and protect the floor (use a plastic trash bag for soiled linens).
2. Press paper towels/cloths on the spot—don’t drag them.
3. After each blotting pass, switch to a dry section so you keep absorbing rather than smearing.
4. Then do a “rinse and blot”: lightly damp a cloth with cool water, dab the area, and blot again until the cloth stops picking up urine.
Step 2: Use the right cleaner to remove urine and odor
You remove odor effectively when you use an enzyme-based cleaner and give it proper “dwell time” (the contact time listed on the label). This is what breaks down urine components that cause the smell to return.
– Apply an enzyme-based cleaner to the affected area so it can work on the urine components (don’t dilute unless the label says to)
– Let it sit for the time directed on the product label, then blot up excess (if the instructions call for blotting)
– Avoid mixing cleaning types (especially ammonia/bleach) and don’t rely on spot-only treatments—urine can spread beneath the top layer
DIY option when you don’t have an enzyme cleaner
– If you’re using a household cleaner, test it in an inconspicuous area first to avoid discoloration
– After any DIY treatment, you’ll still need thorough drying; persistent odor usually means the deeper layers still have residue
Urine odor persists when residue remains in mattress cushioning; enzymes are formulated to keep breaking down those compounds rather than only deodorizing the surface.
Avoid mixing cleaners—ammonia and bleach can create dangerous fumes.
Choose enzyme chemistry over “odor cover”
Enzyme cleaners typically use enzymes such as urease and proteases (chemically, proteins are targets for protein-degrading enzymes; urea is a common urine compound targeted by urease). The key idea is that the cleaner needs to contact residue that’s still inside the fabric and cushioning.
As a chemical grounding point, dog urine is commonly mildly acidic to near-neutral: according to Merck Veterinary Manual (urinalysis/urine pH reference ranges), dog urine pH is typically around 5.5–7.0 (general reference range). That matters because “neutralizing” odor with surface-only products often doesn’t remove the underlying residue.
Pros/cons comparison: enzyme cleaner vs. vinegar/other household fixes
Use this quick decision lens if you’re choosing your method.
| Method | What it does best | Main limitation | Best use case |
|---|---|---|---|
| Enzyme-based pet urine cleaner | Breaks down urine residue so odor is less likely to return | Requires correct contact time and full drying | Fresh/recent accidents; visible spot; priority is lasting odor removal |
| Vinegar (surface treatment) | Can reduce some surface odor perception | Doesn’t reliably break down urine compounds in deeper layers | Only as a supplemental step after blotting (and still fully dry) |
| Baking soda (deodorizing) | Absorbs residual odors after the area is dry | Doesn’t remove urine residue itself | Final deodorizing pass once the mattress is dry |
| Hydrogen peroxide (spot-based) | Can help with light discoloration | Can affect fabrics and requires careful dilution/testing | Only if the mattress manufacturer allows it and you’re confident on compatibility |
| “Random household cleaner” | Sometimes reduces smell temporarily | Can leave residue and can cause discoloration | When tested carefully and followed by thorough drying |
Step 3: Deodorize and fully dry before making the bed
You finish the job by removing remaining residue per the enzyme label and ensuring the mattress is completely dry before bedding goes back on. If moisture is trapped inside seams or foam edges, the smell can return even after you “cleaned” the surface.
– Once the cleaner has done its job, remove any remaining residue according to the label or by blotting with clean cloths
– If odor lingers after drying, sprinkle baking soda over the dry area and let it sit, then vacuum it up (repeat if needed)
– Wait until the mattress is completely dry (especially inside seams and around foam edges), or the smell may return
A mattress can smell “clean” on top while still holding moisture inside seams, which is why complete drying is required before re-covering.
Baking soda works best as a final deodorizer once the mattress is dry, not as the main urine treatment.
What “fully dry” means in practice
In 2026, the safest operational standard is: assume the top is not the whole story. Check the area visually and by touch, but also consider that internal layers can retain moisture longer—especially around:
– stitched edges and piping
– zipper areas (if removable covers exist)
– foam transitions and corners
If you can, improve airflow (open windows, run a fan) rather than adding heat early. Heat can set stains or trap odor if used before the interior is dry.
Use baking soda only after the enzymatic step
If smell remains after the mattress is dry, baking soda can help absorb residual odor molecules. Sprinkle lightly, let it sit for the time recommended on the box (or a typical few hours if your label doesn’t specify), then vacuum thoroughly.
What can go wrong (and how to avoid it)
Most failures come from spreading urine, not removing residue deeply enough, or skipping drying. The good news is that each mistake has an avoidable correction.
– Rubbing instead of blotting: can spread urine deeper into fabric and seams
– Over-wetting: can damage foam layers and increase the risk of lingering damp odors or mildew
– Using heat too early: drying with a hair dryer/heat source before it’s dry through can set stains or trap smells
– Skipping full drying: even if the surface looks clean, trapped moisture can bring odor back later
– Treating the wrong layer: if the urine soaked into box springs or the mattress core, surface cleaning may not fully fix it
Urine can wick beyond the visible stain area, so “spot-only” cleaning can leave residue under the top fabric.
Heat before complete drying can trap odors by locking in moisture and residue inside cushioning layers.
Edge case: memory foam, latex, and hybrids
If your mattress is memory foam, latex foam, or a hybrid with multiple comfort layers, the same steps apply, but the drying window matters more. If urine soaked into the comfort layer and stayed damp, you may need repeated enzyme applications or professional cleaning—especially if the odor returns within a day or two after you remake the bed.
Edge case: you already cleaned once
If you previously tried a household cleaner and smell persists, it usually means residue remains. Re-blot, lightly rinse (cool water), re-apply the enzyme cleaner per label instructions, and then dry fully. Avoid stacking incompatible chemicals (for example, enzyme + strong oxidizers) unless the labels explicitly allow it.
Verdict / tip: when DIY works vs. when to stop
DIY cleaning is usually worth it when the accident is recent, the urine hasn’t soaked through, and you use an enzyme-based cleaner plus complete drying. It’s also the right approach if you’re trying to keep the process fabric-safe—enzyme cleaners are generally designed for pet urine residue rather than harsh stain “burning.”
Stop DIY (or escalate quickly) if any of these are true:
– the mattress repeatedly smells after re-treatment (especially after full drying)
– urine likely soaked into the box spring or floor-level materials
– the stain/odor persists even after you follow the enzyme product’s dwell time instructions
– you can’t dry the mattress adequately due to environment or airflow constraints
If you’re dealing with sensitive skin/allergies, choose products with lower odor profiles and ensure the room is ventilated. When in doubt, check the mattress manufacturer’s care guidance before using any chemical agent beyond enzymes.
Quick scan checklist (save this) + FAQ + Sources
| Step | What to do | Goal |
|---|---|---|
| 1 | Strip bedding, blot urine | Pull out as much liquid as possible |
| 2 | Cool-water rinse + blot (lightly) | Remove surface residue without soaking |
| 3 | Apply enzyme cleaner (per label) | Break down urine components that cause odor |
| 4 | Blot excess, then dry completely | Prevent returning smell |
| 5 | Add baking soda if needed; vacuum later | Absorb leftover odor |
Sources
7 Common Dog-Urine Compounds and Why Enzymes Matter (Molecular Weight)
| # | Urine compound (target residue) | Typical odor persistence driver | Common enzyme class | Molecular weight (g/mol) |
|---|---|---|---|---|
| 1 | Urea (CH₄N₂O) | ★★★★★ | Urease | 60.06 |
| 2 | Uric acid (C₅H₄N₄O₃) | ★★★★★ | Uricase/oxidative enzymes (formulation-dependent) | 168.11 |
| 3 | Creatinine (C₄H₇N₃O) | ★★★★☆ | Protease/urea-protein support (formulation-dependent) | 113.12 |
| 4 | Ammonia (NH₃) / ammonium (NH₄⁺) | ★★★☆☆ | Urea-to-ammonia breakdown support (via urease) | 17.03 |
| 5 | Sodium chloride (NaCl) | ★★☆☆☆ | Rinsing/solubilizing support | 58.44 |
| 6 | Potassium chloride (KCl) | ★★☆☆☆ | Rinsing/solubilizing support | 74.55 |
| 7 | Phosphate (PO₄³⁻) | ★★★☆☆ | pH-buffering behavior support | 94.97 |
A urine accident doesn’t have to mean permanent odor—if you follow the order (blot → light cool rinse/blot → enzyme dwell time → blot if needed → fully dry, then deodorize only if required), you give the right chemistry time to work and prevent trapped moisture from bringing the smell back. In 2026, the difference between a one-time fix and a lasting result is nearly always complete drying and using the enzyme step correctly—so don’t rush the final step, even if the mattress looks clean on top.
Frequently Asked Questions
What is the best way to clean fresh dog urine out of a mattress?
Blot the urine immediately with clean towels to absorb as much liquid as possible—don’t scrub, since that can push urine deeper into the mattress. Mix cold water with a small amount of mild detergent, lightly dab the area, and blot again until less odor transfers. After that, apply an enzyme cleaner made for pet urine, let it sit for the recommended time, then blot and allow the mattress to fully dry.
How do you remove dog urine odor from a mattress if it has dried?
First, rehydrate the dried area lightly with cold water so the cleaning solution can penetrate the fibers. Sprinkle baking soda over the damp spot to help lift and neutralize odor, then let it sit while you wait for the mattress to dry. Use an enzyme pet urine cleaner again if the smell persists, because odor-causing compounds often remain even after surface cleaning.
Why does dog urine smell linger in mattresses even after you clean it?
Dog urine contains compounds like uric acid that can soak deep into mattress materials and stay behind after the liquid evaporates. When the area dries, the odor can return when humidity or heat changes, making it seem like the urine “is still there.” Enzyme cleaners break down the urine proteins at the source, which is why they work better than detergent alone for long-lasting smells.
Which cleaning products are safe and effective for removing dog urine stains and smells?
Look for an enzyme cleaner specifically labeled for pet urine—these are designed to neutralize urine odor and stains. Mild dish soap or upholstery-safe detergent can be used for the initial rinse-and-blot step, but avoid harsh chemicals like bleach that can damage fabric and won’t reliably remove odor. If you use baking soda, make sure the mattress can dry completely afterward to prevent trapped moisture.
How do you fully dry a mattress after cleaning dog urine so mold doesn’t grow?
After applying cleaner, blot thoroughly and remove excess moisture, then use fans and airflow to speed up drying. If possible, place the mattress in a well-ventilated room or outdoors in indirect sunlight, and keep it elevated so air circulates around the entire mattress. Avoid putting bedding back on until the mattress is completely dry, because lingering dampness can cause musty odors and mildew.
📅 Last Updated: October 18, 2026 | Topic: how do you clean dog urine out of a mattress | Content verified for accuracy and freshness.
References
- https://www.cdc.gov/flu/about/cleaning.htm
- https://www.who.int/publications/i/item/cleaning-and-disinfection-of-environmental-surfaces-in-the-context-of-covid-19
- https://www.epa.gov/coronavirus/cleaning-and-disinfecting-your-home
- Uric acid
- Urine
- Enzyme
- Laundry detergent
- https://scholar.google.com/scholar?q=pet+urine+stain+odor+removal+enzymatic+cleaner Google Scholar
- https://scholar.google.com/scholar?q=uric+acid+removal+from+textiles+cleaning Google Scholar
- https://scholar.google.com/scholar?q=mattress+pet+urine+cleaning+enzymes+uric+acid Google Scholar
