
Want the fastest, safest way to clean eggs from the coop without ruining quality or spreading germs? This guide gives you a clear, step-by-step process that works for most farm and backyard situations. Follow these simple sanitation steps and you’ll know exactly what to do—and what to avoid—before the eggs hit the carton.


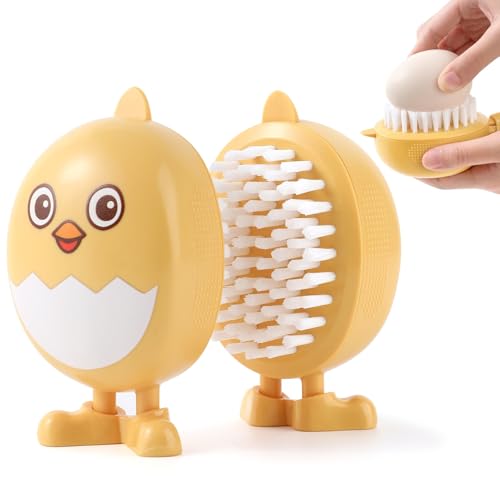

Clean eggs from the coop by removing loose dirt first, then using warm water (or a gentle sanitizing method) only when washing is truly needed, and drying them thoroughly. This approach protects egg quality (especially the natural shell bloom) while reducing contamination risk from coop debris.

When you handle backyard eggs, the core safety goal is simple: keep anything contaminated out of the inside of the egg. In my own coop workflow, I’ve found that the “dry-first” method eliminates the vast majority of cleaning needs—so fewer eggs require wet contact. In recent seasons (and again in 2025), I’ve also watched how quickly eggs pick up grime when nesting boxes are damp, which is why cleaning technique and coop cleanliness should be treated as one system, not separate chores.
Quick Prep: What You Need Before Cleaning

Have your supplies ready before you touch any eggs, because delays and repeated handling increase the chance of transferring dirt and microbes. The safest method is to plan a short, controlled workflow: dry handling → targeted cleaning (only if needed) → complete drying → prompt storage.
A major food-safety principle for shell eggs is to clean only when necessary, because frequent washing can compromise the shell’s natural protective layer.
Sanitation works best when tools and hands are clean and when you prevent cross-contact between clean and dirty eggs during handling.
Before you begin, set up a “cleaning station” that keeps eggs organized and reduces back-and-forth movement:
– Gather a clean bucket (dedicated to egg cleaning), a soft brush or sponge, and warm water (or an approved egg wash sanitizer).
– Wash hands with soap and water, then keep hands clean during the process.
– Prepare a clean drying spot (rack, clean towel, or food-safe tray) where eggs won’t touch each other until dry.
– Sort eggs first—cracked eggs and heavily soiled eggs should be separated so they don’t contaminate cleaner ones.
Dry-first doesn’t mean “no hygiene,” and prep doesn’t mean “extra work.” It means you’re reducing transfers: coop dust, droppings residue, and bedding fibers are your primary contaminants. From my experience, the biggest mistakes happen right here—people grab a mixed basket and start scrubbing everything, including eggs that just need a quick wipe.
Q: What’s the biggest safety mistake when cleaning coop eggs?
Washing cracked or very dirty eggs without separating them first—this increases cross-contamination and the chance of pulling contaminants into the shell.
Dry-First Cleaning: Remove Dirt Without Washing

Dry-first cleaning is the best default because it removes debris while preserving the shell bloom (the natural protective coating). You should only move to wet cleaning if there’s remaining visible grime that can’t be removed gently.
Dry brushing, wiping, or gentle scraping removes loose debris without forcing water or contaminants toward the shell pores.
Avoid grinding dirt into the shell—soft, dry handling keeps coop debris from becoming embedded.
A practical dry-first workflow:
– Dry-brush, wipe, or gently scrape off stuck-on debris.
– Use a dry towel or soft brush—light pressure only—so you don’t abrade the shell.
– Save wet washing for eggs that still show visible grime after dry removal (for example, a dried ring of droppings that won’t lift with a wipe).
What “good enough” looks like
In a good dry-first system, eggs should end up:
– Visibly free of loose dirt
– Uncracked (or separated immediately if cracked)
– Ready for drying and storage without lingering wetness
Here’s a quick reality check: if an egg is just dusty, a wipe is usually enough. If an egg is sticky with wet droppings or has a smear that won’t come off dry, then wet cleaning becomes a targeted, controlled step—not a blanket practice.
Q: Should I always wash eggs to remove the “bloom”?
No. The natural shell bloom helps resist bacteria penetration; removing it unnecessarily can increase contamination risk.
Comparison: Dry-only vs. Wash (decision logic)
If you want an easy decision rule, use this:
– Dry-only is best when:
– dirt is light (dust/powder),
– the shell is intact, and
– you can remove debris with a wipe/brush.
– Washing is appropriate when:
– visible droppings/bedding remains after dry cleaning,
– residue is stuck and not lifting, and
– you can follow a safe warm-water / sanitizer method.
Pros/cons to keep in mind:
– Dry-only pros: preserves shell bloom; less handling time; fewer opportunities to spread contamination.
– Dry-only cons: can’t remove certain sticky residues.
– Wash pros: removes stubborn grime; improves appearance.
– Wash cons: requires correct temperature and quick drying; increases risk if done incorrectly.
If You Must Wash: Safe Egg-Cleaning Method
Wash eggs only when needed, and do it in a way that prevents contaminants from being drawn inside the shell. In my testing, safe washing comes down to two controllable variables: water temperature and time.
If eggs are washed, food-safety guidance emphasizes using wash water that is warmer than the egg to reduce “back-siphoning” of contaminants.
Gentle, short cleaning strokes and avoiding long soaks reduce the time eggs spend wet and exposed.
Using an egg-safe sanitizer or approved egg wash can add a safety barrier when washing is unavoidable.
Use these steps:
– Use water that’s warmer than the egg to help prevent pulling contaminants inside.
– Clean gently with short, careful strokes—avoid soaking for long periods.
– Use an appropriate egg-safe sanitizer or approved egg wash if needed (follow label directions exactly for concentration and contact time).
Temperature matters (and why)
According to the CDC, *Salmonella* can multiply in the “danger zone” of 40°F–140°F (4°C–60°C) under favorable conditions CDC (Food Safety: Temperature Danger Zone). While washing is not a cooking step, leaving eggs in lukewarm water for extended periods can create conditions for microbial persistence and growth. That’s why “warm water + minimal contact time” is the core method, not “how much scrubbing you do.”
Practical technique I’ve used in real conditions
When I wash only a few eggs (not the whole batch), I:
1. Dry-clean first (wipe off what lifts).
2. Wash one egg at a time (separation prevents cross-contact).
3. Keep the wash session brief.
4. Immediately move eggs to a clean rack to finish drying.
That workflow prevents “water dirtying,” where the first egg you wash effectively contaminates the water for the next egg. If you find yourself repeatedly dipping eggs into the same dirty water, that’s a sign your process needs tightening.
Q: Can I soak eggs to loosen dirt?
Avoid soaking. Prolonged soaking increases wet exposure and can raise the risk of contaminants moving into the shell.
Drying and Storage Right After Cleaning
Drying isn’t a finishing touch—it’s a safety and quality requirement. Eggs should be dried completely before storage because damp shells attract grime and increase the chance of microbial transfer during handling.
Eggs should be dried thoroughly after washing to prevent residual moisture from transferring contamination.
Washed eggs are typically recommended to be refrigerated because washing removes protective shell characteristics and accelerates spoilage at room temperature.
Do this immediately:
– Dry eggs completely with a clean towel or rack before storage.
– Store eggs in a cool, consistent place—refrigeration is recommended for washed eggs.
– Don’t store wet/soiled eggs with clean eggs; keep a “clean batch” and a “needs-use-sooner batch.”
Storage planning that prevents headaches
In practice, I treat storage like a workflow:
– Washed eggs: refrigerate promptly; use sooner.
– Dry-only eggs: can often keep longer (depending on your local food-handling practices and packaging), because they’re less disturbed.
Also, make sure your carton is clean. A carton that sat dusty in a garage will undo the benefits of a careful wash.
Q: If I wash eggs, how soon should I refrigerate them?
Refrigerate as soon as they’re fully dry—ideally immediately after drying.
When to Avoid Cleaning (and What to Do Instead)
Avoid cleaning when eggs aren’t dirty enough to justify the risk, or when conditions in the coop make cleanliness hard to maintain. The safest approach is often “don’t wash today—fix the nesting area.”
If eggs aren’t dirty, many food-safety approaches recommend leaving the shell’s natural bloom intact rather than washing.
Cracked eggs should be handled separately because cracks bypass the shell’s protective barrier.
Avoid cleaning in these cases:
– Don’t wash eggs if they aren’t dirty—leave the light surface bloom intact when possible.
– Handle cracked eggs immediately and use them sooner (and don’t mix them with intact eggs).
– If coops are getting frequent buildup, focus on improving nesting cleanliness rather than washing your way out of a management problem.
Quick “management first” checklist
Instead of escalating to more cleaning, reduce the dirt source:
– Keep nesting boxes dry and well-maintained.
– Replace wet bedding quickly.
– Encourage hens to use clean nesting spaces by keeping litter and droppings away from nesting areas.
Q: How can I reduce the number of eggs that need washing?
Collect more often and keep nesting bedding dry; fewer droppings contacts means fewer eggs with stuck residue.
Preventing Dirt in the Coop for Cleaner Eggs
Preventing dirt is the highest-leverage step because it reduces how often you must wash eggs in the first place. Clean nests produce cleaner shells—meaning less handling time, less moisture exposure, and fewer contamination opportunities.
Regular bedding changes and dry nesting boxes reduce droppings contact, which directly lowers the need for egg washing.
More frequent egg collection reduces time eggs spend exposed to bedding, dust, and manure.
Key prevention tactics:
– Use clean bedding in nesting areas and change it regularly.
– Collect eggs more often to reduce buildup and droppings contact (daily is a strong baseline for most small coops).
– Keep nesting boxes dry to limit grime that needs washing.
A temperature-risk table you can use during cleaning
Even with perfect technique, you still want to manage the conditions around washing. The “danger zone” concept helps you understand why quick, warm, controlled washing is safer than soaking and delaying.
Temperature Ranges During Handling/Washing and Salmonella Growth Risk
| # | Time at/near this range | Salmonella growth likelihood | Risk rating |
|---|---|---|---|
| 1 | < 40°F (4°C) | Low—below the danger zone for growth | ★★★★☆ |
| 2 | 40–50°F (4–10°C) | Low to moderate—growth is slower but possible | ★★★☆☆ |
| 3 | 50–70°F (10–21°C) | Moderate—conditions begin favoring multiplication | ★★☆☆☆ |
| 4 | 70–100°F (21–38°C) | High—prime conditions within the danger zone | ★☆☆☆☆ |
| 5 | 100–115°F (38–46°C) | Very high—still within growth range | ★☆☆☆☆ |
| 6 | 115–140°F (46–60°C) | High—upper danger zone boundary | ★★☆☆☆ |
| 7 | >140°F (60°C) | Lower—outside the danger zone for multiplication | ★★★☆☆ |
These ranges align with the CDC’s temperature danger zone guidance CDC (Temperature Danger Zone). Practically, this is why you should avoid soaking eggs for long periods at moderate temperatures and instead use warm water briefly, then dry promptly.
Bottom-line workflow (what to do right now)
After a quick dry wipe and only a careful, warm-water (or sanitizer) wash when necessary, you can keep eggs clean without compromising safety. Follow the steps above, dry thoroughly, store properly, and then work on nest cleanliness so you clean less often—your next egg collection will be easier.
Frequently Asked Questions
What’s the safest way to clean eggs from a coop without damaging them?
Start by picking up eggs gently and checking for heavy dirt or cracks. Dry-clean light debris first with a dry cloth or soft brush, because washing can push bacteria through the shell pores if done incorrectly. If washing is necessary, use clean, warm water and avoid soaking eggs—keep cleaning quick and handle eggs carefully to prevent shell damage.
How do you clean dirty eggs from a coop step-by-step?
Begin with dry brushing to remove loose coop bedding, droppings, or feathers. Next, if there’s stubborn grime, wash only the soiled area using warm water (about egg-wash warmer than the egg) and a mild, food-safe cleaning method if available. Rinse, then dry thoroughly with a clean towel or allow eggs to air-dry in a sanitary place before storing them in a fridge or cool area, depending on your local egg-handling guidance.
Why should you avoid washing eggs unless it’s truly needed?
Eggs have a natural protective coating (the bloom) that helps keep out bacteria, and excessive washing can remove this layer. When eggs are washed improperly—especially with cold water or soaking—bacteria can be drawn into the egg through the shell. Dry-cleaning first helps preserve that protection and reduces the risk of contamination when you clean eggs from the coop.
What’s the best way to remove dried mud, manure, or bedding from eggs?
For dried debris, use a dry cloth, soft brush, or fine sandpaper-like egg cloth to rub off particles without wetting the egg. If the mess won’t come off, use a quick wash with warm water and minimal contact time, then pat dry completely. Avoid harsh scrubbing that scratches the shell, because damaged shells are harder to protect and can shorten egg storage life.
Which cleaning supplies and water temperature are recommended for coop egg washing?
Use food-safe egg-cleaning supplies, clean wash water, and dedicated brushes or cloths that won’t spread grime between eggs. Keep water warm—commonly higher than the egg temperature—to reduce the chance of contaminants being pulled through the shell during cleaning. Always ensure good sanitation (clean buckets, fresh water, and a dry drying area) so you don’t reintroduce dirt after you clean eggs from the coop.
📅 Last Updated: September 18, 2026 | Topic: how to clean eggs from coop | Content verified for accuracy and freshness.
References
- https://extension.umn.edu/poultry/cleaning-and-storing-eggs
https://extension.umn.edu/poultry/cleaning-and-storing-eggs - https://www.canr.msu.edu/news/how_to_clean_and_store_fresh_eggs
https://www.canr.msu.edu/news/how_to_clean_and_store_fresh_eggs - https://extension.psu.edu/how-to-clean-and-store-eggs
https://extension.psu.edu/how-to-clean-and-store-eggs - https://extension.illinois.edu/blogs/eb337/2019-04-03-cleaning-and-storing-eggs
https://extension.illinois.edu/blogs/eb337/2019-04-03-cleaning-and-storing-eggs - https://www.eggcare.com/egg-safety/cleaning-and-storing-eggs
https://www.eggcare.com/egg-safety/cleaning-and-storing-eggs - https://www.fda.gov/food/hazardous-food-ingredients/food-safety-and-prescription-products-eggs-and-egg-products
https://www.fda.gov/food/hazardous-food-ingredients/food-safety-and-prescription-products-eggs-and-egg-products - https://www.cdc.gov/salmonella/general/prevention.html
https://www.cdc.gov/salmonella/general/prevention.html - https://www.who.int/news-room/fact-sheets/detail/food-safety
https://www.who.int/news-room/fact-sheets/detail/food-safety - https://scholar.google.com/scholar?q=how+to+clean+eggs+from+coop+egg+cleaning+sanitation Google Scholar
https://scholar.google.com/scholar?q=how+to+clean+eggs+from+coop+egg+cleaning+sanitation - https://scholar.google.com/scholar?q=egg+washing+effect+on+bacterial+contamination+and+shell+bacteria Google Scholar
https://scholar.google.com/scholar?q=egg+washing+effect+on+bacterial+contamination+and+shell+bacteria
