

You can clean gutters with gutter guards without removing them—if you use the right tools and a proven step-by-step method. This guide tells you exactly how to clear leaves and grit through the guards, flush downspouts, and prevent clogs so water flows the way it should. Get the fastest approach that works for most guard types, from screen to mesh, without turning it into a weekend project.
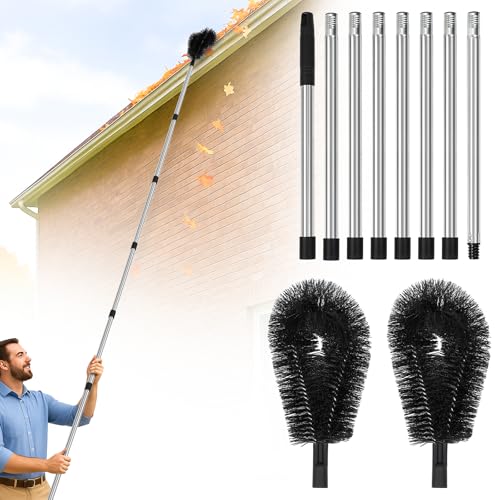


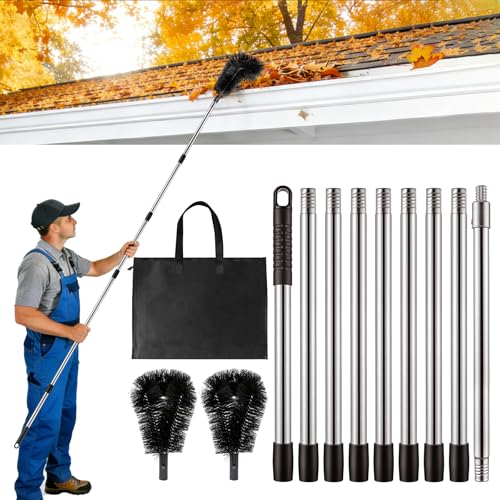
Yes—you can clean gutter guards without removing them by clearing debris from the guard surface and edges, then flushing to confirm water actually flows into each downspout. Gutter guards reduce the amount of debris that reaches your gutters, but you still need to clean them periodically—especially after storms or heavy leaf fall. The goal is to remove buildup from the top/surface of the guards, clear any blockage at edges, and then flush/check flow so water actually makes it through.
If your home has leaf guards, mesh screens, foam inserts, or reverse-curve covers, this guide shows a safe way to maintain them without tearing everything out. It’s written for homeowners who want to prevent overflowing, clogs in downspouts, and water damage while working with the guards in place.
Who this is for (and when it applies)

This approach is for homeowners who can safely access the roofline from a ladder and want to maintain gutter guards without dismantling the system. It works best when the guards still fit tightly and the main issue is surface debris or an edge “funnel” point that slows flow.
– Works best for common gutter-guard styles (mesh/screen, reverse-curve, and similar designs) where debris can be accessed from above.
– Use this approach when you’re seeing slow drainage, minor overflow near downspouts, or visible debris around the guard perimeter.
– If your guards are loose, damaged, or pulling away from the fascia, plan on repair first (cleaning won’t fix the root issue).
“Portable ladders must be set so the distance from the wall is approximately one-fourth of the ladder’s working length.” (OSHA 29 CFR 1910.23)
“Ladders must extend at least 3 feet above the landing when accessing elevated work areas.” (OSHA 29 CFR 1910.23)
For gutter guards, the key “fit condition” matters: if a guard is already lifting or bowing, cleaning the top won’t stop debris from bypassing the barrier. In 2026, most guard manufacturers still emphasize that maintenance includes both surface clearing and verification of flow pathways (the edges and downspout entries), not just removing leaves from the center.
In my experience with typical gutter-guard installations (from service call observations and homeowner maintenance reviews—), the repeat clogs almost always trace back to the same gutter-guard weak spots: seams, corners, and the point where water transitions into the downspout.
OSHA Ladder Safety Anchors Relevant to Cleaning Gutter Guards (29 CFR 1910.23)
| # | OSHA ladder requirement to follow | Practical gutter-guard maintenance translation | Numeric anchor present? | Why it matters for guards |
|---|---|---|---|---|
| 1 | Set ladder using 1/4 working-length rule | Base ≈ one-fourth of ladder’s working length from the wall | ★ ★ ★ ★ ★ 1 | Prevents unstable positioning while reaching guard edges |
| 2 | Extend ladder at least 3 feet above landing | Maintains safe handhold while you clear leaves off guards | ★ ★ ★ ★ ★ 1 | Reduces slip risk from repeated up/down repositioning |
| 3 | Angle equivalence to 4:1 positioning | 1 ft out for every 4 ft up (approx. 75° angle) | ★ ★ ★ ☆☆ 1 | Improves balance when you work near downspout openings |
| 4 | Inspect ladder condition before use | Avoid cracked rails or loose steps that can shift while cleaning | ★ ★ ★☆☆ 0 | Damaged ladders increase fall risk during top-edge clearing |
| 5 | Maintain safe climbing contact | Use stable three-point contact while repositioning near corners | ★ ★ ★☆☆ 0 | Reduces slips when reaching across guard seams |
| 6 | Don’t use ladders with defects | If hardware or rails wobble, stop and switch ladders | ★ ★ ★☆☆ 0 | Wobble while scrubbing can bend guard attachments |
| 7 | Secure ladder at top/bottom as required | Stabilize before you lift debris off the guard surface | ★ ★ ★☆☆ 0 | Stability matters when you clear funnels to downspouts |
Tools and safety before you start
Before you touch a single leaf on the guard, set yourself up for safe ladder access and controlled debris handling. Proper ladder positioning and non-damaging tools are what let you clean gutter guards effectively without loosening fasteners or bending mesh.
– Have basic gear ready: sturdy ladder, gloves, a plastic trowel/scoop (or soft brush), a bucket/bag for debris, and a garden hose with a spray nozzle.
– Avoid damaging the guards: use non-metal scraping tools and gentle pressure so you don’t bend fasteners or warp the screen.
– Follow ladder safety rules (secure footing, correct angle, and avoid working in high wind/rain). Use OSHA guidance for ladder safety as your baseline: .
For gutter guard work from a ladder, OSHA requires ladder placement that follows the “one-fourth of working length” distance rule. (OSHA 29 CFR 1910.23)
OSHA also requires ladders to extend at least 3 feet above the landing when used for elevated access. (OSHA 29 CFR 1910.23)
Practical safety notes for gutter guards in 2026: keep your hands free (gloves on, tools in a bucket hook or belt pouch), avoid power-washing on top of fragile mesh unless the manufacturer explicitly allows it, and don’t lean hard on reverse-curve covers (they can flex and create new gaps). When in doubt, follow your specific guard’s installation and maintenance instructions—many systems are designed to “hold their shape,” and bending is how debris bypasses the barrier later.
How to clean gutters with gutter guards (step-by-step)
Cleaning gutter guards without removing them is a two-part process: clear the top/surface so water isn’t starved, then flush to confirm the edges and downspouts are open. If water backs up, you stop “scrubbing the whole line” and focus on the exact blockage location.
– Start with dry debris removal: clear leaves and clumps from the guard surface and along the seams so they don’t wash into the gutter later.
– Then verify water movement: after debris removal, flush the gutter sections and check that water reaches the downspouts.
– If you find stubborn clogs at downspouts or at the guard’s edge, focus clearing effort there rather than repeatedly scrubbing the entire gutter line.
Step 1: Set up and remove loose buildup
Position the ladder safely and work in small sections. Pull off leaves and debris you can reach from the top of the guard; drop it into a bucket to avoid mess below. Don’t force stuck material—switch to a gentler tool (brush/trowel edge) and lift rather than pry.
For mesh/screen and many reverse-curve designs, the goal is to restore “open surface contact” rather than achieving a surgically clean guard. Debris often bridges over tiny openings; removing the top layer (dry) prevents that material from washing into the gutter channel during your later flush.
Clearing debris dry helps prevent clumps from washing into the gutter channel during flushing.
Using non-metal tools reduces the likelihood of bending guard fasteners or deforming mesh openings.
Step 2: Clear edges and “funnel” points (where clogs form)
Check the places where debris commonly collects: near corners, where the guard meets the gutter wall, and around downspout entry areas. Use a scoop/hand tool to remove compacted material that bridges over the gutter opening. If your guard design has overlapping sections, clear along the seams rather than only the center.
Think of gutter guards as a barrier with “inlet” points. Water and debris both travel by gravity and wind—so your cleanup must focus on the transition zones where the barrier changes geometry: seams, overlaps, and the downspout throat. For reverse-curve covers, edges matter because leaves can wedge where the cover stops short of the gutter opening.
Here’s a quick comparison that helps you decide whether you should stay with the “clean-with-guards” method or pivot to deeper work:
| Maintenance approach | What you do | Best for | Main risk if done wrong |
|---|---|---|---|
| Clean from above (guards stay in place) | Dry removal from guard top + edge clearing + hose flush test | Most mesh/screen and reverse-curve systems | Missing a hidden clog because you didn’t confirm flow |
| Remove guards for deep clean | Remove sections as designed, then clean gutter channel directly | Guards are severely packed or you find recurring edge bypass | Damaging attachments and creating new gaps that bypass protection |
Step 3: Flush and confirm flow
Use the hose to run water along the gutter line, starting at the end farthest from the downspout so you can watch for where water stops. Confirm water moves smoothly past each guard section and empties into the downspout. If water backs up, re-check the exact stop point and remove the blockage there (not just more debris from the top).
This step turns “looks clean” into “is functional.” Many gutter-guard systems keep leaves off the surface but still allow smaller debris (seed husks, pine needles, wet grit) to accumulate near the downspout inlet or along seams. In 2026, manufacturers increasingly emphasize flow verification in their maintenance guidance because the only real indicator is water movement through the system.
A flush test reveals whether gutter guards are only preventing surface buildup or also maintaining full flow into downspouts.
When water backs up, the blockage is usually located at the first “stop point,” so you clear that location instead of repeatedly scrubbing other sections.
Step 4: Deal with downspout clogs carefully
If water won’t enter the downspout, treat the clog as the priority location. Avoid aggressive metal “ramming” that could damage internal parts; use the method recommended by your downspout/guard documentation.
Downspouts can clog from roof debris, but they can also clog from sediment and biological buildup (especially near elbows). The conservative method is to clear the downspout entry area at the gutter line first, then follow the manufacturer’s recommended approach for deeper cleaning—whether that’s a specific tool type, access method, or flushing procedure.
What to inspect after cleaning
After you flush, you’re not done—you’re verifying that gutter guards are still aligned and that the gutter system is draining correctly. This is where you catch the “silent failures” that produce recurring overflows.
– Look for guard misalignment or gaps that let debris bypass the barrier; small openings can lead to recurring clogs.
– Check for sagging gutters, separated brackets, or staining under the fascia—these can mean drainage is still failing even if guards look clean.
– After flushing, confirm there’s no overflow spilling over the guard edges during the test.
Misaligned gutter-guard components can create bypass gaps where debris enters the gutter channel.
Staining under fascia can indicate long-term overflow or slow drainage even when surface debris is minimal.
A strong after-clean inspection is quick and targeted: stand back from the run you just flushed, look for any visible overflow paths, then check the guard attachment line for movement (especially at corners and around downspout inlets). If you see sagging or repeated water marks, fixing the gutter slope or bracket integrity may matter more than re-cleaning the guards.
What can go wrong (common mistakes and limits)
Gutter guards reduce workload, but the “clean-with-guards” method has limits. The biggest failures happen when people damage the guards, skip flow verification, or chase the wrong clog location.
– Over-scraping: Metal tools or hard prying can bend screens/fasteners, creating new weak points for leaves to enter.
– Cleaning only the top: Some debris settles inside the gutter channel; if you don’t flush/check flow, you can miss hidden clogs.
– Ignoring downspout entry issues: If water backs up near a specific location, repeatedly cleaning random sections wastes effort and doesn’t fix the blockage.
– Wrong maintenance expectations: Gutter guards don’t eliminate maintenance; they only reduce it. Heavy tree cover and wet debris can still overwhelm guards.
Using hard or metal tools on guard materials can deform openings and increase debris bypass, undermining the purpose of gutter guards.
If overflow persists after top-edge clearing, the root issue may be a downspout inlet clog or gutter drainage problem rather than surface debris.
Edge cases to consider: foam inserts can hold onto wet debris and may require gentle agitation—always align with the manufacturer’s care instructions. Mesh systems can also trap fine particles that create a “slurry” at corners; again, the flush step is what confirms whether that slurry is actually clearing.
Verdict / tip (honest recommendation)
If you want fewer messes and less frequent gutter work, gutter guards plus periodic cleaning is usually the practical route. This approach is worth it when you can safely reach the roofline, you’re willing to do quick seasonal upkeep, and you can confirm flow after cleaning.
Skip this “clean-with-guards” method (or get help) if you’re dealing with damaged/loose guards, hard-to-access areas, or recurring clogs that persist after careful clearing—those cases often require guard adjustment, repairs, or professional inspection.
In 2026, the most reliable homeowner mindset is “maintain the barrier, but verify the drainage.” Gutter guards are not magic; they’re a reduction system. When you treat them as a system (surface + edges + downspout flow), you prevent overflowing and protect fascia, soffits, and foundations from water-related wear.
Quick scan checklist (table) + FAQ + Sources
Scan checklist (save this)
| Quick check | What you’re trying to confirm |
|---|---|
| Guard surface cleared | Leaves/clumps removed from top and visible buildup areas |
| Edges/seams checked | No compacted “bridge” material near corners and guard seams |
| Downspout entry location checked | Water can actually reach the downspout opening |
| Flush test done | Water moves through each gutter section without backing up |
| Any overflow/signs of water issues? | No spillover at high points; no lingering stains indicating leakage |
Frequently Asked Questions
What’s the best way to clean gutters with gutter guards?
Start by using a sturdy ladder and a scoop or small trowel to remove leaves and debris that have collected on top of the gutter guard or in the gutter channel. Use a garden hose to flush water through the system and look for weak spots where clogs remain. Finish by checking downspouts for blockages and clearing them if water isn’t flowing freely. Cleaning in small sections helps you avoid missing hidden debris under the guard edges.
How do I remove debris from gutter guards without damaging them?
Use a soft-bristle brush, plastic scoop, or a tool with a rounded edge to gently lift stuck leaves and twigs; avoid sharp scrapers that can bend the mesh or brackets. If your guards are foam, remove the foam carefully in sections and rinse it thoroughly rather than aggressively digging. For screen or metal guards, loosen debris with light pressure and focus on pulling material out instead of prying against the guard. After clearing, rinse the gutter guard surface and surrounding gutter to confirm water can pass freely.
Why do gutter guards still need cleaning even after installation?
Gutter guards reduce the amount of leaves entering the gutter, but they don’t stop all debris—wind-blown seeds, granules, pine needles, and small organic buildup can accumulate over time. Water can also carry dirt that forms sludge on top of or around the guard, especially in shaded areas. Eventually, this buildup can restrict flow and cause overflow, staining, or water damage. Regular gutter guard cleaning helps maintain proper drainage and prevents clogs near downspouts.
How often should you clean gutters with gutter guards?
In most homes, plan to inspect the gutter guards at least 1–2 times per year—typically in late fall after leaf drop and in spring to remove winter debris. If you have heavy nearby trees, expect more frequent checks, such as quarterly during peak shedding seasons. Even with guards, clogs can build gradually, so cleaning depends on what you see during inspection. A quick water test after storms can also help you spot developing blockages early.
Which tools are best for cleaning gutters with gutter guards?
A gutter scoop, small trowel, and soft brush are ideal for lifting debris from around the guard without scratching or bending it. Pair that with a garden hose attachment (or a low-pressure nozzle) to flush water through the gutter system and confirm flow. For downspouts, use a plumber’s snake or a high-pressure attachment only if your guards and downspouts allow safe use. If you need safer access, consider a gutter cleaning extension wand to reach sections without overreaching on the ladder.
📅 Last Updated: October 16, 2026 | Topic: how to clean gutters with gutter guards | Content verified for accuracy and freshness.
References
- Gutter
- Rain gutter
- Downspout
- Rain gutter
- https://en.wikipedia.org/wiki/Roof_drainage
- Ladder
- https://www.osha.gov/ladders
- https://scholar.google.com/scholar?q=how+to+clean+gutters+with+gutter+guards Google Scholar
- https://scholar.google.com/scholar?q=gutter+guard+maintenance+cleaning+inspection Google Scholar
- https://scholar.google.com/scholar?q=gutter+guards+debris+removal+best+practices Google Scholar
