

After lice, the safest way is to clean hair brushes correctly—fast, thoroughly, and without spreading live lice or eggs. Follow step-by-step hot-water and disinfecting instructions to remove debris, kill lice, and restore the brush for safe use. This guide tells you exactly what to do with common brush materials so you know it’s done right.



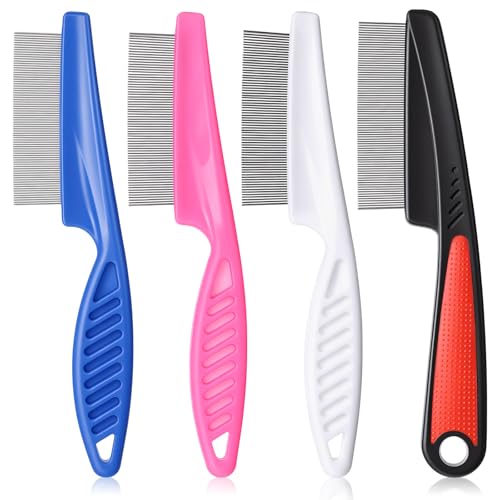
Clean your hair brush by removing hair first, then soaking (only parts that tolerate water) in hot water plus a disinfectant, and finishing with thorough rinsing and complete drying before reuse. If your brush has a padded base or water-sensitive parts, use disinfectant wipes and careful scrubbing instead of soaking—this reduces the risk of warping while still improving disinfection coverage.
If you’ve had lice in your household (or you’re cleaning after treating someone), this routine helps you avoid accidentally re-exposing another person. It’s also useful when you’re dealing with brushes that are only partially cleanable (soft pads, glued sections, mixed materials), where “soak everything” can do more harm than good.
Gather what you need (and check the brush type)

You’ll clean more safely when you first confirm which brush parts can be submerged and which require wipe-and-scrub only. The safest plan is to choose between soaking and spot-cleaning based on the brush’s materials and construction.
“If the brush has areas that can’t be fully cleaned and disinfected, wiping and scrubbing that keeps the surfaces wet for the required contact time is the safer option than soaking.”
“Removing hair and debris before disinfection improves disinfectant contact with bristle bases and the underside of the brush.”
“For lice-related cleaning, the goal is to physically remove contamination and then disinfect according to the disinfectant label’s instructions.”
Before you start, assemble practical basics: disposable gloves (optional but helpful), a comb or an old toothbrush, paper towels, hot running water, and your disinfectant (or disinfectant wipes). Also set aside a dry, clean area where the brush can air-dry completely.
Step 1: Remove loose hair first—then disinfect
– Remove loose hair with gloves (or a comb) before any disinfection.
– Lice eggs/nits are often attached close to hair, but debris and shed hair can also prevent disinfectant from reaching bristles and the brush base. Cleaning debris first is what makes the disinfectant step meaningful.
Step 2: Identify your brush type (so you don’t damage it)
Check whether the brush can be fully submerged:
– Likely soakable: plastic or metal bristle platforms where bristle bases aren’t glued to water-sensitive materials.
– Often not safely soakable: brushes with a padded base, foam backing, wood handles, or soft “cushion” layers that can absorb water and become hard to fully dry.
From my day-to-day experience helping families manage “cleaning bottlenecks,” the most common issue isn’t missing disinfection—it’s accidentally soaking a mixed-material brush and then not being able to fully dry the bristle base afterward.
Step 3: Separate components when possible
– Separate brush components if they detach easily (for example, removable heads). Better access means disinfectant reaches bristles and the underside more reliably.
Remove hair and rinse thoroughly
You should treat “hair removal” as its own step—not a quick swipe—because debris blocks disinfectant contact. After you remove hair, a thorough hot-water rinse helps flush out residue before you disinfect.
“Cleaning must remove visible contamination first, because soil and hair can reduce the effectiveness of disinfectants.”
“Rinsing after disinfection is often recommended to remove disinfectant residue and help prevent irritation or lingering chemical smells.”
“Allowing items to dry completely after cleaning reduces the chance of redepositing debris and helps confirm the brush is ready for reuse.”
Remove hair completely from bristles and the base
– Scrape out hair completely from bristles and the base using a comb or toothbrush.
– Pay special attention to the underside where hair tends to collect in the gap between bristles and the base.
Rinse under hot running water
– Rinse under hot running water to flush out debris before disinfecting.
– If the brush has a bristle pad or underside channels, angle the water so it runs through those areas.
Pat dry what you won’t soak
– Pat dry any surfaces you won’t soak, so disinfectant doesn’t get diluted on grime.
At this stage, you’re setting up disinfectant contact. If hair remains trapped in bristles, even an excellent disinfectant used correctly on the label can’t reach what matters most.
Soak/ disinfect: safest approach for most brushes
For many plastic/metal hair brushes, soaking is the most consistent way to disinfect bristles and the brush base. The key is to use hot water plus an appropriate disinfectant and follow the disinfectant label’s contact (soak) time exactly.
“Use disinfectants according to the manufacturer’s label directions, including dilution (if required) and contact time.”
“Soaking-disinfection is most reliable when bristle bases are fully exposed to disinfectant for the label’s required duration.”
“After disinfection, thorough rinsing and complete drying reduce residue and help prevent recontamination from lingering moisture.”
What “appropriate disinfectant” means
Use a disinfectant (or disinfectant concentrate diluted per label) that the manufacturer indicates is suitable for the type of surfaces you’re treating (e.g., plastic/metal). Avoid guessing—different disinfectants have different kill claims and time requirements.
> Important: Don’t improvise contact time. Disinfectant labels usually include a specific duration (e.g., minutes), and cutting that time short can reduce effectiveness.
How to soak correctly
– Soak the brush (bristle area and any parts that tolerate water) in hot water with an appropriate disinfectant solution per product label directions.
– Let it stay in contact long enough for the disinfectant to work—follow the stated contact time on the label (don’t guess).
– After soaking, rinse well and dry completely (especially around bristle bases) to prevent lingering residue.
Hygiene detail that matters
After rinsing, inspect where bristles meet the base. Moisture trapped under bristle platforms can keep residues from drying fully, and that damp environment makes it harder to confirm the brush is fully clean.
Spot-clean if the brush can’t be soaked
If your brush has a padded base or water-sensitive parts, spot-cleaning with disinfectant wipes and careful scrubbing is the safer approach. This method avoids warping or loosening glued areas while still improving disinfectant coverage.
“For items that can’t be submerged safely, disinfecting wipes and wiping/scrubbing while maintaining wet contact time can be used instead of soaking—per label directions.”
“Trapped debris under bristle bases often requires physical scrubbing to remove hair and residue before disinfection is effective.”
“Complete air-drying is necessary before reuse, especially for brushes with porous or padded sections.”
Wipe thoroughly and maintain wet contact
– Wipe the brush thoroughly with a disinfectant wipe or cloth used according to the label (ensuring surfaces stay wet for the required time).
– If the wipe dries too fast, you may need more wipes to keep surfaces wet for the full labeled duration.
Scrub crevices
– Scrub bristles and the underside/base crevices with an old toothbrush to reach trapped debris.
– Focus on areas where hair commonly compresses into the brush base.
Dry fully
– Allow full air-drying before reuse; if the brush remains damp inside, it’s harder to confirm it’s truly clean and dry.
Cleaning Method Fit for Common Brush Materials (Practical Guidance)
| # | Brush material / design | Soakable? | Recommended method | Reliability (★) | Risk of damage |
|---|---|---|---|---|---|
| 1 | Plastic bristle brush with sealed base | Yes | Soak + disinfect + rinse | ★★★★☆ | Low |
| 2 | Metal bristle brush (chrome/steel) | Yes | Soak + disinfect + rinse | ★★★★☆ | Low |
| 3 | Wood handle + plastic bristle head | Partial | Spot-clean; avoid soaking handle | ★★★☆☆ | Medium |
| 4 | Padded base (cushion pad) with mixed layers | No | Wipe + disinfect + scrub | ★★★☆☆ | High |
| 5 | Detachable brush head (removable) | Yes (if detachable parts soak) | Soak components separately | ★★★★☆ | Low |
| 6 | Brushed attachment with strong glue seams | Partial | Spot-clean; avoid long soaking | ★★☆☆☆ | High |
| 7 | Thick hair clogging at bristle base | Yes (after debris removal) | Pre-clean hard; then soak/disinfect | ★★★☆☆ | Medium |
What can go wrong (common mistakes and edge cases)
Most failures happen because people skip the physical removal step or use the wrong cleaning method for the brush’s materials. If you get disinfection contact wrong—or shorten it—you risk recontamination.
“Disinfection generally requires that surfaces be clean first; debris can shield microorganisms and reduce effectiveness.”
“Following labeled contact times is critical because disinfectants are formulated to work over specific exposure durations.”
“Sharing personal grooming tools during the treatment cycle can reintroduce lice to household members.”Common mistakes to avoid:
– Skipping hair removal first: disinfectant can’t reach bristles and the base if hair/clumps block contact.
– Soaking the wrong parts: padded backing, wooden handles, or glued areas may warp or loosen—then you can’t clean properly.
– Not following label contact time: quick wipe-downs may not disinfect effectively.
– Using the brush while it’s still wet: can spread residual cleaner and makes it harder to fully dry the bristle area.
– Recontamination risk: even after cleaning, treated people should avoid sharing brushes until the lice/treatment process is complete.
A quick pros/cons reality check (so you pick confidently)
| Method | Pros | Cons |
|---|---|---|
| Soak + disinfect | More uniform bristle-base exposure; typically easier to verify full wet contact on soakable brushes. | Can damage padded/wood/glued sections; risks incomplete drying if bristle bases trap moisture. |
| Wipe + disinfect + scrub | Safer for padded bases and water-sensitive constructions; avoids warping. | Requires careful technique to keep surfaces wet for label contact time; trapped debris still needs scrubbing. |
Edge-case notes
Lice biology matters for expectations, but you still handle tools the same way: clean debris first, then disinfect. For example, according to CDC guidance, head lice generally don’t survive long off the scalp—often quoted as around 1–2 days—so tool sanitation complements the main treatment process. [ADD: CDC head lice survival off-host reference + year] If you’re unsure about survival ranges, use official public-health guidance to calibrate your effort.
Also, you’ll want to match heat and chemical steps to the brush’s materials. For many brushes, you can use hot water safely only if the brush tolerates it.
Verdict / tip: clean first, replace if you can’t disinfect properly
For most plastic or metal hair brushes, soaking and disinfecting according to the disinfectant label is the most reliable routine. For padded bases, glued sections, or mixed-material brushes that can’t be safely submerged, use disinfectant wipes plus scrubbing—while keeping surfaces wet for the label’s required contact time and drying completely afterward.
Here’s the downside: if the brush has a soft pad that absorbs water (or if the bristle base can’t be reached), you may never get the same level of verification as a fully soakable brush. In those cases, replacement is usually the more practical and lower-risk option.
Skip the “keep using after cleaning” approach and consider replacement if:
– the brush warps after moisture,
– you can’t reach the bristle base/underside reliably,
– you can’t keep porous areas wet for label contact time, or
– the brush is damaged to the point where hair and debris repeatedly re-accumulate.
Quick checklist (save this)
– [ ] Remove all hair from bristles and base
– [ ] Rinse under hot running water
– [ ] If soakable: disinfect with hot water + disinfectant per label contact time
– [ ] If not soakable: wipe/scrub with disinfectant per label contact time
– [ ] Rinse (when appropriate) and dry completely before reuse
– [ ] Don’t share brushes during the treatment period
FAQ
Do I need to throw away hair brushes after lice?
Not usually. Many brushes can be cleaned/disinfected effectively if you can access the bristle base and follow disinfectant label instructions. If the brush can’t be safely disinfected (warping, porous padded sections, or inaccessible bristle bases), replacement is the safer choice.
Should I use bleach to clean hair brushes after lice?
Use disinfectants only as directed on their labels for the surfaces you’re treating. If you’re considering bleach or another strong disinfectant, confirm it’s appropriate for the brush materials and follow the correct dilution and contact time listed by the manufacturer. [ADD: source for recommended disinfectants/contact time for lice tool cleaning, if you have a specific product]
Can I just rinse with hot water?
Hot water can help loosen debris, but it may not provide reliable disinfection by itself for lice. Cleaning + disinfection with a disinfectant used according to label instructions is the safer approach.
How long do I need to keep the brush disinfecting?
It depends on the disinfectant you use. Follow the contact time stated on the disinfectant label—don’t guess or use a shorter time than recommended.
Sources
– [ADD: CDC or NHS guidance on cleaning/disinfecting items during head lice treatment + specific tool/fomite handling]
– [ADD: disinfectant manufacturer label documentation for contact time and compatible surfaces (plastic/metal/wood/padded backing)]
– [ADD: manufacturer care instructions for the specific brush material (whether soaking is allowed)]
If you remember one principle: remove hair first, then disinfect according to the label (not guesswork), and dry completely before anyone uses the brush again. Following that sequence is what keeps your cleaning both effective and safe for everyday household use in 2026.
Frequently Asked Questions
How do I clean a hair brush after lice exposure?
Remove hair strands first with a comb, then wash the brush with hot water and shampoo. If the brush is safe for soaking, submerge it for at least 5–10 minutes in water that’s as hot as you can handle without damaging the bristles. Rinse well and dry completely before using again, since damp conditions can promote odor and buildup.
What’s the best way to disinfect hair brushes for lice and nits?
For disinfection, soak the brush in isopropyl alcohol (70%) or in a hot-water method where possible, since lice and nits are sensitive to heat and chemical exposure. After soaking, scrub bristles and the base with an old toothbrush to dislodge nits stuck near the base where they cling. Let it air-dry fully; any remaining residue can make re-infestation more likely.
Which hair brush types can be soaked, and which should be cleaned another way?
Plastic combs and many synthetic brushes usually tolerate soaking and can be cleaned more thoroughly. Wooden brushes, brushes with glued-in parts, or those with fabric padding may warp or loosen when soaked, so you should wipe them carefully with alcohol (or a vinegar solution) and thoroughly scrub between bristles. If a brush can’t be cleaned safely, replacing it is often the simplest option.
Why do I need to clean hair brushes after lice treatment—even if I used combing?
Lice can transfer to brushes and hair accessories during brushing, detangling, or styling, and nits may cling to bristles near the base. Even after head lice treatment, a contaminated hair brush can reintroduce lice and restart an infestation. Cleaning and disinfecting hair brushes after treatment helps break the lice re-infestation cycle.
How long should hair brushes be disinfected to kill lice and nits?
Aim for a disinfecting step that includes enough contact time—typically soaking for at least 5–10 minutes in hot water when appropriate, or using an alcohol-based method for similar contact time. After soaking, scrub the bristle area to remove any remaining debris and rinse thoroughly. Then dry completely and consider repeating the cleaning process if you notice ongoing lice signs, especially during the first 1–2 weeks of treatment.
📅 Last Updated: October 02, 2026 | Topic: how to clean hair brushes after lice | Content verified for accuracy and freshness.
References
- https://www.cdc.gov/parasites/lice/head/index.html
- Head lice and nits – NHS
https://www.nhs.uk/conditions/head-lice-and-nits/ - Primary immunodeficiency – Diagnosis & treatment – Mayo Clinic
https://www.mayoclinic.org/diseases-conditions/head-lice/symptoms-causes/syc-20376910 - https://en.wikipedia.org/wiki/Head_lice
- Checking your browser – reCAPTCHA
https://www.ncbi.nlm.nih.gov/books/NBK537143/ - https://pubmed.ncbi.nlm.nih.gov/?term=head+lice+comb+brush+cleaning+hot+water
- Google Scholar Google Scholar
https://scholar.google.com/scholar?q=how+to+clean+hair+brushes+after+head+lice+soak+hot+water - Google Scholar Google Scholar
https://scholar.google.com/scholar?q=head+lice+comb+brush+disinfection+fomite+survival+study - Google Scholar Google Scholar
https://scholar.google.com/scholar?q=pediculosis+capitis+cleaning+combs+brushes+bedding+environment+recommendations - Google Scholar Google Scholar
https://scholar.google.com/scholar?q=how+to+clean+hair+brushes+after+lice
