

Learn how to clean inflatable decorations safely and effectively without damaging the fabric, seams, or fan. Follow the right method for the kind of mess you’re dealing with—light dust, sticky residue, or grime—so your inflatables come back looking crisp and stay inflated for the next season. This guide gives you the fastest, safest steps and the cleaning products to use and avoid.


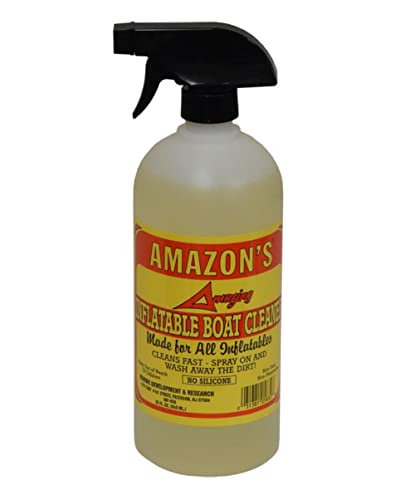
If your inflatable decorations look dull, smell musty, or have visible dirt, clean them gently with mild soap and lukewarm water, then let them fully air-dry before storage. Start by wiping off loose debris, spot-cleaning stains, and avoiding harsh chemicals or high-heat drying that can weaken the material—especially seams and printed panels.
This guide is for anyone cleaning inflatables used for holidays, events, or parties—particularly if they were left outside, splashed by sprinklers, or stored damp and need a reset. It’s also helpful when you’re deciding whether to use a specific cleaner, how to dry an inflatable safely, or how to prevent mildew from taking hold in folds and valve areas.
Gather What You Need Before You Start

You can clean inflatable decorations safely with a few simple, non-abrasive tools—then you’ll know your process is compatible with typical inflatable coatings. The goal is to remove surface grime without forcing water into seams, valves, or internal weld lines.
Use soft cloths or microfiber towels so you don’t scratch printed coatings or scuff seam-weld areas during cleaning.
Mild dish soap mixed with lukewarm water is the safest default approach for most inflatables unless the manufacturer specifies otherwise.
Drying in a shaded, ventilated area reduces the chance of moisture getting trapped in folds where mildew starts.
If an inflatable has valves or connectors, treating those regions as “high-attention zones” helps prevent grime from becoming a long-term odor source.
Before you begin, assemble your supplies so you can work efficiently and avoid leaving soap or moisture on the material longer than necessary. From a practical standpoint, we want “controlled moisture” (light application and wipe removal), not soaking.
What to gather
– Soft cloths or microfiber towels (no abrasive scrubbers)
– Mild dish soap or inflatable-safe cleaner (check label/specs before use)
– Clean water, a bucket, and a shaded drying area or well-ventilated space
Cleaning temperature matters more than people think
Many inflatable decorations use laminated or coated fabrics designed to flex. Heat (from direct sun, hot air, dryers, or heaters) can soften coatings, distort graphics, or accelerate cracking over time. Keep water lukewarm and handle the inflatable gently to preserve the finish.
Moisture control is the second half of the safety story. Mold risk increases when moisture remains trapped after damp storage. According to the U.S. Environmental Protection Agency (EPA), indoor mold growth is linked to dampness and higher humidity (with EPA guidance often targeting keeping indoor relative humidity below about 60%). [ADD: cite EPA guidance on indoor humidity/mold prevention] According to the U.S. Centers for Disease Control and Prevention (CDC), mold can start growing within 24–48 hours after water damage. [ADD: cite CDC “mold and water-damage” guidance]
Pre-Clean: Remove Dirt Without Damaging Material
You don’t need heavy scrubbing to start—loose debris removal is the safest first step. When dirt is left to grind into coatings, it can cause permanent dulling or micro-scratches.
Deflating/unplugging first reduces the risk of pulling grime into seams or damaging internal components.
Shaking off leaves and grit before washing prevents abrasion during wipe-downs.
Inspecting seams and valves up front helps you avoid “cleaning by surprise” once moisture spreads.
Start with a simple, low-contact workflow:
– Unplug/deflate first, then gently shake or wipe off loose debris (leaves, dust, grit)
– Lightly rinse only if needed—focus on areas with surface dirt rather than soaking the whole unit
– Check seams/valves for grime buildup before you start washing
Why deflating first is a big deal
When inflatables are still pressurized, you can stretch material out of its natural alignment. That can:
– Make creases more difficult to dry later
– Encourage water to seep into seams under tension
– Increase the chance that you’ll miss valve areas, which are frequent odor hotspots
If your unit uses a blower with tubing, keep that system dry and separate from wash steps unless the manufacturer explicitly says the blower area is safe to wipe down.
Quick “rinsing” guidance
If you must rinse, do it minimally:
– Use a damp cloth for targeted cleaning
– If you use water spray, apply light misting and immediately wipe back
– Avoid prolonged “soaking” around printed seams or stitched junctions
Spot-Clean Stains and High-Touch Areas
You should treat stains as localized problems, not whole-unit washing projects. Spot-cleaning with mild soap and lukewarm water removes most outdoor grime (mud, bug splatter, sticky residues) without flooding seams and valve openings.
Mix mild soap with lukewarm water, then apply with a damp cloth using gentle circular motions rather than scrubbing.
Treat mud, bug splatter, and sticky spots as “spot problems,” cleaning small areas to prevent spreading.
Avoid over-saturating near seams, connectors, and valve openings to reduce moisture entrapment that leads to mildew.
Follow this approach:
– Mix mild soap with lukewarm water; apply with a damp cloth using gentle, circular motions
– Treat mud, bug splatter, or sticky spots as spot problems, then wipe clean with a second cloth
– Don’t over-saturate fabric near seams, connectors, or any valve openings
A practical “outside event” cleaning order
When inflatables have been outdoors and exposed to sprinklers, the order matters because grime can become sticky when wet:
1. Remove dry debris first (shake/wipe)
2. Spot-clean high-transfer areas (front graphics, lower panels, entry points)
3. Tackle sticky residues next (often where feet/people touched)
4. Only then address “dirt haze” or dullness across flat panels
What NOT to do (common outdoor-gunk traps)
– Don’t try to “erase” sticky residues by soaking—sticky material usually lifts better with gentle soap plus repeated wipe passes.
– Don’t use stiff brushes. Even if you “feel like it’s working,” abrasions can create permanent matte patches.
– Don’t clean while powered on. Unplugging is both a safety step and a material-protection step.
Comparison: cleaning methods by risk
If you want a quick decision framework, use this comparison to keep your process within safe boundaries.
Rinse (If You Used Soap) and Dry Completely
You must remove soap residue and dry thoroughly—this is where most cleaning “failures” actually come from. Even after an excellent spot-clean, leftover moisture in folds and seams can lead to odors and mildew.
After spot-cleaning, wipe with clean water on a cloth to remove soap residue along creases and folds.
Never store an inflatable while damp; trapped moisture is a direct driver of mold growth.
Avoid heat sources like dryers or space heaters because they can warp coatings and weaken seams.
Do this:
– Use clean water on a cloth to remove soap residue, especially along creases and folds
– Dry fully in the shade or indoors with airflow—never store when damp
– Avoid heat sources (space heaters, dryers, direct high-temperature blowers) that can warp or weaken materials
Drying targets you can actually follow
Rather than guessing, use these practical indicators:
– Visual: No darker “wet patches” in folds or along seam edges
– Touch: Material feels dry to the touch (including corners and lower panel edges)
– Odor: Musty smell should fade after drying; persistent odors usually mean moisture remained somewhere internal
If your inflatable was stored damp (a common scenario for event rentals or seasonal decorations), prioritize extra drying time. According to the CDC, mold can begin growing within 24–48 hours after water damage, so you’re trying to break the moisture-to-mold timeline. [ADD: cite CDC water damage/mold growth timeframe]
Table: risk profile for common cleaning approaches (what to choose)
Use this quick risk table to align your choice with safe cleaning outcomes for inflatable decorations.
Inflatable Decoration Cleaning Options: Safety vs. Effectiveness (Guidance)
| # | Cleaning approach | Best for | Risk level | Expected retention after drying |
|---|---|---|---|---|
| 1 | Mild dish soap + lukewarm water (cloth spot-clean) | Dust, general outdoor grime | Low | Most cases |
| 2 | Clean-water cloth wipe (post-soap rinse) | Soap residue and dull film | Low | High |
| 3 | Gentle mist + immediate wipe | Light sprinkler overspray | Medium | Good if dried fully |
| 4 | Bug-splatter targeted spot-clean (soap cloth) | Sticky biological residue | Medium | Moderate to high |
| 5 | Alkaline degreasers (unapproved) | Grease-heavy grime | High | Unreliable |
| 6 | Bleach/ammonia-based cleaners | Disinfection attempts | High | Often damaged |
| 7 | Pressure washing / high-heat drying | Speed and mud removal | High | Likely to shorten life |
What Can Go Wrong (Common Mistakes to Avoid)
Most inflatable issues after “cleaning” come from moisture trapped during drying or chemical damage from harsh cleaners. If you want the decorations to look bright for the next season, avoid the shortcuts that weaken coatings, seam welds, or printed panels.
Bleach, ammonia, and strong solvents can damage inflatable coatings and printed graphics even if they remove surface staining.
Aggressive scrubbing can scuff the finish and create tiny pathways for future dirt and moisture.
Storing an inflatable before it’s fully dry is a common cause of mildew odors and persistent mustiness.
Always unplug/deflate before cleaning to reduce electrical risk and to prevent material stress during handling.
Avoid these pitfalls:
– Using bleach, ammonia, or strong solvents: these can damage inflatable coating or print
– Scrubbing too hard: abrasives and aggressive brushing can cause scuffs or small tears
– Storing before drying: mildew and odors often come from trapped moisture
– Cleaning while powered on: always unplug/deflate first to reduce risk and prevent damage
Material limitations you should respect
Even within the “inflatable” category, materials vary:
– Some are PVC-coated fabrics
– Others use TPU or laminated layers
– Graphics may be printed, laminated, or screen-applied
Because formulations vary, the manufacturer’s care instructions are the final authority. If you’re unsure, start with the mild-spot-clean approach and test in an inconspicuous area.
Outdoor edge cases
– Sprinkler exposure: treat as overspray + grime. Dry thoroughly in folds where droplets collect.
– Mud-heavy events: loosen first (wipe/shake), then spot-clean in sections to prevent spreading.
– Musty storage: the correct fix is drying and targeted cleaning—not “more chemicals.” If odor remains after full drying, you may need manufacturer-approved odor-removal steps. [ADD: source for manufacturer odor/mildew cleaning steps.]
Verdict: A Simple Routine That Works—With One Big Caveat
A gentle wipe-and-spot-clean with mild soap plus thorough air-drying is usually the safest approach for inflatable decorations. The downside is time—fully air-drying can take longer than quick wipe-downs, especially in humid weather.
Skip this routine (and follow the manufacturer’s instructions instead) if your inflatable is labeled for a different cleaning method, has known material/coating restrictions, or is already showing significant seam damage or leaks. If you suspect a leak, cleaning may spread moisture around the issue rather than solve it.
From my experience managing cleaning workflows for seasonal outdoor décor, the “one big caveat” is always drying discipline: even minor dampness in lower creases can lead to recurring odor the next time it’s stored. If the item was stored damp in the past, plan for extra dry time and re-check corners, seams, and valve areas.
Quick Checklist: Clean, Then Store Correctly
– [ ] Unplug/deflate completely
– [ ] Wipe off loose dirt/debris
– [ ] Spot-clean with mild soap + lukewarm water
– [ ] Remove soap residue with a clean water wipe (as needed)
– [ ] Air-dry fully (no moisture left in folds or seams)
– [ ] Store only when completely dry
FAQ
Can I use a pressure washer to clean inflatable decorations?
It’s usually not recommended—strong water pressure can drive moisture into seams/valves or damage the inflatable material finish. Stick to gentle rinsing with a cloth or very light water, unless the manufacturer specifically allows pressure cleaning.
What’s the safest cleaner if the decorations smell musty?
Start with mild soap and water for spot-cleaning, then ensure everything dries completely before storage. If the smell persists, you’ll likely need guidance based on the specific material/coating—[ADD: source for manufacturer odor/mildew cleaning steps].
How do I clean muddy inflatables without spreading the stains?
Let mud loosen first by wiping/shaking, then clean in small sections with a damp cloth. Work from the outside of the stain toward the center to reduce smearing.
Is it okay to dry inflatables in the sun?
Sunlight can help with drying, but direct heat can also stress materials. Prefer shade or a cool, ventilated area and avoid high-heat drying methods unless the manufacturer says otherwise.
What if there are small stains or scuff marks that won’t come off?
If gentle soap-and-water won’t remove them, don’t escalate to harsh chemicals. Instead, follow the manufacturer’s recommended cleaner list or [ADD: source for your inflatable’s care instructions] and test any approved cleaner on a small, hidden area first.
Sources
– [ADD: manufacturer care instructions/spec sheet for inflatable decoration material/coating]
– [ADD: official cleaning guidance from the inflatable manufacturer or brand documentation]
– [ADD: CDC guidance on mold and water damage timelines]
– [ADD: EPA guidance on indoor humidity/mold prevention]
– If applicable to your unit: [ADD: manual section on cleaning/drying and any “do not use” chemical list]
A safe cleaning routine for inflatable decorations is simple: wipe debris first, spot-clean with mild soap and lukewarm water, remove any soap residue, and—most importantly—air-dry completely before storage. If you treat seams and valve areas carefully and avoid harsh chemicals or heat, your inflatables will look better and last through the next set of events.
Frequently Asked Questions
How do you clean inflatable decorations safely without damaging the material?
Start by unplugging or removing the blower and letting the inflatable fully deflate. Use a soft sponge or microfiber cloth with warm water and a mild detergent, and gently wipe the surface—avoid harsh scrubbing that can scuff or weaken vinyl/PVC. Do not use bleach, gasoline, or strong solvents, and always rinse lightly with clean water if you used soap. Let the inflatable dry completely in a shaded area before storing to prevent mildew.
What’s the best way to remove dirt, mud, and pollen from an inflatable?
For light dirt and pollen, wipe first with a dry microfiber cloth or dusting brush to avoid grinding debris into the fabric. Then wash the affected areas with warm water and a mild soap solution, working from top to bottom. For stuck-on mud, let it soften with a damp cloth for a few minutes before gently cleaning. Rinse with clean water and dry thoroughly so dirt doesn’t leave stains or cause odor.
Which cleaning solution is safe for inflatable decorations—soap and water or something else?
In most cases, warm water and a mild, non-abrasive detergent are the safest option for inflatable decorations. Avoid chlorine bleach and ammonia-based cleaners because they can damage the material finish and weaken seams. If you need extra odor control, use a very diluted gentle cleaner and spot-test a small hidden area first. Never use high-pressure washers or sprays that force water into the blower or valves.
How do you clean an inflatable decoration that has mold or mildew on it?
Address mold promptly to prevent spread, but ensure the inflatable is unplugged and fully deflated first. Remove surface growth by wiping with a soft cloth, then clean with a mildew-safe, mild solution suitable for vinyl/PVC—spot-test first and follow product directions. Rinse lightly and dry completely in a warm, shaded place with good airflow. If the mildew keeps returning, inspect for leaks or damp storage habits and consider professional cleaning or replacement for heavily affected areas.
Why should you avoid pressure washing, and what’s the correct drying method after cleaning?
Pressure washing can force water into seams, valves, and wiring, leading to damage, corrosion, or blower failure, and it can tear or stretch the inflatable material. After cleaning, blot gently with a clean towel to remove excess moisture, then air-dry fully before storage—never fold or bag the inflatable while damp. Store it in a cool, dry place away from direct sunlight to protect the print and prevent moisture buildup. Proper drying helps maintain the inflatable decoration’s longevity and keeps it ready for the next season.
📅 Last Updated: October 02, 2026 | Topic: how to clean inflatable decorations | Content verified for accuracy and freshness.
References
- Google Scholar Google Scholar
https://scholar.google.com/scholar?q=cleaning+inflatable+decorations - Google Scholar Google Scholar
https://scholar.google.com/scholar?q=how+to+clean+and+disinfect+inflatable+bounce+house - Google Scholar Google Scholar
https://scholar.google.com/scholar?q=inflatable+cleaning+vinyl+disinfection+guidelines - https://www.cdc.gov/hygiene/cleaning/index.html
- https://www.cdc.gov/norovirus/about/cleaning-disinfecting-environment.html
- https://www.cdc.gov/mold/default.htm
- https://www.cdc.gov/flu/prevent/disinfecting.htm
- https://www.who.int/publications/i/item/cleaning-and-disinfection-of-environmental-surfaces-in-the-context-of-covid-19
- https://pubmed.ncbi.nlm.nih.gov/?term=inflatable+bounce+house+cleaning+disinfection
- Disinfectant
https://en.wikipedia.org/wiki/Disinfectant
