

Cleaning the inside of a radiator clears out rust, sediment, and mineral buildup that can trap water flow and lower heat output. By the time you finish, you will have a visibly cleaner system and more consistent warmth from every valve and outlet. Follow the step-by-step method below to do it safely and effectively, using the right supplies like gloves, a descaling solution (such as white vinegar), and basic draining tools, typically in about 1–2 hours.



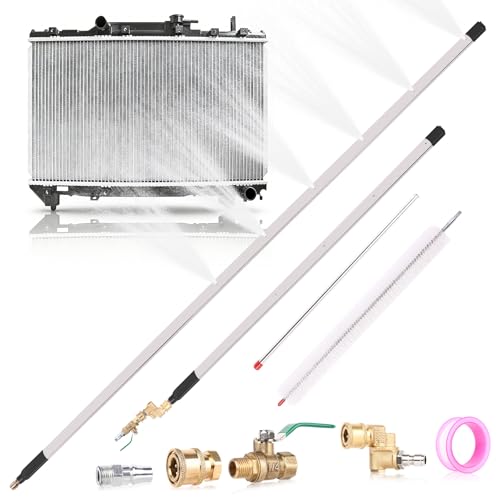
Yes—if your radiator isn’t heating evenly or you smell dust/musty air, the fastest route to restored performance is usually a proper inside radiator clean: drain to remove loose sludge, rinse, then flush and only use a radiator cleaner if your system and the product label explicitly allow it. Done carefully, this clears sediment that blocks flow through the radiator’s internal channels while avoiding damage to valves, bleed screws, and protective coatings.
This article is for homeowners (and careful DIYers) dealing with radiators that feel cold at the top, take longer to warm, or show signs of buildup. It applies to most standard water-filled radiators; if you have a special system type, follow your boiler/radiator manufacturer’s guidance first.
Gather What You Need (and Check Your Setup)

You’ll get the safest results by confirming your heating system type and checking that you’re allowed to drain/bleed before you touch any valves. Once the setup is verified, you can use a controlled radiator flush and (optionally) a label-approved radiator cleaner without introducing new problems.
– Identify whether your system is pressurized (most homes are) and confirm you’re allowed to drain/bleed radiators safely.
– If you have a sealed system (common with combi boilers), you may still bleed radiators, but draining the whole system is more constrained and should follow boiler/manufacturer guidance.
– Have basic tools ready: radiator key/bleed key, buckets, towels/rags, hose or emptying container, and protective gloves.
– Keep a “catch plan” for dirty water—sediment can stain and may be unpleasant, even if it’s not chemically hazardous.
– Choose a radiator-safe cleaning method: plain flushing first, and chemical cleaning only if the product is explicitly meant for your radiator/system type.
– A “plain flush” is your safest first step because it doesn’t require chemical compatibility or extra residue-control.
Key safety reality: hot water can scald quickly, even before components look “dangerous.” According to the UK Health and Safety Executive (HSE), water at 60°C can cause scalding burns in around 1 minute for some people, and hotter temperatures reduce that time drastically (HSE scalding guidance). For radiator draining, treat anything that’s “not cold” as hot enough to cause injury—wear gloves and drain only when the radiator is cool to the touch.
Remove Debris: Drain and Initial Rinse
You should drain and rinse first because clearing loose debris prevents you from grinding sediment deeper into the valve seats and internal pipe connections during later flushing. This step also lets you visually confirm whether you’re dealing with sludge, rust, or mostly air/scale.
– Turn off the heating, let the radiator cool, then place towels and a bucket under the bleed valve.
– Drain the radiator fully, then rinse with clean water until it runs clearer (this gets loose sediment out before deeper cleaning).
– Keep an eye out for valve strain—avoid forcing anything that feels stuck; stop and reassess if you meet resistance.
What I recommend operationally: open the bleed valve only enough to release water safely, then close it promptly once draining starts to slow. Sediment tends to “catch” at transitions (inside valves and at the start of internal channels), so forcing parts can worsen restriction. If you see heavy debris early, expect the first rinse to look worse than the second—this is normal when a radiator flush is doing its job.
To reduce confusion between “still dirty” and “still air,” remember that even after cleaning, trapped air can mimic poor flow. After rinsing, you’ll confirm results later with a proper bleed.
Hot-Water Scald Time by Temperature (Planning Safety for Radiator Drains)
| # | Water Temperature | Typical Risk Window | DIY Action |
|---|---|---|---|
| 1 | 50°C | Several minutes | Gloves still recommended |
| 2 | 55°C | ~1–2 minutes | Drain only when cool |
| 3 | 60°C | ~1 minute (some cases) | Treat as hot—full PPE |
| 4 | 65°C | Tens of seconds | No rushing—position first |
| 5 | 70°C | A few seconds | Stop if water feels very hot |
| 6 | 75°C | ~1–3 seconds | Do not attempt without gloves |
| 7 | 80°C+ | Instant injury risk | Only with sealed, planned draining |
(Safety planning table adapted for radiator drain decisions; always follow local guidance and manufacturer instructions.)
Flush the Radiator Inside (Clear Sediment Properly)
You’ll clear the real restriction when you flush the inside channels long enough to improve water clarity—not just for a quick rinse. This step is what typically solves “cold at the top” because sediment settles in the lowest-flow paths and gradually starves the upper sections.
– Use a hose/clean water flow to push remaining particles out of the radiator channels, using the inlets/outlets as intended by the design.
– Continue flushing until water quality improves, not just for a few minutes—sediment can take longer to loosen.
– Bleed the radiator after flushing to remove trapped air so you don’t confuse trapped air issues with “still dirty” performance.
How to do it methodically (without guessing):
1. Connect clean water flow at the radiator’s appropriate connection so you’re flushing through the internal passages as intended.
2. Keep the flow steady and watch the discharge: sediment often starts heavy, then transitions to finer particles, then clearer water.
3. Stop flushing only when the output remains noticeably clearer for several continuous moments, not just right after debris loosens.
Trapped air is a frequent “false negative.” If the radiator still feels uneven after a thorough radiator flush, bleeding again can improve heat distribution because air reduces effective circulation area. And if you’re working in a pressurized system, remember that many boilers call for a cold system pressure around 1.0 to 1.5 bar as a normal range (check your boiler manual for the exact target). According to typical UK boiler commissioning guidance, low pressure is a common cause of reduced circulation (manufacturer installation/commissioning manuals, recent boiler documentation).
Optional: Use a Radiator Cleaner Safely
You only need chemical treatment when sediment is stubborn—plain flushing is often enough if the buildup is mild. If you use a radiator cleaner, the safest approach is “label-first”: confirm compatibility with your system and follow dosage and rinse requirements exactly.
– Only use radiator cleaner if the label explicitly supports your system type and doesn’t conflict with your boiler/antifreeze/water treatment.
– Follow instructions precisely (dosage time and amount), and don’t mix products—some cleaners react badly with others.
– After the treatment, flush/rinse as directed to avoid leaving residue that can affect corrosion protection.
Flush vs chemical treatment: when each makes sense
Below is a practical comparison to help you choose whether a radiator cleaner is worth the added risk.
| Approach | Best for | Main benefit | Main downside | “Stop and reconsider” signal |
|---|---|---|---|---|
| Plain radiator flush (water-only) | Recent sludge, early uneven heating | Low risk; clears loose sediment | May not dissolve magnetite/scale | Output stays dark/particulate after extended flushing |
| Cleaner + controlled soak (label-approved) | Persistent cold sections after flushing | Can dissolve deposits clinging to channels | Compatibility/residue risk | Instructions conflict with existing inhibitor/antifreeze |
| Whole-system approach (often pro) | Multiple radiators affected or recurring sludge | Addresses root cause (system-wide) | Messier; may need specialist equipment | New sludge appears quickly after refilling |
Compatibility matters because “safe for radiators” doesn’t always mean “safe for every system.” Some cleaners target limescale, some target magnetite (black iron oxide), and others rely on pH changes. If your system already has an inhibitor, adding the wrong chemistry can strip corrosion protection or leave residue that later promotes corrosion.
If you’re in the UK or another region where building-service guidance is followed, the controlled sequencing logic aligns with common best-practice guidance for water treatment: clean first, then restore protection. Studies and industry guidance consistently stress that residue management is part of safe flushing—not just “what chemical you used.” (industry best-practice water treatment guidance for heating systems, recent editions)
As of 2026, installers and service firms still emphasize this “flush/neutralize/restore” mindset because it reduces recurrence. That same logic applies to a DIY inside radiator clean, as long as you strictly follow the product label.
What Can Go Wrong (Common Mistakes to Avoid)
Most radiator cleaning problems come from skipping the fundamentals: forcing valves, rushing the flush, or leaving chemical residue. If you avoid those pitfalls, the odds of restoring even heating improve significantly.
– Over-tightening or forcing bleed valves and fittings can cause leaks—if a part won’t move, stop rather than “making it work.”
– Skipping the rinse step after chemical cleaning can leave deposits behind or interfere with corrosion inhibitors.
– Cleaning won’t fix everything: if your cold spots are caused by airlocks, blocked valve internals, or boiler circulation issues, you may need a system-level check.
– If your radiator has a non-standard finish or special internal materials, aggressive methods can harm coatings—stick to radiator-specific guidance.
The two most expensive mistakes are mechanical and chemical. Mechanically, corrosion can “lock” bleed screws and valves; forcing them can crack threads or deform seats. Chemically, mixing products is risky because different cleaners may neutralize each other or create unwanted byproducts. Even if your radiator flush succeeds, poor rinse control can reduce future corrosion protection.
A final edge case: if only one radiator is cold at the top while others heat fine, it’s often localized (air, valve restriction, or internal sediment). But if multiple radiators behave similarly after you clean them, the cause may be boiler circulation, diverter valve issues, flow/return balancing, or system-wide sludge—meaning repeating the same inside radiator clean may not solve the underlying problem.
Practical Verdict: When This Is Worth It (and Who Should Skip)
This method is worth it when you suspect internal sediment buildup and your system supports careful draining/flushing without creating major leak or re-pressurizing risk. It’s also a strong first step when several radiators show similar symptoms, because it targets the common “blocked flow” mechanism.
The downside is that DIY draining, flushing, and refilling can be messy, time-consuming, and sometimes destabilizing to a pressurized system. In some setups, a professional may be safer—especially where valves are corroded, access is difficult, or the radiator has been leaking previously.
Skip DIY if:
– you’re unsure about draining a pressurized/ sealed system
– valves look corroded/stuck and you’d likely be tempted to force them
– you suspect a bigger circulation/boiler issue rather than radiator buildup
A good rule: if your radiator flush doesn’t produce improvement in clarity after reasonable time, or if you find recurring issues quickly after refilling, step back and diagnose the system rather than repeatedly treating symptoms.
Quick Checklist (Scan Before You Start)
– [ ] Heating off + radiator cool to touch
– [ ] Towels/bucket ready under the bleed valve
– [ ] Radiator drained fully (no guessing)
– [ ] Rinsed/flushed until water runs clearer
– [ ] Bled to remove trapped air
– [ ] Chemical cleaner only if label matches your system (if used: rinse/flush per instructions)
– [ ] Check for leaks after refilling and re-pressurizing (if applicable)
Frequently Asked Questions
What’s the best way to clean the inside of a radiator?
Start by draining the radiator when the engine is cool, then flush the system with clean water to remove loose rust and sediment. For deeper cleaning, use a radiator flush solution designed for coolant systems, following the product instructions and running the engine for the recommended time. After flushing, drain again and refill with the correct coolant type to protect the radiator from corrosion.
How do I flush out rust and sludge from inside a car radiator?
After the radiator cools, open the drain valve and flush with water until it runs clearer, which helps remove sediment. If rust or sludge is heavy, use a radiator descaling or flushing chemical, then flush thoroughly until the water is mostly clean. Keep an eye on hoses and the radiator core—clogs can restrict flow and cause overheating if not fully cleared.
Why is it important to clean the inside of a radiator?
Over time, coolant breaks down and leaves deposits that reduce heat transfer, making your engine run hotter. Rust and scale inside the radiator can also block narrow passages, leading to poor circulation and potential overheating. Regular internal radiator cleaning helps restore radiator performance and helps extend the life of both the radiator and the cooling system.
Which radiator cleaner should I use for internal cleaning—flush vs descaler?
Use a standard radiator flush if the main issue is mild buildup and the coolant looks dirty or contaminated. Choose a descaler or rust-remover if you’re seeing heavy rust, scale, or recurring overheating from restricted flow. Always match the cleaner to your coolant system type and follow the label directions, then flush completely to avoid leftover chemicals that can affect corrosion protection.
How can I clean the inside of a radiator without damaging the core?
Avoid using high-pressure water or harsh chemicals that aren’t specifically made for radiators, because they can damage fins or loosen debris that clogs elsewhere. Keep the cleaning process controlled: drain, flush with water, use the recommended radiator flush cleaner, and then flush again until clear. If you find persistent blockages or leaks, consider professional radiator cleaning to prevent core damage and ensure proper refill with the correct coolant mixture.
📅 Last Updated: November 14, 2026 | Topic: how to clean inside radiator | Content verified for accuracy and freshness.
References
- engine cooling system flushing – Search Results – PubMed
- https://www.ncbi.nlm.nih.gov/pmc/?term=radiator+flushing+cooling+system+deposits
- Cooling system
- Radiator
- Descaling agent
- Coolant
- Scale
- https://scholar.google.com/scholar?q=how+to+flush+engine+radiator+cooling+system Google Scholar
- https://scholar.google.com/scholar?q=cooling+system+flushing+deposits+corrosion+inhibitors Google Scholar
- https://scholar.google.com/scholar?q=cleaning+heating+radiator+descaling+internal+tubing Google Scholar
