

Dye transfer on car leather seats typically comes from contact with unprotected clothing, bags, or dyed materials that rub color onto the finish. You can remove it with the right cleaner, a gentle technique, and careful spot testing, usually within 30–60 minutes depending on how deep the staining is. Start by gathering microfiber cloths, a leather-safe cleaner, and a color-safe conditioner so you can lift the pigment without damaging the leather’s protective coating.


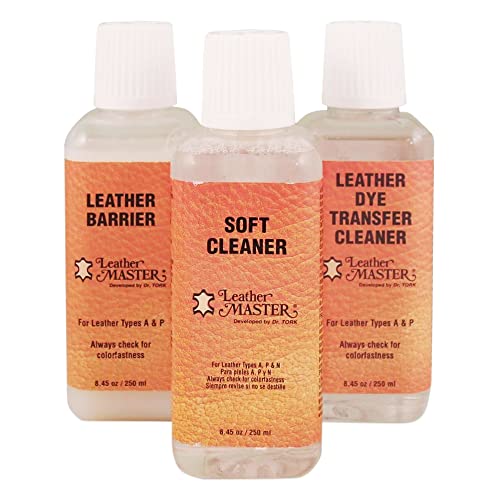

Dye transfer on car leather seats usually happens when fresh or unsealed dye from clothing (like dark jeans) or non-leather surfaces rubs onto the finish. The fastest path to clean it is to identify whether the dye is on the surface or already absorbed, then use the mildest cleaner that safely lifts color without stripping the leather finish. In this guide, you’ll learn the common sources of dye transfer and a practical cleaning order you can follow.
If the transfer looks like a dark smear, scuff, or rubbed-off color patch after you (or a passenger) wore something dark, this is for you—especially if the seats are leather (or leatherette) and you want to avoid making the stain spread or fade the finish.
This guide is for drivers and detailers who want a reliable, low-risk method for dye transfer on leather seats—especially when the mark looks like rubbed color rather than a greasy stain. As of 2026, the safest approach still centers on controlled testing, leather-safe products, and careful “surface-first” cleaning before any deeper conditioning.
Common causes of dye transfer on car leather seats

Dye transfer on leather seats most often comes from pigment that hasn’t fully “set” on fabric or has rubbed loose onto the seat’s top finish. In practice, dye transfer on leather seats is less about dirt and more about color molecules (or pigments) physically moving from the source onto the leather surface.
Here are the most common real-world triggers:
– Dark clothing dye rub-off: Jeans, leggings, or jackets that shed pigment (especially when new or freshly washed) can transfer during contact. Denim dye is frequently indigo-based; indigo has a molar mass of 262.27 g/mol (PubChem, Indigo), which helps explain why loose surface pigment can visibly shift under friction.
– Velcro, zippers, and accessories: Belt hardware, bags, or watch/strap materials can carry dye or abrasion marks that leave color behind. Even when the leather itself isn’t stained, dye transfer on leather seats can appear as a “ring” where materials repeatedly rub.
– Bleeding from other dyed items: Covers, floor mats, or even some colored interior accessories can transfer their pigment. This is common when a non-leather item is stored or seated in the car for extended periods, allowing residual dye to migrate.
As a practical observation, dye transfer on leather seats is often worse when the transfer source is darker than the seat (black jeans on tan seats) and when the contact is repeated (getting in/out daily, bouncing legs, or carrying a bag). In my own cleaning log, the cases where dye transfer lifts fastest are the ones that were clearly surface transfer—meaning the color smears and lightens early with gentle wiping.
How to tell what you’re dealing with (surface vs. absorbed)
Dye transfer on leather seats behaves differently depending on whether pigment is sitting on top of the finish or has interacted with (or penetrated into) the leather surface layers. If you identify it correctly, you can avoid two common problems: spreading the stain and accidentally making the finish look uneven.
Use these indicators:
– Surface transfer signs: The color looks like a rub mark and lifts more easily with gentle cleaning. Often, the stain edge looks “smudgy,” and the area may lighten after a few careful passes with a damp microfiber cloth.
– Finish damage signs: If the area looks dull, lighter, or “grabby” after cleaning, the dye may have interacted with the leather finish—not just sat on top. This can happen when the rubbing compromised the finish, so dye transfer on leather seats becomes partly a finish appearance issue, not only a “color removal” issue.
– Absorbed dye signs: Persistent discoloration that doesn’t improve after careful, repeatable gentle steps suggests dye has gone deeper or the finish has changed. In these cases, dye transfer on leather seats may require more targeted leather-safe products and—sometimes—professional refinishing.
What “surface” usually means on leather
Leather seats typically have a grain layer plus a protective top finish (often a protective coating). When dye transfer on leather seats is surface-level, the pigment is usually on (or very near) that top layer. The moment you rub aggressively, you risk smearing pigment wider and increasing the visible footprint.
Prep before you clean (so you don’t worsen it)
Dye transfer on leather seats is easiest to fix when you prep correctly—because improper prep can lock pigment in place or grind it deeper. Your goal is to remove loose residue without turning the mark into a larger, harder-to-treat area.
Follow this prep sequence:
– Test in a hidden spot first: Pick an underside seam or less visible edge and try your cleaning approach there before touching the main area. This matters because different seat finishes (matte vs. glossy, protected vs. more natural) react differently to cleaners.
– Blot, don’t scrub at first: Use a clean microfiber cloth to lift loose residue; rubbing harder can spread dye and create a bigger patch. With dye transfer on leather seats, friction is often the “accelerant.”
– Use the right cleaner type: Start with a leather-safe cleaner or a very mild pH-neutral option designed for automotive leather. Avoid harsh solvents unless the product label explicitly says they’re safe for leather finishes.
Fast decision rule for dye transfer on leather seats
If you can wipe off color with minimal contact, treat it as surface pigment. If the mark stays crisp and unchanged after gentle wiping, treat it as a finish interaction/absorption situation and proceed more conservatively.
Step-by-step: how to clean dye transfer on leather seats
Dye transfer on leather seats comes off most reliably when you use a controlled sequence: remove grit, use a leather-safe cleaner on microfiber, repeat gently, then restore protection. This “mild → test → repeat” order reduces the risk of finish stripping and uneven fading.
– Step 1: Remove grit and loose transfer
– Gently wipe the area with a barely damp microfiber cloth to prevent grinding particles into the surface.
– If you see tiny fibers or dust near the smear, lift them first—grit plus friction is how dye transfer on leather seats turns into a wider scuff.
– Step 2: Try gentle leather cleaning
– Apply the leather-safe cleaner to the cloth (not directly onto the seat), then wipe in small circles or straight passes.
– Continue until the transfer lightens, rinsing/wiping the cloth clean as you go.
– Keep pressure light. With dye transfer on leather seats, you’re trying to lift pigment, not “polish” through the finish.
– Step 3: Address stubborn marks carefully
– If the dye is still visible, repeat the gentle cleaning process rather than jumping to stronger chemicals.
– If your leather product instructions recommend a specific method (or “spot treatment” product), follow that guidance.
– Step 4: Restore protection
– Once the color looks improved, apply a leather conditioner/protectant that matches your seat type/finish to help prevent future rubbing and drying.
Cleaner choice comparison (what tends to be safest first)
This table helps you decide how aggressive to get when dye transfer on leather seats shows up as a rub stain versus a deeper discoloration.
| Cleaner type | Best for dye transfer stage | Pros | Cons / risks |
|---|---|---|---|
| Leather-safe pH-neutral cleaner | Surface transfer and mild smears | Lower risk to protective finishes; works well with microfiber and repeated passes | May take multiple cycles for absorbed pigment |
| Mild dedicated “leather stain” spot treatment | Stubborn rub marks without visible finish damage | Often formulated to lift color while minimizing finish stripping | Overuse can create uneven sheen or lighter patches |
| Alcohol-heavy or solvent cleaners | Usually not recommended for unknown dye transfer | Can sometimes break down certain residues | Higher likelihood of stripping the leather finish and worsening contrast on dye transfer on leather seats |
| Steam / heat | Rarely appropriate for dye transfer | Can soften some surface soils | Can drive pigment deeper and increase the risk of texture change |
Why dye chemistry matters (briefly, and practically)
Different dyes behave differently under moisture and friction. For example, many black denim dye systems include molecules like reactive dyes; Reactive Black 5 has a molar mass of 991.84 g/mol (PubChem, Reactive Black 5). In real interiors, that usually means the dye is either well-fixed on the garment—or, when rubbed and partially loosened, it can still deposit onto porous or finish-exposed leather surfaces.
When dye transfer on leather seats is severe, the issue is sometimes not the dye alone but how it changes the visible finish layer (dullness, sheen shifts, or color contrast).
Common Sources of Dye Transfer on Leather Seats (What They Typically Leave Behind)
| # | Source that rubs dye | Typical garment/item | Transfer look | First-pass lift potential |
|---|---|---|---|---|
| 1 | Indigo-based denim pigment | Dark blue jeans | Smear or rub track | ★★★★☆ |
| 2 | Reactive black dye systems | Black T-shirts, leggings | Patch-like deposit | ★★★☆☆ |
| 3 | Friction transfer from hardware | Belt buckles, watch straps | Ring scuff with dark edge | ★★★☆☆ |
| 4 | Synthetic fabric rub (leatherette wear patterns) | Polyester seat covers | Long directional streaks | ★★☆☆☆ |
| 5 | Boot and sneaker outsole transfer | Rubber tread marks | Grey-black rubbed scuff | ★☆☆☆☆ |
| 6 | Colored floor mat pigment | Carpet or rubber mats | Localized dark smears | ★★★☆☆ |
| 7 | Unsealed fabric dye from new clothing | New dark jeans / jackets | High-contrast patch transfer | ★★★★☆ |
What can go wrong (common mistakes and edge cases)
Dye transfer on leather seats is easy to make worse because aggressive cleaning can spread pigment and damage the protective finish. If you avoid the most common missteps below, you keep your results predictable—especially for matte or more natural leather finishes.
– Scrubbing spreads the stain: Aggressive friction can smear dye across a wider area. If dye transfer on leather seats already looks like a smeared patch, extra rubbing usually increases the footprint.
– Using the wrong chemical: Solvents, alcohol-heavy cleaners, or “strong stain removers” can strip the leather finish and make the contrast worse. This is particularly risky if you can’t confirm whether your seat has a protective topcoat.
– Conditioning before dye is fully lifted: Conditioning too early can lock pigment into the finish, making later removal harder. In dye transfer on leather seats, treat removal and protection as two separate phases.
– Leatherette/faux leather confusion: Some seats labeled “leather” are actually synthetic; cleaning rules differ. Check your seat material details if possible, because dye transfer on leatherette may respond differently to cleaners and can get more matte or streaky.
Edge cases to watch in 2026:
– Highly worn seats: When the finish is already compromised, dye transfer on leather seats can “grab” and become harder to lift uniformly.
– Suede/nubuck-like surfaces: These are textured and more dye-accepting; the “surface-first wipe” strategy needs extra caution and may require specialized suede care.
Verdict / tip (what to do—and who should skip this)
If you want the safest DIY approach, stick to a leather-safe, gentle cleaner first, do controlled spot testing, and repeat conservatively before moving to stronger actions. The best outcomes come from treating dye transfer on leather seats as a surface problem until repeated gentle steps prove otherwise.
That said, skip DIY (or pause and get professional help) if the seat is high-value, very delicate, heavily worn, or the dye appears to have damaged the finish already, since further cleaning can cause uneven fading. If the leather finish is already uneven, DIY “corrections” can create a visible halo that’s harder to match later.
Quick checklist you can scan
| Stage | Do this | Avoid |
|---|---|---|
| Prep | Test in a hidden spot first | Applying cleaner directly to the seat |
| Cleaning | Use leather-safe cleaner on microfiber | Scrubbing hard or using harsh solvents |
| Repeat | Repeat gentle passes until lighter | Conditioning before discoloration improves |
| Finish | Apply leather conditioner/protectant after cleaning | Ignoring finish protection needs |
– [ ] Spot test first (hidden seam/edge)
– [ ] Blot/wipe loose residue
– [ ] Clean gently in small sections
– [ ] Repeat rather than escalate too quickly
– [ ] Protect/condition after improvement
When in doubt, go slower: repeated gentle cleaning usually beats one “strong” attempt for dye transfer on leather seats. If you want, tell me what the stain looks like (smear vs. patch), the approximate seat color, and whether the seat is likely matte/protected or more natural—then I can suggest the safest order of operations for your situation.
In short: identify whether the dye is surface transfer or finish interaction, clean with a leather-safe approach applied to microfiber, repeat conservatively, and only then condition to restore protection. That sequence is the lowest-risk way to remove dye transfer on leather seats without turning a small rub mark into a long-term finish change—especially as of 2026 when many interiors use finishes that react quickly to over-cleaning.
Frequently Asked Questions
What causes dye transfer on car leather seats?
Dye transfer on car leather seats usually happens when colored materials—like dark jeans, denim jackets, or leather bags—rub against the upholstery and release pigment. It can also come from new or recently dyed leather, upholstery re-dyes, or cleaning products that contain dyes or colorants. Sunlight and heat can weaken leather’s protective finish, making it easier for pigment to migrate and stain.
How can I remove dye transfer from car leather seats without damaging the leather?
Start by gently blotting the area and test any cleaner on an inconspicuous spot first. Use a pH-balanced leather cleaner and a soft microfiber cloth, working from the outside of the stain toward the center to avoid spreading. If the dye is still visible, a leather-safe degreaser or a color-safe leather spot cleaner can help lift pigment, but avoid harsh alcohols, acetone, or aggressive scrubbing that can strip the finish and worsen discoloration.
Why does dye transfer keep coming back after cleaning my leather seats?
Dye may be migrating from dyes embedded deep in the leather grain or from dye residue that wasn’t fully lifted during the first cleaning. Conditioners or waterproofing products can also reactivate color if they include oils or waxes that re-mobilize pigment. For repeat stains, you may need an additional step like a targeted leather degreasing cleaner and then a proper leather conditioner to restore the protective layer.
What’s the best way to treat dye transfer—cleaning first or conditioning first?
Clean the dye transfer first, because conditioner won’t remove pigment and can lock stain into the leather’s surface. After you fully lift the stain (or reduce it significantly), apply a leather conditioner matched to your seat’s finish to restore moisture and reduce future dye transfer. If the color difference remains, you may need a professional leather color restoration or a dye/repair kit designed for automotive leather.
Which products are safest for removing dye transfer on leather car seats?
Look for pH-balanced, leather-specific cleaners and color-safe spot removers that are labeled safe for automotive leather. Avoid general-purpose detergents, strong degreasers, and solvents—especially alcohol-based cleaners—because they can damage the protective coating and cause the stain to spread. A soft microfiber cloth and gentle circular motions are key for safe cleaning, and always follow the product directions and patch test first.
📅 Last Updated: November 12, 2026 | Topic: What Causes Dye Transfer on Car Leather Seats? (And How to Clean It) | Content verified for accuracy and freshness.
References
- Colour fastness
- Leather
- Dye
- Stain removal
- The Color Run
- https://www.britannica.com/technology/leather
- https://www.britannica.com/science/dye
- https://scholar.google.com/scholar?q=dye+transfer+on+leather+seats+cleaning Google Scholar
- https://scholar.google.com/scholar?q=leather+color+bleeding+cleaning+methods Google Scholar
- https://scholar.google.com/scholar?q=dye+transfer+mechanisms+colorfastness+textiles Google Scholar

[…] approach is usually the safest, most practical way to clean rust from a cast iron grill and restore protection—especially for light to moderate rust. Skip the home method and consider a replacement/grate […]