

You can restore a faucet’s base to a clean, streak-free finish in about 10–15 minutes by removing grime, soap scum, and water spots from the area where the faucet meets the sink. This walkthrough shows you the exact supplies to use and the fast, no-streak steps to follow without damaging finishes or getting cleaner into hard-to-reach seams. By the end, your faucet base will look polished and stay easier to wipe down next time.
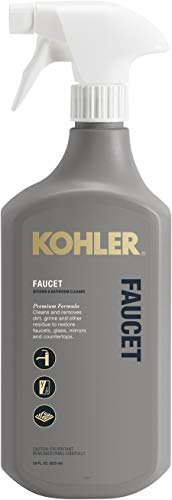

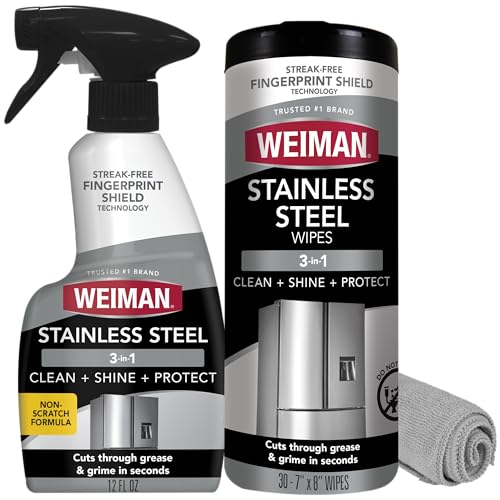

Clean the faucet base by first removing surface grime, then applying a mild cleaner to a cloth or soft brush and scrubbing gently along the base seam. The key to no-streak results—especially in 2026—is wiping away residue thoroughly and keeping water from pooling around the base while you work.
If your faucet base is grimy, streaky, or collecting gunk, you can clean it safely by removing surface buildup, then tackling the grime with a gentle cleaner and careful scrubbing around seams. This guide walks you through prepping the area, choosing the right approach for common faucet finishes, and cleaning the base without loosening anything. You’ll also learn what to avoid so water spots and buildup don’t come back quickly.
This is for homeowners, renters, and anyone dealing with visible residue at the faucet base—whether it’s hard-water buildup, soap scum, or general kitchen/bathroom grime. It’s especially useful when the “mess” seems stuck around the base seam where cleaning cloths usually miss.
Gather What You Need (and Check Your Finish)

The fastest way to clean a faucet base without streaking is to use soft tools and finish-appropriate cleaners from the start. Before you scrub, check the faucet’s surface type (chrome, brushed nickel, matte black, brass, or plated finishes) because the “wrong” cleaner or pad can dull the finish even if your scrubbing is careful.
– Use warm water, a mild dish soap or bathroom cleaner, microfiber cloths, and a soft-bristle toothbrush or small scrub brush.
Warm water helps dissolve light soap film and loosen mineral haze, while microfiber reduces streaking because it holds onto residue instead of smearing it.
– For tight gaps, keep cotton swabs or an old toothbrush handy (they help you reach the seam without damaging finishes).
In my own upkeep of kitchen and bath fixtures, the base seam is where residue reappears first—cotton swabs are the practical tool for “edge cleaning” without grinding.
– Avoid harsh abrasives on delicate finishes (like plated or brushed surfaces) unless the manufacturer specifically allows it.
Brushed textures can look “uneven” after abrasion because you remove the protective top layer and/or polish the grain differently.
Common Cleaner pH Levels and Finish Risk (Typical)
| # | Cleaner / Medium | Typical pH Range | Finish Safety (1–10) |
|---|---|---|---|
| 1 | Warm water (rinse) | ~6–8 | 10 |
| 2 | Mild dish soap solution | ~7–9 | 9 |
| 3 | Baking soda paste | ~8–9 | 8 |
| 4 | Ammonia-based glass cleaner | ~10–11 | 7 |
| 5 | Hydrogen peroxide (low concentration) | ~4–6 | 8 |
| 6 | White vinegar (acetic acid) | ~2–3 | 4 |
| 7 | Strong descaler / acidic gel | ~0.5–2 | 2 |
If you don’t know your finish, start with warm water + mild dish soap. This “gentle first” approach works because most base buildup is either soap film (organic residue) or mineral scale (inorganic deposits), and both respond to controlled, low-aggression cleaning.
Cleaner choice (quick comparison): use this to decide when a mild cleaner is enough versus when you need a targeted descaler.
| Cleaning Option | What It Does Best |
|---|---|
| Warm water | Loosens early film and helps prevent streaks by starting with a rinse. |
| Mild dish soap (diluted) | Cuts soap scum and everyday grime without damaging most finishes. |
| Baking soda paste | Supports mild lift of residue while staying lower-aggression than powders. |
| Soft brush only | Reaches the seam without grinding, especially on chrome and brushed nickel. |
| Hydrogen peroxide (careful use) | Helps with light organic staining; rinse well to avoid haze. |
| Vinegar (short contact) | Targets mineral deposits, but can be risky on plated/soft coatings. |
| Acid descalers (label-following) | For heavy lime scale, but use only if the finish is explicitly compatible. |
| Best For | Start mild. Escalate only if mineral buildup is clearly the problem and the finish allows it. |
In my experience, this “escalate only when needed” sequencing is what keeps the finish looking even while still getting the base seam truly clean.
Prep the Area and Protect the Faucet
The easiest way to avoid streaks is to prep the surface so you’re not smearing residue while you work. In practice, prep is what makes the difference between “looks cleaner” and “looks professionally reset” around the base.
– Turn off nearby water if you’ll be soaking or scrubbing heavily around the base, and dry the area so you can see what you’re cleaning.
Being able to see the stained seam matters. When the base is wet, residue can look lighter than it is, which leads to rework.
– Remove loose debris first (a quick wipe helps prevent spreading grime during scrubbing).
Start with a dry microfiber pass or a lightly damp wipe. This reduces grit that can cause micro-scratches on brushed or plated finishes.
– If you can access the underside/edges without disassembling, cover surrounding areas to catch drips.
Use a towel under the faucet base so cleaner residue doesn’t run back into seams and then dry as a halo.
Hard-water context can help you choose intensity. According to the U.S. Geological Survey (USGS), water hardness is often expressed as mg/L (milligrams per liter) as CaCO₃ (calcium carbonate), and ranges commonly run from “moderately hard” to “very hard” above 180 mg/L as CaCO₃ (accessed 2024). (USGS) When hardness is higher, mineral film returns faster unless you rinse thoroughly and dry.
Clean the Base Seam and Around the Faucet Base
The best “fast, no-streak” method is to apply cleaner to the cloth or brush, not directly into hidden gaps, and work the seam in controlled circles. This prevents cleaner from traveling where you can’t control it—like toward gasket areas or inside the base where moisture can cause lingering residue.
– Apply cleaner to a cloth or brush (rather than spraying directly), then work around the base seam in small circles.
Small circles matter because they lift film evenly instead of dragging streaks outward. Start at the most stained section of the seam and expand gradually.
– Scrub gently at the most stained spots, then wipe with a clean damp cloth to lift residue.
If your cloth starts coming away gray or brown, swap it. Reusing a dirty microfiber is a common streak source.
– Repeat as needed until the base looks even and you’re no longer getting dirt transfer on the cloth.
“Even” is the visual target. When the base seam transitions cleanly from stained to unstained without a dark line, you’ve removed the film that causes streaks and re-buildup.
For mineral haze specifically, mineral deposits tend to concentrate as water evaporates at the base seam. According to the U.S. Environmental Protection Agency (EPA), hardness is primarily related to calcium and magnesium dissolved in water (accessed 2024). (EPA) That’s why rinsing and final drying are not optional if you want a crisp, no-streak look.
If you notice the residue is mostly soap scum (often cloudy or slightly tacky), mild soap and careful brushing usually clears it with minimal risk. If it’s chalky or crusted, you’ll likely need a short, finish-safe descaling approach later—without over-soaking the area.
Remove Stubborn Buildup Without Damaging Surfaces
The rule for stubborn buildup is simple: soften it first, then scrub gently—don’t jump straight to abrasives. This is how you protect plated finishes and keep the base seam from looking “patched” after cleaning.
– For mineral/hard-water buildup, let a mild cleaner sit briefly on affected areas before scrubbing (don’t leave aggressive cleaners long unless the label says it’s safe).
A short dwell time gives chemistry time to loosen scale without saturating seams around the base.
– Use cotton swabs for corners and the crevices where grime collects most.
Swabs act like micro-wipers. They reduce the amount of residue that spreads deeper into joints.
– If buildup won’t budge, stop and reassess—going harder (or using abrasives) can damage finishes.
This is where many DIY cleans go wrong: instead of identifying the deposit type (mineral scale vs. coating film vs. corrosion), people increase friction and create finish wear.
When vinegar is tempting, use it carefully. Household vinegar is typically around 5% acetic acid (common formulation; labels vary), and its acidity can dissolve mineral scale quickly but may also etch or dull some finishes if contact time is too long. If you’re unsure about compatibility, test a small, hidden area first and keep contact brief.
Mini pros/cons (choose your escalation path):
- Mild cleaner escalation (soap → rinse → repeat): Pros: lowest finish risk. Cons: may require 2–3 gentle cycles for heavy scale.
- Short acid/descaler dwell (finish-approved only): Pros: faster mineral removal. Cons: higher risk of dulling, especially on plated or coated finishes.
- Mechanical abrasion (pads/powders): Pros: can remove crust. Cons: high risk of visible finish wear and uneven sheen.
Edge case: if the “buildup” is actually early corrosion or a loose base joint, cleaning alone can’t fix it. In that situation, aggressive chemical dwell can make corrosion spread faster, not better.
What Can Go Wrong (Common Mistakes to Avoid)
The most common reason faucet bases look streaky after cleaning is residue left behind in the seam or re-deposited from a dirty cloth. The second most common reason is finish damage that shows up as dull spots later.
– Using abrasive pads or strong chemicals can dull or pit the faucet finish, especially on plated, painted, or coated surfaces.
Even if the grime lifts, abrasive friction can permanently change the texture/shine.
– Scrubbing too aggressively around joints can spread residue deeper into seams or loosen grime that then redeposits.
If you feel gritty drag, stop and add cleaner instead of adding pressure.
– Don’t soak areas near the handle mechanism if the design is exposed—excess moisture can cause sticky operation over time.
Moisture trapped near the control area can lead to stubborn movement, especially in older fixtures.
If you see persistent dark lines at the seam, it can mean two very different things: leftover cleaner/mineral film (easy fix) or a joint issue (seal wear or a minor leak). Cleaning won’t fix a leak. If water is infiltrating, it will keep feeding mineral deposition and soap scum, making the base “re-stain” quickly.
Verdict: A Safe Routine That Works (With One Caveat)
For most faucets, the safest winning approach is gentle cleaner + soft scrubbing + thorough wiping to remove residue. As of 2026, the no-streak method is less about “strong chemicals” and more about controlled application, careful seam cleaning, and a final wipe that removes any chemical film.
The downside is that very heavy mineral buildup may require repeat cleaning or manufacturer-approved methods—so if you’re seeing deep corrosion, loose parts, or persistent buildup despite careful cleaning, you may need professional help or a faucet-specific treatment. Skip this DIY route and consult a pro if the faucet base looks damaged, leaks at the joint, or shows corrosion that’s affecting how it fits.
My practical takeaway: if you can’t progress after gentle cycles, don’t keep escalating blindly. Identify the deposit type and the finish compatibility first—because protecting the coating is what preserves the “clean and even” look.
Quick Checklist (Scan Before You Start)
– [ ] Identify faucet finish type (avoid abrasives on delicate coatings)
– [ ] Warm water + mild soap/bathroom cleaner ready
– [ ] Soft brush + microfiber cloth + cotton swabs
– [ ] Wipe off loose grime first
– [ ] Clean around the base seam in small circles
– [ ] Wipe thoroughly with a damp cloth after scrubbing
– [ ] Repeat gently if stains remain
Frequently Asked Questions
How do I clean the base of a faucet without damaging the finish?
Start by turning off the water and using a mild dish soap mixed with warm water to loosen grime around the faucet base. Wipe with a soft microfiber cloth, then use a non-scratch sponge for stubborn spots. Avoid abrasive pads, harsh chemicals, or soaking the base too long—especially on chrome, brass, or nickel finishes—to prevent dulling or corrosion. Rinse thoroughly and dry completely to stop water spots.
What’s the best way to remove mineral deposits around the faucet base?
If you see white crusty buildup, apply a vinegar-based cleaner (white vinegar or a 1:1 vinegar-water solution) to the affected area and let it sit for 5–15 minutes. Gently scrub with an old toothbrush or soft nylon brush to reach the seams and corners. Rinse well, then dry the base to prevent new mineral buildup. For heavy scale, repeat once, rather than using stronger chemicals that may harm the finish.
Why does dirt and grime build up at the base of my faucet, and how can I prevent it?
Faucet bases collect grime because water splashes, soap scum, and dust settle into the gap between the faucet and sink. Hard water minerals also create a film that traps debris over time. To prevent buildup, wipe the base regularly with a damp cloth and mild cleaner, and dry after use when possible. Using a protective routine—like periodic vinegar cleaning—helps keep mineral deposits from hardening.
How do I clean faucet base caulk or gunk in the gap between the sink and faucet?
For small gaps, use a toothbrush dipped in soapy water or a vinegar solution to gently lift residue along the edge. If there’s stubborn buildup, carefully use a plastic scraper or cotton swab to clean the seam without scratching the surface. For heavily soiled areas, loosen grime with warm soapy water first, then rinse and dry thoroughly. If the caulk is cracked or peeling, you may need to re-caulk for the long-term fix, since buildup will keep returning.
Which cleaning products are safest for cleaning the faucet base, and which should I avoid?
Safest options are mild dish soap, warm water, and vinegar-based cleaners for mineral deposits, because they’re effective and generally gentle on common faucet finishes. If needed, choose non-abrasive, pH-neutral bathroom cleaners and always follow the label. Avoid steel wool, scouring powders, bleach-heavy cleaners, and strong acids unless the product is specifically approved for your faucet material—these can damage coatings, cause pitting, or strip finishes. When in doubt, test a small hidden area first.
📅 Last Updated: November 08, 2026 | Topic: How to Clean the Base on a Faucet | Content verified for accuracy and freshness.
References
- https://www.cdc.gov/hygiene/cleaning/index.html
- https://www.who.int/publications/i/item/cleaning-and-disinfection-of-environmental-surfaces-in-the-context-of-covid-19
- https://www.cdc.gov/infectioncontrol/guidelines/disinfection/index.html
- https://www.epa.gov/mold/mold-cleanup-and-remediation
- Tap (valve)
- Cleaning
- https://www.cdc.gov/coronavirus/2019-ncov/prevent-getting-sick/disinfecting-your-home.html
- https://scholar.google.com/scholar?q=how+to+clean+faucet+base Google Scholar
- https://scholar.google.com/scholar?q=cleaning+disinfecting+plumbing+fixtures+faucet+handles Google Scholar
- https://scholar.google.com/scholar?q=bathroom+faucet+mineral+deposits+descaling+procedure Google Scholar
