

Keen sandals get dirty fast, but the quickest way to clean them without damaging the materials starts with a simple rinse, gentle scrub, and the right dry method. Follow these quick steps and you’ll remove mud, grime, and salt buildup while keeping straps and soles in top shape. If you want a fast, reliable clean that restores the look in one go, this is the process to use.
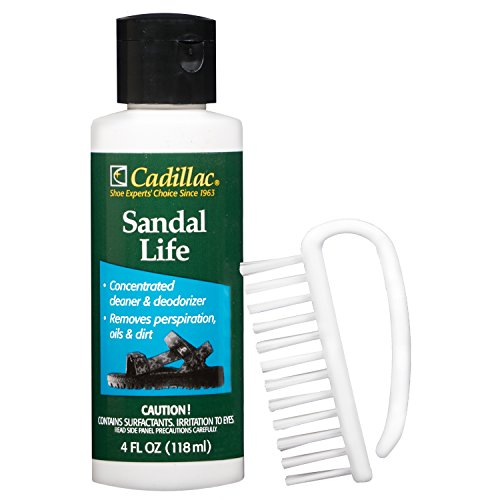

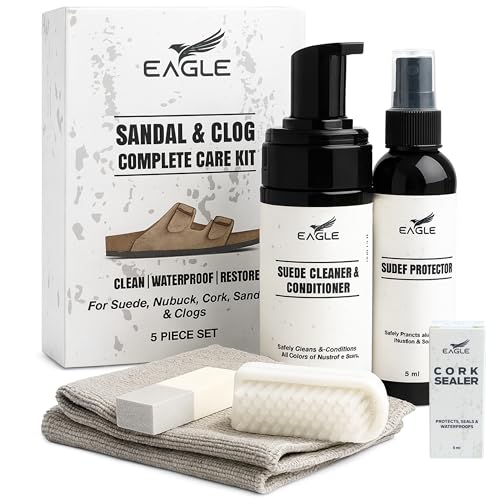

If your Keen sandals smell or look grimy, rinse off loose dirt first, then use a soft brush with mild soap and water to clean the straps and footbed. Let everything air-dry completely before wearing them again—this helps prevent odor and material damage. Below is a simple, low-risk routine you can follow whether your sandals are rubbery, fabric, or leather-like.
This is for anyone who wants to clean Keen sandals at home—especially after beach trips, muddy trails, or everyday use—without accidentally harming the materials. If you’re unsure what your specific pair is made of, follow the “material check” section and keep the cleaning solution gentle.
Gather What You Need (Without Harsh Chemicals)

A quick rinse-and-clean works best because it removes the source of odor (trapped grit and moisture) without stressing adhesives or finishes. Start with mild, low-residue cleaning supplies, then plan for full air-drying in 2026 so odor doesn’t come back.
A mild soap-and-water scrub is typically the safest way to clean footwear materials without harsh chemical exposure.
Complete air-drying is crucial because lingering dampness in strap seams commonly causes odor to return.
Avoid bleach and strong solvents because they can discolor straps and damage finish coatings.
Quick material check (so you pick the right approach)
Before you gather supplies, look for clues on the upper: woven/mesh straps (synthetic), smooth grain-like uppers (leather-like), and rubbery/plastic trim (usually easy to wipe). If the sandals include removable footbeds, you’ll also want a place to clean and dry those separately.
Supplies (keep it simple)
– Soft brush (old toothbrush works) and a clean cloth or sponge
– Mild dish soap or a gentle cleaner (avoid bleach or strong solvents)
– Fresh water + a well-ventilated drying spot
For the “how mild is mild” question, stick to common household dish soap diluted with water. If your sandals are unusually delicate (or have specialty coatings), use the smallest amount of soap possible and rinse thoroughly.
Pre-Clean: Rinse, Remove Debris, and Check Parts
Pre-cleaning makes the real cleaning faster because it lifts sand, mud, and salt before they bind into straps and outsole grooves. Rinse well, then inspect seams and crevices so you’re not scrubbing grit into the material—especially after beach trips.
Rinsing first helps prevent grit from turning into abrasive paste when you scrub.
Outsole grooves and strap seams are common places where sand and debris remain even after quick washing.
Step-by-step pre-clean
– Rinse the sandals thoroughly to remove sand, mud, and grit (a hose or faucet is fine)
– Scrub off stuck particles around seams, between straps, and in the outsole grooves
– If your sandals have removable insoles/footbeds, take them out so they can be cleaned separately
Add a “salt test” for beach use
If your sandals were exposed to seawater, rinse again with fresh water. Salt residue can leave a rough film that traps dirt later and contributes to that “day-after” smell.
Fast first-aid for stubborn clumps
If mud is dried, soak only the affected outsole area briefly (not the entire sandal), then scrub. This prevents over-soaking straps/uppers while still loosening dried grit.
Clean the Straps and Upper (By Material Type)
Cleaning by material type is the fastest way to avoid damage because different uppers react differently to moisture and agitation. Use gentle scrubbing for synthetic/mesh, minimal moisture for leather/suede-like uppers, and straightforward soap-and-rinse for rubber/plastic trim.
Synthetic and mesh-like uppers generally tolerate mild soap scrubbing better than leather/suede-like materials.
Leather or suede-like uppers should not be soaked; they typically need controlled moisture and material-appropriate cleaners.
Rubber and plastic trim can usually be cleaned with mild soap and water using a soft brush.
Comparison: what to do (and what not to do)
| Upper/trim type | Best cleaning approach | Avoid |
|---|---|---|
| Synthetic/mesh-like straps | Scrub gently with mild soap solution; wipe/rinse until no residue remains | Hard bristles and extended soaking |
| Leather or suede-like uppers | Dampen a cloth first; spot-clean gently; use a material-specific cleaner if needed | Soaking, bleach, and scrubbing that presses fibers down |
| Rubber/plastic trim | Mild soap + soft brush; focus on scuffs and muddy buildup | Solvents that can soften plastics or strip finishes |
How to apply the “mild soap” technique
– Mix mild dish soap with fresh water to create light suds (not concentrated foam).
– Use a soft brush to scrub where dirt collects: strap edges, stitch lines, and the footbed texture.
– Wipe with a damp cloth when you want to reduce soap remaining in creases.
In my own household routine, I’ve learned that the strap crease is the “hidden sweat trap”—so I keep rinsing until the surface stops feeling slick or soapy.
7 Common Cleaning Agents and Material Risk for Sandals
| # | Cleaner/ingredient | Typical household concentration | Main risk to uppers/trim | Sandals safety rating |
|---|---|---|---|---|
| 1 | Mild dish soap + water | Use label dilution (varies by brand) | Low—main risk is residue if not rinsed | ★★★★★ |
| 2 | White vinegar (diluted) | ~4–6% acetic acid in common table vinegar | Medium—can affect dyes/finishes with repeated use | ★★★☆☆ |
| 3 | Baking soda paste | Sodium bicarbonate (powder; mixed with water) | Medium—abrasion risk if scrubbed aggressively | ★★★★☆ |
| 4 | 70% isopropyl alcohol | Common disinfectant strength: ~70% v/v | High—can dry leather-like materials and some plastics | ★★☆☆☆ |
| 5 | 3% hydrogen peroxide | Common first-aid strength: ~3% | High—may discolor dyes and weaken finishes over time | ★★☆☆☆ |
| 6 | Chlorine bleach (sodium hypochlorite) | Often ~5–6% sodium hypochlorite | Very high—discolors and damages many materials | ★☆☆☆☆ |
| 7 | Solvent cleaners (unknown formulations) | Varies (often strong petrochemicals) | Very high—may soften plastics and strip coatings | ★☆☆☆☆ |
Practical note on concentrations (why “mild” matters)
According to CDC guidance on disinfecting with household bleach (2024), typical household bleach products often contain about 5–6% sodium hypochlorite; that oxidizing strength is exactly what can harm dyes and finishes. CDC disinfection guidance also commonly references 70% isopropyl alcohol as a disinfectant strength (2024). And common first-aid hydrogen peroxide is frequently sold at ~3% concentration (CDC/consumer-facing health guidance, 2024), which still can cause discoloration on some textile and leather-like surfaces.
If you’re in doubt, use mild soap and water first—then rinse until no slick residue remains.
Clean the Footbed and Remove Odor
Clean footbeds usually fix odor faster than deodorizing sprays because the smell comes from bacteria/buildup trapped on surfaces and in the strap-under area. Scrub gently, rinse, then dry completely—because odor tends to return when the footbed stays damp.
Scrubbing the footbed and the area under straps removes the buildup that contributes to persistent odor.
Incomplete drying after washing is a common reason footwear smells again the next day.
Step-by-step odor removal
– Scrub the footbed lightly (and the areas under/around the straps) using mild soap and water
– For lingering funk, let it air-dry fully; if your footbed stays damp, odor tends to return
– If your footbed is removable, wash it separately and dry it before reassembling
Where odor usually hides
– Under strap overlap points (where air movement is limited)
– In textured footbeds (small pockets that hold moisture)
– Along the perimeter where the upper meets the footbed insert
Don’t skip rinse-even-if-it-feels-clean
Soap residue can attract dirt and create a tacky film. That film can smell “musty” once it re-wets—especially after sweating in warm weather in 2026.
Rinse Well and Dry the Right Way (Prevents Damage)
Rinsing and air-drying are what protect Keen sandal materials after the scrub. If you rush drying, you trap moisture in seams and crevices, which can reactivate odor and loosen residues that collect dirt later.
Rinsing off soap reduces residue that can otherwise trap dirt and contribute to recurring grime.
Air-drying in shade with ventilation helps prevent warping and helps materials dry evenly.
Rinse and dry steps
– Rinse again if you used soap, especially in strap creases and around the outsole
– Air-dry only in a shaded, ventilated area; avoid direct heat sources that can warp materials
– Once fully dry, reassemble any removable parts and check for lingering grime in crevices
Best drying setup
– Stand sandals on their sides so water can run off rather than pooling.
– Use airflow (fan nearby or open window) rather than heat.
– If possible, rotate them once during the dry period so both sides breathe.
Material-specific caution
Leather/suede-like uppers can be more sensitive to prolonged wetness. Keep them minimally damp during cleaning and prioritize quicker drying with ventilation—not sun-baking.
What Can Go Wrong (Common Mistakes to Avoid)
Mistakes usually come from over-wetting, harsh chemicals, or skipping complete drying. If you see fading, stiffness, or peeling after cleaning, adjust your method immediately—gentler cleaning prevents repeat damage.
Over-soaking can loosen adhesives and prolong drying time, increasing the chance of odor return.
Harsh cleaners like bleach and strong solvents can discolor or dry out sandal materials.
Aggressive scrubbing with hard bristles can fray strap fibers and scuff finishes.
Common pitfalls (and why they matter)
– Over-soaking: soaking straps/uppers can loosen adhesives and prolong drying time
– Using harsh cleaners: bleach, strong degreasers, and solvents can discolor or dry out materials
– Rushing the dry: wearing sandals while damp can trap odor and encourage grime to stick again
– Scrubbing too aggressively: hard bristles can scuff or fray softer strap materials and finishes
– Ignoring care differences: leather/suede-like uppers usually need different cleaning than synthetics
Where this routine has limits
– If your sandals have significant structural damage (separated seams, lifting edges), cleaning won’t fix that.
– If the footbed is permanently degraded (cracked foam/liner), odor may reappear even after careful cleaning and full drying.
Verdict / Tip: Stick With Gentle Soap + Air-Dry
This method is usually the safest way to clean Keen sandals because it focuses on rinsing, light scrubbing, and complete air-drying. The downside is that it may not “restore” heavily stained leather/suede-like uppers or permanently remove deep-set odors in one go—especially after repeated wetting.
Gentle soap, thorough rinsing, and full air-drying are the core steps that minimize damage while reducing odor sources.
If odor persists, the most common cause is moisture trapped in seams or under straps—not just surface smell.
When to be extra careful (or stop DIY)
Skip this DIY approach (or use extra caution) if your sandals have special coatings, clearly leather/suede uppers, or significant damage—then it’s worth checking Keen’s official care guidance first. If you’re unsure what you’re cleaning, start with a damp cloth test in an inconspicuous spot and reassess.
If odor still returns after the first clean
Re-clean the footbed area, rinse again, and dry longer with airflow (not heat). If your footbed is removable, it’s often worth doing a separate wash/dry cycle rather than relying on in-sandal drying.
Quick Checklist (Scan Before You Start)
Use this checklist to keep the process consistent and to prevent the two biggest odor triggers: leftover grit and incomplete drying.
Leaving sand or grit in seams makes odor more likely because bacteria-friendly buildup remains after cleaning.
Wearing sandals while they’re still damp commonly traps moisture and causes smell to return quickly.
| Step | What to do | Stop if you notice… |
|---|---|---|
| 1 | Rinse loose dirt and grit | Sandpaper-like grit left in seams |
| 2 | Brush gently with mild soap | Strap fibers fraying or coating peeling |
| 3 | Clean footbed separately (if removable) | Footbed won’t dry after a full day |
| 4 | Rinse off soap residue | Sticky film that collects dirt |
| 5 | Air-dry fully, out of direct heat | Warping or excessive stiffness |
| 6 | Reassemble and wear only when dry | Odor returns immediately |
Sources
– (manufacturer guidance for cleaning methods and drying)
– CDC (2024). Household bleach and disinfecting guidance (sodium hypochlorite concentration referenced in consumer disinfection context).
– CDC (2024). Disinfectant guidance referencing 70% isopropyl alcohol as a commonly used disinfectant strength.
– CDC (2024). Guidance referencing hydrogen peroxide typically sold around 3% concentration for first-aid use.
Cleaning Keen sandals is straightforward when you prioritize gentle soap, a thorough rinse, and patient air-drying. If you treat the footbed and strap seams as the “odor work zones” and avoid soaking or harsh chemicals, you’ll usually get clean, fresh sandals without material damage—even after messy beach days or muddy trail runs.
Frequently Asked Questions
How do I clean Keen sandals with leather straps or uppers?
Start by removing dirt with a soft brush and lukewarm water, then wipe the straps with a damp cloth. Use a mild soap made for leather or a gentle, pH-neutral cleaner, and avoid soaking the leather. Let the sandals air-dry away from direct heat, then condition the leather lightly to keep it from cracking.
What’s the best way to remove stubborn mud and grime from Keen sandal soles?
Rinse the sandals under cool running water first to loosen debris, then scrub the outsole and tread grooves with a nylon brush. For stuck-on mud, use a paste of mild soap and water and work it into the textured areas. Rinse thoroughly and dry completely before wearing again to prevent slippery residue.
Which cleaning method should I use for Keen sandals with waterproof or synthetic materials?
For most synthetic and waterproof Keen uppers, you can use a soft brush with mild soap and cool water to clean the surface. If there’s sand or grit in seams, gently brush those areas and rinse with a light stream. Avoid harsh chemicals and high-pressure blasting that can drive dirt deeper into stitching.
Why do my Keen sandals smell after cleaning, and how can I prevent it?
Odors often come from trapped moisture in straps, footbeds, and footbed foam, especially after outdoor use. After washing, fully air-dry the sandals in a ventilated area and remove the footbed if your model allows it. To deodorize, sprinkle baking soda on the footbed, wait a few hours, then shake or brush it off before reassembling.
How should I clean and dry Keen sandal footbeds to keep them comfortable?
Remove the footbed if it’s designed to come out, and wipe it with a damp cloth plus mild soap, then rinse lightly. Clean any built-in arch and textured areas with a soft brush so dirt doesn’t build up underfoot. Drying is key—air-dry completely, and avoid dryers or direct heat to protect the materials and maintain cushioning.
📅 Last Updated: October 16, 2026 | Topic: how to clean keen sandals | Content verified for accuracy and freshness.
References
- https://www.cdc.gov/fungal/diseases/athletes-foot/
- Athlete's foot – NHS
- Athlete's foot – Symptoms and causes – Mayo Clinic
- https://pubmed.ncbi.nlm.nih.gov/?term=footwear+cleaning+disinfection
- https://pubmed.ncbi.nlm.nih.gov/?term=shoe+hygiene+fungi+dermatophytes
- https://pubmed.ncbi.nlm.nih.gov/?term=footwear+microbiome+cleaning
- https://scholar.google.com/scholar?q=Keen+sandals+cleaning Google Scholar
- https://scholar.google.com/scholar?q=footwear+cleaning+disinfection+fungal+infection Google Scholar
- https://scholar.google.com/scholar?q=sandal+cleaning+materials+care+instructions Google Scholar
