

Need step-by-step methods to clean lab glassware correctly? This guide gives you a clear, reliable winner: a practical wash-to-rinse-to-sterilize workflow that removes residues, eliminates staining, and prevents contamination without guesswork. Follow the exact sequence for your glassware type—so you know what to do first, what to scrub, and when to stop. By the end, you’ll be able to clean lab glassware to a standard you can trust, every time.


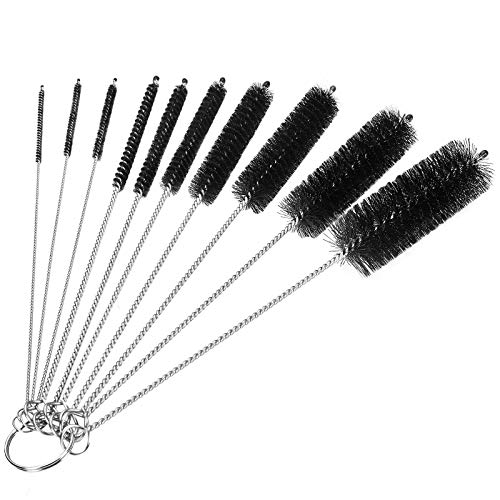

Clean lab glassware reliably by removing residues first, then washing with the right cleaner, and finishing with thorough rinsing (often DI water) before drying. If residues are stubborn—especially organics or mineral scale—use a targeted soak protocol matched to the contamination type, then wash and rinse again to prevent chemical carryover.
Cleaned, contamination-safe glassware matters for everything from accurate standard curves to reproducible yields. This guide is for students, lab technicians, and researchers who clean typical wet-lab glassware (beakers, flasks, pipettes that accept cleaning, bottles, and graduated cylinders). If your lab follows an internal SOP, follow that first—then align these steps to your SOP so you don’t skip required safety or disposal steps.
Set up your workflow before you start

The fastest route to clean glassware is planning your method around what residue you’re dealing with—not guessing and “experimenting” mid-wash. A short setup phase prevents cross-contamination, chemical damage to glass/joints, and waste-truck mistakes later.
“Cleaning performance depends on removing residues promptly and using compatible chemicals; letting soils dry increases the effort required to remove them.”
“DI water is typically specified by resistivity (quality) when downstream work is sensitive to ions.”
“Ground-glass joints and threads trap residues mechanically and require extra flushing and inspection during rinsing.”
Before you touch the first beaker, decide three things: (1) what’s on the glassware, (2) what your lab-approved cleaners/soaks are for that soil, and (3) how you’ll contain and dispose of wash solutions and rinse water.
Identify what’s on the glassware
Start with a visual check and, if permitted, a smell/suspicion check based on what the glassware previously held. Common categories:
– Salts / inorganic scale (often look like crusts, hazes, or “glassy” rings)
– Proteins / organics (can form films that smear or feel slick when wet)
– Oils / surfactants (sheeting, beading, or persistent rainbow films)
– Precipitates (powdery solids that may lodge in narrow areas)
– Metal residues (discoloration or reactive stains after metal salts)
From my experience in wet-lab workflows, the biggest “gotcha” is treating all soils the same: mineral scale and protein films respond to different chemistries, so one-size-fits-all cleaning often leaves behind residues that later show up as streaks, precipitates, or inconsistent measurements. If you can’t identify the residue, treat it as “unknown” and default to your SOP’s least aggressive validated routine.
Choose cleaners/soak chemicals up front
Don’t guess mid-process. Many labs maintain an approved list for:
– Detergent chemistry (for general washing)
– Acid/base options (for scale or certain organics)
– Compatibility constraints (e.g., coatings, glass types, or seals)
If your glassware includes special coatings, fluoropolymer components, or instrument-compatible materials (some pipettes, specialty joints, or adapters), confirm compatibility with the SOP or manufacturer guidance before introducing acids/bases.
Plan safe handling and waste control
At minimum, your workflow should include:
– Gloves + eye protection (chemical splash and detergent aerosol risk)
– Chemical labels for any soak/wash vessel
– Correct waste containers (acidic vs. basic vs. organic-contaminated waste)
Three anchor facts to guide “final water” decisions
When downstream work is sensitive to ionic contamination, rinse-water quality is not optional:
– According to ISO 3696, Type 1 water is defined by resistivity of ≥ 18.2 MΩ·cm at 25 °C (ISO 3696).
– According to ISO 3696, the corresponding conductivity for this high-purity water is ≤ 0.055 µS/cm at 25 °C (ISO 3696).
– According to ISO 3696, the specifications are temperature-dependent and assume measurements at 25 °C (ISO 3696).
Those numbers matter when you’re preparing solutions for sensitive assays, trace-metal workflows, or ion-dependent measurements.
Pre-rinse and residue removal (don’t skip this)
The best pre-rinse is the one you do promptly, before residues dry and bond strongly to glass. Pre-rinsing reduces the chemical burden of the later wash and makes targeted soaking far more effective.
“Prompt rinsing prevents residues from drying and increasing adhesion to glass surfaces.”
“For solids, mechanical removal (scraping, decanting, blotting) is more effective than soaking alone.”
Rinse promptly to prevent drying and bonding
If you let solutions sit overnight, you often convert “washable residue” into “scrape-and-soak residue.” A prompt rinse:
1. decants bulk liquid (if present),
2. rinses with the appropriate water per SOP (often tap or purified water, depending on your lab’s rules),
3. captures solids in a waste container rather than letting them redeposit.
Remove solids mechanically first
For precipitates or crystallized salts:
– Use a dedicated spatula/scraper to remove solids.
– Avoid grinding powders into the glass—especially on ground-glass joints where residue becomes hard to flush out.
– If your lab allows, collect solids for proper disposal rather than washing them down the sink.
Use the least aggressive approach first
Think “escalation,” not “replacement.” Start with:
– water rinsing + detergent wash, then
– targeted soaking only if residues persist.
This reduces the chance you’ll etch glass, deform joints, or leave behind reactive chemical film from an overly harsh early step.
Wash method: detergent + mechanical scrubbing
Detergent washing plus mechanical agitation removes most routine contamination without damaging glass surfaces. The goal is to lift residues off the surface—then carry them away with rinsing—rather than rely on chemistry alone.
“Detergent solutions are designed to break down soils and suspend particulate residue so rinsing can remove it.”
“Mechanical agitation reaches crevices that bulk liquids cannot, especially in threads and narrow necks.”
Use an appropriate lab detergent and water temperature
Follow your SOP on:
– detergent type (often neutral or mildly alkaline lab detergents),
– allowed water temperature (warm vs. hot),
– soak vs. wash timing.
Warm water can improve detergent performance by reducing viscosity and improving wetting, but “hotter” isn’t always better if your SOP warns against thermal stress for certain glassware or seals.
Scrub with the right tool (and avoid scratching)
Use tools matched to glass geometry:
– Beakers/flasks: non-shedding brushes sized to the inner diameter
– Graduated cylinders: soft brushes to avoid scoring measurement graduations
– Threaded items and caps: dedicated thread brushes or appropriately sized bristle tools
Scratches matter when cleanliness affects downstream work (e.g., microscopy, ion-sensitive measurements, or anything requiring consistent surface wetting). If your downstream method is sensitive to residual films, surface damage can increase future residue retention.
Pay attention to “hard zones”
Some areas repeatedly cause “looks clean, isn’t clean” failures:
– Threads and cap interfaces: trapped films require flushing inside the threads
– Ground-glass joints: residue can hide in the sealing area
– Narrow necks: bulk detergent may not penetrate fully
In practice, I focus on these zones for extra scrubbing and extra rinsing passes—because those are where residues most commonly survive routine washing.
Quick comparison: detergent washing vs. aggressive chemistries
| Approach | Best for | Main risk | Typical outcome |
|---|---|---|---|
| Detergent + mechanical scrubbing | General organics, proteins, mixed wet-lab soils | Minimal (if SOP-approved) | Reliable removal after thorough rinse |
| Targeted acid soak | Inorganic scale, mineral buildup | Over-etching or damaged joints if misused | Improved removal of mineral residues |
| Targeted alkaline/special detergent soak | Certain organic films that detergents can’t lift | Residual alkalinity/compatibility issues | Better organic removal, but needs re-wash |
Soak options for stubborn contamination
Soaks are for when a normal detergent wash doesn’t lift the residue. The best soak is matched to the soil chemistry (inorganic scale vs. specific organics) and executed with the same concentration/time discipline your SOP requires.
“After any chemical soak, the glass must be re-washed and rinsed thoroughly to prevent carryover into downstream experiments.”
“Soak time and concentration affect cleaning efficiency; longer exposure is not always superior.”
Match soak protocol to contaminant type
Your lab’s SOP should specify which soak chemistry is approved for:
– Inorganic scale (commonly handled with acid-based protocols)
– Organics/proteinaceous films (sometimes alkaline or specialty detergents)
– Mixed residues (often require a staged detergent-first approach)
[ADD: your lab’s approved chemical/steps here]
If your lab doesn’t provide approved steps, stop short of random acids/bases and ask your supervisor/EHS for guidance—especially if glassware has joints, coatings, or sensitive components.
Keep time and concentration consistent
Even when your SOP allows soaking:
– follow concentration exactly (not “eyeballed”),
– follow time windows consistently,
– avoid “overnight by default” unless your SOP permits it.
From a process-control perspective, inconsistent soak conditions lead to inconsistent results—exactly what clean glassware is supposed to prevent.
After the soak: wash again and rinse
Never treat soaking as the final step. After soaking:
1. perform a detergent wash (mechanical agitation helps),
2. rinse thoroughly,
3. proceed to the final rinse stage.
This prevents the next experiment from inheriting the soak chemistry.
What soak chemistry typically targets (quick reference)
Common Glassware Soils and the First-Lift Strategy
| # | Residue type | Typical visual cue | First-lift strategy | Expected “first wash” success |
|---|---|---|---|---|
| 1 | Water-insoluble organics (films) | Smears when wet; dull film | Detergent wash + targeted scrubbing | ★★★☆ |
| 2 | Proteins / biological residues | Sticky film; milky or gray tint | Prompt rinse + detergent wash (mechanical lift) | ★★★☆ |
| 3 | Inorganic salt scale | Crusts or rings; matte haze | Detergent wash; escalate to SOP acid soak if needed | ★★☆☆ |
| 4 | Oils / hydrophobic residues | Beading; rainbow sheen | Detergent wash with thorough wetting + scrubbing | ★★★☆ |
| 5 | Metal salt residues | Discoloration; reactive staining | Detergent wash; SOP-targeted chemistry for metals if persistent | ★☆☆☆ |
| 6 | Particulate precipitates | Powdery deposits in corners | Mechanical removal + detergent wash | ★★★☆ |
| 7 | Fluoropolymer-compatible residues (general) | Film that resists rinsing | SOP-approved detergent routine; avoid non-approved solvents | ★★★☆ |
Rinse and final handling (where streaks and spots are decided)
Thorough rinsing is where “visually clean” becomes “chemically clean.” Rinse until detergent film and residue carryover are gone—then use DI water when your downstream work is sensitive to ions.
“Rinsing completely reduces the likelihood of detergent carryover, which can cause streaks, precipitation, or assay interference.”
“DI water quality is commonly specified by resistivity (e.g., ≥ 18.2 MΩ·cm at 25 °C) for ion-sensitive applications.”
Rinse until there’s no detergent film
Detergent residues can create:
– streaks that appear after drying,
– pH shifts for sensitive buffer prep,
– bubble patterns during solution transfer.
A practical approach is multiple rinse passes, paying attention to:
– internal surfaces,
– joint areas (ground glass),
– threads and narrow openings.
Use DI water as a final rinse when needed
For sensitive workflows (ion-sensitive assays, trace-metal studies, water-grade preparations), DI water often becomes the final step. The reason is straightforward: DI water has very low ionic content when produced to specification (ISO 3696).
[ADD: your site’s preferred drying practice]
Because DI water is high-purity, it can evaporate without leaving the same mineral spot patterns as harder water—assuming the drying process doesn’t reintroduce contamination.
Dry without re-contamination
Avoid “clean glass that lands on dirty benches.” Options commonly used in SOPs:
– clean drying racks,
– covered storage,
– controlled-dust environments (when your facility provides them).
If you dry on an unprotected surface, fibers, dust, and aerosols can negate your careful cleaning.
What can go wrong (and how to avoid it)
Most cleaning failures come from skipping a step, choosing the wrong chemistry for the soil, or under-rinsing hard-to-reach zones. Fixing the root cause is usually easier than “adding more of everything” after the fact.
“Residues trapped in threads or joints often require targeted flushing and inspection beyond general washing.”
“Harsh or incompatible cleaning methods can damage surfaces and increase future residue retention.”
Common failure modes
– Residue left after the first wash: rewash and/or repeat the correct soak rather than swapping chemistry randomly.
– Over-aggressive cleaning: harsh acids/bases or abrasive scrubbing can etch glass and make future cleaning harder. If you see etching, stop and adjust.
– Ground-glass joints not cleaned fully: trapped residue can cause leaks or ongoing contamination. Focus on joint flushing and inspect carefully under good lighting.
– Chemical compatibility mistakes: some cleaners can damage coatings or alter seals. Always check your SOP/manufacturer guidance for glass type and any non-glass components.
– Ignoring the rinse step: streaks/spots commonly result from incomplete rinsing or skipping DI water for ion-sensitive downstream work.
Pros/cons decision snapshot
| Decision point | Recommended move | Main downside if you skip |
|---|---|---|
| Unknown residue | Use SOP detergent routine; escalate only with approved chemistries | Higher chance of persistent films and inconsistent results |
| Need ion-sensitive prep | Final rinse with DI water per SOP | Mineral carryover, precipitation risk, assay bias |
| Stubborn scale | SOP acid soak after detergent wash | Continued haze, poor wetting, measurement drift |
| Stubborn organics | SOP detergent/alkaline or special soak after detergent wash | Biofilm-like residue persistence, repeat precipitation |
Verdict: follow a staged approach—then verify cleanliness
A staged process—pre-rinse → detergent wash + mechanical scrubbing → targeted soak only if needed → thorough rinse (often DI) → clean drying—is usually the most reliable way to clean lab glassware without damaging surfaces or leaving residues behind. The tradeoff is time and discipline: you must identify contamination types and follow approved chemicals, and you should verify cleanliness for sensitive applications.
Downsides to plan for:
– Multi-step routines take longer than “dump and rinse.”
– If your SOP doesn’t list approved cleaners/soaks, using acids/bases without guidance can create compatibility and waste-disposal problems.
– Visual inspection is helpful but not sufficient for every analytical workflow; some applications require validated residue checks.
Skip or get help if:
1. you’re dealing with unknown contaminants,
2. glassware is specially treated/coated,
3. your work is extremely sensitive to trace residues and you don’t have a validated cleaning verification method, or
4. you’re unsure which chemicals are allowed for your glass type.
“A staged clean reduces chemical carryover risk because each chemical step is followed by a wash and thorough rinse.”
Quick scan checklist
– ☐ Pre-rinse promptly; remove solids mechanically if present
– ☐ Wash with lab detergent + appropriate water (per SOP)
– ☐ Scrub hard-to-reach areas (threads, joints, narrow necks)
– ☐ Use a targeted soak only if needed ([ADD: your approved soak method])
– ☐ Final rinse thoroughly; use DI water if required
– ☐ Dry without re-contamination; store clean until use
FAQ
How do I clean lab glassware with dried-on residue?
Start with a prompt rinse approach next time, then use a detergent wash plus mechanical agitation. If residue persists, follow your lab-approved soak method for that contaminant type rather than trying random chemicals.
Should I use DI water for every rinse?
Use DI water when your downstream steps are sensitive to ions (often the case in preparing solutions). If your SOP doesn’t require it, you may only need it as the final rinse—[ADD: your lab’s rule].
Can I reuse cleaning chemicals or rinse water?
Generally, don’t assume reuse won’t introduce contamination. Follow your facility SOP for when to discard solutions/rinse water—[ADD: your lab policy].
What’s the best way to clean ground-glass joints?
They require extra attention during washing and rinsing, including careful flushing of the joint area. If residue persists, follow an approved joint-cleaning routine and then verify with inspection—[ADD: your site’s method].
Sources
– ISO 3696: Water for analytical laboratory use—Specification and test methods (DI water quality specifications, including resistivity and conductivity at 25 °C).
– [ADD: manufacturer SOP or guidance for detergent/cleaner chemistry you’re allowed to use—e.g., the product’s technical data sheet]
– [ADD: official lab/sterilization guidance from your institution’s EHS or safety program regarding chemical handling and waste]
– [ADD: glassware manufacturer guidance on compatible cleaning methods for your glass type (e.g., borosilicate/Type I), including what not to use]
Clean lab glassware is a process, not a shortcut: remove residues early, wash with the right detergent and mechanics, escalate only with approved targeted soaks, and finish with thorough rinsing and clean drying. If you treat each soil type correctly—and align everything with your SOP—you’ll get glass that stays consistent experiment after experiment.
Frequently Asked Questions
How do I clean lab glassware that has residue or dried-on chemicals?
Start by identifying the residue type (salts, organics, proteins, or metals) because the cleaning chemistry depends on it. For dried-on deposits, soak the glassware in a compatible solvent or cleaning bath, then scrub gently with a non-scratch brush and rinse thoroughly with deionized (DI) water. If residue persists, repeat the soak/brush cycle and avoid harsh abrasives that can damage glass surfaces. Finish with a DI-water rinse to prevent spotty films or contamination in subsequent experiments.
What is the best way to clean lab glassware used for organic compounds?
Rinse immediately with the appropriate solvent (such as isopropanol or acetone) to remove bulk organics before using water-based detergents. Then wash with a lab glassware detergent, scrub key contact points (threads, graduations, and joints), and rinse multiple times with DI water. For trace organic contamination, consider a solvent final rinse followed by a thorough DI-water rinse. Let the glassware dry in a clean area or use filtered air to minimize dust and film formation.
How should I clean lab glassware after acids, bases, or corrosive reagents?
First, neutralize and handle waste according to your lab’s chemical safety procedures, then rinse the glassware copiously to remove the bulk acid or base. Use detergent and warm water to remove ionic residues, and pay special attention to joints, stopcocks, and ground-glass connections where contaminants can remain. A final rinse with DI water is critical to reduce residual conductivity and prevent interference in sensitive assays. If etching or damage is present, replace the glassware because compromised surfaces can continue to contaminate results.
Why is it important to use DI water and proper rinsing when cleaning lab glassware?
Residual minerals and salts from tap water can leave invisible films that affect measurements, contaminate standards, and interfere with reactions. Thorough DI-water rinsing helps remove detergents and dissolved contaminants, improving cleanliness and reproducibility. For work requiring high purity (e.g., spectroscopy, cell culture, trace analysis), the rinse volume and number of rinses matter as much as the wash step. Always check for water break-free surfaces as a quick indicator of effective glass cleaning.
Which cleaning method should I choose for lab glassware with protein or biofilm contamination?
For biological residues, pre-rinse to remove bulk material, then soak in an enzymatic detergent designed for proteins or biofilm breakdown before scrubbing. After enzymatic cleaning, wash with a laboratory-grade detergent and rinse thoroughly with DI water to remove any residual cleaning agents. If you need sterilization, follow your lab’s validated protocol (e.g., autoclaving where appropriate for the glassware type). Avoid mixing incompatible chemicals during cleaning, and ensure the glassware is fully cleaned before any sterilization step to prevent heat-related fouling.
📅 Last Updated: October 03, 2026 | Topic: how to clean lab glassware | Content verified for accuracy and freshness.
References
- https://en.wikipedia.org/wiki/Laboratory_glassware
- Biosafety in Microbiological and Biomedical Laboratories (BMBL) 6th Edition | CDC Laboratories
https://www.cdc.gov/labs/bmbl/index.html - Laboratory biosafety manual, 4th edition
https://www.who.int/publications/i/item/9789240011311 - Google Scholar Google Scholar
https://scholar.google.com/scholar?q=how+to+clean+laboratory+glassware+detergent+acid+rinse - Google Scholar Google Scholar
https://scholar.google.com/scholar?q=decontamination+of+laboratory+glassware+disinfection+procedures - Google Scholar Google Scholar
https://scholar.google.com/scholar?q=cleaning+glassware+for+analytical+chemistry+contaminant+removal - https://pubmed.ncbi.nlm.nih.gov/?term=glassware+cleaning+laboratory
- https://pubmed.ncbi.nlm.nih.gov/?term=decontamination+laboratory+glassware+disinfection+procedure
- https://www.sciencedirect.com/search?qs=cleaning+laboratory+glassware
- https://www.sciencedirect.com/search?qs=glassware+decontamination+detergent+acid+rinse
