

Want to know how to clean maple furniture with beeswax polish step by step? This guide delivers the fastest, safest method to remove everyday grime, revive dulled finish, and protect the wood without over-waxing or streaking. Follow the sequence exactly and you’ll get a clean, even glow that holds up to regular use.
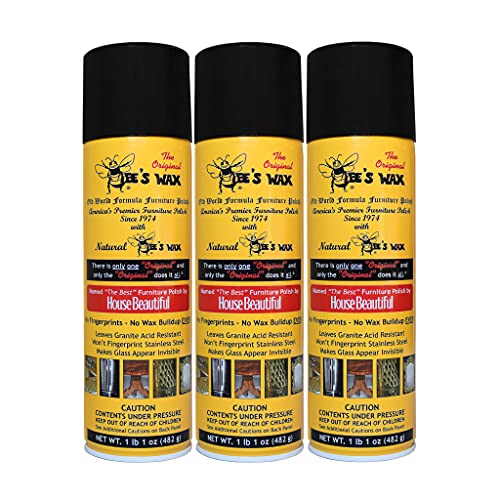



Maple furniture usually cleans best by dusting first, then wiping with a lightly damp cloth, drying completely, and finishing with a thin layer of beeswax polish. For the safest, most even shine in 2026, apply wax sparingly and buff until it looks uniform—because thick, sticky buildup is what most commonly leads to haze and tackiness.
This is for anyone trying to remove grime and restore a soft glow on maple furniture that already has a protective finish (like varnish/lacquer or an existing wax/oil layer). If your piece is bare/raw wood or has peeling damage, beeswax may not be the right fix.
Who this method fits (and when it doesn’t)

Beeswax polish is a good routine-care option when your maple already has a stable topcoat and you’re mostly dealing with dust, fingerprints, and light film. It’s not a repair solution for failing finishes, exposed fibers, or any situation where moisture and trapped residue can worsen existing problems.
– Best for maple with a protective topcoat where you’re doing routine cleaning + light polishing.
– Not ideal for unfinished/bare maple or furniture with flaking/peeling finish—wax can trap problems and make them harder to remove.
– If you’re unsure what finish your table has, do a small test in an inconspicuous spot first.
Beeswax polish is designed to condition and protect finished wood surfaces, not to seal raw wood the way a film-forming finish does.
If the existing varnish/lacquer is failing (peeling, lifting, or powdering), wax can mask symptoms and complicate inspection and removal later.
A spot test in a hidden area is the fastest way to confirm whether the surface turns tacky, hazes, or smears before you treat the whole piece.
In my experience with finish-care troubleshooting (especially on older maple sideboards), the “wrong time” to wax is when the topcoat is already breaking down—so you’re better off stopping early and diagnosing first.
Also, because maple is relatively hard but still can be scratched by embedded grit, your first question should be: “Is this just surface soil, or is the finish itself compromised?” Hard maple’s mechanical durability is high (hard maple is often cited at about 1,450 lbf Janka hardness), but that doesn’t prevent abrasion from sand-like particles trapped during wiping. According to the USDA Forest Service, Wood Handbook (hard maple properties), hard maple is commonly listed around 1,450 lbf (approx. 6,450 N).
This means your cleaning technique (dust removal first) matters more than your wax choice.
Get ready: supplies and workspace
Have your supplies staged before you start, because the key to a clean beeswax finish is dry surface prep and controlled application. In 2026, the most “DIY-proof” setup is two cloths—one for cleaning/wax application and one dedicated to buffing.
– Soft microfiber cloths/rags, plus a second clean cloth for buffing (separate “apply” vs “buff” cloths helps).
– Mild cleaner (or just water if the surface is only dusty) and a dry cloth to remove moisture.
– Beeswax polish and ; work in a well-ventilated area.
Using separate “apply” and “buff” cloths reduces cross-contamination that can leave streaks or make wax look patchy.
A well-ventilated workspace is important if your beeswax polish contains solvents or fragrance carriers (common in some liquid polishes).
Before you open any container, confirm the moisture state of the environment. Wood finish performance and surface acceptance depend heavily on moisture content; according to the USDA Forest Service, Wood Handbook (wood moisture content concepts), interior equilibrium moisture content is commonly in the ~6–12% range (varies by climate and HVAC). If your home is extremely humid or your furniture was recently moved from a damp area, give it time to acclimate—then clean and wax only when the surface feels dry to the touch.
Quick supply spec (what to avoid)
– Avoid abrasive pads, textured scrubbers, and anything that can shed fibers.
– Avoid “all-purpose degreasers” unless your wax manufacturer and the existing finish explicitly approve them—some residues can interfere with wax uniformity and adhesion.
Clean maple before you wax (don’t skip this)
You get the best beeswax result when you remove dust and film first, then ensure the surface is fully dry before wax touches it. If you trap moisture under wax, you’re more likely to end up with haze, smearing, or a finish that feels tacky longer than it should.
– Remove surface dust with a dry microfiber cloth to prevent scratching during the wipe.
– For smudges/film, wipe with a lightly damp cloth (use minimal cleaner if needed), then wipe again with a dry cloth so moisture doesn’t get trapped under wax.
– Let the surface fully dry before applying polish—wax over damp areas can haze or smear.
Beeswax polish bonds most reliably to clean, dry surfaces; cleaning first prevents dust particles from becoming “scratch points” during buffing.
A second dry wipe after the damp wipe is a practical way to prevent trapped moisture from turning the sheen cloudy.
Letting the wood finish return to a fully dry state before waxing helps minimize streaking and wax bloom.
Here’s the logic chain that tends to work on sealed maple:
1) Dust removal prevents abrasion.
2) Light cleaning removes body oils and grime that otherwise block even wax distribution.
3) Complete drying prevents haze and prevents wax from moving like a slurry.
What “lightly damp” really means
In practice, “lightly damp” is a cloth you can wipe with confidently without leaving visible wet spots. If you see droplets, pooling, or longer-than-normal drying times, you’ve used too much water or cleaner.
Also, maple’s density and hardness mean you can scrub—don’t. Even though hard maple is durable, a scratch isn’t erased by wax; wax only hides lightly, and only temporarily, depending on the surface condition.
Apply beeswax polish the right way
For an even, warm glow, apply a very thin coat and buff until the surface looks uniform (not glossy-wet). Beeswax softens as it warms, so controlled, sparing application is what prevents buildup and sticky residue.
– Apply a very thin coat using a soft cloth; more wax usually means more buildup (and extra haze) later.
– Work in small sections and follow the grain so you don’t end up with streaks.
– Let the wax set briefly until it looks less glossy/duller (follow your polish label for timing), then buff with a clean cloth.
A thin beeswax film is easier to buff out than a thick coat, which is the most common cause of tackiness and haze.
Following the wood grain during application reduces cross-grain streaking that shows up under side lighting.
Why temperature matters (and when it goes wrong)
Beeswax is a solid wax with a melting/softening range in the low 60s °C. According to , beeswax typically softens around ~62–64°C (about 144–147°F).
That matters because in a warm room, wax can spread too easily—so you still need sparing application and timely buffing.
Pro tip: “less wax, more buff”
If the wax looks glossy immediately after application, that’s usually normal. The goal is not “maximum shine,” it’s “maximum evenness.” If it starts accumulating in corners, folds, or edges, wipe off the excess and re-buff.
Buff, protect, and maintain the finish
Buffing is what turns a wax layer from “product sitting on top” into “conditioning that looks finished.” Maintenance is then about keeping dust from turning into grit and keeping wax buildup under control with light, periodic reapplication.
– Buff firmly but gently to even out the sheen; use a fresh cloth if the first one starts spreading residue.
– Keep wax buildup under control by cleaning dust often and reapplying only when the surface stops looking refreshed ().
– Avoid soaking the furniture—extra water is a common reason waxed surfaces look cloudy.
Buffing evenly reduces visible streaks and helps remove excess wax before it settles into uneven patches.
Regular dust removal slows buildup because wax polish doesn’t “erase” gritty contamination—it can only distribute it.
Maintenance cadence that prevents buildup
Instead of waxing on a fixed calendar date, watch the visual cue: once the surface stops looking “refreshed” after dusting and gentle wiping, that’s usually the time to reapply lightly.
Also, avoid sitting the furniture in front of strong heat vents. Rapid drying and thermal cycling can make some topcoats more prone to minor clouding or to uneven wax behavior over time.
What can go wrong (and how to avoid it)
Most wax problems come from one of three causes: too much product, insufficient drying, or incompatibility with cleaners/finish residues. The good news is that most of these issues can be prevented by tightening your prep and using compatible cleaning methods.
– Sticky or cloudy finish: usually from too much wax, not drying the surface first, or incomplete buffing.
– Uneven sheen: often caused by applying wax unevenly or missing spots during dusting/initial cleaning.
– Finish incompatibility: some cleaners (especially harsh degreasers or oily/waxy products) can interfere with adhesion and cause smearing—use only what’s compatible with your polish and your existing finish.
– Peeling/spotty topcoat: if the finish is already failing, wax can make it harder to assess—address the underlying damage instead.
Cloudiness is most often a “prep error” (wax on damp surface) or a “process error” (too-thick coat that didn’t get fully buffed).
Uneven sheen typically tracks back to uneven dust removal or uneven application—side lighting makes these differences obvious.
Beeswax vs. other common approaches (quick contrast)
If your finish is already failing
If you see flaking, lifting, or spotty clouding that looks structural rather than just surface smudging, wax may conceal the evidence but not fix the root cause. In that case, you’ll usually need finish-specific cleaning and possibly refinishing rather than ongoing wax application.
Verdict: worth it for routine maple care
Beeswax polish is a solid choice for regular cleaning and gentle shine on sealed maple, especially when you want a warm, natural look. The trade-off is that wax can build up over time and isn’t the right strategy for bare/unsealed wood or furniture with peeling finish—those cases usually require a different product pathway.
If you want the easiest “safe” path: clean with a damp (not wet) cloth, dry fully, apply wax thinly, then buff to a uniform sheen.
For finished maple, a properly applied thin beeswax layer can improve appearance without disturbing the integrity of varnish/lacquer.
Avoid using wax as a substitute for repairing peeling or failed topcoats, because the underlying problem can continue expanding.
From a practical care perspective, beeswax works best when you treat it like a periodic finishing “top-up,” not a one-time coating meant to last indefinitely. Maple furniture care in 2026 tends to reward small, frequent interventions—especially when sunlight, kitchen grease, and tracked dust are part of your daily reality.
7 Routine Scenarios for Beeswax Polish on Sealed Maple (Practical Fit)
| # | Scenario | Maple finish condition | Best use | Routine suitability |
|---|---|---|---|---|
| 1 | Dust + fingerprint film | Sealed and intact | Quick refresh + light buff | ★★★★☆ |
| 2 | Smudges on table edges | Varnish/lacquer intact | Thin coat on edges; buff fully | ★★★★☆ |
| 3 | Light water spots (finish not damaged) | Surface intact, not peeling | Clean-dry-wax to restore uniform sheen | ★★★☆☆ |
| 4 | Seasonal dry-looking finish | Sealed; matte areas only | Reapply sparingly; avoid stacking layers | ★★★★☆ |
| 5 | Kitchen haze from frequent use | Topcoat intact | Use gentle cleaner first; wax thin | ★★★☆☆ |
| 6 | Older wax buildup | Sealed but layered with wax | Reduce frequency; focus on thorough buffing | ★★☆☆☆ |
| 7 | Peeling/lifting finish areas | Topcoat failing | Skip waxing; evaluate repair/refinish | ★☆☆☆☆ |
Quick scan checklist (save this)
| Step | What to do | Stop if you notice… |
|---|---|---|
| Dust | Dry microfiber pass first | Scratches or grit you missed |
| Wipe | Lightly damp cloth (minimal cleaner) | Water pooling or long drying times |
| Dry | Dry cloth wipe + fully dry | Smears from moisture |
| Wax | Thin layer with soft cloth | Thick residue forming quickly |
| Set + buff | Buff until even sheen | Haze that won’t improve after buffing |
| Maintain | Dust often; reapply sparingly | Sticky surface or gummy buildup |
Can I use beeswax polish on bare/raw maple?
You can, but it’s not the same as protecting sealed finishes; beeswax may not behave like a true barrier coating, and it won’t address structural staining or surface prep issues the way a dedicated finish or sealer would. If the wood is raw or looks thirsty, use a product specifically intended for bare wood—and do a hidden spot test first.
What cleaner is safe to use before beeswax polish?
Use the mildest option that actually removes grime: a lightly damp cloth with minimal cleaner, then a dry wipe to remove moisture. If your wax label specifies “compatible cleaners only,” follow it; strong degreasers and oily cleaners are common reasons for smearing or uneven sheen.
Why does my wax look cloudy or feel sticky?
Cloudiness and tackiness usually come from applying too thick a layer, buffing incompletely, or waxing over a damp surface. Reduce wax quantity next time, ensure full drying, and buff with a clean cloth until the sheen looks consistent.
How often should I reapply beeswax polish?
Start with the reapplication guidance on your specific polish label, then adjust based on how quickly the surface loses its refreshed look (). In 2026, many owners get the best results by reapplying sparingly rather than “deep waxing” too frequently.
Conclusion
Beeswax polish can restore a soft glow on sealed maple when you follow a simple, reliable sequence: dust first, wipe lightly, dry completely, apply wax thinly, and buff to an even sheen. In 2026, the biggest success factor isn’t the polish itself—it’s avoiding excess product and trapped moisture, and skipping waxing when the existing finish is peeling or failing.
Frequently Asked Questions
How do I clean maple furniture before applying beeswax polish?
Start by dusting the maple furniture thoroughly with a soft microfiber cloth to remove grit that can scratch the finish. Wipe the surface with a slightly damp cloth (or a mild, pH-neutral wood cleaner) and immediately dry it with a clean towel. Avoid soaking the wood, especially around joints and carvings, because excess moisture can raise the grain.
What’s the best way to remove dust, grime, and fingerprints from maple using beeswax polish?
For everyday dust and light grime, use a gentle cleaner first and dry completely. If fingerprints are oily, clean with a lightly damp cloth using a mild soap solution, then dry; beeswax polish works best as a protective layer rather than a heavy-duty degreaser. Once the surface is dry, apply a thin coat of beeswax polish to the maple and buff until it looks even and glossy.
Which cleaners should I avoid on maple furniture before using beeswax polish?
Avoid harsh chemicals like ammonia-based cleaners, abrasive scrubbers, and furniture polishes that contain silicones if you plan to use traditional beeswax. Also steer clear of soaking with water or using too much cleaner, since maple can swell or develop a roughened grain. Stick to pH-neutral wood cleaners or minimal soap-and-water methods, then dry thoroughly before polishing.
How do I apply beeswax polish to maple furniture for a smooth, streak-free finish?
Apply beeswax polish in a thin, even layer using a soft lint-free cloth or wax applicator pad. Let it sit for a short time according to the product directions, then buff gently with a clean cloth in circular or straight-line motions. For streaks, the fix is usually to reduce the amount applied and buff longer with a dry cloth until the wax is evenly distributed.
Why does maple furniture sometimes look cloudy or sticky after waxing, and how can I fix it?
Cloudiness or stickiness often happens when too much beeswax is applied or when the surface wasn’t fully cleaned and dried before polishing. To fix it, remove excess wax with a clean cloth lightly dampened with mineral spirits meant for wood (test in an inconspicuous spot first), then wipe with a dry cloth. After it’s fully dry, reapply a thinner coat of beeswax polish and buff well to restore clarity and protection.
📅 Last Updated: October 24, 2026 | Topic: How to Clean Maple Furniture With Beeswax Polish | Content verified for accuracy and freshness.
References
- beeswax wood coating – Search Results – PubMed
- beeswax protective coating wood surface – Search Results – PubMed
- Beeswax
- Wood finishing
- https://en.wikipedia.org/wiki/Paste_wax
- Wood finishing
- https://en.wikipedia.org/wiki/Furniture_restoration
- https://scholar.google.com/scholar?q=how+to+clean+wood+furniture+with+beeswax+polish Google Scholar
- https://scholar.google.com/scholar?q=beeswax+wood+coating+furniture+maintenance Google Scholar
- https://scholar.google.com/scholar?q=beeswax+paste+wax+wood+surface+cleaning+care Google Scholar

[…] (check your table’s finish instructions in the sources below). According to , wiping with a lightly damp cloth and drying promptly is preferred over […]