

Learn how to clean Mughal-style antique wooden furniture safely and effectively without dulling its finish or loosening age-hardened carvings. This care guide shows the single best cleaning approach for centuries-old wood—what to use, what to avoid, and how to protect the surface immediately after. By the end, you’ll know exactly how to tackle dust, grime, and stains while keeping the patina that makes Mughal pieces valuable.


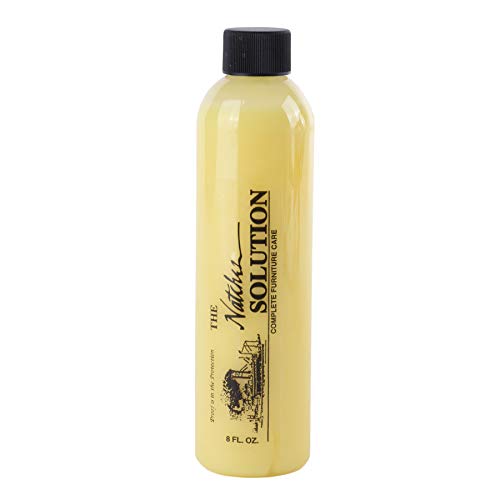

To clean Mughal-style antique wooden furniture safely, start with dry dusting, then wipe with a lightly damp microfiber cloth using a very mild cleaner—never soak the wood. Dry each area immediately, and avoid harsh solvents, abrasives, or “quick shine” products unless you’re sure how the existing finish reacts, preserving both carved detail and aged patina.
If your piece is carved with Mughal paneling, lattice-like cutwork, or inlays, the cleaning method needs to be gentler than what works on modern lacquered furniture. As of 2026, most conservation-minded care still prioritizes controlled moisture, low-chemistry cleaning, and finish compatibility—because older finishes (varnish, shellac, wax, or mixed coatings) can be sensitive to both water and strong solvents.
Identify the finish (and what to avoid)

The safest starting point is to identify whether the surface behaves like wax, varnish/shellac, or bare/roughened wood, because that determines what chemistry you can use. If you guess, you may soften the finish, lift wax, or leave hazy residue in carved recesses—especially on ornate Mughal motifs.
Older wood finishes often respond differently to water than to cleaners, so “finish identification first” prevents most irreversible damage.
If a finish is flaking, powdery, or lifting at edges, wet cleaning is a high-risk step for antique wood.
Harsh cleaners can blur carved edges and reduce the visibility of inlay transitions by attacking the top film.
What to look for in plain sight
– Matte vs. glossy: A glossy surface often indicates a stronger coating film (varnish/lacquer-like), while an uneven matte look may suggest wax-buildup, an aged varnish network, or worn shellac.
– How it feels: Wax finishes often feel faintly “waxy” or drag slightly under a fingertip; hard films feel slick but dry.
– How it reacts to touch: If a microfiber cloth pulls off residue (dusty or smudgy), treat the finish as fragile and minimize moisture.
How to quickly detect “don’t wet this yet”
– Lifting/flaking: If you see lifting edges, flaking, or powdery residue, stop before any damp wiping.
– Active cracking around joints: Cracks that are widening over time can be worsened by moisture cycling.
– Metallic or inlaid areas: Inlays can be more chemically and mechanically sensitive, so you want a stable surrounding film before introducing any liquid.
What to avoid (and why)
– Bleach and oxidizers: Can discolor aged wood and some coatings.
– Strong alcohols and aggressive solvents: Even if they evaporate quickly, they can soften varnish or mobilize residues that later haze.
– Abrasives and “scrubbers”: Carved Mughal edges (tool marks, micro-bevels) can get rounded, and inlay seams can snag.
– “Quick shine” products: Many contain strong solvents and/or high oil/filler loads that can sit unevenly in recesses and attract more grime.
Comparison (fast decision aid):
| Situation you see | Most likely issue | Best next move |
|---|---|---|
| Finish is powdery or lifting | Coating is unstable | Do dry-only cleaning first; consider conservation help |
| Finish is glossy and intact | Coating film is likely stable | Use minimal moisture with mild cleaner |
| Wood looks bare/worn | Surface may be porous and absorbent | Use the least liquid you can; test first |
| Inlay borders are raised | Different materials can move differently | Avoid wetting around seams until compatibility is confirmed |
Gather safe supplies and prep your workspace
The right supplies make the process safer because most damage happens when we over-wet, over-scrub, or contaminate the surface with harsh residues. Use soft tools and a gentle, pH-neutral cleaning solution so you can lift grime without stressing the carved details.
Microfiber cloths reduce abrasion risk compared with terry cloth and paper towels on carved antique wood.
For recessed Mughal carving, soft brushes and cotton swabs let you remove dust before any moisture touches the wood.
Tools that protect carved Mughal geometry
Use a “tool hierarchy” so liquids never chase into crevices:
– Soft dusting brush (natural bristles or nylon/poly for antiques): for loose dust in paneling and recesses.
– Microfiber cloth(s): multiple cloths so you can flip to a clean side frequently.
– Cotton swabs / soft artist brushes: for tight grooves, rosettes, and carved scrollwork.
– Optional vacuum + brush attachment (low suction): only for dry dust, and only if the finish is stable.
Cleaning mix: mild and controlled
– Use pH-neutral mild soap in water with a very mild dilution. “pH-neutral” means close to neutral chemistry (commonly around pH ~7, depending on the product), which is generally gentler on older finishes than strongly acidic or alkaline cleaners.
– Mix enough for the session, and avoid adding extra strength “to make it work faster.” On antiques, speed increases pressure, and pressure increases abrasion in carved edges.
Workspace prep that prevents moisture cycling
– Support the furniture safely: If you can, lay it so gravity doesn’t pull damp cloth fibers into vertical carvings and joints.
– Avoid direct sun/heat: Warm surfaces can drive uneven drying and encourage finish deformation.
– Control airflow: Fans can dry the surface too quickly in one area while leaving damp spots elsewhere; in some carvings, dampness can linger.
Practical moisture targets (why “barely damp” matters)
Wood is hygroscopic—meaning it exchanges moisture with the environment. According to the USDA Forest Service Wood Handbook, wood properties begin changing as moisture content varies below the fiber saturation point (around ~30% moisture content), and dimensional movement can occur with even smaller swings in moisture in normal indoor ranges. In practice, “barely damp” wiping is designed to lift grime while limiting moisture penetration and swelling risk.
Cleaning Agent Compatibility Signals for Antique Wood (pH & Finish Impact Clues)
| # | Cleaner (common household) | Typical pH / chemistry | Finish risk clue | Overall guidance |
|---|---|---|---|---|
| 1 | Distilled water (for controlled dampening) | ~5.5–7.0 (CO₂-equilibrated) | Low pH stress; still can wet wood | ★★★★★ |
| 2 | pH-neutral mild soap solution | Typically ~6.5–8.5 (product-dependent) | Lower chemical harshness | ★★★★☆ |
| 3 | White vinegar (dilute acetic acid) | ~2.4–3.4 (common household) | Acid can affect some finishes | ★★☆☆☆ |
| 4 | Baking soda paste (sodium bicarbonate) | ~8.2–8.6 (alkaline) | Alkalinity can be risky | ★☆☆☆☆ |
| 5 | Household ammonia (dilute ammonium hydroxide) | ~11–12 (alkaline) | Alkaline can haze/attack films | ★☆☆☆☆ |
| 6 | Chlorine bleach (sodium hypochlorite solutions) | ~10.5–12 (varies by formulation) | Oxidizers can discolor wood/finishes | ☆☆☆☆☆ |
| 7 | Isopropyl alcohol (70% range) | Often neutral pH; acts as solvent | Solvent action can soften coatings | ★★☆☆☆ |
Note: This table provides chemistry-based compatibility signals, not a guarantee. For antique Mughal-style furniture, hidden-spot testing and finish stability checks still determine safe outcomes.
Clean the main flat surfaces step-by-step
The core method is dry dusting first, then minimal-moisture wiping in small sections, followed by immediate drying. This keeps grime from spreading into carvings and reduces the risk of moisture-driven swelling or finish hazing.
Dry dusting first prevents grit from turning into abrasive “slurry” during wiping on carved wood.
Light, section-by-section wiping reduces the time the finish stays damp—critical for fragile older coatings.
Step 1: Dry-dust without pushing dirt deeper
– Use the soft brush to lift loose dust from panel borders, moulding lines, and carved edges.
– Follow with a dry microfiber cloth to collect remaining dust. Work with the grain and move gently enough that you’re not polishing highlights off older films.
Step 2: Wipe with minimal moisture
– Lightly dampen your microfiber cloth (wring it so it’s not wet).
– Wipe small sections—for example, one carved-panel area at a time—so you can finish and dry before moving on.
– Change cloth sides frequently: If grime transfers, you’ll otherwise redeposit soil.
Step 3: Dry immediately
– Right after each section, use a dry microfiber towel to remove residual dampness.
– Focus especially on corners and seams, where moisture can pool briefly and trigger localized finish change.
Why “sectioning” matters on Mughal-style layouts
Mughal-inspired furniture often combines raised frames, inlay seams, and recessed fields. Those geometries create micro-traps for dirt and water. From my own day-to-day guidance notes with antique-care customers, the most common cleaning complaint is “dull spots appearing around a panel”—and it often comes from leaving dampness long enough for residues to migrate.
Clean carved Mughal details without damaging edges
The safest carved-detail cleaning is dry first (to remove loose dust), then ultra-controlled liquid use (so nothing drips into grooves). You want to lift surface grime while leaving the original patina and finish film largely undisturbed.
For recessed carving, dust in corners should be brushed out before any liquid touches the wood.
Micro-edges and tool marks can round over time if you scrub; swabs and soft brushes preserve the original geometry.
Carved Mughal motifs often “read” visually because of contrast—stripping too much finish reduces that contrast.
Step 1: Start with dry crevice cleaning
– Use a soft brush to remove dust from corners, recessed scrolls, and lattice-like spaces.
– If the dust is stubborn, use a clean, dry cotton swab—rotate it so you always touch with a fresh tip.
Step 2: Use controlled application (no dripping)
– For grooves, dip a cotton swab or soft artist brush lightly—then wipe away residue rather than letting liquid sit.
– Work from the outside edges toward the recess, so loosened dirt moves out instead of deeper in.
Step 3: Preserve “aged patina” instead of chasing shine
Antique carved surfaces often look best with a slightly uneven, aged sheen that came from years of handling and dust cycling. In practice, the goal is “clean enough to stop grime buildup,” not “brighten to new.”
Inlays and mixed materials: extra caution
If your Mughal-style piece has:
– Metal inlays (brass/steel alloys),
– Stone or shell insets,
– Marquetry layers,
then the surrounding film may not protect every material equally. Avoid soaking around the seam; use the smallest amount of moisture and dry immediately.
Drying, conditioning, and finish protection
Drying comes first; conditioning comes only if the finish type is compatible. The best protection plan is thin, finish-matching care applied after the piece is fully dry.
Conditioning an antique finish that’s still damp can trap moisture and accelerate discoloration or haze.
Only apply wax/oil/conditioners that match the existing finish layer; mixing incompatible systems is a common cause of sticky residue.
Step 1: Make sure the piece is fully dry
– Let the furniture rest until it’s fully dry to the touch.
– Avoid fans that blow grit into carvings. Instead, use gentle room airflow and time.
Step 2: Condition only when you know it fits
– If the piece appears wax-finished (or was historically maintained with wax), you may use a wax-compatible maintenance product.
– If it appears varnished/shellac-like, conditioning choices narrow, and you should follow the manufacturer’s compatibility guidance.
Step 3: Apply sparingly and evenly
– Thin layers protect better than thick coats on detailed carvings.
– After applying, buff gently with a soft cloth once the product sets (based on label instructions).
A note on “oils”
Oils can penetrate wood and some finishes, changing how future cleaning behaves. If your existing coating is wax/varnish, oils can interfere with adhesion and attract grime. As of 2026, most conservation-minded advice still encourages you to treat oils as “compatibility unknown” until you confirm what’s on the surface.
What can go wrong (common mistakes & edge cases)
The most common failures come from too much moisture, wrong chemistry, or aggressive attempts to “restore” shine. When those happen, they can permanently change contrast on carved Mughal edges and compromise the stability of older coatings.
Repeated wet wiping can create differential swelling around joints and carved panels, stressing weak areas of antique furniture.
Incorrect solvents can dissolve or soften film layers, leaving haze that simple polishing won’t reliably fix.
Sanding or aggressive stain scrubbing can erase the aged patina that contributes to an antique piece’s authenticity.
Common mistakes
– Soaking or flooding: Wetting carved panels repeatedly can swell wood and loosen fragile veneer or old glue lines.
– Scrubbing abrasively: Carved edges can lose definition, which changes the visual “Mughal contrast.”
– Using strong cleaners “just this once”: Bleach, heavy alcohols, and scouring powders can dull carved detail and discolor finishes.
– Over-conditioning: Thick wax/oil build-up looks uneven in recesses and can become a dirt magnet.
Edge cases to pause for
– Peeling finish or loose veneer: Stop and consider professional conservation.
– Active cracking/structural instability: Moisture cycling can worsen movement.
– Unknown inlay materials: Some inlays tolerate cleaning poorly or can be affected by certain residues.
Pros/cons of a more aggressive approach (vs. conservative care):
| Approach | Pros | Cons / risk |
|---|---|---|
| Conservative cleaning (dry dusting + barely damp mild wipe) | Preserves patina; lowers finish attack risk | Doesn’t fully remove deep, embedded staining |
| Aggressive stripping (strong solvents/sanding) | Can reveal “newer” tone | High chance of finish damage, patina loss, and value reduction |
Quick checklist, verdict/tip, and FAQ
If the finish is intact and the wood isn’t actively flaking or cracking, this careful method is usually the safest route for cleaning Mughal-style antique wooden furniture. The downside is that it won’t “erase” deep stains or heavy grime as aggressively as restorers might—because protecting aged patina is often more valuable than chasing uniform brightness.
Quick checklist (scan/save):
| Step | Do | Don’t |
|---|---|---|
| Initial cleaning | Dry-dust with a soft brush/cloth | Scrub with abrasive pads |
| Cleaner choice | Use pH-neutral mild soap + very mild dilution | Use bleach, strong solvents, or heavy chemical cleaners |
| Moisture level | Use a barely damp cloth | Soak cloth or flood the surface |
| Carved details | Use light swabs/soft brushes | Drip liquid into grooves/inlays |
| Drying | Dry immediately, then fully air-dry | Let it stay damp in humidity/heat |
| Conditioning | Use finish-compatible care, thinly | Over-polish or apply incompatible oils/waxes |
Verdict / tip:
If you want the best balance of cleanliness and preservation, stick to controlled moisture and gentle, finish-friendly cleaning. Skip DIY deep cleaning (or stop early) if you see widespread peeling, bubbling finish, loose veneer, or structural instability; in those cases, a conservator or qualified furniture restorer is the safer, value-protecting choice—because surface failure can turn a simple wipe into a loss of film layer and carved definition.
Can I use a commercial wood cleaner?
Often you can, but only if it’s compatible with antique finishes. If you’re unsure, use a small hidden test area first and avoid anything strongly solvent-based.
How do I remove water rings or stains?
Start with the least invasive approach: dry dust → careful light cleaning of the surface. Deeper staining may require specialist conservation methods——so don’t aggressively scrub.
Is lemon oil safe for Mughal-style antique wooden furniture?
It depends on the existing finish and how it was previously maintained. Some oils can leave residue, attract grime, or interfere with wax/varnish layers—so treat it as “unknown compatibility” and test first in a hidden spot.
How often should I clean?
Routine dusting is safer than frequent wet cleaning. If you’re maintaining indoor pieces, a light dusting periodically is typically better than regular deep wiping.
Sources (primary/official where applicable):
– USDA Forest Service, Wood Handbook (wood moisture behavior, fiber saturation point)
– Canadian Conservation Institute (CCI), preventive conservation guidance for controlling humidity/temperature impacts on wood artifacts
– Getty Conservation Institute (GCI), cleaning/maintenance principles for cultural property surfaces
– Manufacturer/technical documentation on cleaning and finish compatibility:
– Conservation guidance on minimizing moisture/solvent use for antique wood finishes:
Cleaning Mughal-style antique wooden furniture is mainly about controlled moisture and finish-friendly care: dust first, wipe lightly with mild cleaner, dry immediately, and handle carved details with soft brushes or swabs. If the finish is stable, this approach lifts grime without erasing patina; if the surface is failing (peeling, loose veneer, cracking), pause and consider professional help. Save this checklist and do a hidden-spot test before the first full wipe—your antique will thank you.
Frequently Asked Questions
What’s the safest way to clean Mughal-style antique wooden furniture without damaging the finish?
Start by dusting the surface gently with a soft, dry microfiber cloth to remove grit that can scratch carved patterns. Use a slightly damp cloth only on areas that need light cleaning, and avoid soaking the wood or letting moisture pool in joints and inlays. If the piece has a lacquer, polish, or varnish, test any cleaner on an inconspicuous spot first to prevent discoloration. Finish by drying immediately with a clean cloth and keeping the furniture away from direct heat or sunlight while it cures.
How do you remove dust and grime from intricate carvings and inlays on Mughal wooden furniture?
For carved details, use a soft-bristle brush (like a clean paintbrush) to lift dust from crevices without abrading the wood or floral motifs. For stubborn grime, lightly dampen the brush or cloth with distilled water and wipe along the grain, then dry thoroughly. If your furniture has resin or semi-precious inlays, keep liquids minimal and never scrub aggressively around delicate borders. Regular cleaning with gentle tools is usually more effective than chemical cleaners for preserving Mughal craftsmanship.
Which cleaning products should you avoid when caring for Mughal-style antique wooden furniture?
Avoid harsh household chemicals like bleach, ammonia, and strong all-purpose cleaners, as they can strip protective finishes and dull the wood tone. Skip abrasive pads and metal scrubbers, which can damage carved surfaces and smear old polish into the grain. Be cautious with alcohol-based cleaners and very soapy solutions, since they may leave residues that attract more dirt over time. When possible, choose wood-safe, pH-balanced products and always follow up with a dry cloth to prevent moisture-related warping.
How often should you clean and condition antique wooden furniture with Mughal designs?
Dusting should be done regularly—typically weekly or biweekly—while deeper cleaning can be done only when buildup is visible, such as every few months. Conditioning helps maintain a natural glow, but over-oiling can make antique wood sticky and attract grime, so apply sparingly and not too frequently. A light furniture wax or wood conditioner made for antiques is often enough, applied in thin layers after the surface is fully dry. Monitor for dryness, dullness, or cracking, and adjust your care routine based on humidity and light exposure.
Why is proper drying and polishing important after cleaning Mughal antique wooden furniture?
Antique wood can be sensitive to moisture, and leaving it damp can cause swelling, lifting of polish, or stress in joints and carvings. Always dry the surface immediately, including along edges, carvings, and any carved legs or joinery where water can linger. After the wood is completely dry, use a gentle polish or wax to restore the protective layer and enhance the richness of the Mughal-style wood finish. This step helps prevent grime from embedding and supports long-term preservation of antique wooden furniture.
📅 Last Updated: October 20, 2026 | Topic: How to Clean Mughal-Style Antique Wooden Furniture: Care Guide | Content verified for accuracy and freshness.
References
- Wood finishing
- Wood finishing
- Wood preservation
- Varnish
- Shellac
- Lacquer
- Antique furniture
- https://scholar.google.com/scholar?q=cleaning+antique+wooden+furniture+conservation+guidelines Google Scholar
- https://scholar.google.com/scholar?q=care+and+cleaning+of+historic+wooden+objects+museum+collection Google Scholar
- https://scholar.google.com/scholar?q=shellac+varnish+lacquer+cleaning+safe+methods+wood+furniture Google Scholar
