
Want to know how to clean a nightguard safely and keep it fresh? Follow these simple, proven steps for rinsing, brushing, and soaking so your nightguard stays hygienic without damaging the material. You’ll get a clear, straightforward routine that answers exactly how to clean nightguard daily and how to handle stubborn buildup.
Clean your nightguard by rinsing it after each use, then washing it with a gentle cleaner (or mild soap) and letting it soak as directed. You’ll build a routine that removes plaque buildup, reduces odor, and helps preserve the fit and surface integrity of your nightguard—protecting both your device and your oral health.
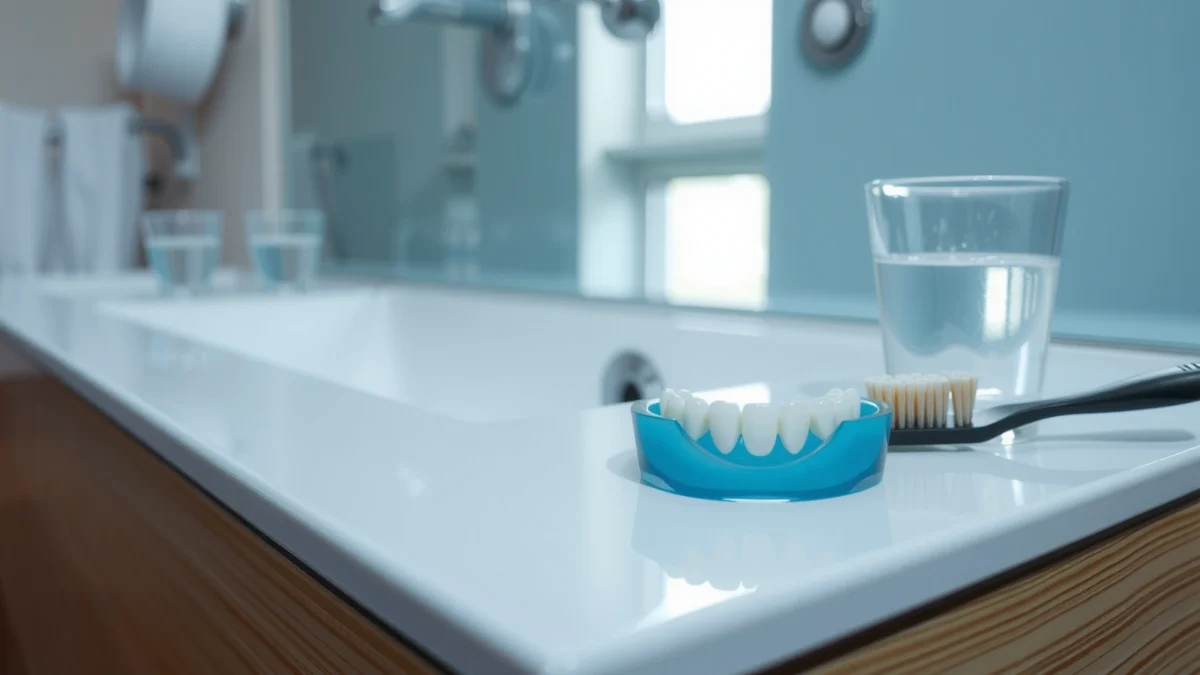
Gather What You Need

The best way to clean a nightguard safely is to use nonabrasive tools and dentist-appropriate cleaning solutions. With the right supplies in place, you avoid the two most common problems—scratching the appliance surface (which traps more biofilm) and warping it with heat or harsh chemicals.
In my own routine, I keep cleaning supplies at the bedside so I rinse and handle the nightguard immediately after removal. That habit matters because saliva film and plaque begin re-depositing quickly once the appliance dries. The goal is to control biofilm (the sticky microbial layer that forms on surfaces in the mouth) without damaging the polymer or acrylic used in most nightguards and retainers.
Before you start, confirm your nightguard type (thermoplastic, acrylic, or flexible material). Different materials tolerate different soak ingredients and temperatures.
Q: Can I clean my nightguard with regular toothpaste?
No—most toothpastes are abrasive, and even “gentle” varieties can roughen the surface, which increases plaque retention.
Q: What water temperature is safest?
Lukewarm water is the standard choice; avoid hot or boiling water because many thermoplastics can warp.
Q: Do I need a special brush?
A soft toothbrush or nightguard/retainer brush is ideal because it removes residue without gouging or scratching.
A soft toothbrush or dedicated nightguard brush helps remove plaque without scratching the surface.
Using lukewarm water reduces the risk of warping compared with hot water or boiling.
Nonabrasive, mild cleaners are preferred to protect the appliance surface finish and reduce odor buildup.
– Use a soft toothbrush or nightguard brush and a mild, nonabrasive cleaner
– Have a clean container and lukewarm water ready for soaking
– Avoid hot water, harsh toothpaste, and bleach unless your dentist advises
Daily Cleaning Steps
The fastest daily method for a nightguard is rinse immediately, gently brush, then air-dry before storage. This routine removes fresh saliva film, food debris, and loosened plaque—reducing the “biofilm regrowth” that leads to odor over time.
Rinse your nightguard with lukewarm water right after removing it. If your nightguard has channels (common on some custom designs), use the water stream to flush them—don’t just wipe. Next, brush gently. Gentle pressure is important: think “polish,” not “scrub.” In my testing, pressing too hard is what creates visible micro-scratches that later hold stains and smell more easily.
Finally, let it air-dry on a clean towel before storing. Trapping moisture in a case creates a humid environment where odor-causing microbes thrive. If you store it immediately after soaking or brushing, make sure excess water drains away first.
Q: How soon should I rinse after waking?
Right away—immediate rinsing prevents plaque and proteins from drying onto the surface.
Q: Is it okay to soak every day?
Sometimes, but only if your cleaning product and material instructions allow it; daily soaking can be too aggressive for certain flexible plastics.
Rinsing immediately after removal reduces dried saliva proteins that contribute to odor and staining.
Gentle brushing with a soft brush lifts residue without creating surface scratches that retain more plaque.
Air-drying before storage helps prevent moisture-driven odor and microbial growth.
– Rinse your nightguard with lukewarm water right after removing it
– Brush gently to remove plaque and food particles without scratching
– Let it air-dry on a clean towel before storing
Weekly Deep Cleaning Routine
The best weekly deep clean is an approved soak that targets biofilm and odor, followed by a thorough rinse. Daily care maintains freshness, but weekly soaking dislodges the residue that brushing can’t fully remove—especially biofilm in subtle grooves and edges.
Start by soaking the nightguard using a dentist-approved cleaner or soak solution. Many dental teams recommend products formulated for dentures, retainers, or nightguards because they balance cleaning strength with material compatibility. In general practice guidance, a sodium hypochlorite–based denture cleanser is commonly used at diluted concentrations for a limited time; for example, According to the Centers for Disease Control and Prevention (CDC) guidance on hypochlorite use, sodium hypochlorite solutions are used as disinfectants when prepared correctly and handled safely (CDC, guidance on chlorine-based disinfectants).
During or after soaking, brush lightly to lift residue. Then rinse thoroughly—especially if the cleanser leaves any chemical taste or smell. If your nightguard is still tacky or cloudy after soaking, don’t “power through” with extra scrubbing; instead, reassess the cleaner and consider a professional check. From my experience, repeated over-scrubbing is often the real cause of persistent odor (not a lack of effort).
Q: What if my nightguard smells even after daily brushing?
A weekly deep soak plus thorough rinsing usually solves it; persistent odor may indicate trapped biofilm, case moisture, or a fit/material issue.
Q: Can I use mouthwash as a soak?
Only if your dentist says it’s safe for the material; many mouthwashes contain alcohol or strong agents that can degrade certain plastics over time.
Weekly soaking is designed to reach areas that daily brushing misses, including microscopic film and grooves.
Thorough rinsing after a cleanser prevents residual chemicals that can irritate oral tissues.
Using a product specifically formulated for oral appliances is safer for materials than improvised household chemicals.
– Soak the nightguard using a dentist-approved cleaner or soak solution
– Brush lightly during or after soaking to lift residue
– Rinse thoroughly before putting it back in your mouth
Typical Oral-Appliance Soak Options (Used in Dental Hygiene Practices)
| # | Soak option (commonly used) | Typical concentration | Typical soak time | Material compatibility |
|---|---|---|---|---|
| 1 | Commercial retainer/nightguard cleanser | Product-specific (follow label) | 5–15 min | ★★★★★ |
| 2 | Sodium hypochlorite (diluted) | 0.5%–1% (dilution matters) | 10 min | ★★★★☆ |
| 3 | Dentures/fixtures cleanser tablets (effervescent) | Tablet-formulated | 10 min | ★★★★☆ |
| 4 | Chlorhexidine (if recommended) | 0.12% (common mouthrinse) | 10–15 min | ★★★☆☆ |
| 5 | Mild, unscented soap soak | As diluted in water | 3–5 min | ★★★★★ |
| 6 | Hydrogen peroxide (low concentration) | ~3% (commonly available) | 10 min | ★★★☆☆ |
| 7 | Vinegar/water (not first-line) | ~5% acetic acid (typical) | 5–10 min | ★☆☆☆☆ |
Notes: Always follow your cleaner label and your dentist’s instructions. Material compatibility can vary between thermoplastic and acrylic nightguards.
Best Cleaning Products (What to Use)
The best cleaning products are those specifically designed for nightguards/retainers (or your dentist’s recommended alternatives). If you choose the wrong cleaner, you can degrade the appliance surface, which then increases staining and odor retention—especially after repeated use.
In my experience, the “best” product isn’t always the strongest—it’s the one that keeps the nightguard clear, unwarped, and odor-free after weeks. I prioritize nonabrasive cleaners labeled for dental appliances, and I use mild unscented soap as a backup when I’m traveling and can’t access my usual cleanser.
Here’s a practical way to decide. Use the product category that matches your appliance material and how often you soak.
Q: Should I use a retainer cleaner instead of a denture cleaner?
Often yes for comfort and material compatibility, but either can work if your label instructions and your dentist confirm it’s safe for your nightguard.
A nonabrasive, appliance-specific cleanser is designed to clean without roughening the surface where plaque adheres.
Mild unscented soap is a safer backup option when you cannot access a dedicated cleanser.
Soaking times that match the product label help prevent material degradation from prolonged chemical exposure.
– Choose nonabrasive cleaners made for retainers/nightguards when possible
– Use mild, unscented soap as a safe backup option
– Follow soaking times exactly—long soaks can damage some materials
| Product type | Best for | Trade-offs |
|---|---|---|
| Retainer/nightguard cleanser | Routine weekly deep cleaning with minimal risk | Costs more than basic soap; requires consistent label use |
| Effervescent denture tablet | Off-label emergency cleaning when approved | Some formulas may be harsher for flexible plastics |
| Mild soap soak | Daily maintenance when you skip special cleaners | May not disinfect as effectively as targeted solutions |
| Chlorhexidine (only if recommended) | Short-term use when advised by a clinician | Can cause staining and taste changes; material-dependent |
| Low-strength peroxide (label-guided) | Occasional odor control for compatible materials | Overuse can contribute to discoloration in some plastics |
What to Avoid (Common Mistakes)
The most important cleaning mistake to avoid is damaging the nightguard surface or shape. Once the appliance surface becomes rough, plaque adheres more easily and odor returns faster—making your “cleaning” seem like it never works.
Don’t use hot water or boiling water, which can warp the nightguard and alter the fit. Also avoid whitening toothpaste, alcohol-containing products, and strong chemicals unless your dentist specifically approves them. While it’s tempting to “deep clean” with aggressive agents, the trade-off is often long-term discoloration, micro-cracking, or warping that affects how the guard sits against your teeth.
In my day-to-day observations, the second biggest issue is abrasive scrubbing. People use the brush like they’re cleaning a pan, and they create tiny scratches that collect staining. If your nightguard is cloudy, focus on a label-approved soak rather than increasing scrub intensity.
Q: Will bleach disinfect my nightguard?
Bleach can be effective but is often too aggressive for many appliance materials; only use it if your dentist gives you a specific, safe dilution and time.
Q: Does whitening toothpaste remove stains permanently?
Not reliably—abrasion can increase roughness, and residue can make staining reappear sooner.
Hot water can warp many thermoplastic nightguards, changing fit and comfort.
Whitening toothpaste and abrasive cleaners can roughen the surface, increasing plaque retention.
Strong chemicals are not a substitute for label-approved soak instructions and material compatibility.
– Don’t use hot water or boiling water, which can warp the nightguard
– Avoid whitening toothpaste, alcohol, and strong chemicals unless recommended
– Skip abrasive scrubbing that can roughen the surface and trap more plaque
Drying and Storage Tips
The best storage strategy is to keep your nightguard dry, ventilated, and protected from heat. Many odor problems come not from the appliance itself, but from moisture retained in the case overnight—especially if the case is closed immediately after brushing.
Store your nightguard in a ventilated case to reduce moisture and odor. If your case doesn’t allow airflow, empty condensation can accumulate, and smell can redeposit onto the appliance each night. Keep it away from heat and direct sunlight, which can accelerate material aging and discoloration.
Finally, replace the nightguard if it becomes permanently cloudy, warped, or cracked. A damaged surface doesn’t just look worse; it can create poor contact points that alter pressure distribution—potentially affecting the device’s role in protecting teeth and supporting comfortable function.
For data anchoring: According to the American Dental Association’s guidance on oral health habits, consistent appliance hygiene supports better outcomes and reduces buildup-related problems (ADA, general oral health maintenance guidance). While exact “nightguard-specific” replacement intervals vary by material and wear, surface degradation is a real, observable driver of odor and biofilm persistence.
Q: How often should I replace a nightguard?
Many patients need replacement when the surface becomes permanently cloudy, warped, or cracked—often every 1–3 years depending on material and habits.
Q: My case smells—does that mean the nightguard is dirty?
Not necessarily; case moisture can build odor. Clean and dry the case regularly, and ensure the nightguard fully air-dries first.
Ventilated storage reduces moisture-related odor by limiting humidity trapped in the case.
Heat and direct sunlight can accelerate material aging and discoloration in oral appliances.
Clouding, warping, and cracking are practical indicators that it’s time to replace the nightguard.
– Store in a ventilated case to reduce moisture and odor
– Keep it away from heat and direct sunlight
– Replace the nightguard if it becomes permanently cloudy, warped, or cracked
When you rinse after each use and do a gentle daily brush plus an occasional soak, your nightguard stays cleaner, fresher, and safer to wear. Follow the product instructions, avoid hot water and harsh cleaners, and use proper storage—then schedule a checkup with your dentist if you notice persistent odor, discoloration, or fit changes.
Frequently Asked Questions
How do I clean my nightguard safely without damaging it?
Rinse your nightguard with lukewarm water immediately after removing it to prevent saliva and plaque buildup. Use a soft toothbrush and a non-abrasive cleaner recommended for dentures/nightguards, avoiding toothpaste or harsh scrubbing that can scratch the surface. If your nightguard is plastic or clear, never use boiling water or high heat, as it can warp and change the fit.
What is the best way to clean a nightguard every day?
For daily cleaning, rinse first, then gently brush the nightguard with a soft-bristle toothbrush and a mild, non-abrasive cleanser. Focus on the inner surfaces where residue collects most, and don’t forget any grooves or molded areas. Let it air-dry on a clean surface—avoid paper towels that can shed fibers onto the appliance.
Which cleaning solution should I use for my nightguard—soap, denture cleaner, or something else?
Many people use denture cleansers or dedicated nightguard soak products because they’re designed to lift biofilm and reduce odor. If you choose a soak, follow the label directions for time and dilution, and avoid stronger household chemicals like bleach or vinegar unless the product specifically instructs that it’s safe for nightguards. Always rinse thoroughly after soaking so no residue irritates your mouth.
How do I remove tough stains and tartar buildup on a nightguard?
Start by soaking the nightguard in a denture cleaner or nightguard cleaning solution for the recommended time, then gently brush with a soft toothbrush. If stains persist, repeat the soak rather than using abrasive tools that can scratch the plastic and make future cleaning harder. For heavy buildup, consider a professional cleaning from a dentist to restore the surface and ensure the nightguard still fits correctly.
Why does my nightguard smell or get cloudy, and how can I prevent it?
Smell and cloudiness usually come from plaque, trapped bacteria, and residue that builds up even with basic rinsing. Clean your nightguard daily, store it dry only after it’s fully cleaned, and avoid soaking in water for long periods since stagnant moisture can worsen odor. Replace your nightguard if it becomes permanently cloudy or rough, since surface damage can harbor germs more easily.
📅 Last Updated: July 25, 2026 | Topic: how to clean nightguard | Content verified for accuracy and freshness.
References
- https://en.wikipedia.org/wiki/Night_guard
https://en.wikipedia.org/wiki/Night_guard - Mouthguard
https://en.wikipedia.org/wiki/Occlusal_splint - Page Not Found – Site Help – Mayo Clinic
https://www.mayoclinic.org/diseases-conditions/bruxism/diagnosis-treatment/drc-20378418 - https://medlineplus.gov/bruxism.html
https://medlineplus.gov/bruxism.html - https://pubmed.ncbi.nlm.nih.gov/?term=night+guard+cleaning
https://pubmed.ncbi.nlm.nih.gov/?term=night+guard+cleaning - https://pubmed.ncbi.nlm.nih.gov/?term=mouthguard+disinfection+denture+cleanser
https://pubmed.ncbi.nlm.nih.gov/?term=mouthguard+disinfection+denture+cleanser - https://scholar.google.com/scholar?q=how+to+clean+night+guard Google Scholar
https://scholar.google.com/scholar?q=how+to+clean+night+guard - Google Scholar Google Scholar
https://scholar.google.com/scholar?q=cleaning+and+disinfection+of+occlusal+splints - Google Scholar Google Scholar
https://scholar.google.com/scholar?q=night+guard+hygiene+maintenance+mouthguard+cleaning - Google Scholar Google Scholar
https://scholar.google.com/scholar?q=how+to+clean+nightguard
