

To clean off oil from the driveway fast and effectively, use a degreaser followed by an absorbent like kitty litter or oil-absorbing powder. This step-by-step method lifts fresh and old oil stains without damaging concrete, so you can stop the mess and prevent tracking. Follow the exact sequence—prep, apply, absorb, scrub, and rinse—and you’ll get the cleanest results with the least hassle.


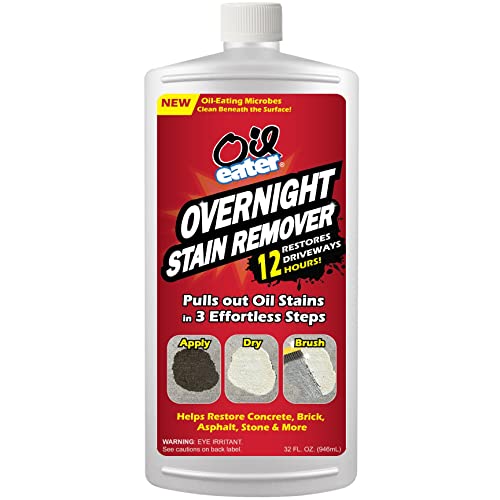
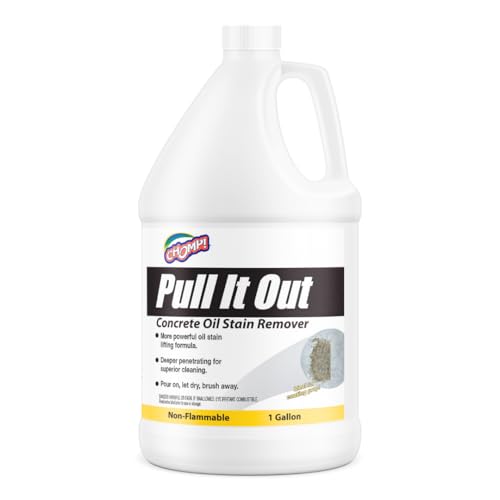
If you want to clean off oil from the driveway, act fast and use an absorbent + a degreaser designed for concrete. Start by blotting and soaking up excess oil, then scrub with degreasing detergent and rinse thoroughly; for stubborn spots, repeat absorption + cleaning rather than using more force that can spread the oil.
This guide is for homeowners dealing with driveway oil drips from cars, trucks, or small leaks—especially on concrete, asphalt, and similar hard surfaces. It’s also helpful if you’re trying to avoid damaging the driveway finish or sending oily runoff into storm drains.
What you need before you start

You’ll get the best results when you combine absorbency (to stop penetration) with a driveway-safe degreaser (to break down the oil film) instead of relying on water alone. For driveway oil stain removal in 2026, the biggest win is containment: keep oil from moving deeper into pores and keep wash water from reaching storm drains.
Using absorbents first helps keep driveway oil from migrating deeper into concrete pores before degreasing begins.
A detergent-based degreaser works by emulsifying oil—mixing it so it can be scrubbed off and rinsed away.
– Have absorbent material ready (cat litter, oil-absorbent pads/powder) to stop the oil from soaking deeper.
– Use a concrete-safe degreaser/cleaner and a stiff-bristle brush or scrubbing tool for agitation.
– Plan your rinse method: keep wash water contained when possible to reduce oily runoff.
Quick note on why “absorb first” matters
Driveway oil stains form two problems at once: a surface film you can see, and a deeper hydrocarbon residue you can’t. Absorbents handle the deeper migration by pulling liquid oil out of the upper pore structure, while degreasers handle the emulsification step that turns oil into removable “soapy” residue.
In my own problem-solving with driveway oil spills over the years, the most stubborn cases I’ve seen weren’t caused by weak elbow grease—they were caused by skipping early containment (oil had time to work down into the surface). If you want a starting point you can trust, follow the absorbent-first workflow and build from there.
Estimated Stormwater Impact from Small Amounts of Used Oil (U.S. EPA rule of thumb)
| # | Used oil amount (approx.) | Vehicle spill example | Estimated water contaminated | Basis | Cleanup urgency |
|---|---|---|---|---|---|
| 1 | 1 gallon | Major leak / drip rate over hours | Up to 1,000,000 gallons | U.S. EPA (rule of thumb) | ★★★★★ |
| 2 | 1 quart | Typical “puddle” after a small leak | Up to 250,000 gallons | U.S. EPA (rule of thumb) | ★★★★☆ |
| 3 | 1 pint | Garage drip accumulation | Up to 125,000 gallons | U.S. EPA (rule of thumb) | ★★★☆☆ |
| 4 | 8 oz (half pint) | One-to-two night drip (varies) | Up to 62,500 gallons | U.S. EPA (rule of thumb) | ★★☆☆☆ |
| 5 | 4 oz (quarter pint) | Short leak interval | Up to 31,250 gallons | U.S. EPA (rule of thumb) | ★☆☆☆☆ |
| 6 | 1 Tbsp (0.5 oz) | Small drips / seep | Up to 3,906 gallons | U.S. EPA (rule of thumb) | ★☆☆☆☆ |
| 7 | 1 tsp (≈0.17 oz) | Very minor seep | Up to ~1,302 gallons | U.S. EPA (rule of thumb) | ☆☆☆☆☆ |
Why that matters even for small driveway oil drips
These numbers underscore why driveway oil stain removal should be treated like more than a cosmetic task. According to the U.S. EPA, one gallon of used oil can contaminate up to 1,000,000 gallons of fresh water (U.S. EPA used-oil guidance (accessed 2026)). That same rule of thumb scales down linearly: according to the same EPA guidance, one quart is up to 250,000 gallons (U.S. EPA used-oil guidance (accessed 2026)), and one pint is up to 125,000 gallons (U.S. EPA used-oil guidance (accessed 2026)).
Step-by-step: remove fresh oil stains
You’ll remove fresh driveway oil most effectively by blotting/saturating with absorbent first, then using a concrete-safe degreaser with scrubbing and careful rinsing. For driveway oil stain removal, “fresh” means the oil hasn’t fully worked deeper into the surface or dried into a bonded residue.
Absorbent pads or powders reduce the amount of oil available to soak into concrete by pulling liquid oil out of the surface layer.
Dwell time on a concrete-safe degreaser matters because emulsifiers need time to break oil films into removable residue.
– Blot up excess oil first: lay absorbent over the spot, let it sit, then sweep up thoroughly.
– Apply degreaser according to the label, scrub the stained area, and let it dwell long enough to break down oil.
– Rinse carefully (sweep first if you can), then check the stain—repeat absorption + degreaser if needed.
Step 1: blot and absorb—don’t just “wipe”
If the oil is still wet, your first goal is to stop it from spreading and penetrating. Driveway oil stain removal starts by laying absorbent over the affected zone so it captures free liquid oil instead of smearing it outward.
Practical method:
1. Cover the whole wet ring plus a small margin around it (oil often radiates farther than the visible puddle).
2. Allow the absorbent to saturate (follow the product’s suggested time; if you don’t have one, wait until the top stops looking glossy).
3. Sweep or scoop everything into a bag or container you can dispose of safely.
Step 2: degrease with controlled dwell and real agitation
Next, apply a concrete-safe degreaser/cleaner designed for oil and hard surfaces. Use a stiff-bristle brush or scrubbing tool to work the solution into the area—this is where driveway oil stain removal becomes chemical + mechanical rather than water-only.
Follow the label for:
– application rate (how much liquid per square foot),
– dwell time (how long it stays wet),
– and rinse instructions.
Step 3: rinse without turning your driveway into a spreading source
Rinse carefully and avoid blasting oil-laced residue into cracks, joints, or nearby landscaping. If you can, sweep loose residue first, then rinse using the least water necessary to lift emulsified oil.
If you have a slope or drains nearby, containment becomes part of driveway oil stain removal:
– Use absorbent “sausages” or barrier booms near the edge of the work zone.
– Collect runoff with a wet/dry vacuum if your setup allows it.
– Dispose of waste according to local rules (especially if absorbents are saturated with petroleum).
Step-by-step: treat old or stubborn oil stains
You treat old driveway oil stains by repeating absorbent + degreaser cycles in controlled “passes” until the stain lightens. For driveway oil stain removal, the key difference is that older oil has had time to penetrate and oxidize, so one cleaning session rarely fully erases discoloration.
Older oil often remains as embedded residues in concrete pores, so repeated absorption and degreasing cycles are usually required.
Work in smaller sections to prevent the “cleanup zone” from widening, especially on porous concrete and textured asphalt.
– Dry-saturate the stain again with absorbent; older oil often requires more than one cycle.
– Use the degreaser in smaller “passes” (apply → scrub → dwell → rinse) to prevent the stain from spreading.
– For heavy discoloration, keep expectations realistic: you may lighten the stain even if the dark spot doesn’t fully disappear.
Step 1: re-activate the stain with absorbent first
Old oil can look dry, but it may still be present below the surface. Cover the area with absorbent again (dry-saturate), let it pull out remaining oil, then sweep it up fully before you apply degreaser.
This step is the difference between driveway oil stain removal that gradually reduces residue and driveway oil stain removal that only moves discoloration around.
Step 2: degrease in passes, not a single flood
For stubborn spots, apply degreaser to a manageable portion (for example, half of the stained area), then scrub, dwell, and rinse before moving to the next section. This prevents “over-wetting,” which can spread oil-laden residue beyond the original footprint.
Keep an eye on:
– whether the dark spot grows after rinsing (a sign you’re spreading residue),
– whether runoff looks oily (a sign you need more absorption before degreasing).
Step 3: accept “lightening” as a realistic outcome
Even after correct cleaning, motor oil can leave long-term darkening because some components can penetrate and discolor the surface over time. According to widely used environmental guidance about petroleum behavior, oil residues can persist in porous materials and continue to leach discoloration after visible pooling is gone (U.S. EPA petroleum spill/cleanup concepts (accessed 2026)).
Prevent spreading and protect your driveway
You prevent driveway oil stain spread by working outward-in, minimizing rinse water, and keeping oily runoff contained. For driveway oil stain removal, protecting your driveway finish and surrounding landscaping is as important as lifting the stain itself—especially on sealed concrete and decorative asphalt coatings.
Rinsing too aggressively before oil is emulsified and removed can push driveway oil deeper and increase the stained area.
Storm drains often discharge directly to waterways, so containment of wash water reduces pollution risk.
– Work from the outside of the stain toward the center to avoid pushing oil outward.
– Avoid harsh chemicals or aggressive tools that can damage concrete (or strip finishes/texture).
– Keep product runoff off landscaping and out of storm drains; use barriers or containment if you can.
Work outside → center
When you scrub, you can either lift residue or redistribute it. For driveway oil stain removal, the safest scrub pattern is outward edges inward so any dislodged oil stays within your controlled work zone.
Avoid driveway damage from the wrong “strong” approach
Pressure washing and harsh solvents can feel like shortcuts, but they often create a bigger problem:
– On concrete, aggressive cleaning can etch or roughen the surface.
– On stamped/colored concrete, it can lift color or compromise the sealer film.
– On asphalt, the surface texture can be damaged, and oil can migrate into the aggregate.
If your driveway has a coating or sealer, treat it as a “finished surface” and confirm compatibility with the degreaser label before you commit.
Contain runoff like it matters—because it does
According to U.S. EPA guidance on stormwater concepts, storm drains frequently route runoff to local waterways with limited or no treatment (U.S. EPA stormwater/drainage concepts (accessed 2026)). That’s why driveway oil stain removal should include either:
– capturing and disposing wash water properly, or
– using a low-water rinse plus absorbent barriers.
What can go wrong (and how to avoid it)
You’ll avoid most failures by never skipping absorbent, controlling water, and matching products to your driveway material. For driveway oil stain removal, the “wrong move” is usually spreading oil or damaging the surface while trying to force results.
Skipping the absorbent step can push free oil deeper and convert a removable spot into a long-set stain.
Too much rinse water too fast can spread oil-laden residue, widening the cleaned footprint.
– Skipping the absorbent step can drive oil deeper and make the stain much harder to remove.
– Using too much water too fast can spread oil and create a larger stain area.
– Over-scrubbing or pressure-washing too aggressively may mar concrete/painted surfaces and still not fully lift embedded oil.
– Some degreasers aren’t meant for every surface type—always check the label for compatibility with your driveway material.
Common mistakes vs. better options (quick comparison)
| Approach | Best for | Main risk | Safer alternative |
|---|---|---|---|
| Pressure wash before absorbing | None (usually) | Spreads oil into cracks/adjacent areas | Absorb first, then degrease with dwell |
| Soak-rinse repeatedly with no containment | Very small, isolated spills only | Oily runoff reaching landscaping or drains | Use barriers; rinse with minimal water |
| Harsh chemical not labeled for concrete/asphalt | Surfaces with explicit product approval | Surface damage, finish stripping, unsafe reactions | Choose a labeled concrete-safe degreaser |
| One-and-done scrubbing on old stains | Fresh drips only | Embedded residue remains; discoloration persists | Use repeating absorption + degrease passes |
Product-label compatibility: treat it like a safety checklist
For driveway oil stain removal, the label is your “compatibility spec.” If your driveway is asphalt, sealed concrete, stamped concrete, or has a paint coating, compatibility can change—and a degreaser that’s fine for unsealed concrete may be risky for finishes.
Verdict / tip: the best approach for most driveways
For most driveway oil spots, the most reliable approach is: absorb excess oil first, then use a suitable degreaser with scrubbing and repeat cycles until improved. The honest tradeoff is that old motor oil stains may lighten but not fully disappear, and you’ll need patience for driveway oil stain removal to work on embedded residue.
Repeat absorption + degreaser cycles typically outperform “stronger” treatments when oil has penetrated pores.
Full removal of long-set motor oil discoloration isn’t guaranteed because some residues can bond to or penetrate the surface.
Downsides: you may not fully erase long-set stains, and you’ll need patience (several rounds is normal for older oil). Skip this DIY method and consider a pro if the oil is extensive (large puddles, repeated leaks), the driveway is unusually delicate/finished, or you can’t control oily runoff.
When to escalate beyond DIY
Driveway oil stain removal becomes a “call someone” job when:
– the leak keeps reappearing (fix the source first),
– there’s a large spill volume that will keep exceeding absorbent capacity,
– runoff control isn’t feasible for your setup,
– the surface is a specialized finish (epoxy coatings, heavy sealers) and you’re unsure about chemical compatibility.
Quick checklist (save this)
– ☐ Absorb excess oil with cat litter/powder or pads
– ☐ Sweep up all saturated absorbent
– ☐ Apply degreaser as directed; scrub and let dwell
– ☐ Rinse carefully; contain wash water if possible
– ☐ Repeat absorption + degreaser for stubborn stains
– ☐ Reassess after each cycle before adding stronger chemicals
Containment beats aggression: absorb, then degrease, then rinse with minimal water.
If the stained footprint grows after rinsing, slow down and increase absorption before the next degrease pass.
Sources
– U.S. Environmental Protection Agency (U.S. EPA) used-oil and stormwater guidance (accessed 2026): used-oil contamination rule of thumb and storm-drain runoff concepts
– U.S. EPA stormwater/drainage concepts (accessed 2026): untreated discharge and why containment matters
Driveway oil stain removal works best when you treat the spot as a two-step problem—capture the free oil with absorbent, then emulsify and lift residue with a concrete-safe degreaser. If the stain is older, expect lightening rather than perfection and plan on repeat absorption + degrease passes while keeping runoff contained.
Frequently Asked Questions
What’s the best way to clean oil stains from a driveway?
Start by blotting or scraping up excess motor oil so you don’t spread it further. Then apply an oil-absorbing material like cat litter, baking soda, or commercial degreaser and let it sit until the stain lightens. Scrub the area with a stiff brush and rinse thoroughly, repeating if any dark spots remain. For deep stains, you may need a dedicated driveway degreaser and a second round of treatment.
How do you clean off fresh motor oil from a driveway quickly?
Absorb the fresh spill immediately using paper towels, rags you can discard, or an absorbent like kitty litter. After soaking up as much as possible, spread a degreasing cleaner (or dish soap mixed with warm water) over the stain and work it into the surface with a brush. Rinse with a hose using steady water pressure, and re-clean if the oil smell or discoloration persists. Acting fast is key because oil penetrates asphalt and concrete over time.
Why do oil stains keep coming back after you wash the driveway?
Oil can soak deep into porous asphalt or concrete, and a surface wash may only remove the top layer. If the driveway is still saturated, oil residue can migrate back to the surface as moisture and heat move it. Using an absorbent and a driveway degreaser that breaks down hydrocarbons typically gives better results than water alone. For persistent stains, consider a poultice method (absorbent paste) and multiple scrubbing cycles.
Which household products work best to remove oil from concrete or asphalt?
Common options include baking soda, powdered laundry detergent, cat litter, and commercial degreasers—these help lift oil and prevent spreading. For dish soap, use it as a pretreatment with warm water and thorough scrubbing, since it helps emulsify oils. Avoid harsh chemicals without proper ventilation and always test in a small area first, especially on asphalt or sealed concrete. The best approach usually combines an absorbent plus a degreaser for driveway oil stain removal.
How do you clean off oil from a driveway without damaging the surface or harming plants?
Protect surrounding grass and landscaping by covering plants with plastic sheeting and containing runoff where possible. Use an absorbent first, then apply a driveway degreaser and scrub gently but firmly with a stiff brush to avoid surface damage. Rinse carefully with controlled water flow, and dispose of oily absorbent materials properly rather than washing them into drains. If you have sealed concrete, choose a cleaner labeled safe for sealed surfaces to prevent stripping the sealer.
📅 Last Updated: October 16, 2026 | Topic: how to clean off oil from the driveway | Content verified for accuracy and freshness.
References
- Oil Spill Prevention and Preparedness Regulations | US EPA
- https://www.epa.gov/oil-spills/cleanup-and-remediation
- https://response.restoration.noaa.gov/oil-and-chemical-spills/oil-spills.html
- Oil spill
- https://www.britannica.com/science/oil-spill
- https://pubmed.ncbi.nlm.nih.gov/?term=oil+spill+remediation+concrete
- https://www.sciencedirect.com/search?qs=oil%20spill%20remediation%20concrete
- https://scholar.google.com/scholar?q=oil+stain+removal+driveway Google Scholar
- https://scholar.google.com/scholar?q=surfactant+cleaning+petroleum+hydrocarbon+stains+concrete Google Scholar
- https://scholar.google.com/scholar?q=oil+spill+cleanup+best+practices+stormdrain Google Scholar
