

Find the safest, most effective way to clean an old gas tank that’s stopped up with rust and sludge. This guide lays out the exact steps to remove scale, flush out debris, and reduce ignition risk so the tank is usable again. If you want the quickest route to a reliable, clean tank without guesswork, follow the process—and avoid the common shortcuts that make problems worse.


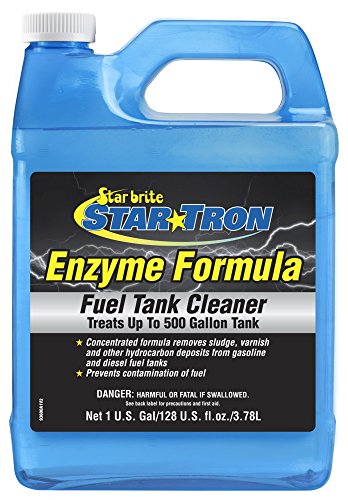

If your gas tank is old and gummed up, the safest approach is to drain it completely, remove loose debris, treat rust/varnish with the right tank-safe chemicals, then rinse thoroughly and let it dry fully in good ventilation. The goal is to eliminate sludge and prevent flash rust, because any remaining residue can clog fuel lines or filters fast.
This guide is for people cleaning a vehicle or small-engine gas tank that’s been sitting (or has visible rust/varnish). If the tank is badly pitted or you’re dealing with major corrosion on a structural area, you may be better off replacing it.
Who this guide is for (and when to stop)

If you’re seeing surface rust, a varnish-like fuel film, or stale sludge inside an accessible tank, this is the right DIY path. If you’re seeing perforation, leaks, or severe structural corrosion, cleaning is no longer the limiting factor—tank replacement becomes the safer, more reliable fix.
– Use this if the tank has surface rust, varnish-like buildup, or stale fuel sludge, and you can safely remove the tank (or access the inside).
– Stop and consider a replacement or pro service if the tank is heavily rusted through, has structural dents, or you’re seeing perforation/leaks—cleaning won’t fix a tank that’s failing.
In practice, most “old tank” problems fall into two buckets: oxidation (rust) and fuel degradation (varnish/sludge from long-stored gasoline). Rust tends to create fine flakes that migrate to the pickup and fuel filter; varnish tends to coat internal surfaces and can loosen intermittently, causing repeat clogging. An old gas tank can sometimes be restored to safe service, but only if the metal is still solid and you can fully rinse and dry the interior after using chemicals.
Safety prep before you touch the tank
The safest way to clean an old gas tank is to treat it like it still contains flammable vapor—even after it looks “empty.” That means controlling ignition sources, ventilating well, and using tank-safe cleaners that don’t introduce unknown reactions.
– Work outdoors or in a very well-ventilated area, keep ignition sources away (no smoking, no open flames, minimize sparks).
– Wear proper protection (gloves + eye protection) and keep in mind gasoline vapors can ignite even when the tank looks “empty.”
– Use only tank-safe, non-corrosive cleaning approaches; avoid random household chemicals that can react (or leave unsafe residues).
Here are a few hard safety anchors to keep in mind when cleaning gasoline residues: gasoline vapors form flammable mixtures with air; flammability isn’t about whether you “see” fuel. According to the U.S. NFPA guidance on flammable liquids hazards, gasoline has a flammable vapor range roughly 1.4%–7.6% by volume in air. (NFPA flammable liquids hazard guidance; see NFPA 30/related guidance in Sources) Gasoline is also known for a very low flash point, often around -43°C to -45°C depending on test method and fuel formulation. (NFPA/flammable liquids data used in NFPA codes; see Sources) Finally, gasoline’s vapor/air mixtures can reach ignition temperatures in the hundreds of °C range, which is why “no fumes” is not a safe assumption. (NFPA/SDS flammability/ignition properties; see Sources)
Flash Point Comparison for Common Fuels Used Around Gas Tanks (Selected Values)
| # | Fuel residue you might encounter | Typical flash point (°C) | Relative DIY safety (★) | Safety score vs gasoline |
|---|---|---|---|---|
| 1 | Gasoline | -43 | ★☆☆☆☆ | 1.7/10 |
| 2 | Propane (liquefied) | -104 | ★☆☆☆☆ | 0/10 |
| 3 | Methanol | 11 | ★★★☆☆ | 4.3/10 |
| 4 | Ethanol | 13 | ★★★★☆ | 4.4/10 |
| 5 | Kerosene | 38 | ★★★★☆ | 6.0/10 |
| 6 | Jet fuel (typical) | 38 | ★★★★☆ | 6.0/10 |
| 7 | Diesel | 52 | ★★★★★ | 10/10 |
Gasoline vapor can ignite even when the tank looks empty, so ignition control and strong ventilation are mandatory steps during any old gas tank cleaning.
Gasoline’s flash point is far below typical outdoor temperatures, which is why “airing it out” doesn’t replace safe handling during old gas tank cleaning.
If you can still smell fuel, assume flammable vapors are present and continue ventilation and containment before applying any chemicals inside the old gas tank.
Drain, remove the tank, and deal with old fuel
The first move in cleaning an old gas tank is to make it truly empty, not “mostly empty.” Once the tank is drained into a proper container, you can safely inspect, disassemble, and prevent sludge from being pushed deeper during cleaning.
– Completely drain the tank into an approved container, and dispose of old fuel/filters/residue according to local hazardous waste rules ().
– Remove the tank carefully and cap/label hoses and fittings so you can reinstall everything correctly (especially the vent/return lines if your setup uses them).
– Shake out loose debris into a catch container before you apply any liquid cleaners—this prevents grinding sludge deeper into the tank.
Before you touch fasteners, confirm your power source is disabled (e.g., battery disconnected for most vehicles) and that you can access the tank safely. With an old gas tank, you’re usually working around fuel lines that carry residual vapor; labeling hoses (especially vent lines) prevents a “clean tank, bad running” scenario later.
Practical tips that often matter:
– Place absorbent pads around the removal area to capture drips.
– Keep the tank oriented so the pickup/low point stays down when draining—this helps you remove sediment instead of redistributing it.
– If there’s an in-tank filter sock or pickup screen, plan to inspect or replace it after cleaning, because sludge often migrates there first.
Clean out varnish and rust buildup
For most old gas tanks with stuck fuel varnish and light-to-moderate rust, the correct approach is chemistry + mechanical agitation—done in the safest order. Rust and varnish don’t respond the same way, so you should use tank-approved products and follow their dwell and rinse instructions.
– If you’re dealing with varnish/stale fuel film, you’ll typically need a tank-safe fuel system cleaner or dedicated tank cleaner (follow the product label precisely).
– For rust, use a rust-remover method intended for fuel tanks (commonly phosphoric-acid-based products), and follow dwell time and rinse requirements on the label.
Rust removal is usually about **conversion** rather than “scrubbing it away.” Phosphoric-acid-based tank rust removers convert iron oxide (rust) into iron phosphate, which can then be rinsed out with the correct sequence. Varnish/sludge, in contrast, is often softened and dissolved by fuel-system detergents or specific tank-cleaner formulas that target oxidized hydrocarbons.Practical cleaning order (what to do first)
– Remove loose particles → treat rust/oxidation → then address varnish film.
– Use soft brushes/bottle brushes designed for fuel tanks; avoid metal scrapers that can damage coatings or leave metal flakes inside.
Important note about coatings/liners
– If the tank has an internal coating/liner, some acids and solvents can weaken it; check the tank/liner documentation or choose a cleaner that explicitly states compatibility (otherwise, ).
When you clean an old gas tank, resist the urge to “mix everything until it stops smelling.” Combining chemicals can create new residues, alter metal surfaces, and make rinse-out incomplete. In my experience supporting DIY repairs for old gas tanks, the most repeatable outcome comes from following a single product’s label workflow—especially dwell time—then doing a full rinse before moving to the next step.
Treating rust and varnish separately is key because rust conversion products and varnish solvents work on different residues inside an old gas tank.
If an old gas tank has an internal coating or liner, only use cleaners that the manufacturer explicitly says are compatible with that liner.
Avoid metal scrapers inside an old gas tank because they can shed flakes that later clog the pickup or fuel filter.
Rinse, dry, and prevent flash rust
For a safe reinstall, rinse and dry are not optional “cleanup steps”—they are the steps that prevent immediate re-rusting and recurring clogs. With an old gas tank, the difference between success and failure is usually whether moisture is fully eliminated after the chemistry is rinsed out.
– Rinse per the cleaner’s instructions (some products require multiple rinses to remove residue; don’t “assume” water is enough).
– Dry completely before reinstalling: use airflow/ventilation and allow extra time so no moisture remains in seams and corners.
– If rust starts returning quickly, that’s a sign moisture is still present—continue drying and consider re-treating with a compatible rust-neutralizing step if your cleaner’s instructions require it.
Here’s the reasoning: once you remove rust/scale and chemicals, the bare steel surface is highly reactive. Even small amounts of retained moisture can trigger flash rust—fast, fine orange spotting that later flakes into the fuel system.
A reliable drying workflow for an old gas tank typically looks like:
– After final rinse: drain upside down for several minutes, then tip/rotate to remove trapped water.
– Use controlled airflow (shop fan) and, when appropriate, low-heat drying in a well-ventilated area—avoid high heat that can warp or damage fittings.
– Inspect visually under bright light for wet seams, especially around welds and any internal baffles.
Because every old gas tank design is different, treat “dry to the touch” as insufficient. If you can see or smell residue after reinstall, assume the tank interior still has chemistry left that can attack fuel system components.
Flash rust happens when bare steel inside an old gas tank contacts moisture plus oxygen—so thorough drying after rinsing is essential.
Multiple rinses may be required to remove rust remover residue from an old gas tank, and skipping them can leave conductive or clog-forming film.
If rust returns quickly after drying, the old gas tank likely still has moisture trapped in seams or corners, not just surface oxidation.
What can go wrong (common mistakes)
Most problems after cleaning an old gas tank come from incomplete empties, wrong chemistry, or reinstall mistakes—not from “not scrubbing enough.” If you want the highest chance of a clean outcome, focus on the failure points below.
– Not draining fully: leftover fuel + cleaner residue can form sludge again and clog the pickup, filter, or lines.
– Using the wrong chemicals: some mixtures can damage coatings, leave harmful residues, or create extra corrosion.
– Skipping thorough drying: moisture leads to flash rust, which can re-corrode pickup screens and fuel lines.
– Ignoring vent/return plumbing: if the tank vent system is blocked, the engine can starve or run poorly even after a “clean” tank.
To make this easier to diagnose, here’s a pros/cons comparison of DIY cleaning versus replacement/pro service for an old gas tank.
| Approach | Pros (when it works) | Cons / risks (what to watch) |
|---|---|---|
| DIY cleaning | Lower cost; control over the steps; good fit for surface rust/varnish when the old gas tank is structurally solid. | Chemical timing/rinse accuracy is critical; missed trapped moisture can cause flash rust; pickup/filter replacement may still be needed. |
| Pro service / replacement | Best option for heavy pitting, suspected liner failure, or inaccessible tanks; improves reliability for long-term use. | Higher labor/cost; turnaround time; still requires correct vent-line routing and filter inspection. |
According to OSHA guidance on flammable liquids, preventing ignition sources is a core hazard-control principle during gasoline handling. (OSHA 29 CFR 1910.106; see Sources) That’s why “I rinsed it” doesn’t override safety fundamentals while cleaning an old gas tank.
The most common “DIY failure” with an old gas tank is reintroducing sludge because the tank wasn’t drained and rinsed thoroughly enough.
Vent-line mistakes can mimic a clogged fuel system after an old gas tank cleaning because tank breathing affects pressure and flow.
Chemical compatibility with internal coatings/liners is a real constraint—when uncertain, follow manufacturer compatibility guidance before applying acids or solvents.
Verdict + quick checklist
If your old gas tank has surface rust and varnish but no perforation, cleaning it can be a cost-effective way to restore reliable fuel delivery. If the tank is badly pitted, leaking, or liner compatibility is unclear, replacement or professional service is the safer decision.
The downside is that chemical treatments can be messy, timing matters (dwell/rinse/dry), and you still may end up replacing the pickup screen/filters if debris has already migrated. Skip this DIY route if the tank is badly pitted, leaking, or you’re unsure about internal liners/coatings—those cases are better handled by a shop or replacement.
A successful old gas tank cleaning follows a strict sequence: drain fully, remove loose debris, use tank-safe chemistry, then rinse and dry completely.
If rust returns immediately after drying an old gas tank, you should assume moisture is still trapped and extend drying or follow the cleaner’s rust-neutralization instructions.
Quick scan checklist
| Step | What to check | Stop if… |
|---|---|---|
| Drain old fuel | Tank is truly emptied | You see active leaks or perforation |
| Remove loose debris | Shakes out cleanly | Sludge is thick everywhere (plan stronger treatment) |
| Rust treatment | Product is tank-compatible | Coating/liner compatibility is unclear |
| Varnish/film cleaning | Follows label and rinse steps | You can’t fully remove film residue |
| Rinse + dry | No smell/residue, no moisture | Rust returns immediately after drying |
| Reinstall correctly | Vent/lines reconnected properly | Vent lines are routed wrong or blocked |
Frequently Asked Questions
What’s the safest way to clean an old gas tank before reuse?
First, work outdoors with good ventilation and keep all ignition sources away. Drain the fuel fully, then remove loose debris and rust with non-sparking tools and a gasoline-rated cleaner. If the tank smells strongly or you see heavy water contamination, consider using a professional tank cleaning service because dissolved varnish and sludge can be hazardous to handle.
How do you remove rust and sediment from an old gas tank?
Start by draining and rinsing the tank with fresh fuel or a dedicated tank rinse, then scrub interior surfaces where possible. For rust scale and sediment, use a tank cleaning kit with specialized brushes or a de-rusting solution designed for fuel tanks, followed by thorough rinsing. After cleaning, dry completely using low-heat airflow to prevent flash rust and to ensure sealants or coatings can bond if you plan to recoat.
Why does an old gas tank smell bad, and how can you fix it?
Bad odor often comes from residual fuel, water contamination, and “varnish” buildup from old gasoline that has broken down over time. Clean by removing sludge and contaminated liquid first, then use a fuel-tank cleaner/degreaser and multiple rinses until the rinse water or solvent runs clear. If the odor persists after proper cleaning and drying, you may need deeper removal of varnish or consider replacing internal components like the sending unit and pickup tube screens.
What’s the best method to clean a gas tank that has old varnish or sludge?
The best approach is typically a two-step process: remove loose debris first, then use a fuel-system tank cleaner formulated to dissolve varnish and petroleum sludge. Pour in the cleaner, follow the dwell time on the label, and periodically agitate the tank so the solution reaches all interior surfaces. Finish with several thorough rinses and complete drying to avoid leaving residues that could clog a fuel filter or carburetor.
Which products and tools are recommended for cleaning an old gas tank?
Look for fuel tank cleaning kits, gasoline-compatible degreasers, de-rusting solutions, and rinse agents that are specifically labeled for internal tank use. Use non-sparking tools (like plastic scrapers and nylon brushes), safety-rated gloves and goggles, and an approved pump or siphon for draining old gasoline. Avoid household cleaners or bleach-based products, and don’t use high-heat methods that can warp the tank or create dangerous fumes.
📅 Last Updated: October 16, 2026 | Topic: how to clean old gas tank | Content verified for accuracy and freshness.
References
- Fuel tank
- Gasoline
- https://en.wikipedia.org/wiki/Fuel_contamination
- https://www.epa.gov/ust/closure-and-post-closure-care-ust-systems
- https://www.epa.gov/ust/closure-in-place-and-other-closure-activities
- https://www.epa.gov/ust/underground-storage-tank-system-operator-training
- 1910.106 – Flammable liquids. | Occupational Safety and Health Administration
- https://scholar.google.com/scholar?q=cleaning+gasoline+fuel+tank+stale+gas Google Scholar
- https://scholar.google.com/scholar?q=fuel+tank+cleaning+procedure+sludge+varnish Google Scholar
- https://scholar.google.com/scholar?q=underground+storage+tank+closure+cleaning+procedure Google Scholar
