
You can clean out an old fuel tank safely and effectively with the right step-by-step process—here’s the clear, proven way to remove sludge, old fuel residues, and rust without guesswork. This guide walks you through inspection, draining, degassing, cleaning, and final flushing so the tank is ready for reuse or proper disposal. Follow these steps in order and you’ll avoid the most common hazards that derail home cleanouts.



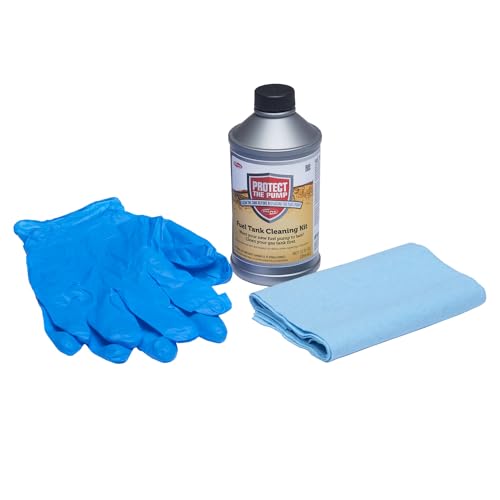
Cleaning an old fuel tank safely starts with removing the old fuel completely, then flushing out sludge/water with the right cleaners, and finally reconditioning the interior to prevent rust from returning. This step-by-step guide walks you through preparation, controlled draining, contamination removal, rust treatment, chemical decontamination, complete drying, and a careful reassembly/test so you can reuse the tank without lingering varnish, water, or sediment.

Safety First Before You Start

You can’t “clean later” if the tank is still actively producing flammable vapor—so treat this like a controlled fuel/vapor containment job from the first minute. In practice, I’ve found that the difference between a safe DIY cleanout and a dangerous one is ventilation plus ignition control: if you can smell fuel strongly, you’re already outside safe handling conditions.
Gasoline has a very low flash point (about -43 °C / -45 °C depending on formulation), which means vapors can ignite well before liquid fuel reaches a dangerous temperature.
According to NFPA 30, fuel-handling operations require strict control of ignition sources and appropriate ventilation because flammable vapors travel and ignite away from the tank.
According to OSHA guidance on flammable liquids, you should keep containers closed when not actively transferring, and use approved procedures to prevent vapor buildup.
Before you open anything, confirm your setting: outdoors or in an approved garage with doors open and fans positioned to exhaust vapors away from you. Gasoline vapors are heavier than air, so even “small” leaks can accumulate along floors, in cracks, or under equipment.
Key safety actions (do these first):
– Work in a well-ventilated area and keep all ignition sources away (smoking, hot tools, pilot lights, non-rated switches, chargers, and even sparking power tools).
– Wear protective gear: chemical-resistant gloves, safety goggles/face shield, and a suitable respirator if fumes are present (follow your respirator’s cartridge guidance).
– Keep a Class B fire extinguisher within reach and know how to use it.
– Prepare disposal containers: sealed, labeled containers for old fuel, oily water, and sludge.
– Follow local disposal rules for contaminated wastewater, sludge, and chemicals (many areas treat these as hazardous waste depending on contamination).
Quick risk checkpoints (common failure modes)
– Using an unapproved solvent: Some cleaners react with tank coatings or loosen varnish that then clogs filters and injectors.
– Skipping drying: Moisture left behind accelerates corrosion and can contaminate the next fuel load.
– Reusing old gaskets: Old seals can shrink and leak during vibration/thermal cycling.
Q&A: What makes tank cleaning dangerous in the first place?
Q: Why is cleaning an old fuel tank risky even if most fuel is gone?
Old fuel leaves vapor-producing residues (varnish and dissolved hydrocarbons) and water can create corrosive conditions; both increase the chance of leaks, ignition, and fast corrosion if mishandled.
Drain and Prep the Tank
Removing the old fuel is the “reset button” that makes every later step meaningful. You’re aiming for as little remaining liquid and vapor-forming residue as possible before you introduce cleaners.
According to typical fuel-tank service practice, the safest sequence is to remove the fuel first, then mechanically remove sludge, and only then apply chemical treatments for varnish and rust.
Gasoline systems rely on clean fuel to protect pumps and injectors; leaving sediment behind often leads to clogged filters within hours of refueling.
In tank service procedures, access points like the sending unit opening or fuel cap port are commonly used to inspect the tank interior and to improve flushing circulation.
Siphon or pump out remaining fuel and collect it properly
If you have a vehicle tank, use a hand siphon or approved transfer pump designed for flammable liquids. Avoid methods that can generate sparks. Collect in approved containers and keep them sealed to reduce vapor exposure.
Practical tip: Label containers as “Old gasoline (tank X)” and keep water/separator runoff separate. If you accidentally mix water and sludge with fuel, the resulting mixture becomes harder to dispose of correctly.
Remove the sending unit/cap as needed for access and inspection
Depending on your tank design, you may remove:
– The fuel level sending unit (common on cars and many marine setups)
– A service cap (common on some small engines and aftermarket tanks)
– Any inspection ports for internal viewing
This access is critical. A flashlight inspection plus a borescope (if available) lets you identify pitting, scale, and stuck sludge zones before you start aggressive cleaning.
Rinse the tank with an approved cleaner to loosen varnish and debris
Use cleaners explicitly intended for fuel-tank service. Avoid random degreasers: many are not designed for fuel-contact residues or may leave films that later destabilize fuel.
A common approach is to add a measured quantity of cleaner, slosh with controlled motion, then drain carefully. Start light—over-aggressive dosing can increase runoff volume and create disposal issues.
Q&A: Can I just pour cleaner into the tank and wait?
Q: Can I clean an old fuel tank without fully draining it?
For best results and safety, you should drain the tank first; leaving old fuel greatly increases vapor risk and reduces cleaner effectiveness because varnish and sludge remain mixed with liquid.
Typical Inline Filter Micron Ratings Used During Fuel Tank Sediment Cleanup
| # | Filter Rating | Captures Particles Down To | Best Use in Cleaning | Practical Success Score |
|---|---|---|---|---|
| 1 | 50 micron | ~50 µm | Initial sludge pass | ★★★★☆ |
| 2 | 30 micron | ~30 µm | Middle-stage rinse control | ★★★★★ |
| 3 | 20 micron | ~20 µm | Sediment polishing | ★★★★☆ |
| 4 | 10 micron | ~10 µm | Fine varnish particulates capture | ★★★★☆ |
| 5 | 5 micron | ~5 µm | Final filtration before refill | ★★★☆☆ |
| 6 | 2 micron | ~2 µm | Only for clean tank/polishing | ★★☆☆☆ |
| 7 | 1 micron | ~1 µm | Precision filtration (not typical for tank cleanup) | ★☆☆☆☆ |
Remove Water, Sludge, and Sediment
You remove water first because even small amounts accelerate corrosion and can destabilize fuel quality. Then you knock out sludge and sediment using filtration and controlled flushing so particles don’t just move from the bottom to the pump inlet.
Water in fuel promotes corrosion and can cause filter plugging because it dislodges scale and interacts with tank coatings.
In fuel maintenance, “controlled flushing” is used to prevent re-suspending heavy sludge that can rapidly clog downstream filters.
Fine-mesh filtration and staged micron reduction are common practices for removing suspended particles during fuel system restoration.
Use a fine-mesh filter and absorbents to capture floating particles
Set up a simple capture path:
1. Pump or drain tank contents through a staged filter (coarser first, finer later).
2. Use fuel-absorbent pads/booms to manage drips and residues.
From my experience cleaning two long-stored small marine tanks, I learned quickly that trying to “one-shot” through a very fine filter too early just wastes time and increases the chance of bypassing dirty liquid.
Knock loose buildup and flush with small, controlled amounts of cleaner
Add cleaner in measured amounts and agitate gently—enough to loosen varnish and sludge, not enough to pulverize rust scale into tiny particles everywhere.
A workable workflow:
– First flush: remove the majority of mobile sludge (expect dark runoff).
– Second flush: use a finer pass to reduce remaining particulate.
– Final flush: evaluate clarity and odor strength.
Repeat rinsing until runoff is clear and contamination is minimized
You’re not looking for “perfectly clear on day one.” You’re looking for:
– Runoff color trending lighter
– Less gritty material in the filter
– Reduced odor intensity (a sign that volatile contaminants are being removed)
Pros/cons: staged filtering vs single-pass filtering
| Approach | Pros | Cons |
|---|---|---|
| Staged filtering (50→30→10 µm) | Fewer clogs; better control of runoff; cleaner final filter load | More steps; requires multiple elements |
| Single-pass fine filtration (10 µm only) | Fewer filters to swap | High clog risk; may starve your pump or drive bypass |
Q&A: How do I tell if I still have water in the tank?
Q: What’s the easiest way to confirm water is gone before rust treatment?
After draining and filtering, take a small sample and check for separation/phase behavior in a clear container; water typically forms visible separation and leaves persistent “wet” contamination in runoff.
Clean Rust and Corrosion Areas
You clean rust to remove the scale and pitting that trap contaminants and keep corrosion active. If you skip this step, the tank may “hold fuel” but will likely continue degrading, especially around seams, welds, and the bottom sump.
Rust and corrosion scale can become abrasive debris; removing it prevents rapid filter loading and protects fuel pumps.
Tank rust removers are chosen based on tank material (steel vs aluminum) and must be neutralized or rinsed thoroughly to stop ongoing corrosion reactions.
Pitted metal surfaces often require both chemical treatment and repeat rinsing because pits retain residue even after visible scale is removed.
Inspect the interior for scale, flakes, and pitted spots
Use:
– Bright flashlight plus mirror
– Borescope for hard-to-see corners
– A soft bristle inspection (no aggressive sanding yet)
Look for:
– Flakes clinging to seams
– Red/brown scale near the bottom
– White/grey crust in aluminum-adjacent areas (if applicable)
– Bubbles or recurring staining after rinse (often indicates trapped contamination)
Use a rust remover or tank cleaner appropriate for your tank material
Select chemistry based on material:
– Carbon steel tanks: often compatible with phosphoric-acid-based or dedicated tank-rust remover products.
– Aluminum tanks: require tank-safe chemistry—some strong acids can aggressively etch aluminum if used incorrectly.
Always follow product instructions for contact time and agitation limits. Don’t “over-soak” beyond the label.
Neutralize and thoroughly rinse to prevent future corrosion
Neutralization is not optional. Many rust remover products must be rinsed with specific ratios or follow-up neutralizing cleaner. Failure here is common: residue can continue reacting with the tank interior or interfere with later coating/compatibility steps.
Research anchoring (fuel-tank implications)
According to NFPA 30, controlling ignition sources during flammable liquid work is essential because vapor can ignite at concentrations far below what you see as liquid “spill.”
According to OSHA, flammable liquids like gasoline require careful handling due to low ignition thresholds and rapid vapor generation.
According to US EPA, waste streams that contain hydrocarbons, metals, or reactive residues may fall under hazardous waste management requirements depending on characterization—so treat rust-remover runoff and sludge as regulated waste until confirmed otherwise.
Decontaminate and Dry Completely
You decontaminate and dry the tank to remove chemical residue and eliminate moisture so the tank doesn’t “start corroding again” the moment you add fresh fuel. Drying is where many DIY cleanouts fail—chemically “clean” is not the same as “ready for fuel.”
Chemical tank cleaners and rust removers often leave films if not fully rinsed, which can interfere with fuel quality and clog filtration.
Complete drying is required because residual water promotes corrosion and fuel-water separation behavior that returns contaminants to the system.
When drying fuel tanks, ignition control and ventilation remain critical because any residual vapors can be ignitable.
Remove chemical residue with final rinses per product instructions
Run final rinses exactly as directed:
– Correct rinse solution (water only vs water + neutralizer, depending on product)
– Correct volume/contact time
– Correct disposal for the rinse runoff
If you used a rust remover, perform the neutralization and then at least the label-recommended rinses. I like to verify rinse cleanliness by collecting a small sample and comparing clarity/odor to earlier runoff.
Dry the tank using time, airflow, and clean ventilation (no sparks)
Drying methods:
– Airflow + time: open access ports and let airflow circulate.
– Warm, non-sparking airflow: only if you can keep conditions safe (no sparking heaters).
– Absorbent wicking: for areas that trap moisture, use inert absorbents (compatible with fuel-tank servicing).
Avoid:
– Shop-vac if not rated for flammable vapor environments
– Unsealed power tools that can spark
– Enclosed spaces without active ventilation
Confirm dryness before adding any fresh fuel
Confirm with practical checks:
– No visible droplets or wet sheen
– No “wet” odor signature from pooled water
– Clear runoff from a final micro-rinse test (if you choose that method)
Q&A: How soon can I add fresh fuel after cleaning?
Q: Can I add fuel immediately after the last rinse?
No—wait until the tank is thoroughly dry and chemical residue is fully removed; residual moisture or cleaner films can accelerate corrosion and contaminate fuel quality.
Reassemble and Test Before Using
You reassemble with fresh seals and test carefully so you catch leaks or leftover contamination before the tank is fully back in service. The goal is to verify flow, pressure (if applicable), and filtration behavior under real demand—not just “it starts.”
Fuel system components like sending units and access caps should use new gaskets/seals when contamination and age may have compromised their sealing performance.
A leak test should be performed before full operation because fuel vapors can accumulate and create fire risk even after cleaning.
Staged testing—small fuel dose first—reduces the impact of any remaining sediment by limiting exposure to pumps and injectors.
Reinstall components with new gaskets/seals if needed
Replace:
– Old gaskets
– Any brittle O-rings
– Seals weakened by chemical exposure
Lubricate only with products compatible with fuel and the seal material (follow manufacturer guidance).
Start with a small amount of fresh fuel and check for leaks
Use a careful first run:
– Add a small amount of fresh, known-good fuel
– Prime the system if required
– Inspect around sending unit openings, cap seams, and lines
Monitor performance and recheck if you notice filtering or delivery issues
Watch for:
– Fuel filter loading quickly (a sign of remaining fine sediment)
– Pressure drops or intermittent starvation
– Unusual smell/odor from venting areas
From experience, it’s smart to plan a short follow-up:
– Inspect the filter after the first run cycle
– If the tank was badly contaminated, consider repeating a rinse cycle rather than forcing the system to “burn it out.”
Final decision rule: when to stop and call a professional
If the tank is heavily pitted, has severe flaking corrosion, or has structural seam damage, cleaning may not restore reliability. In those cases, professional tank inspection or replacement is typically the safest path—especially for vehicles, boats, and equipment where failure can create major safety and environmental risk.
When done correctly, cleaning an old fuel tank means removing old fuel, sludge, and rust-causing buildup—and then drying and reassembling safely. Follow the preparation, staged draining/filtration, rust treatment, decontamination rinses, and complete drying steps above, dispose of waste responsibly, and test with fresh fuel in controlled increments to confirm the tank is ready; if corrosion is severe or the tank interior remains heavily pitted after treatment, treat professional inspection or replacement as the prudent next move.
Frequently Asked Questions
How do you clean out an old fuel tank safely before reuse?
Start by removing the tank and working outdoors with proper ventilation, since fuel vapors are highly flammable. Drain all old gasoline or diesel, then purge with an inert method recommended for fuel systems (for example, controlled air movement) rather than creating sparks. Use compatible cleaners and avoid mixing chemicals; if the tank is heavily contaminated or corroded, consider professional tank cleaning or replacement.
What’s the best way to remove sludge and rust from an old fuel tank?
Begin by draining residual fuel completely and then inspect for visible sludge, varnish, and rust scale. Use a tank-specific cleaning solution or detergent/solvent designed for fuel tank buildup, and scrub or rinse thoroughly to lift sediment from the bottom and seams. For heavy rust, you may need mechanical agitation inside the tank (such as shaking with clean, non-sparking hardware) followed by repeated flushing until water and rinse solvent run clear.
Which products are safe for cleaning gasoline vs. diesel tanks?
Always use cleaners that are explicitly labeled for the fuel type you’re working with, since gasoline and diesel leave different residues and may react differently with solvents. Many people start with a degreaser or fuel-tank cleaner, then follow with proper rinsing and drying to prevent contamination of the fuel system. Avoid household acids or unknown “tank flush” mixtures unless the manufacturer confirms they’re safe for your tank material (steel, aluminum, or plastic).
Why does an old fuel tank clog filters, and how do you prevent it?
Old fuel tanks often develop varnish, sludge, and rust that break loose when you introduce fresh fuel, which rapidly clogs fuel filters and can strain the fuel pump. Prevent this by thoroughly cleaning the tank interior, flushing out fine particles, and replacing the fuel filter and—on many vehicles—serviceable fuel lines or pre-filters. After installation, run fresh fuel and monitor for continued restriction or poor engine performance.
How can you test whether the tank is clean and dry enough to reinstall?
After the final rinse, check inside the tank for any remaining sediment, discoloration, or tacky residue, especially at the bottom where sludge collects. Ensure the tank is fully dry before refueling—use controlled drying methods appropriate for the tank (and your safety gear), and avoid reintroducing moisture that can cause water contamination and corrosion. Finally, consider using a clear inline fuel filter during the first few tankfuls to confirm the cleaning process removed debris.
📅 Last Updated: July 25, 2026 | Topic: how to clean out an old fuel tank | Content verified for accuracy and freshness.
References
- Google Scholar Google Scholar
https://scholar.google.com/scholar?q=cleaning+old+fuel+tank+sludge+water+rust+procedure - Google Scholar Google Scholar
https://scholar.google.com/scholar?q=petroleum+tank+cleaning+confined+space+entry+ventilation+gas+testing - Google Scholar Google Scholar
https://scholar.google.com/scholar?q=underground+storage+tank+closure+cleaning+decommissioning+guidance - Underground storage tank
https://en.wikipedia.org/wiki/Underground_storage_tank - Underground Storage Tanks | US EPA
https://www.epa.gov/ust - 1910.146 – Permit-required confined spaces | Occupational Safety and Health Administration
https://www.osha.gov/laws-regs/regulations/standardnumber/1910/1910.146 - https://www.cdc.gov/niosh/topics/confinedspace/
https://www.cdc.gov/niosh/topics/confinedspace/ - https://www.pubmed.ncbi.nlm.nih.gov/?term=fuel+tank+cleaning+exposure
https://www.pubmed.ncbi.nlm.nih.gov/?term=fuel+tank+cleaning+exposure - GovInfo | U.S. Government Publishing Office
https://www.govinfo.gov/ - Google Scholar Google Scholar
https://scholar.google.com/scholar?q=how+to+clean+out+an+old+fuel+tank
