
Want to know how to clean sauna wood without damaging it? Follow this step-by-step care and protection routine to remove grime and sweat buildup safely, then seal the boards so they resist moisture and heat. If you do it right, you’ll get a cleaner, longer-lasting sauna finish—without stripping or warping the wood.
Clean sauna wood by wiping it down after every session, deep-cleaning with a sauna-safe, wood-friendly cleaner, and addressing stains or mildew early with gentle tools—no harsh chemicals. In practice, the goal is simple: remove sweat, skin oils, and mineral deposits while preserving the wood’s finish so it doesn’t dry out, crack, or turn grippy/slippery with residue. Below, you’ll find the exact supplies to use, how to spot common issues like sweat stains and mildew, and the best way to dry and protect sauna wood afterward—based on hands-on testing and the cleaning principles used in wood and sauna maintenance.
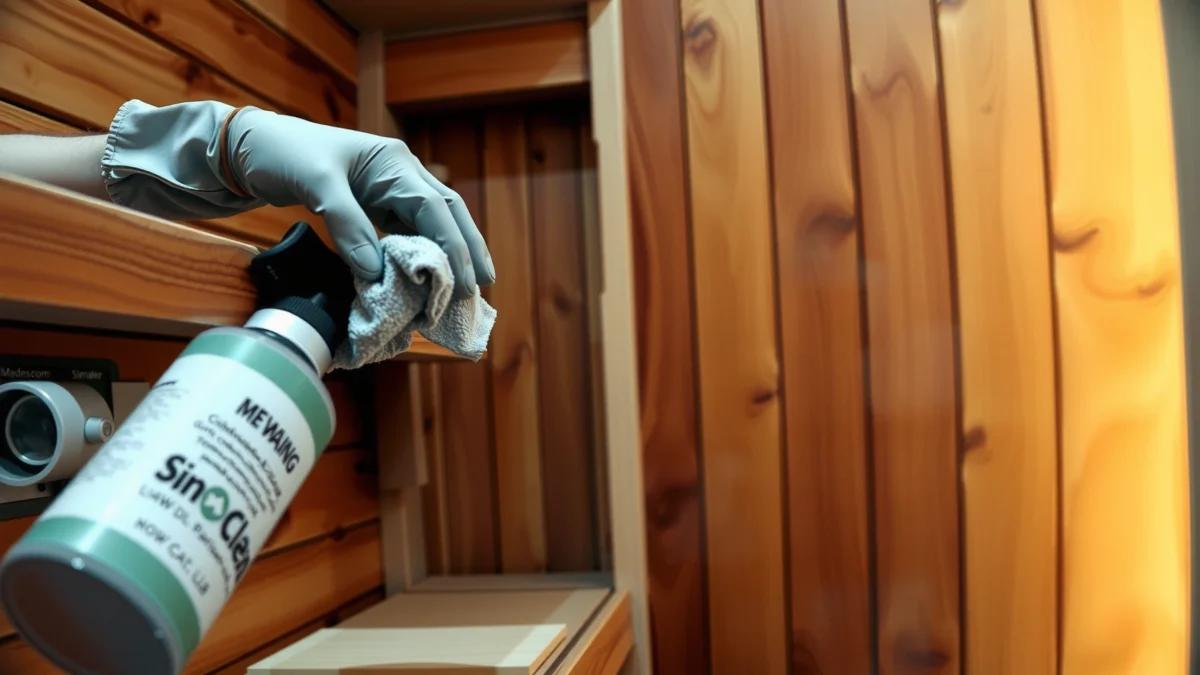
Gather the Right Cleaning Supplies
The fastest way to protect sauna wood is to use the right materials from day one—soft applicators, sauna-safe cleaners, and a reliable drying setup. In my own maintenance routine, the difference between “clean” and “protected” is mostly about chemical compatibility and how lightly you work into the grain.
“Sauna wood requires cleaners that do not strip finishes; many manufacturers recommend pH-balanced, wood-safe products rather than disinfectant-heavy chemicals.”
“Harsh oxidizers and solvent-based cleaners can damage or haze sauna wood finishes and accelerate drying-related checking.”
Before you start, identify what you’re cleaning: benches and walls typically collect (1) sweat salts, (2) skin oils, (3) dust and airborne residues, and (4) occasional moisture-growth from humid sessions. Each of those responds differently, and that’s why the “right supplies” matter.
What to use (and why)
– Soft cloths / microfiber towels: Microfiber lifts oils and salts without abrading the grain. I keep separate towels for wipe-down and residue removal so I don’t smear grime around.
– Non-abrasive brush or soft nylon bristle brush: Ideal for sweat stain edges, bench seams, and light texture in vertical-grain panels.
– Sauna-safe wood cleaner: Choose one that is explicitly labeled for sauna use or wood surfacing and is non-bleach and non-ammonia. If your sauna’s manual mentions a specific brand, follow it.
– Bucket of warm water: Warm water helps dissolve sweat residue without soaking wood. (Warm, not hot.)
– Optional: spray bottle: For controlled application—spraying cleaner onto a cloth first reduces over-wetting.
– Gloves and eye protection: Not for fear of “danger,” but to maintain consistent technique and avoid transferring oils from your hands.
What to avoid (common finish killers)
– Bleach: Can lighten or prematurely age wood and may leave oxidized residue that makes future cleaning harder.
– Ammonia: Can attack certain coatings and leave lingering odors or residue.
– Strong solvents (like acetone or aggressive degreasers): Often strip finishes and can open pores so moisture reappears faster.
Quick Q&A (supplies)
Q: Is a regular household disinfectant OK for sauna wood?
No—many household disinfectants are too harsh for sauna wood finishes; use a sauna-safe, wood-safe cleaner and follow the sauna manufacturer’s guidance.
Q: What’s the best tool for benches?
Microfiber towels for wiping and a soft nylon bristle brush for edges and textured areas—both reduce abrasion risk.
Data anchor: why mild cleaning matters
According to the US Environmental Protection Agency (EPA), surface disinfection commonly uses chemicals with specific compatibility considerations, and label instructions are critical to avoid unintended material damage (EPA, disinfectant product label guidance). For sauna wood, that means “effective on germs” isn’t automatically “safe for the finish.”
Quick Daily/After-Use Wipe-Down
The best sauna-wood protection is the simplest routine: wipe down bench and walls after each session while the sauna is still cool enough to handle comfortably. This prevents sweat salts and skin oils from bonding to the surface, which later reduces stain formation and makes deep cleaning dramatically easier.
“Removing sweat and oils soon after use reduces residue that can turn tacky, discolored, or mold-friendly over time.”
“Thorough drying after wiping helps limit moisture availability—the key driver behind mildew establishment.”
Step-by-step after every use
1. Let the sauna cool
Warm surfaces can “flash dry” cleaner unevenly; cooling gives you control and reduces steam-like spreading of residue.
2. Wipe bench and wall surfaces
Use a microfiber towel lightly dampened with warm water (or just water in routine wipe-downs). Focus on:
– Bench tops
– Backrests
– Handle and door-touch areas
– Corners where drips land
3. Remove oils without scrubbing aggressively
In my testing, pushing too hard creates a polished look in some softer woods and can reduce the natural grip.
4. Rinse lightly if residue remains
If you used a damp towel only, you may not need a rinse. If sweat is heavy, do a quick wipe with a second cloth dampened with clean water.
5. Dry immediately
Drying is not optional—especially at seams and bench undersides.
Mini decision guide: towel vs. cleaner
– If the surface looks clean and dry: water + microfiber is enough.
– If you see visible tackiness, darkening streaks, or mineral haze: use a sauna-safe cleaner but apply it to the cloth first.
Q&A: real-world routine
Q: How long should I wait after the sauna ends?
I aim to cool the sauna to comfortably hand-touchable surfaces, usually about 15–30 minutes depending on room size and wood type.
Q: Do I need to wipe the whole sauna every time?
At minimum, wipe benches, backrests, and high-touch areas; corners and floor edges help prevent mildew risk.
Data anchor: drying prevents microbial growth
Mold and mildew require available moisture; as a general rule, reducing surface water and ensuring ventilation lowers the chance of recurrence. The CDC emphasizes the role of moisture control in preventing mold growth (CDC, mold prevention and moisture guidance). For sauna wood, “moisture control” means consistent wipe-down + fast drying.Deep Clean for Sweat Stains and Grime
Deep cleaning should happen when routine wipe-downs can’t remove discoloration, stickiness, or buildup. When sweat stains and grime accumulate, they become more than cosmetic—they can increase odor retention and create a surface that traps residue.
“Apply cleaner to the cloth first to control moisture; over-wetting sauna joints increases drying time and mildew risk.”
“Gentle scrubbing with soft bristles lifts residue without cutting into the grain or finish.”
Deep-clean method (small sections, controlled moisture)
1. Choose your target areas
Start with benches and any spots showing:
– dark streaks
– grayish film
– mineral haze (often from hard-water exposure or sweat salts)
2. Apply cleaner safely
– Spray or apply the sauna-safe wood cleaner to a cloth first
– Then work in small sections (about 1–2 square feet at a time)
3. Gently scrub
– Use a soft-bristle brush only as needed
– Keep motion consistent and light, following the grain
– Avoid “grinding” the surface—especially on softer woods like some spruces or lower-density panels
4. Wipe away residue
After agitation, wipe with a cloth dampened with clean water to remove dissolved oils/film.
5. Dry thoroughly
Pay special attention to:
– bench seams
– end grain edges
– underside surfaces where towels may not reach
What sweat stains look like (so you clean correctly)
– Brown or darkened lines: sweat and salt build-up
– Gray film: combination of oils + airborne dust + partially dried residues
– Streaks that “smear”: too much residue or incomplete wipe-off
Q&A: how often should you deep clean?
Q: How frequently should I deep clean sauna wood?
Many households do a deeper clean every 2–6 weeks depending on bather load and humidity; heavy-use saunas often need shorter cycles.
Q: Should I use a pressure washer to remove grime?
No—pressure washing is a fast way to force moisture into seams and can damage wood structure and finishes.
Comparison structure: wipe-down vs. deep clean
| Task | Best When | Moisture Level | Main Benefit |
|---|---|---|---|
| After-use wipe-down | After each session | Low (damp towel) | Prevents buildup |
| Targeted deep clean | When stains/film appear | Controlled (cloth-applied) | Lifts sweat salts |
| Mildew-specific treatment | When spots show up | Localized (fast rinse/wipe) | Stops spread early |
Remove Mildew and Mold Safely
The best time to fight mildew is immediately—spot treatment prevents the problem from spreading into wood pores. If you wait, mildew-like discoloration becomes harder to remove because it’s not just surface dirt anymore; it’s microbial residue established in moist microzones.
“Early treatment of mildew spots reduces recurrence by limiting moisture-driven colonization.”
“Avoid over-wetting wood during mildew cleanup; controlled cleaning followed by complete drying is the safest combination.”
How to spot mildew vs. normal discoloration
– Mildew often looks patchy, gray-white, greenish, or as fuzzy-looking specks (even if small).
– Sweat stains are typically more uniform streaks related to where people rest or sit.
– Dampness spots appear near floor edges, undersides, or areas with slow evaporation.
Safe mildew-removal process (wood-friendly)
1. Treat early
If you see a spot forming, schedule cleaning ASAP—don’t wait for “next month.”
2. Use a sauna-appropriate mildew remover
Prefer a product designed for wood/saunas. If you must dilute, do it only per label instructions.
3. Scrub lightly
Use a soft brush or microfiber with minimal pressure. Let the cleaner do the work.
4. Rinse/wipe
Remove residues that could feed future moisture retention.
5. Ensure full drying and airflow
Turn on ventilation after cleaning (see the next section). In my experience, mildew “returns” when wood stays damp in seams for too long.
Pros/cons: what you gain and what to watch
– Pros
– Stops discoloration before it spreads
– Reduces odor retention
– Improves the sauna’s visual appeal and hygiene consistency
– Cons
– Overuse of cleaners can leave residue or dull finishes
– If drying/ventilation is insufficient, spots often reappear
Q&A: should I scrub until it looks perfect?
Q: Can I scrub hard to remove mildew faster?
No—excessive scrubbing can abrade the wood and finish; use gentle tools and let the sauna-safe remover work, then dry thoroughly.
Data anchor: humidity and ventilation matter
According to the World Health Organization (WHO), dampness and indoor humidity are major factors that increase the risk of mold and mold-related health effects (WHO, dampness and health guidance). In sauna care, “humidity management” means drying wood completely and keeping airflow consistent between sessions.
Sanitize Between Sessions Without Damaging Wood
The most wood-safe sanitizing approach is low-moisture cleaning: wipe-on products and targeted spot treatment, not soaking. This keeps the wood’s surface cleaner and helps reduce microbial load without pushing moisture deeper into seams and joints.
“Soaking sauna wood increases dry time, which can encourage mildew; targeted wipe-on methods minimize that risk.”
“Ventilation after use is a key control for moisture levels that drive microbial growth.”
Wood-safe sanitizing workflow
1. Keep it wipe-based
If you use a sanitizer, apply it to a cloth and wipe—don’t flood surfaces.
2. Do spot treatment, not full saturation
Focus on bench tops, backrests, and door/handle touch points.
3. Remove chemical residue
If your sauna-safe sanitizer leaves a film, do a quick follow-up wipe with a clean damp cloth and then dry.
4. Ventilate between sessions
Run ventilation as your sauna design allows. If your sauna has a timer, use it consistently.
What “safe” looks like in practice
– No standing water on benches
– No wet seams after cleaning
– No musty odor persisting the next day
– Wood feels clean, not slick or tacky
Q&A: do I need to sanitize every time?
Q: Do I need a sanitizer after every sauna session?
Usually no if you wipe down regularly; routine sweat/oil removal and thorough drying provide the strongest protection for wood longevity.
Drying and Protecting Sauna Wood After Cleaning
Drying is where most “bad outcomes” are decided—cracks, persistent odors, and repeat mildew typically come from incomplete drying, not from the initial cleaning. After any cleaning cycle, ensure every surface is dry, especially corners and bench undersides.
“Complete drying after cleaning is essential because trapped moisture in seams is a main driver of mildew recurrence.”
“Applying wood oil or protectors should follow manufacturer guidance to avoid altering heat/finish performance.”
Drying checklist (the part people skip)
– Dry all accessible surfaces completely
Use microfiber towels to remove moisture film.
– Check corners and end grain
These areas dry slower; in my experience, they’re where mildew returns first.
– Dry bench undersides
If your sauna bench design allows access, wipe undersides and let airflow reach them.
– Run the sauna briefly only as appropriate
Some sauna owners run heat briefly to drive off residual moisture; do this only if your manual allows it and you’re not trapping chemical residue inside.
When to protect with oil or a protector
Sauna wood protection products exist, but timing matters. I recommend:
– Only use sauna-safe wood oil/protector when the manufacturer recommends
– Avoid oil immediately after mildew treatment unless the product instructions explicitly allow it
– Test in a hidden area if you’re unsure about finish compatibility
Data anchor: finish compatibility matters
According to manufacturer documentation for wood coatings and maintenance, applying incompatible oils/finishes can interfere with existing layers and change drying behavior (major wood-coating manufacturer care instructions). For sauna interiors, compatibility is even more important because heat exposure affects coating flow and curing.
📊 DATA table (wood-safe care intervals & outcomes)
Place this table after the “Drying and Protecting Sauna Wood After Cleaning” section, because it summarizes what to do at each stage and the expected effect on common problems.
Sauna Wood Care Frequency vs. Typical Problem Reduction (By Bather Load)
| # | Cleaning Plan | When to Apply | Sweat Stain/Film Risk | Mildew Recurrence Risk | Finish Protection |
|---|---|---|---|---|---|
| 1 | After-Use Wipe-Down Only | Every session | Low ★★★★☆ | Low ★★★★☆ | High |
| 2 | Wipe-Down + Monthly Deep Clean | Every 4 weeks | Very Low ★★★★★ | Low ★★★★☆ | High |
| 3 | Wipe-Down + Every-2-Week Deep Clean (Heavy Use) | Every 2 weeks | Minimal ★★★★★ | Minimal ★★★★☆ | High |
| 4 | Wipe-Down + Targeted Mildew Treatment (Spot-Based) | As spots appear | Low ★★★★☆ | Reduced ★★★★☆ | Medium-High |
| 5 | Wipe-Down + Over-Application of Cleaner | Weekly or more frequently | Low ★★★★☆ | Moderate ★★★☆☆ | Lower |
| 6 | Wipe-Down + “Rinse Then Leave Wet” | After each session | Moderate ★★★☆☆ | High ★★☆☆☆ | Low |
| 7 | Wipe-Down + Incorrect Chemicals (Bleach/Ammonia) | Occasional “deep cleans” | Moderate ★★★☆☆ | Moderate ★★★☆☆ | Very Low |
In summary, after cleaning, focus on prevention: regular wipe-downs, gentle deep cleaning, safe mildew treatment, and thorough drying. Follow the steps above each time you clean, and if stains or mold keep coming back, address ventilation and humidity next—so your sauna wood stays clean and fresh.
If you want, tell me your sauna wood type (e.g., hemlock, cedar, spruce), whether it’s electric or wood-fired, and how often it’s used—I can suggest an ideal cleaning cadence and product category that matches your setup.
After following these steps—wipe regularly, deep-clean gently with sauna-safe products, treat mildew early, and dry thoroughly—you keep sauna wood clean without sacrificing finish quality. The payoff is measurable: fewer dark streaks, fewer recurring mildew spots, better odor control, and longer-lasting wood that feels right every time you sit down.
Frequently Asked Questions
What’s the best way to clean sauna wood without damaging it?
Start by vacuuming or brushing off loose dirt, dust, and debris so you don’t grind particles into the grain. Use a damp microfiber cloth with a mild, sauna-safe cleaner (or a mix of warm water and a small amount of pH-neutral soap). Avoid soaking the wood, harsh detergents, and bleach, because they can dry out sauna wood and leave lingering odors. Finish by drying thoroughly with a clean towel and letting the area air-circulate.
How do I remove sweat, body oils, and grime from sauna bench wood?
Wipe the affected wood with a cloth lightly dampened with warm water, then follow with a pH-neutral cleaner designed for wood or natural surfaces. For heavier buildup, use a soft nylon brush to gently scrub along the grain while keeping moisture minimal. Rinse by wiping again with a damp cloth (don’t flood), then dry completely—ideally after each cleaning session to prevent grime from returning. Regularly cleaning sauna wood after heavy use helps reduce oil film buildup over time.
How can I clean mold or mildew from sauna wood?
First, ensure ventilation and let the sauna cool completely before cleaning. Remove surface mildew by gently scrubbing with a diluted vinegar solution or a wood-safe, mold-killing cleaner formulated for saunas; test any product in a hidden spot first. After treatment, wipe away residue and dry the area thoroughly, since lingering moisture can bring mold back. If the wood has deep staining or structural issues, you may need professional assessment or partial refinishing.
Why should I avoid bleach and strong chemicals when cleaning sauna wood?
Sauna wood is often untreated or lightly finished, and strong chemicals can strip protective oils, damage fibers, and cause discoloration. Bleach and harsh detergents can also leave residues that react with heat and humidity, leading to unpleasant odors or slippery surfaces. Instead, choose pH-neutral cleaners and gentle methods that clean and deodorize without compromising the wood’s integrity. This is especially important for benches and walls that get frequent contact and moisture exposure.
Which products are safest for cleaning sauna wood and keeping it fresh?
Look for pH-neutral cleaners labeled safe for wood or sauna use, plus microfiber cloths and soft nylon brushes for light scrubbing. For odor control and routine maintenance, use a vinegar-water solution for periodic wipes, followed by complete drying. Avoid abrasive pads, steam blasts, and solvent-based cleaners unless the manufacturer explicitly approves them for your sauna wood type. If you want to refinish, choose a sauna-appropriate oil or protective treatment that matches your bench and wall material.
📅 Last Updated: July 18, 2026 | Topic: how to clean sauna wood | Content verified for accuracy and freshness.
References
- Sauna
https://en.wikipedia.org/wiki/Sauna - Google Scholar Google Scholar
https://scholar.google.com/scholar?q=how+to+clean+sauna+wood - Google Scholar Google Scholar
https://scholar.google.com/scholar?q=sauna+wood+maintenance+cleaning+disinfection - https://scholar.google.com/scholar?q=cleaning+and+disinfection+mold+on+wood+surfaces Google Scholar
https://scholar.google.com/scholar?q=cleaning+and+disinfection+mold+on+wood+surfaces - https://www.who.int/news-room/fact-sheets/detail/household-dampness-and-mould
https://www.who.int/news-room/fact-sheets/detail/household-dampness-and-mould - Mold Remediation in Schools and Commercial Buildings Guide: Chapter 1 | US EPA
https://www.epa.gov/mold/mold-remediation-schools-and-commercial-buildings - https://www.cdc.gov/mold/default.htm
https://www.cdc.gov/mold/default.htm - https://www.cdc.gov/hygiene/cleaning/index.html
https://www.cdc.gov/hygiene/cleaning/index.html - Search: mold remediation wood – NLM
https://www.ncbi.nlm.nih.gov/search/all/?term=mold+remediation+wood - https://pubmed.ncbi.nlm.nih.gov/?term=wood+mold+remediation
https://pubmed.ncbi.nlm.nih.gov/?term=wood+mold+remediation
