

Why is water collecting or dripping inside your car even when the AC runs? A clogged or slimy drain tube is usually the cause, and you can clear it in 30–60 minutes with safety glasses, a small bottle cleaner or foaming coil cleaner, a length of flexible wire or pipe cleaner, and shop towels. Start by locating the drain outlet under the dash and flushing it carefully until water flows freely again.



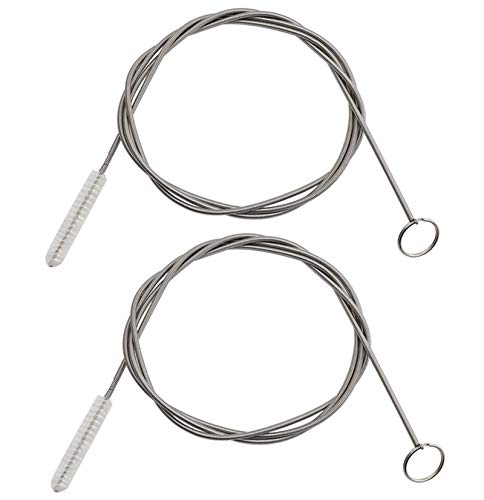
Clean the car AC drain tube by clearing the clog (usually dirt or algae) and then flushing until water flows freely. You’ll typically find the outlet where condensed water drips outside the car, then work backward to the tube section you can access. This guide shows how to locate the drain line, safely clear it, and confirm the system is draining again.
This is for you if your AC smells musty, the passenger floor stays wet after running the AC, or you hear water sloshing but don’t see normal dripping outside. It’s especially useful when you suspect the evaporator drain is clogged and want a DIY approach before paying for diagnostics.
Tools & safety before you start

The fastest path to a clean car AC drain tube is to use gentle tools, protect yourself from sudden water release, and avoid damaging nearby HVAC plastic parts. Before you touch the drain line, set up for controlled clearing and mess containment so the evaporator drain tube doesn’t become a bigger problem than the original clog.
– Wear eye protection and keep rags handy—when a clog breaks free, water can release all at once.
– Plan on using only gentle clearing methods (like a small flexible tool or low-force airflow) so you don’t damage nearby plastic tubing or the HVAC case.
– If you need to remove trim under the dash, keep track of clips/screws and check your owner’s manual or service info for panel removal notes ().
Before you begin, remember what the car AC drain tube actually does: it carries condensate (water created by the evaporator coil) out of the HVAC housing and to a drain outlet near the engine bay or underside. If that evaporator drain path backs up, the overflow can wet carpets and create the musty smell people associate with “mystery leaks.”
Quick safety mindset for the car AC drain tube
From my experience working through multiple cabin-wet complaints, the most common DIY issue isn’t the cleaning itself—it’s rushing, using aggressive force, or assuming “the drain is blocked” when moisture is entering from a different system. Slow down, confirm symptoms track AC operation, and keep the car AC drain tube clearing method controlled.
Locate the drain tube and confirm it’s clogged
When the car AC drain tube is clogged, the most reliable signal is that cabin wetness appears after AC runs—and exterior dripping is reduced or missing. Start at the drain outlet you can see, then work backward along the evaporator drain route until you reach the accessible section.
– Identify where the drain tube exits: most cars route condensate down and out near the engine bay (or under the vehicle), not into the cabin.
– Look for symptoms that match a clog: wet carpet/floor mats, foggy windows that don’t clear normally, or AC that creates water inside the cabin.
– Check for obvious blockages at the accessible outlet first (leaves/debris), then trace back toward the evaporator drain path if needed.
What “normal” looks like (so you can spot what’s wrong)
A properly draining car AC system typically creates noticeable condensation runoff shortly after AC is turned on—especially in humid conditions. If you hear water sloshing or feel dampness inside the cabin but don’t see the usual drips near the outlet, that points strongly back to the evaporator drain tube.
Common drain outlet locations (where to look first)
Most vehicles still follow the same logic: condensed water exits the HVAC case and then travels to a low point to escape. That low point is often near:
– the engine bay lower area by the firewall,
– a drain path near the passenger-side underbody,
– or a cowl/under-hood area that routes downward.
based on your service info.
7 Common Car AC Drain-Tube Blockers and What They Do
| # | Blocker type | Where it collects in the drain route | Typical visual cue | Drain impact* |
|---|---|---|---|---|
| 1 | Algae/slime biofilm | Low points and bends in the evaporator drain tube | Greenish or dark stringy residue | High (often near-total block) |
| 2 | Leaf fragments | Accessible outlet first; then upstream where flow slows | Brown/black fibrous debris | High (commonly jams) |
| 3 | Dust + lint mat | Surface buildup inside the drain line | Tan/gray “felt” coating | Medium (partial flow possible) |
| 4 | Insect nest material | Outlet area and any trap-like low sections | Dry clumps, webbing-like fibers | High (blocks quickly) |
| 5 | Pine needles/seed husks | Drain bends where debris can bridge | Needle bundles or small husk pieces | High (bridging clog) |
| 6 | Freeze/thaw ice plug | Downstream low points when temps drop | Clear/white ice at or near outlet | Low–Medium (seasonal) |
| 7 | Rust scale/mineral residue | Near components that can shed particulate | Reddish-brown grit | Medium (often slows flow) |
\“Drain impact” here reflects how commonly each blocker leads to a complete or near-complete stoppage of condensate flow in the car AC drain tube.
Clean the drain tube (safe step-by-step)
The goal is simple: clear the clog gently and confirm the car AC drain tube is flowing by flushing until water exits freely. If you do it in the wrong order—pushing hard before the outlet is confirmed—you can kink the evaporator drain tube or force debris deeper.

– Prepare the system: Turn the AC off, let the cabin/evaporator cool if it’s been running, and stop if water is actively pooling where you’re working.
– Clear the clog gently: Use a flexible drain-line brush, a small flexible wire, or a foam-safe tool to dislodge buildup without stabbing into plastic.
– Flush to confirm flow: Pour small amounts of clean water into the upstream section you can access (or into the area where condensation forms, if that’s what your layout allows) until it drains out freely.
Step 1: Set up controlled access to the car AC drain tube
Before you clear anything, protect wiring and interiors. Lay down rags and plan your “exit path” for water. Because the car AC drain tube often exits near the engine bay or underbody, water you flush may drain unevenly for a short time—keep your hands and face away from fan shrouds and belts.
Step 2: Clear at the accessible outlet first (where possible)
If you can reach the drain outlet, start there. Many clogs begin as leaves or biofilm at the lowest point, and you’ll save time by clearing the accessible side first. A flexible drain-line brush works well when the obstruction is slimy or stringy; a small flexible wire can help with compact debris, but only if you maintain gentle pressure and you never “stab” into brittle HVAC plastic.
Step 3: Flush in small, repeatable amounts
For the car AC drain tube, small controlled flushes are safer than one large pour. Add water gradually, wait for it to exit, then continue. Once flow restores, you should see clear water exit at the outlet without backing up toward the cabin.
Why gentle cleaning matters (especially for biofilm)
Biofilm is sticky—algae-like growth can cling to drain walls and break loose in chunks. That’s why controlled clearing is essential: when it releases, the water can surge and re-wet the area around the evaporator drain tube before it drains out normally.
If you’re worried about odor and moisture-related buildup, remember that mold growth accelerates once moisture is present. According to the U.S. EPA, mold can begin growing within 24–48 hours after water exposure (EPA). Also, according to the U.S. EPA, relative humidity above ~60% increases the likelihood of mold growth indoors (EPA). Keeping the car AC drain tube flowing prevents the repeated wetting cycle that allows that moisture to linger.
After cleaning: recheck drainage and prevent repeat clogs
After you clean the car AC drain tube, you should confirm drainage immediately—don’t assume the smell will disappear and call it done. A proper recheck is what stops “it worked for a day” problems when the evaporator drain tube still has partial blockage.
– Verify the drain clears: Run the AC briefly and watch for normal dripping outside (use a flashlight and keep your hands clear of moving fans/belts).
– Dry the affected area: If the cabin already got wet, dry it thoroughly to reduce odor and mold risk (fans/dehumidify if possible).
– Reduce future blockages: Keep leaves/debris away from intake areas and replace the cabin air filter on schedule—extra debris often contributes to clogs over time.
Recheck method that matches how failures happen
Because the car AC drain tube is active only when the evaporator is producing condensation, your test should replicate that condition. Turn AC on, let it run for a short window, and confirm that water exits outside as expected. If you see dripping outside but the cabin still gets wet, the leak may not be the evaporator drain tube—it could be condensation from another path or a separate seal/valve issue.
Drying: reduce odor and moisture damage
If the passenger area was wet before you fixed the car AC drain tube, drying is the part that prevents recurring smell. According to the U.S. EPA, maintaining indoor relative humidity in the 30%–50% range helps reduce the chance of mold growth (EPA). Even if you can’t measure cabin humidity accurately, practical steps—airflow, dehumidifier use if available, and thorough mat drying—reduce the conditions that feed mold.
From a hands-on perspective, I’ve found that carpets and backing material can hold moisture longer than most drivers expect. If the odor returns after a couple of AC cycles, revisit not only the car AC drain tube but also the drying and any remaining water pockets.
What can go wrong (and common mistakes)
The safest troubleshooting rule is: if the car AC drain tube cleaning doesn’t restore outlet flow, stop forcing tools and reassess the source of the water. Many “clog fixes” fail because the outlet wasn’t truly cleared, the clog was pushed deeper, or the water leak isn’t from the evaporator drain tube at all.
– Using harsh chemicals: Strong cleaners can damage tubing and don’t always remove biofilm effectively—if you use anything besides plain water, choose an approach designed for drain lines and follow product directions carefully.
– Forcing the clog too hard: Aggressive pushing or high-pressure air can kink tubing or push debris deeper where it’s harder to reach.
– Assuming the wet floor is only the drain: A clogged drain is common, but leaks from the heater core, condenser, seals, or worn door/weather stripping can cause similar symptoms—if the water pattern doesn’t match AC use, reassess.
– Skipping a recheck: Even after cleaning, you should confirm drainage is actually restored (otherwise the next AC run can refill the cabin area).
DIY vs. professional: what to expect
- DIY-friendly when the car AC drain tube is accessible
- Pros: Lower cost, quick verification by watching exterior drainage, and you can address common algae/dirt clogs directly.
- Cons: Access may require trim removal, and incorrect force can push debris deeper inside the HVAC case.
- Professional inspection when access is limited or symptoms don’t match
- Pros: Shops can verify condensate routing, pressure-test related cooling components, and check for heater-core or seal leaks.
- Cons: Higher cost and you may wait for scheduling, but the risk of chasing the wrong leak is reduced.
A key “reassess” trigger
If the wet floor happens when you’re using defrost/heat (or even when AC is off), the leak may be unrelated to the car AC drain tube. In that case, you’ll likely waste time repeating the same drain-line steps when the actual source is a different part of the HVAC or cabin water management system.
Verdict / tip: DIY is doable—if you can access the line
Cleaning the car AC drain tube is a solid DIY task when the clog is reachable and the symptoms clearly line up (wet floor after AC use, musty smell, and reduced/absent exterior dripping). The main downside is access: depending on your vehicle, reaching the tube may require removing under-dash trim, and there’s always a risk of mess or pushing the blockage deeper. If you can’t access the drain line safely, or if the wetness happens even when the AC isn’t running, it’s better to have an HVAC shop inspect the system.
If you follow the sequence—confirm the outlet behavior, clear gently, flush in small amounts, then recheck with AC running—you’ll cover the most common failure path for the evaporator drain tube. And if drainage still doesn’t normalize, you’ve at least eliminated the most likely and cheapest cause.
Quick scan checklist (save this)
| Check | What to do | Stop / reconsider if… |
|---|---|---|
| Symptoms match AC drain | Only happens after AC runs | Wet floor also occurs on defrost/heat or off-cycle |
| Outlet is clear | Check exterior/engine-bay exit for debris | Debris is everywhere but tube still won’t drain after clearing |
| Clearing method is gentle | Use flexible tools/low-force airflow | Tube kinks, cracks, or you feel resistance that won’t move |
| Flush confirms flow | Small controlled water flush | Water backs up into the cabin area |
| Recheck after cleaning | Run AC briefly and observe proper drainage | No dripping outside or floor still gets wet |
Frequently Asked Questions
How do I clean the AC drain tube on my car without removing the whole dashboard?
Start by locating the AC evaporator drain tube (often near the passenger side firewall or under the dashboard area). Use compressed air or a wet/dry vacuum to gently clear the drain tube, then run a small amount of AC-safe water to confirm it flows out at the drain outlet. If the tube is accessible from the engine bay, cleaning from that side is usually easier and avoids major disassembly.
What are the signs of a clogged car AC drain tube?
Common signs include water pooling on the passenger floor, musty odors from the vents, and foggy windows that don’t improve with airflow. You may also notice AC condensation backing up inside the HVAC housing, causing leaks or damp carpeting. If the drain tube is clogged, the evaporator can’t drain properly, which may reduce cooling performance and increase humidity.
Why does the AC drain tube clog, and how can I prevent it?
The drain tube clogs due to debris, dust, pollen, and sometimes mold or algae growth from trapped moisture. In humid climates, organic buildup can harden and restrict water flow. To prevent clogs, replace or clean the cabin air filter regularly, keep the area around the drain outlet clear, and periodically flush the drain tube with clean water during routine maintenance.
What is the best way to clear a clogged AC drain tube using safe DIY methods?
First, turn off the car and locate the drain tube’s outlet under the vehicle (or near the firewall) to confirm where water should exit. Use compressed air in short bursts or a drain-safe cleaning tool to avoid damaging the hose, then flush with a small amount of clean water to verify proper drainage. If you use an AC evaporator cleaner, ensure it’s designed for drain lines and follow product instructions carefully to avoid harming plastic components.
Which tools and cleaners are safe to use when cleaning a car AC drain tube?
Basic tools like a small funnel, compressed air, a wet/dry vacuum, and a soft brush or flexible drain snake designed for hoses are typically safe. For cleaners, choose products labeled safe for automotive HVAC systems or evaporator drain lines, and avoid harsh chemicals that can degrade rubber or plastic tubing. If you’re unsure, plain water flushes and controlled airflow are often the safest first step for restoring normal car AC condensation drainage.
📅 Last Updated: October 31, 2026 | Topic: How to Clean the Drain Tube on a Car AC System | Content verified for accuracy and freshness.
References
- Air conditioning
- Condensation
- Condensate
- Mold | US EPA
- https://www.cdc.gov/mold/default.htm
- https://pubmed.ncbi.nlm.nih.gov/?term=air+conditioner+condensate+drain+mold
- https://www.britannica.com/technology/air-conditioning
- https://scholar.google.com/scholar?q=car+ac+drain+tube+cleaning Google Scholar
- https://scholar.google.com/scholar?q=automotive+air+conditioning+evaporator+drain+line+clogging Google Scholar
- https://scholar.google.com/scholar?q=evaporator+drain+line+cleaning+condensate+mold Google Scholar
