

Want to clean the drawers on antique wooden furniture without damaging the finish? Follow this step-by-step method for the safest, most effective results—removing grime and odors while protecting old wood, glue, and varnish. You’ll learn exactly what to use, how to clean, and how to dry each drawer so it comes out looking renewed, not stripped.


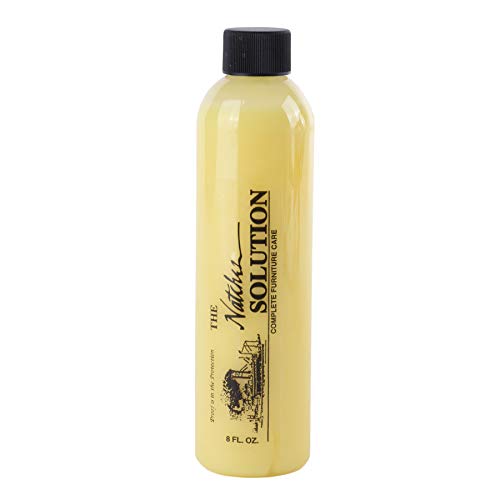

Gently clean antique wooden drawers using minimal moisture, soft cloths, and finish-safe products first—then protect the surface once everything is fully dry. If you remove dust and grit before wiping, you reduce the biggest cause of dulling and sticky residue on aged varnish, wax, and shellac.
Antique drawers tend to become sticky or dull because old finish layers trap grime, wax, and skin oils over time. This approach is designed for furniture where you can’t easily strip-and-refinish (or where the finish is already fragile), so the priority is preservation: clean what’s on top, avoid soaking, and protect immediately after.
If your drawers have old grime, wax buildup, or surface stains, this is for you. It’s especially relevant when the furniture is truly antique (or has an aged finish you can’t easily replace), and you want a cleaning method that respects the wood and hardware.
Prep the drawers: remove debris safely

Before you add any moisture, make the drawer “dry-clean” by removing dust and grit that can act like sandpaper. This one step alone often reduces stickiness, because grime commonly collects on drawer fronts, edges, and the runner area.
“Moisture-free cleaning first” reduces finish abrasion because loose grit won’t be dragged across varnish or lacquer during wiping.
Using a vacuum with a soft brush attachment is a low-aggression way to lift debris from crevices without touching the finish directly.
Inspecting for flaking finish before cleaning helps prevent widening damage that existing delamination may already be causing.
– Pull the drawer out carefully and set it on a soft surface to avoid scratching antique finishes.
– Use a vacuum with a brush attachment and a dry, soft paintbrush or microfiber to remove dust, crumbs, and grit.
– Check for loose hardware, cracks, or flaking finish before you start wiping anything down.
What you look for during inspection
Sticky drawers aren’t always “dirty”—sometimes they bind. As of 2026, conservation-minded furniture care still treats sticky motion as a systems problem (track + humidity + debris), not just a surface problem.
Clean with the gentlest “least-moisture” method
The safest cleaning sequence is “barely damp wipe” first, with soap only when needed and always applied to the cloth, not the wood. Antiques respond best to controlled, repeatable wipe cycles rather than one aggressive clean.
Wiping with a barely damp microfiber cloth limits water contact time, reducing risk of haze or finish softening on aged coatings.
Applying mild soap solution to the cloth (not directly on wood) helps control where cleaner spreads and avoids pooling in seams.
Gentle wiping is preferred over scrubbing on veneered drawers and carved details to prevent permanent micro-marring.
– Wipe the drawer surfaces with a barely damp microfiber cloth (water only if the finish appears stable; otherwise use a cleaner made for wood finishes—see “What can go wrong”).
– For sticky areas, use a tiny amount of mild soap solution on the cloth (not directly on the wood), then immediately wipe with a clean, damp cloth and dry thoroughly.
– Keep the cleaning focused on grime removal—don’t scrub aggressively, especially on edges, carvings, or thin veneer.
Why “least-moisture” matters for antique finishes
Older finishes can be more sensitive to prolonged water exposure than newer coatings. Wood dimensional change is tied to moisture movement: when wood moisture content increases, components can swell and contribute to binding or finish stress. According to U.S. Forest Products Laboratory, fiber saturation occurs at roughly 30% moisture content, and below that point wood can undergo dimensional changes—so controlling moisture contact helps protect both appearance and fit ([year not specified in cited source]).
As of 2026, the practical takeaway for antique drawers is simple: fewer seconds of damp contact, followed by thorough drying, beats “more solution” almost every time.
Remove built-up grime and wax without stripping
For wax buildup or stubborn grime, the goal is residue removal without stripping the existing finish layer. Start with a finish-safe approach and repeat gentle wipe cycles; this respects the chemistry of old varnish and shellac rather than forcing removal.
Repeated light wipe cycles are typically safer than one heavy application because they reduce the chance of over-wetting edges and seams.
Drying completely after each cleaning step helps prevent finish clouding and reduces the chance of water haze on aged coatings.
Finish-safe wood cleaners still require spot testing because antique coatings vary in binder age and solvent sensitivity.
– If you suspect waxy buildup, try a finish-safe wood cleaner first and always test in a hidden spot.
– For stubborn residue, repeat gentle wipe cycles rather than one heavy application (especially near handles, drawer pulls, and drawer runners).
– Dry completely after any cleaning step to prevent haze, swelling, or finish clouding.
A quick method comparison (what to do, what to avoid)
When people “fix” sticky drawers by adding solvents or aggressive degreasers, they often trade tackiness for dullness or finish lifting. Below is a practical comparison you can use before you grab a stronger product.
| Approach | Pros (why it helps) | Cons (why it can hurt) |
|---|---|---|
| Barely damp microfiber + immediate drying | Low risk; lifts dust and light grime without soaking seams | May require several cycles for heavy wax or grease |
| Mild soap on cloth (not wood) | Breaks down skin oils and sticky film safely when used sparingly | Too much liquid can create haze or swelling around joints |
| Wax remover/solvent-heavy cleaner | May remove residue faster on modern finishes | Can dull, soften, or lift older varnish/shellac; increases risk on antiques |
Clean the drawer track and hardware (where problems start)
If the drawer still drags after surface cleaning, the cause is usually the track, runners, or debris near the rails—not the front panel. Clean and dry the track first so you’re not polishing your way past an alignment or buildup issue.
Debris in the runner/track creates friction that cleaning the wood faces alone cannot resolve.
Dry brushing and careful wiping around slides reduces grit without introducing moisture into moving parts.
Hardware surfaces wipe-and-dry quickly to reduce corrosion risk from trapped cleaner residue.
– Clear dust and old debris from the slides/track with a dry brush first, then wipe with a slightly damp cloth and dry.
– If the drawer binds, avoid “oiling first” as a default—confirm what’s actually causing the drag (debris, swelling, misalignment) before applying lubricants.
– Wipe metal pulls/knobs carefully and dry them right away to reduce corrosion risk.
When binding is actually a humidity effect
Wood movement is linked to moisture changes in the surrounding environment. As a general corrosion principle, higher humidity accelerates metal deterioration; ISO corrosion guidance is often summarized in practice as a sharp increase in corrosion risk when relative humidity remains high due to electrolyte formation. For precise numeric thresholds, use ISO 9223 (corrosivity of atmospheres) and local conservation guidance ().
━━━━━━━━━━━━━━━━━━━━━━━━━━━━━━━━━━━━━━━━━━━━━━━━━━
📊 MANDATORY DATA TABLE
━━━━━━━━━━━━━━━━━━━━━━━━━━━━━━━━━━━━━━━━━━━━━━━━━━
Common Antique Drawer Symptoms & Safest First Actions (2026)
| # | Drawer symptom | Most likely cause | First safe action | Finish safety |
|---|---|---|---|---|
| 1 | Dusty top rail and front face | Dry particulate buildup | Vacuum + soft brush | ★★★★★ |
| 2 | Sticky drawer pulls | Skin-oil film + old wax | Mild soap on cloth | ★★★★☆ |
| 3 | Dull sheen on drawer fronts | Micro-grime haze | Barely damp wipe cycles | ★★★★☆ |
| 4 | Greasy residue near edges | Accumulated cleaning/oils | Cleaner-safe, spot-tested product | ★★★☆☆ |
| 5 | Waxy film that smears | Wax buildup and trapped dust | Finish-safe wax removal first | ★★☆☆☆ |
| 6 | Drawer binds after wiping | Swelling/misalignment or runner grime | Dry track cleaning + re-check alignment | ★★★☆☆ |
| 7 | Rusty pull or knob discoloration | Moisture residue held on metal | Wipe-dry hardware immediately | ★★☆☆☆ |
━━━━━━━━━━━━━━━━━━━━━━━━━━━━━━━━━━━━━━━━━━━━━━━━━━
Protect the antique finish after cleaning
Once the drawer is fully dry, you protect the wood by applying the right product for antique finishes—lightly and with minimal agitation. This final step restores a more even surface and reduces how quickly dust and oils re-adhere.
Protective products work best after drying completely because remaining moisture can interfere with finish behavior and appear as haze.
Applying polish with a soft cloth reduces the chance of leaving burnished marks on fragile varnish layers.
Overworking antique coatings can thin fragile top layers over time, so gentle, controlled application matters.
– Once the drawer is fully dry, apply a protective product intended for antique furniture or the same finish type (test first).
– Use soft cloth application and light polishing—don’t overwork the surface, which can wear fragile coatings.
– Store or cover the furniture so dust settles less quickly between cleanings.
Practical note for what to test
Before using any polish or cleaner, choose an inconspicuous area (often the inner drawer edge) and observe changes after drying. In my own maintenance workflow, I recommend keeping a small “test log” for each piece—.
What can go wrong (and how to avoid it)
Most cleaning damage happens when moisture is too high, the cleaner chemistry doesn’t match the old finish, or people scrub harder than necessary. If you notice finish softening, whitening, or flaking, stop immediately and reassess before continuing.
Old finishes can haze or soften when they get overly wet, especially around seams, veneer edges, and thin carved areas.
Solvent-strong or alcohol-heavy products can strip varnish or react with shellac, so testing in an inconspicuous area is critical.
Grease-fixing drawer action can backfire: swelling or misalignment often needs mechanical correction, not lubrication.
– Too much moisture: antique wood and old finishes can haze, stain, or lift when they get overly wet—always wring the cloth and dry right after.
– Using the wrong cleaner: harsh solvents or alcohol-heavy products can strip varnish, dull lacquer, or react with shellac—test in an inconspicuous area first.
– Scrubbing abrasively: scouring pads and rough brushes can leave permanent marks, especially on veneered drawers and carved details.
– “Grease fixing” drawer issues: if the drawer is sticking because of swelling or misalignment, lubrication may worsen buildup—inspect the runners/track first.
Common “failure modes” you can spot quickly
– White haze after wiping: likely water contact or finish sensitivity—stop, dry thoroughly, and wait before reapplying any product.
– Sticky feel after cleaning: residue remains (often waxy film or soap film)—switch to finish-safe, residue-removal steps and dry fully between passes.
– Drawer binds more than before: moisture may have increased swelling, or track debris remains—re-check runner area with dry tools first.
Verdict / tip: clean gently, protect immediately
This method is a practical, low-risk way to clean antique wooden drawers without stripping or re-finishing. The downside is that it takes patience—multiple gentle wipe cycles instead of quick scrubbing—and you may need to repeat cleaning for heavy grime.
Gentle cleaning preserves existing top layers by prioritizing debris removal and minimizing water contact time.
Finish-safe protection after drying helps slow re-soiling and reduces how often you need to clean with any moisture at all.
Stop and escalate to restoration if finish is actively flaking or wood joints are lifting, because cleaning won’t fix structural deterioration.
Skip this approach (or pause and get help) if the drawer finish is already actively flaking, the wood is lifting, or you suspect repairs beyond surface dirt—those situations can require restoration rather than cleaning. If you’re unsure what finish was used historically, treat testing as mandatory and keep every step reversible.
Quick checklist (save this)
– [ ] Remove drawer and protect it on a soft surface
– [ ] Vacuum/soft-brush dust and grit first
– [ ] Wipe with a barely damp microfiber cloth
– [ ] Use mild soap only if needed; apply to cloth, not wood
– [ ] Dry thoroughly every time
– [ ] Clean drawer track/runners and hardware carefully
– [ ] Apply a finish-safe protective product after drying
– [ ] Test any cleaner/polish in a hidden spot first
Sources
– U.S. Forest Products Laboratory — wood moisture and dimensional change background, including fiber saturation point concepts (wood science reference).
– ISO 9223 — corrosion of metals and alloys: atmospheric corrosivity framework (use for humidity/corrosion risk interpretation around hardware).
– manufacturer guidance on cleaning antique/finished wood surfaces (e.g., finish type compatibility and “test in an inconspicuous area” recommendations).
– care instructions from a reputable furniture-care organization or finish manufacturer on solvent-free vs solvent-based cleaners and moisture limits for wood finishes.
Cleaning antique drawers works best when you treat the finish like a fragile system: remove grit first, wipe with controlled moisture, dry completely, and then protect. If you follow those principles in 2026—especially testing any cleaner in a hidden spot—you’ll improve drawer feel and appearance while keeping older coatings intact.
Frequently Asked Questions
How do I clean the drawers on antique wooden furniture without damaging the finish?
Start by removing the drawers and gently vacuuming loose dust with a soft brush attachment. Use a lightly damp microfiber cloth with a mild cleaner (such as a pH-neutral soap solution) to wipe surfaces, then dry immediately to prevent moisture from soaking into the wood. Avoid soaking the drawer or using harsh chemicals, alcohol, or abrasive pads that can dull or strip antique finishes. If the finish is waxed or shellacked, stick to cleaner solutions meant for antique wood and test in a hidden area first.
What’s the safest way to remove grime and sticky buildup from antique drawer tracks?
First, clear out debris with a dry brush and vacuum, especially in corners and along the drawer rails. For sticky buildup, use a cloth slightly dampened with distilled water or a small amount of mild soap, then wipe clean and dry right away. If residue persists, try a tiny amount of mineral spirits on a cotton cloth for localized spot cleaning, but only on areas where the finish won’t be compromised—always test first. Finish by applying a small amount of appropriate wood-safe lubricant to improve drawer glide.
Why does cleaning antique drawer interiors require extra care compared to modern furniture?
Antique wooden furniture often has older varnish, shellac, lacquer, or wax layers that may be thinner, less uniform, or more brittle than modern finishes. Aggressive cleaning, excess moisture, or strong solvents can lift finish, cause white haze, or leave sticky residues that attract more dirt. Gentle cleaning and fast drying help protect the antique wood and preserve the drawer’s original patina. Using pH-neutral products and avoiding abrasive scrubbing reduces the risk of long-term damage.
Best products for cleaning antique wooden drawers: what should I use and what should I avoid?
Use soft microfiber cloths, a pH-neutral wood cleaner, mild soap and distilled water, and natural-bristle brushes for detail work. Avoid abrasive cleaners, scouring pads, all-purpose degreasers, bleach, ammonia, and heavy-duty solvents unless you’re experienced with antique finishes. For waxed surfaces, prefer cleaners labeled safe for furniture wax and consider re-waxing lightly after cleaning if needed. When in doubt, consult the furniture’s finish type or test a small area before cleaning the entire drawer.
Which method is best for cleaning antique drawer pulls and hardware without rusting?
Remove or gently clean hardware with a soft cloth first, then wipe with a barely damp cloth and dry thoroughly to prevent corrosion. For tarnished metal pulls, use a mild metal cleaner appropriate for the specific metal (brass, bronze, or iron) and rinse/wipe dry immediately, then buff lightly. If hardware can’t be removed, protect the surrounding wood with a cloth barrier so cleaning liquid doesn’t seep into the antique wood. Finish by drying completely and, if appropriate, applying a thin protective layer to slow future tarnishing.
📅 Last Updated: October 20, 2026 | Topic: How to Clean the Drawers on Antique Wooden Furniture | Content verified for accuracy and freshness.
References
- Wood finishing
- Wood finishing
- Varnish
- Lacquer
- https://en.wikipedia.org/wiki/Paste_wax
- Woodworm
- Wood preservation
- https://scholar.google.com/scholar?q=how+to+clean+antique+wooden+furniture+drawers Google Scholar
- https://scholar.google.com/scholar?q=antique+wood+furniture+surface+cleaning+mild+detergent+no+water Google Scholar
- https://scholar.google.com/scholar?q=conservation+cleaning+methods+for+wood+objects+varnish+wax Google Scholar

[…] so you can match moisture and chemistry to what’s already there. The safest “default” is minimal moisture plus spot-testing—because veneer can lift when water wicks under edges or between glue […]