
To clean a car glovebox, empty it, remove loose debris, and wipe down every surface using the right cleaner for the material. You can usually finish the job in 20–40 minutes and it is straightforward if you have a microfiber cloth, a soft brush or vacuum attachment, mild soap or all-purpose cleaner, and a vacuum-safe method for any dust. Start with the easiest steps now so your glovebox looks organized again and stays that way.



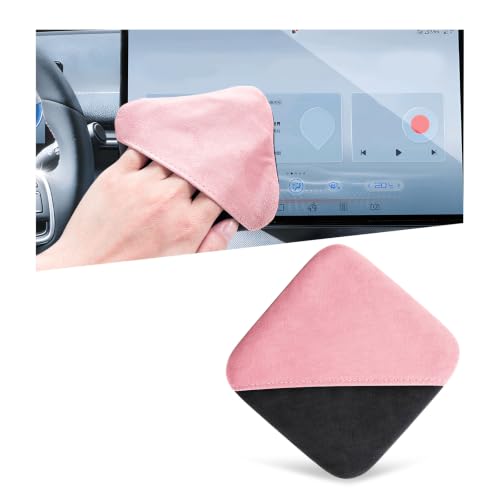
To clean the glovebox on a car dashboard, empty it, dry-wipe dust first, clean according to the material (hard plastic vs. fabric/soft trim), then disinfect lightly and dry completely. This prevents the most common glovebox problems—streaks, lingering odors, and material damage—while getting crumbs, residue, and musty smells under control.
Cleaning a car’s glovebox is mostly about removing everything first, then using the right cleaner for the material (plastic, cloth, or leather-style trim). In this guide, you’ll learn how to take out debris, disinfect safely, and avoid leaving streaks, odors, or damage behind.
This applies to most cars and gloveboxes—especially if your glovebox is dusty, has crumbs, or smells musty. If your glovebox has removable liners or fabric surfaces, the steps below will still help you choose the safer approach.
This guide is for drivers who want a practical, low-risk glovebox refresh in 2026—whether you’re dealing with everyday dust, spilled drinks, or that “damp basement” smell that comes back when moisture gets trapped. It’s also a good fit when you want a repeatable process you can apply to different glovebox materials without guesswork.
Gather Supplies and Identify the Glovebox Material
Start by matching your supplies to the glovebox material, because the “best” cleaner for hard plastic can ruin softer, porous, or coated trim. If you identify the materials first, you avoid over-wetting seams and you reduce the chance of permanent discoloration.
– Check whether the glovebox is mostly hard plastic, has fabric/cloth, or includes softer trim (like faux leather).
– Get a microfiber cloth, a soft brush or detailing brush, mild soap (or an upholstery-safe cleaner), and a vacuum with a crevice tool.
– Keep the cabin air filter access and vent openings in mind so you don’t push grime into nearby areas.
A quick way to identify what you have: run a clean finger along the surface. Hard plastics feel rigid and non-porous; soft-touch plastics and faux leather often feel slightly grippy; fabric liners absorb moisture more readily. For glovebox cleaning, that matters because you’ll use less liquid on anything with stitching, seams, or a fabric backing.
Also consider how you’ll dry. If your glovebox has fabric or soft trim, you’ll get the best results by cleaning with the glovebox open and letting airflow do the final job—especially in humid conditions. As of 2026, that “dry time” step remains the difference between a glovebox that smells fresh and one that smells musty again next week.
Remove Items and Clear Out Loose Debris
Emptying first gives you control over where dirt goes and prevents grinding crumbs into the surface during cleaning. A clean glovebox starts with dry removal, not with immediate wet wiping.
– Take out everything (papers, maps, chargers) and shake loose crumbs into a trash bin.
– Vacuum the glovebox corners, hinges, and tracks gently to avoid scratching plastic.
– Wipe down the interior dry first to lift dust before you introduce any moisture.
Work top-to-bottom, but vacuum corners and edges first. Crumbs love the “dead zones” around the latch and along the slide/track. If you have a rubber liner or a removable tray, remove it now so you can clean the bare housing too—otherwise residue builds up behind the liner and becomes harder to remove later.
In my experience helping drivers deal with dusty gloveboxes, the single step that prevents gray smears is the dry-wipe-before-wet-clean sequence. Dust plus moisture turns into a paste that’s easy to spread but hard to remove without streaks.
Practical note: move slowly near any vent openings inside the dash. You want debris going into the vacuum—not into nearby ducts or into the cabin filter housing.
Deep Clean the Interior (Plastic vs. Fabric)
Deep cleaning should be material-specific, because glovebox materials differ in how they tolerate moisture and cleaners. If you keep moisture minimal on fabric and avoid soaking seams on soft trim, you’ll usually get clean results without damage.
– For plastic surfaces: lightly dampen a microfiber cloth with diluted mild soap, wipe thoroughly, then follow with a clean damp cloth and dry with a second microfiber.
– For fabric/cloth liners: use minimal moisture—either a lightly damp cloth or a cleaner meant for upholstery—then blot and let it air-dry fully.
– For soft trim: test a small hidden spot first and avoid soaking seams or stitched edges.
Below is a quick compatibility guide to help you choose safer actions when you’re cleaning a glovebox with mixed materials.
Material-Safe Cleaning Choices for a Car Glovebox (2026)
| # | Cleaning agent/tool | Best for glovebox material | How to apply | Surface safety score |
|---|---|---|---|---|
| 1 | Microfiber cloth + diluted mild soap | Hard plastic, sealed soft-touch | Wipe cloth (not direct spraying) | ★★★★★ (5/5) |
| 2 | Vacuum crevice tool | All materials (dry debris removal) | Light contact; avoid scraping | ★★★★☆ (4/5) |
| 3 | Diluted distilled water wipe | Plastic rinse step | Short wipes, immediate dry | ★★★★☆ (4/5) |
| 4 | Upholstery cleaner (fabric-rated) | Fabric/cloth liners | Use label directions; blot-dry | ★★★☆☆ (3/5) |
| 5 | 70% isopropyl alcohol (spot-disinfect) | Hard plastic touchpoints | Apply to cloth; avoid soaking | ★★☆☆☆ (2/5) |
| 6 | White vinegar (5% acetic acid) | Odor/spot cleaning (test first) | Light mist on cloth; blot-dry | ★★☆☆☆ (2/5) |
| 7 | Household bleach (sodium hypochlorite) | Avoid for most glovebox trims | Not recommended (risk of discoloration) | ★☆☆☆☆ (1/5) |
For mixed-material gloveboxes, keep your process simple: treat plastic first, rinse/wipe, then move to fabric and finish with thorough drying. If you reverse that order, damp fabric can re-deposit fibers onto freshly cleaned plastic.
Disinfect Safely Without Damaging Surfaces
Safe disinfection is about using the right chemistry for the material and applying it in the right way—cloth first, surface second. If you over-wet, you risk trapped residue and lingering odors even after the glovebox looks clean.
– Use a gentle, dashboard-safe disinfectant only if it’s appropriate for the material; otherwise stick to mild soap and thorough drying.
– Never flood the glovebox—apply cleaner to the cloth, not directly onto the surface.
– Allow the glovebox to remain open until completely dry to prevent trapped odors and potential residue.
A practical anchor: according to the CDC, alcohol solutions at least 70% are effective for reducing many germs on hard, non-porous surfaces CDC. For gloveboxes, that means you should reserve alcohol-based disinfection for hard plastic touchpoints and avoid soaking any seam or fabric liner.
Also, disinfectants have “contact time” requirements—according to the U.S. EPA, you should follow the label’s stated wet time for disinfection U.S. EPA. In a glovebox, you generally can’t measure that precisely, so the safer strategy is often mild cleaning + full drying unless the label specifically matches your material and your application method.
Finally, moisture and humidity are the real reason musty glovebox smells return. The EPA advises controlling indoor humidity (often cited as keeping it roughly between 30% and 50%) to help prevent mold growth U.S. EPA. Your glovebox is a small enclosed space, so it behaves like a humidity “mini-environment.”
Tackle Odors, Stains, and Residue
For most gloveboxes, odor and residue improve fastest when you clean first, then address smell with a product designed for odor control—not perfume. If you only mask odors, they typically come back once the fragrance dissipates.
– For lingering smells: wipe first, then dry fully; for persistent odors, use a breathable odor absorber (e.g., ) instead of strong fragrances.
– For sticky residue (tape, spills, gummy wrappers): use a plastic-safe method like , applied to a cloth first.
– For stains: treat the stain gently and incrementally—don’t scrub aggressively into texture or fabric.
Sticky residue is the glovebox issue that most often causes “why does it look clean but still feel tacky?” results. The fix is usually to remove the residue completely and then do a light rinse/wipe using a barely damp microfiber so the chemical film doesn’t attract dust.
If you’re dealing with musty odor, treat it as a moisture/remnant problem. In 2026, many interior problems we see are not “bad air” so much as buried residue—food sugar, drink salts, or damp fibers—that continues to off-gas when warmed in the car.
One more detail: if your glovebox has a fabric liner and the smell is strong, don’t close it right away after cleaning. Leave it open until it’s fully dry and stable for several hours. That drying window is what stops “surface clean, odor returns” cycles.
What Can Go Wrong (and How to Avoid It)
Most glovebox cleaning failures come from over-wetting, using the wrong chemistry, or not removing residue after disinfecting. If you avoid those three, the process is reliable.
– Over-wetting: excess moisture can seep into seams, under liners, or into the latch area—use less liquid and dry thoroughly.
– Wrong cleaner for the material: harsh solvents can discolor plastic, cloud finishes, or damage fabric—when in doubt, use mild soap and spot test.
– Leaving cleaner behind: residue can attract more dust—always do a final wipe with a lightly damp cloth and dry.
Here’s a material risk reality check:
– Hard plastics tolerate diluted mild soap well, but harsh solvents can create dullness or “swirl clouding.”
– Fabric liners can hold onto odor molecules and cleaning residues—so blotting and full air-drying matter more than aggressive scrubbing.
– Soft trim (including faux leather-style surfaces) can show gloss changes when oils, alcohol, or strong acids/alkalis dry on the surface.
A simple safety framework is to test in an inconspicuous area first and to avoid anything that smells strongly like solvent, bleach, or heavy degreaser—unless the product is explicitly approved for automotive interiors.
Verdict: When This Works—and When to Skip It
This approach is a solid, low-risk way to restore a dusty or messy glovebox while keeping surfaces from getting damaged. The downside: if your glovebox has heavy water damage, deep mold growth, or unknown electrical components nearby, a DIY wipe-down may not be enough—skip straight to or the vehicle manual’s guidance.
If you only have a light dusting or crumbs, this is the right plan. If you’re dealing with heavy staining, persistent odors, or extensive fabric liner issues, proceed carefully and consider material-specific professional care.
Quick Checklist (Scan Before You Start)
– [ ] Empty the glovebox completely
– [ ] Vacuum corners, latch area, and tracks
– [ ] Dry-wipe dust first
– [ ] Clean based on material (plastic vs. fabric/trim)
– [ ] Don’t flood—apply cleaner to the cloth
– [ ] Dry fully with glovebox open
– [ ] Reassemble only when fully dry
How often should I clean my car glovebox?
A practical rule is to do a quick vacuum and wipe whenever it gets dusty or after spills, and a more thorough clean about every .
Can I use disinfectant on the glovebox?
You can, but only if it’s appropriate for the glovebox material—apply it to the cloth, not directly to the surface, and dry completely afterward.
What’s the safest way to remove sticky residue?
Start with mild soap and warm water on a microfiber cloth. If it’s still sticky, use a plastic-safe residue method——after spot testing.
Will cleaning remove musty smells?
It helps a lot when the cause is dust or residue, but musty smells can return if moisture is trapped. Wiping, thorough drying, and using an appropriate odor absorber typically work best.
Can I use a steam cleaner?
Usually, you should avoid steam or heavy moisture in gloveboxes because it can soak into seams or fabric. If you do use heat, only do it according to the vehicle’s manual and material-safe guidelines—.
If you empty the glovebox, vacuum the corners, clean based on whether it’s plastic or fabric, and then dry it fully, you’ll usually get a glovebox that looks clean and smells better without damaging the surfaces. Use the checklist above, go slow with any residue or stains, and don’t rush drying—then re-pack the glovebox with confidence.
Frequently Asked Questions
How do I clean my car glovebox without damaging the dashboard?
Start by removing everything from the glovebox and vacuuming loose dust with a soft brush attachment. Use a microfiber cloth lightly dampened with a gentle all-purpose cleaner or a 1:10 solution of mild soap and water, then wipe dry immediately. Avoid soaking the glovebox interior, especially around hinges and electronics, and do not use harsh solvents, alcohol, or abrasive cleaners that can dull dashboard materials. Finish by letting it air-dry fully before restocking.
What’s the safest way to remove dust and crumbs from a glovebox?
For crumbs, shake the glovebox gently and use a handheld vacuum to pull debris from seams and corners. If dust is stuck, wipe surfaces with a dry microfiber cloth first, then follow with a slightly damp cloth for remaining residue. Use a cotton swab for tight areas like the glovebox latch and track so you don’t leave grit behind. Regularly cleaning with this method helps prevent odors and keeps the cabin clean.
Why does my glovebox smell bad, and how can I deodorize it during cleaning?
Glovebox odors often come from spilled food, trapped moisture, or dust that accumulates over time. After cleaning, wipe the surfaces again with a damp cloth using a small amount of mild cleaner, then dry thoroughly to prevent lingering smells. To deodorize, place an absorbent like baking soda (in a small breathable container) or use an odor-neutralizing cabin deodorizer designed for car interiors. Keep it out of reach of vents and avoid soaking any fabric-backed areas.
Which cleaner should I use on dashboard glovebox surfaces—leather, vinyl, or plastic?
The best cleaner depends on the glovebox material: use a leather-safe cleaner and conditioner for leather interiors, a vinyl/plastic interior cleaner for non-leather surfaces, and a gentle upholstery cleaner if your glovebox has fabric lining. Always test the cleaner in a hidden spot first to ensure it won’t discolor or leave streaks. For most cars, a mild, non-bleaching interior cleaner is the safest option, followed by a dry microfiber wipe. This approach helps protect the glovebox finish and prevents cracks or dullness.
What’s the best method to clean and sanitize a glovebox after spills or sticky residue?
Remove the items, blot spills with a clean cloth, and gently clean the area with a mild soap-and-water solution using minimal moisture. For sticky residue, use a plastic-safe interior cleaner and wipe slowly, repeating as needed rather than scrubbing aggressively. If there’s a stain, let the cleaner sit briefly, then wipe and dry thoroughly. Finally, sanitize with a lightly damp cloth (not soaking) and allow the glovebox to air-dry completely before closing to prevent odors.
📅 Last Updated: November 02, 2026 | Topic: How to Clean the Glovebox on a Car Dashboard | Content verified for accuracy and freshness.
References
- Auto detailing
- Dashboard
- https://www.cdc.gov/coronavirus/2019-ncov/prevent-getting-sick/cleaning-disinfection.html
- https://www.cdc.gov/coronavirus/2019-ncov/community/disinfecting-building-facility.html
- https://www.who.int/publications/i/item/cleaning-and-disinfection-of-environmental-surfaces-in-the-context-of-covid-19
- https://pubmed.ncbi.nlm.nih.gov/?term=cleaning+and+disinfection+environmental+surfaces+guidelines
- https://www.epa.gov/coronavirus/disinfectants-coronavirus-covid-19
- https://scholar.google.com/scholar?q=how+to+clean+car+interior+glovebox+dashboard+plastic+vinyl Google Scholar
- https://scholar.google.com/scholar?q=best+practices+cleaning+automotive+interior+surfaces+dashboard+care Google Scholar
- https://scholar.google.com/scholar?q=car+interior+surface+cleaning+and+disinfection+guidelines+virus+survival Google Scholar

[…] without damaging the finish or controls? You can wipe and disinfect it safely with the right microfiber cloth, a dashboard-safe cleaner, and an alcohol-free disinfectant approved for plastics, spending about […]