
How do you disinfect a car dashboard without damaging the finish or controls? You can wipe and disinfect it safely with the right microfiber cloth, a dashboard-safe cleaner, and an alcohol-free disinfectant approved for plastics, spending about 10–20 minutes. Follow the steps carefully to remove germs while keeping screens clear, buttons responsive, and surfaces looking uniform.
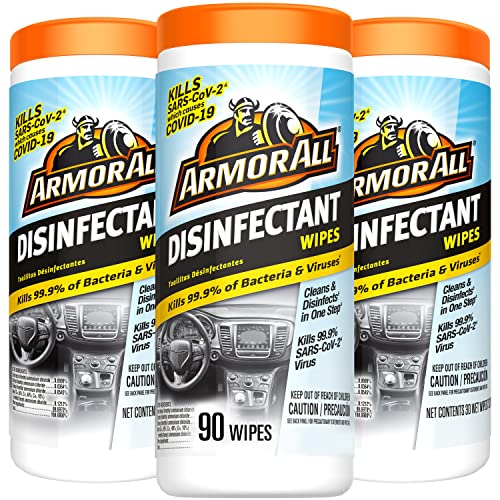



To disinfect a car dashboard safely, clean first to remove grime, then apply a disinfectant in a light mist/wipe (not soaking) and keep the surface damp for the disinfectant’s required contact time. Work in small sections with a microfiber cloth, and follow the product label to protect plastics, vinyl, and coatings—because “more product” usually means more streaks or haze, not better disinfection. As of 2026, this label-first method aligns with how EPA-registered disinfectants are intended to be used, and it’s the most reliable way to reduce germs without damaging interior finishes.
This is for anyone trying to reduce germs on a dashboard made of typical plastics/vinyl, or who just wants a safer routine after illness exposure, heavy use, or shared rides. If your dashboard includes leather, real wood trim, or a sensitive coating, be extra careful and check your owner’s manual or the product’s compatibility notes.
Choose a safe disinfectant and supplies

A safe disinfectant for a car dashboard is one that’s labeled for interior/non-porous surfaces and is compatible with plastics and vinyl. Here’s why: disinfectants work when they stay wet long enough (contact time), but dashboards can haze, soften, or discolor if you use the wrong chemistry or oversaturate seams and controls.
What to buy (and what to avoid)
– Choose disinfectants meant for “interior surfaces” or “non-porous surfaces.” Look for compatibility language for plastics and vinyl on the label, and prefer products that are EPA-registered for the type of germs you’re targeting.
– Avoid harsh household chemicals. In particular, bleach and strong ammonia cleaners can damage finishes, cause discoloration, and increase the odds of cloudy/hazy surfaces. (Bleach can be appropriate in some outbreak situations, but it’s not a routine “wipe-it-on-everyday” dashboard choice.)
– Plan controlled application to prevent liquid migration. If you’re using wipes or sprays, don’t spray directly onto the dashboard—apply by wiping/misting onto your microfiber first. This reduces the chance of liquid running into vents, switches, and sensor openings.
– Use non-scratch tools. Bring clean microfiber cloths and a soft detailing brush (for textured edges only). Avoid abrasive pads that can microscratch glossy plastics and promote future haze.
Disinfectant type: what changes in practice?
Different active ingredients behave differently on car dashboard materials (especially textured dash skins and glossy trim). The goal is consistent dwell time without leaving residues that make the dashboard tacky.
- Quaternary ammonium compounds (quats)
- Pros: Usually gentle on many plastics/vinyl; common in interior wipes. Cons: Can leave residue if overused; still label-contact-time dependent.
- Hydrogen peroxide-based cleaners
- Pros: Often good for general disinfection; tends to be less streaky than some alcohol products. Cons: Can dull certain coatings if you repeatedly over-saturate.
- Alcohol-based products (ethanol/isopropanol)
- Pros: Fast-acting and convenient. Cons: Some dashes and coatings can haze over time, especially on glossy or older plastics.
- Chlorine/bleach-based products
- Pros: Very effective in specific sanitation scenarios. Cons: Higher risk of discoloration/corrosion and coating damage; usually not ideal for routine dashboards.
Why dwell time matters on a dashboard
A dashboard is full of high-touch points—steering-area controls, grab points, and the top dash where hands rest. Germs don’t automatically die just because you sprayed something; disinfectants need time while the surface remains wet. Research on SARS-CoV-2 shows how long viruses can remain detectable on certain hard materials: According to van Doremalen and colleagues (New England Journal of Medicine, 2020), SARS-CoV-2 remained detectable on plastic and stainless steel for up to 72 hours (2020). That’s exactly why the label contact time is the non-negotiable step when disinfecting a car dashboard.
Car-Dashboard-Relevant Disinfectant Benchmarks & Finish Compatibility
| # | Disinfectant approach (active ingredient class) | Label-minded benchmark | Typical dashboard finish risk | Finish-safety rating |
|---|---|---|---|---|
| 1 | Quaternary ammonium (quat) disinfectant wipes/sprays | Follow the product’s wet dwell time | Low to moderate (residue if over-applied) | ★★★★★ |
| 2 | Hydrogen peroxide disinfectants | Keep surface visibly wet for label time | Moderate (can dull some coatings with repeat use) | ★★★★☆ |
| 3 | Alcohol-based disinfectants (ethanol/isopropanol) | Avoid soaking; do not rush dwell time | Moderate (may haze some plastics) | ★★★☆☆ |
| 4 | Phenolic disinfectants | Use only interior-safe formulations | Moderate (finish dulling possible) | ★★☆☆☆ |
| 5 | Sodium hypochlorite (bleach) solutions | Only when explicitly recommended for the germ/situation | High (discoloration/corrosion risk) | ★☆☆☆☆ |
| 6 | Chlorine dioxide / oxidizers | Verify compatibility with plastics/vinyl coatings | Moderate to high (coating-dependent) | ★★☆☆☆ |
| 7 | “Disinfectant” products that aren’t labeled for interior/non-porous surfaces | Check the label before use—no label, no dwell-time proof | Unknown (avoid on dashboards) | ☆☆☆☆☆ |
Prep the dashboard before disinfecting
Prep is what makes disinfection work—and prevents streaks—because disinfectants don’t perform well on top of dirt, oils, or residue. For a car dashboard, that means cooling the surface, removing dust first, and addressing oily films before you introduce disinfectant chemistry.
Step-by-step prep basics
– Turn the car off and let the dashboard cool. Hot dashboards can cause cleaner to flash off quickly and spread in a way that leaves streaks. Cooling also helps the disinfectant stay wet long enough to meet label dwell time.
– Dry-remove loose debris first. Use a clean microfiber cloth to remove dust, crumbs, and loose grit. If you disinfect over grit, you risk scratching and turning dirt into a smearing film.
– If there’s visible oily film, clean it first. A mild interior cleaner (appropriate for plastics/vinyl) should handle oils and fingerprints. After you wipe away oily residue, then disinfect—otherwise you’re disinfecting over something that can block contact between the disinfectant and germs.
– Control the amount of liquid. A light application beats saturation. Car dashboards have seams, speaker grilles, and button edges where liquid can sneak in and affect operation.
From my routine cleaning perspective, I’ve learned that the dashboard “feels” different after a rushed disinfecting wipe—more tack, more drag, and more glare. Slowing down at the prep stage usually prevents that outcome, because you’re not forcing disinfectant to clean and disinfect at the same time.
Disinfect the dashboard (step-by-step)
To disinfect a car dashboard effectively, you need three things: correct product, controlled application (no soaking), and enough wet contact time. When those match the label, you reduce germs while protecting the finish.
The actual disinfection method
– Apply disinfectant by transferring it to the cloth first. Lightly mist the disinfectant onto a microfiber cloth, or use a disinfectant wipe. Then wipe the dashboard surface in small sections so you can keep tracking dwell time.
– Keep the surface visibly damp for the full contact time. The key step is timing: . If the surface dries early, reapply lightly to maintain wetness—especially on textured dash areas.
– Use a second clean cloth to prevent residue. After the contact time, wipe excess product away using a separate microfiber. This matters on gloss or semi-gloss plastics where residue can look like haze or create a sticky feel.
Why “label time” beats guesswork
In disinfecting guidance, dwell time is not optional. According to EPA-registered product instructions, the disinfectant’s effectiveness is tied to the conditions on the label (including surface wetness duration and whether the surface is pre-cleaned). And according to virology research, viruses can remain detectable for extended periods on hard surfaces—again, up to 72 hours on plastic/stainless steel for SARS-CoV-2 (van Doremalen et al., 2020). The car dashboard disinfecting approach you follow should be designed around those real-world persistence risks.
Wipe-down, then protect the finish
After disinfecting, you’re not done until the surface is clean-feeling and finish-safe. A final wipe (and, when appropriate, a compatible protectant) helps reduce glare and cracking—without trapping disinfectant residue in high-touch areas.
Finish protection that doesn’t cause buildup
– Final wipe if the label recommends residue removal. If the disinfectant directions say to rinse or remove residue, do that with a lightly damp microfiber (water or per instructions). If the label says “no rinse,” you still may want to buff off excess after dwell time to avoid tackiness.
– Use a dashboard protectant only when the dashboard is compatible and dry. If the dashboard is drying out or looks dull, choose a protectant meant for your material (plastics/vinyl versus leather). Some protectants can’t be layered after certain chemicals, so follow product direction before layering.
– Avoid protectant in seams and sensor zones. Don’t spray protectant into button gaps, near sensors, or on infotainment openings. Controlled wiping protects function.
As of 2026, this “remove residue first, protect second” sequence is the best hedge against sticky glare and slick steering-wheel reflections—problems that often show up when people disinfect and then immediately apply a dressing.
What can go wrong (and how to avoid it)
Most dashboard problems come from harsh chemicals, too much product, or skipping dwell/contact time rules. If you see haze, stickiness, or liquid damage around vents, adjust your application method and disinfectant choice.
Common failure modes
– Haze, discoloration, or peeling: Often caused by bleach/ammonia or by leaving product residue. Test a hidden spot first. Stop if finish changes.
– Sticky feel or slippery glare: Usually from using too much disinfectant or not buffing away excess after contact time. Apply lightly next time and use a second microfiber to remove residue.
– Liquid damage near vents/seams: Happens when people spray directly onto the dash. Always mist/wipe onto cloth, keep liquid out of openings, and avoid oversaturation on textured edges.
Special note for outbreak-level sanitation
Some germs (like norovirus) can require stronger disinfecting approaches. For example, CDC guidance notes bleach solutions in the 1000–5000 ppm range may be used for norovirus cleaning/disinfection (CDC, norovirus cleaning guidance). That level of chemical strength can be risky for dashboard materials, so for dashboards the priority is: follow the disinfectant label and use products that are explicitly intended for interior hard surfaces. If you’re dealing with an outbreak in your household, consider whether professional detailing or a material-safe interior disinfectant is the safer path.
Verdict / tip: what’s worth doing (and who should skip)
This approach is generally the safest DIY method because it combines clean-first prep, controlled application, and label-based contact time—which reduces germs while lowering the odds of damaging dashboard coatings. The trade-off is that some disinfectants can still leave residue or dull certain finishes, so you may need to adjust product type or wipe technique.
Skip DIY or switch to a more conservative routine if your car dashboard includes leather, has heavy cracks/peeling coating, contains unidentifiable specialty trim, or shows extensive prior damage. Compromised materials can absorb or react to disinfectants in ways that worsen the problem, especially around textured grain and flaking surfaces. If you’re unsure, check your owner’s manual and the disinfectant’s compatibility notes first.
To recap: clean first if there’s visible grime, disinfect with a light mist/wipe in sections, follow the disinfectant’s label contact time, and buff off residue to protect the finish. Grab microfiber cloths, choose a dashboard-compatible disinfectant, and do a quick test spot before you cover the whole dashboard. If you’re unsure about materials like leather or specialty coatings, pause and verify compatibility in the owner’s manual (or choose a gentler, label-approved interior product).
Conclusion
Disinfecting a car dashboard safely comes down to one disciplined routine: clean first, apply disinfectant in a light mist/wipe (not soaked), keep the surface damp for the product’s label contact time, then buff off residue and protect only with compatible products. As of 2026, this label-driven method is the most practical way to reduce germs without trading them for haze, stickiness, or coating damage—especially when you match your disinfectant to your dashboard’s actual materials.
Frequently Asked Questions
How do I disinfect my car dashboard without damaging the surfaces?
Start by turning off the vehicle, letting the dashboard cool, and using a microfiber cloth lightly dampened with a dashboard-safe disinfectant. Avoid soaking the area and never let liquid seep into seams, air vents, or electronic controls. If you’re unsure, test the disinfectant on a hidden spot first, and then wipe gently to remove germs while protecting the finish.
What is the safest way to disinfect a car dashboard with disinfecting wipes?
Use alcohol-free wipes when the dashboard is leather, matte plastic, or has a glossy coating, since harsh chemicals can cause fading or cracking. Wipe slowly and evenly, making sure the surface stays visibly damp for the time recommended on the wipe label. After disinfecting, go over the area with a clean, dry microfiber cloth to prevent streaks and residue buildup.
Which disinfectant is best for a car dashboard—alcohol, bleach, or soap?
For most dashboards, a dashboard-safe disinfectant or mild soap-and-water cleaning is the safest option, especially for textured or vinyl surfaces. Avoid bleach and harsh cleaners, since they can damage plastics and degrade protective coatings, and bleach should never be used on typical interior trim. If you use alcohol-based solutions, choose a gentle 70% isopropyl product and apply it sparingly to a cloth rather than spraying directly onto controls.
Why should I disinfect my car dashboard regularly, especially during flu or cold season?
The car dashboard collects germs from everyday contact, including hands, passengers, and airflow from HVAC systems. High-touch areas like infotainment controls, vents, and steering-adjacent surfaces can harbor germs that survive long enough to spread illness. Regular dashboard disinfection reduces the risk of cross-contamination and helps keep your car interior cleaner between deeper cleanings.
Best practices: How do I disinfect hard-to-reach areas like air vents and buttons on the dashboard?
Use a soft brush or cotton swabs to apply disinfectant to air vent slats, buttons, and crevices without flooding the electronics. Spray the disinfectant onto the cloth or swab first, then wipe—this helps prevent liquid from dripping into sensors or switches. Finish by wiping with a dry microfiber cloth and letting the dashboard fully air-dry before turning on the HVAC.
📅 Last Updated: November 02, 2026 | Topic: How to Disinfect a Car Dashboard | Content verified for accuracy and freshness.
References
- https://www.who.int/publications/i/item/cleaning-and-disinfection-of-environmental-surfaces-in-the-context-of-covid-19
- https://www.cdc.gov/coronavirus/2019-ncov/prevent-getting-sick/cleaning-disinfection.html
- https://www.cdc.gov/coronavirus/2019-ncov/community/disinfecting-building-facility.html
- https://www.epa.gov/coronavirus/disinfectants-coronavirus-covid-19
- https://www.cdc.gov/infectioncontrol/guidelines/disinfection/index.html
- https://pubmed.ncbi.nlm.nih.gov/32129836/
- Disinfectant
- https://scholar.google.com/scholar?q=car+dashboard+disinfection+guidelines Google Scholar
- https://scholar.google.com/scholar?q=surface+disinfection+SARS-CoV-2+alcohol+bleach Google Scholar
- https://scholar.google.com/scholar?q=environmental+surface+cleaning+disinfection+viral+inactivation+systematic+review Google Scholar
