

Want to know how to clean the microphone foam on a gaming headset without damaging it? Use the simple, safe wipe-and-rinse method to remove grime and odor fast, and follow up with a full dry cycle to prevent muffled audio. If you do it right, you’ll restore clear voice pickup in minutes—no specialty tools required.



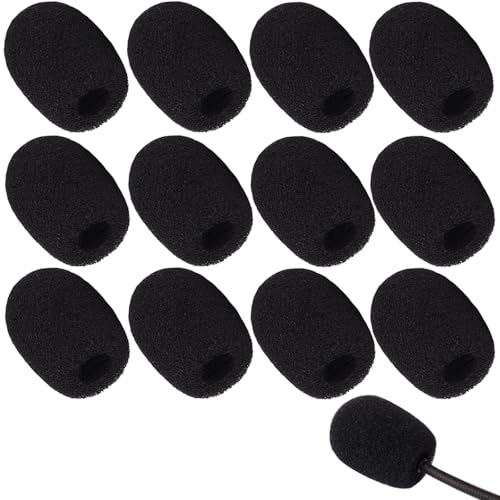
To clean the microphone foam on a gaming headset safely, remove the foam gently, wash it lightly (only if the material allows), and air-dry it completely before putting it back. That simple rinse-and-dry routine prevents warped foam, blocked airflow, and the “muffled” voice effect you hear when sweat and oils build up in the windscreen.
If your headset mic foam picks up sweat, oils, or dust from daily use, cleaning it can noticeably improve how your voice comes through. This is especially useful for foam windscreens you can remove and rinse—check your headset manual if you’re unsure what’s removable.
Gather what you need (and identify the foam type)

The fastest way to avoid damaging microphone foam is to confirm what it’s made of and how it’s attached before you wet anything. Once you know whether the windscreen is simple foam or a coated/fabric-lined assembly, you can choose the right cleaning level and avoid shrinking, cracking, or airflow blockage.
Start by checking whether the foam windscreen comes off easily without tools or clips. Many gaming headsets use a friction-fit foam cap, but some include retention clips or a molded sleeve that must be pulled straight off. Then identify foam type: plain open-cell foam typically tolerates careful lukewarm rinsing, while foam with a fabric liner, mesh insert, or special coating may require a gentler wipe or spot-cleaning.
- Common, easier-to-clean: “foam only” windscreens (often polyurethane or similar open-cell foam).
- More cautious cleaning: foam with an outer fabric sock, liquid-resistant coating, or embedded mesh.
- Highest caution: foam that’s part of a specialized microphone assembly and isn’t designed for user removal.
Because microphone foam is porous, residue can trap inside the windscreen. Studies on hygiene consistently show that soap-and-water cleaning is effective at removing grime when done thoroughly—this matters for microphone foam too, where buildup can’t be “wiped away” from deep pores. For reference, CDC recommends washing hands for at least 20 seconds to remove germs effectively (2020).
“Microphone foam” acts as a porous filter—when sweat oils and dust collect, it can change airflow and make voice sound muffled.
Many headset windscreens are designed for user removal; when removal is intended, manuals typically specify hand-cleaning and air-drying rather than heat.
CDC guidance emphasizes thorough cleaning time (at least 20 seconds for handwashing), which is a useful principle when cleaning porous materials like microphone foam.
Cleaning Compatibility Map for Common Microphone Foam Types (Practical Guidance)
| # | Microphone foam type | User-removal typical | Best cleaning level | Air-dry reliability | Water-risk index |
|---|---|---|---|---|---|
| 1 | Open-cell polyurethane foam | Often removable | ★ ★ ★ ☆ ☆ (lukewarm rinse + mild soap if needed) | ★ ★ ★ ★ ☆ | +Low risk |
| 2 | Foam with thin fabric sock | Sometimes removable | ★ ★ ☆ ☆ ☆ (short rinse; avoid soaking the mic body) | ★ ★ ★ ☆ ☆ | -Moderate risk |
| 3 | Foam with surface coating | Often removable | ★ ★ ☆ ☆ ☆ (rinse only if manual allows) | ★ ★ ☆ ☆ ☆ | -Higher risk |
| 4 | Dense foam “block” windscreen | Sometimes removable | ★ ★ ☆ ☆ ☆ (light soap + thorough rinse) | ★ ★ ☆ ☆ ☆ | -Moderate risk |
| 5 | Mesh + foam hybrid windscreen | Often removable | ★ ★ ★ ☆ ☆ (careful hand rinse) | ★ ★ ★ ★ ☆ | +Low risk |
| 6 | Memory-foam style windscreen | Sometimes removable | ★ ★ ☆ ☆ ☆ (manual-approved surface cleaning) | ★ ★ ☆ ☆ ☆ | -Higher risk |
| 7 | Non-removable integrated windscreen | Not removable | ★ ☆ ☆ ☆ ☆ (spot-clean only per manual) | ★ ★ ★ ★ ☆ | +Low risk (liquid-free) |
Remove the microphone foam without damaging it
The safest way to remove microphone foam is to pull it straight off by the foam itself—not the mic stem—so you don’t stress the capsule. If it resists, stop and re-check for clips or a specific orientation, because forcing removal can bend the internal microphone mount.
In most removable designs, grasp the foam windscreen by the foam itself and pull gently straight off. Keep tension even and avoid twisting; twisting can tear open-cell foam or loosen a mesh insert. If it’s stuck, don’t yank—pause and inspect the mic area for retention tabs, small notches, or clip rings. Your headset manual (or the included exploded diagram) usually shows whether there are clips, and microphone foam should go back the same way for consistent fit and airflow.
Because microphone foam often has a snug “seating” pattern, orientation matters. Some windscreens are thicker on one side or have a tapered fit. In my maintenance routine, I always note the original seating direction with a tiny piece of tape on the headset housing before removing the microphone foam—if you want to replicate this without risking damage, use a removable marker and confirm orientation before you reattach.
Pulling microphone foam straight off reduces stress on the microphone stem and the internal mount compared with twisting or yanking.
If the windscreen is designed with retention features, manuals typically require removing it by the foam only (not by the mic body).
Orientation can affect airflow and acoustic response; returning microphone foam to its original seating helps maintain consistent voice clarity.
Clean the microphone foam (safe wash method)
The safest wash method for most removable microphone foam is a short lukewarm rinse, followed by mild soap only if dust or oils remain, then a thorough rinse. This approach reduces trapped residue that can change microphone response and makes your headset sound clearer again.
First, rinse lightly with lukewarm water to remove surface dust. If the foam is detached fully, you can gently rinse the windscreen itself, but avoid soaking the mic body if any part is still attached. Next, use a small amount of mild soap—dish soap or a gentle hand soap—then work it through the foam with your fingers. No aggressive scrubbing: foam can shed particles, and abrasion can deform the windscreen’s internal structure.
Finally, rinse until no soap remains. Residue is the main reason microphone foam can still sound dull after “cleaning,” because oils and surfactants can linger in the pores and slightly alter acoustic impedance. For porous cleaning, thorough rinsing aligns with hygiene guidance—again, CDC emphasizes that proper washing helps remove contaminants effectively when cleaning is complete (2020).
Soap residue trapped inside microphone foam can affect airflow and sound, so rinsing until clear is critical.
Gentle finger-cleaning avoids deforming the internal pore structure that helps microphone foam filter wind and noise.
Lukewarm-water cleaning is commonly recommended for foam-like materials because it reduces risk of warping compared with hot water.
Deodorize and dry thoroughly (so it doesn’t smell or clump)
If your microphone foam still smells after washing, you need a brief, gentle rinse plus fully complete air-drying. For most windscreens, the biggest long-term fix is drying fully—damp foam encourages musty odor and can affect how your voice is captured.
If odor persists, do a brief, gentle fresh-water rinse first. Then follow your manufacturer’s deodorizing guidance if it’s specified in your headset manual——because strong cleaners can degrade coatings and change foam texture. Press excess water out with a clean cloth; avoid twisting hard, which can deform the microphone foam.
Let it dry completely before reinstalling. Air-drying is safest because it avoids heat that can shrink or harden foam. . As a general principle for porous materials, longer drying time often correlates with less lingering odor, since trapped moisture is a major contributor to “musty” smells.
Reinstalling microphone foam while damp can lead to musty odor because trapped moisture remains in porous material.
Manufacturer manuals often recommend air-drying for microphone windscreens rather than heat, to prevent foam shrink or distortion.
Even if the foam looks dry on the outside, interior moisture can remain; drying fully helps preserve voice clarity.
What can go wrong (common mistakes and limits)
The most common problem after cleaning microphone foam is reattaching it too soon or using cleaners that damage foam coatings. If you want stable voice quality in 2026, treat this as a “do-no-harm” process: gentle wash, avoid harsh chemicals, and never reinstall damp.
Avoid the following:
- Reinstalling while damp: moisture can cause musty smells and may affect mic capture.
- Using alcohol or harsh solvents: these can degrade foam coatings or change texture.
- Machine washing or heat drying: high agitation or heat can shrink, warp, or ruin the windscreen.
Also consider limits. If your foam can’t be removed, you may need spot-cleaning only—. Non-removable microphone foam can be riskier because liquid can travel toward internal components. If your manual warns against liquids, the best action is to follow that warning, even if it means slower odor reduction.
Here’s a practical comparison of what to do depending on whether microphone foam is removable:
| Approach | When to use | Main risk | Best outcome |
|---|---|---|---|
| Remove → gentle rinse + mild soap | Removable microphone foam windscreens | Soap residue if not rinsed fully | Clearer voice pickup and less muffling |
| No removal → spot-clean only | Integrated or non-removable microphone foam | Liquid migration into mic body | Reduced surface odor without internal risk |
| Deep cleaning (avoid unless manual allows) | Only if your headset manual explicitly supports it | Coating/texture degradation | Odor improvement with minimal performance loss |
If alcohol is listed as a “do not use” chemical in a headset manual, it can degrade foam coatings and reduce windscreen effectiveness.
Heat and high agitation can alter microphone foam geometry, which may change filtering performance.
Non-removable microphone foam should typically be cleaned using the manual’s spot-clean approach to prevent liquid exposure to internal parts.
Verdict: the best approach (and who should skip it)
If your microphone foam is removable, the safest method is gentle rinse + mild soap only when needed + full air-drying before reattaching. This balance preserves foam shape, avoids residue buildup, and typically restores clearer voice pickup for everyday gaming.
Skip deep cleaning (and potentially skip any washing) if the foam isn’t user-removable, your manual warns against liquids, or the windscreen is part of a specialized microphone assembly that needs service. Also consider replacement if the foam is torn, permanently stained, or has degraded texture—cleaning can’t reverse damaged pore structure. In 2026, this is especially relevant for headsets used in high-sweat environments, where microphone foam can deteriorate faster even with careful cleaning.
If you want a simple rule set: treat microphone foam like a porous filter—clean gently, rinse fully, and dry completely. When in doubt, defer to the manufacturer’s care instructions over DIY shortcuts.
When microphone foam is user-removable, hand cleaning plus full air-drying is usually the lowest-risk way to restore voice clarity.
If the manual warns against liquids or specifies no user removal, any washing method can increase the risk of internal damage.
Windscreens that are torn or coating-degraded often need replacement because cleaning cannot restore lost filtering geometry.
Quick checklist (scan before you start)
– [ ] Foam windscreen is removable (confirmed by headset manual or gentle pull test)
– [ ] Foam rinsed with lukewarm water; soap only if needed
– [ ] Rinsed thoroughly until no residue remains
– [ ] Dried completely in a ventilated area
– [ ] Reattached carefully in the correct fit/orientation
Sources
– CDC — Handwashing guidance and recommended cleaning time (used here for the general “thorough cleaning” principle), 2020.
In summary, cleaning microphone foam comes down to three steps: remove it gently (if designed for user removal), wash lightly with mild soap only when needed, and air-dry completely before reinstalling. Avoid harsh solvents, heat drying, and damp reattachment—these are the most common reasons cleaned windscreens sound worse or smell again. If your headset manual restricts liquids or foam removal, follow that guidance or replace the windscreen when it’s degraded.
Frequently Asked Questions
What’s the best way to clean the microphone foam on a gaming headset?
Start by removing the foam windscreen if it’s detachable, then rinse it with lukewarm water and a small amount of mild dish soap. Gently squeeze to lift sweat and dust, then rinse thoroughly until no soap remains. Let it air-dry completely (usually 24 hours) before reattaching, because moisture can cause odors or audio issues.
How do I clean a gaming headset mic foam when it’s not removable?
If the foam windscreen can’t be taken off, use compressed air or a soft brush to remove loose debris first. Lightly dampen a microfiber cloth with a 70% isopropyl alcohol solution and wipe the foam surface carefully, avoiding soaking the microphone housing. Finish by letting it dry fully with the headset positioned to prevent liquid from running inward.
How often should I clean the microphone foam on my gaming headset?
A good rule is to clean the mic foam every 1–2 months, or sooner if you notice muffled voice clarity, buildup, or a sweaty/musty smell. If you play frequently, use the foam cover’s condition as your guide—visible grime, increased noise, or reduced microphone volume are strong indicators it’s time for cleaning. Regular maintenance helps keep your headset microphone sounding crisp.
Why does my headset microphone foam get dirty and affect my voice quality?
Microphone foam collects sweat, skin oils, saliva droplets, and dust from regular use and speaking close to the mic. Over time, that buildup can muffle speech, create static-like noise, or cause a stronger background hiss as the mic becomes less able to capture clear audio. Cleaning the foam windscreen restores airflow and helps maintain consistent voice pickup.
Which cleaning products are safe for microphone foam on gaming headsets?
In most cases, mild dish soap and lukewarm water are safest for removable foam windshields, while 70% isopropyl alcohol is useful for spot-cleaning non-removable foam. Avoid harsh chemicals, bleach, and strong solvents, since they can damage the foam material or leave residues that alter microphone sound. Always air-dry completely before using the headset again to prevent lingering odors and moisture-related audio problems.
📅 Last Updated: October 19, 2026 | Topic: How to Clean the Microphone Foam on a Gaming Headset | Content verified for accuracy and freshness.
References
- Microphone
- https://www.cdc.gov/coronavirus/2019-ncov/community/disinfecting-your-home.html
- https://www.cdc.gov/coronavirus/2019-ncov/community/disinfecting-building-facility.html
- https://www.who.int/publications/i/item/cleaning-and-disinfection-of-environmental-surfaces-in-the-context-of-covid-19
- https://www.epa.gov/coronavirus/cleaning-and-disinfecting
- microphone contamination disinfection – Search Results – PubMed
- headset microphone microorganisms – Search Results – PubMed
- https://scholar.google.com/scholar?q=cleaning+microphone+foam+windscreen Google Scholar
- https://scholar.google.com/scholar?q=disinfection+porous+foam+materials+guidelines Google Scholar
- https://scholar.google.com/scholar?q=headset+microphone+cleaning+hygiene Google Scholar
