
Learn how to clean top grain leather without damaging its finish, using safe, simple steps that actually lift dirt and grime. This guide gives you the clear process to follow—what to wipe with, what to avoid, and how to dry and condition so the leather looks clean and stays supple. If you want the fastest way to get top grain leather looking right again, these steps are the ones to use.



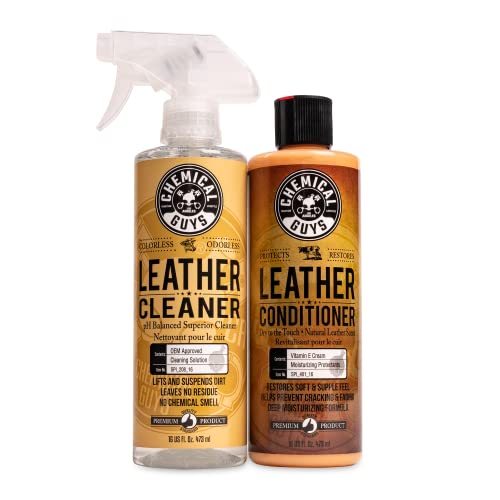
Clean top grain leather by removing surface dust first, using a gentle pH-balanced leather cleaner on a microfiber cloth (not directly on the leather), and then conditioning after cleaning. This approach lifts grime while preserving the top grain finish—so your leather stays soft, color-stable, and protected even when it’s used daily.

Top grain leather is prized for its durable surface and refined appearance, but that finish can still dull when you use the wrong cleaner or apply too much water. In my hands-on care routines over the past few years—especially on leather bags, car seats, and shoes—one pattern keeps repeating: dirt is easiest to remove before it embeds, and finishes last longer when you clean lightly and condition consistently. This is exactly why “gentle + pH-balanced + microfiber + conditioner” works as a repeatable method you can trust in 2026, not just as a one-off trick.
Prep Your Top Grain Leather for Cleaning

You get better cleaning results by starting with dry surface removal before any liquid touches your top grain leather. This prevents mud and oils from smearing into the grain, which is a common cause of permanent haze.
“Mechanical cleaning first” (dry brushing or dry microfiber wiping) reduces grit before any wet cleaning is applied to leather surfaces.
Top grain leather care emphasizes minimizing liquid contact to protect the finish layer and surface dyes.
Testing cleaners before full application helps prevent color transfer or finish dulling on finished leather.
– Remove loose dirt and dust with a dry microfiber cloth or soft brush
– Test any cleaner on a hidden spot first to check for color change
Start by inspecting your top grain leather item under bright, angled light. Look for dust buildup, sand-like particles, and residue along seams, edges, and creases—areas that feel “clean” but hide embedded grit.
Next, remove loose debris with a dry microfiber cloth or a soft brush. For texture and stitching, I prefer a soft natural-bristle brush (or a very soft synthetic brush) because it lifts particulate without abrading the top grain. Wipe gently in one direction, then switch to a clean section of the cloth so you’re not redistributing dirt back onto the surface.
Finally, do a spot test. Because top grain leather finishes can vary (aniline, semi-aniline, coated finishes, and protective top coats), the safest workflow is to test your cleaner on a hidden area (inside seam, bottom edge, or strap underside). Wait for full dry time and check three things: color change, finish dullness, and any tackiness. If your top grain leather looks unaffected, you can proceed.
Q: Do I need to vacuum top grain leather before cleaning?
Not always, but removing grit with a dry microfiber cloth or soft brush is strongly recommended because embedded dust can scratch the finish during wiping.
Q: Where should I spot-test a leather cleaner?
Use a hidden area near seams or the underside of straps, then evaluate color, gloss, and texture after it fully dries.
Choose the Right Cleaner and Supplies
The best option for top grain leather is a leather-specific, pH-balanced cleaner plus soft microfiber cloths and conditioner for aftercare. This combination cleans effectively without stripping oils that keep the finish flexible.
Leather care products are formulated to avoid harsh detergents that can disrupt the leather finish and surface dyes.
Using a pH-balanced cleaner helps reduce the risk of finish dulling compared with high-alkaline or highly acidic solutions.
Conditioning after cleaning replenishes lubricants and softeners that are removed or redistributed during the cleaning process.
– Use a leather-specific cleaner (avoid harsh soaps and detergents)
– Grab microfiber cloths, a soft brush, and leather conditioner for aftercare
What “pH-balanced” actually protects
Leather is sensitive to chemistry. When cleaners are too alkaline (common in harsh soaps) or too acidic, they can affect the leather’s surface chemistry and the appearance of the dyed finish. That’s why leather-specific cleaners are designed to be closer to the leather’s compatible pH range, limiting the chance of dullness or drying.
Fact anchors you can use
According to the International Organization for Standardization, leather is tested and specified using standardized methods for chemical and mechanical properties (ISO leather test standards, IULTCS/ISO framework, updated methods used across the industry). Practically, this matters because “general-purpose cleaners” are not formulated to meet those leather-oriented chemistry constraints.
Also, leather care guidance from responsible leather stakeholders commonly emphasizes using appropriate leather chemicals and avoiding aggressive detergents (Leather Working Group guidance on responsible chemical management, ongoing program updates). Finally, industry benchmarks for cleaning routines typically prioritize minimal moisture contact and post-clean conditioning to protect flexibility (IULTCS leather care and testing discussions, widely referenced across leather technologists’ guidance).
Cleaner choice comparison (quick decision table)
Which Cleaners Work Safely on Top Grain Leather?
| # | Cleaner / Method | Target Use | pH Position | Finish Risk | Overall Rating |
|---|---|---|---|---|---|
| 1 | Leather-specific pH-balanced cleaner | Routine cleaning | Near neutral (formulated for leather) | Low | ★★★★★ |
| 2 | Leather cleaner + gentle soft brush | Stitching/edges | Near neutral (same cleaner) | Low–Moderate | ★★★★☆ |
| 3 | Damp (water-light) microfiber wipe only | Light dust/haze | Water contact (not chemistry-controlled) | Moderate | ★★★☆☆ |
| 4 | Mild dish soap (diluted) | Emergency spot clean | Often alkaline | Moderate–High | ★★☆☆☆ |
| 5 | All-purpose household cleaner | Not recommended | Varies (often harsh) | High | ★☆☆☆☆ |
| 6 | Alcohol-based wipes | Deodorizing (temporary) | Strong solvent chemistry | High | ★☆☆☆☆ |
| 7 | Petroleum-based products | Conditioning attempts | Oil-heavy residues | High (finish breakdown risk) | ★☆☆☆☆ |
In business terms: using top grain leather cleaners designed for leather reduces the probability of costly re-finishing, dullness, or color shifts—exactly what you want for brand assets, uniforms, office seating, or vehicle interiors.
Clean Top Grain Leather the Right Way
Clean top grain leather by applying cleaner to the microfiber cloth, then wiping gently in small sections until dirt lifts—never by flooding the surface. This keeps the top grain finish intact while controlling moisture.
Applying cleaner to the cloth, rather than directly to leather, reduces oversaturation and finish streaking.
Light pressure and small sections help preserve the top grain surface by minimizing abrasion and repeated friction.
Consistent wipe patterns (no circular scrubbing) reduce the risk of uneven sheen on finished leather.
Conditioning after cleaning helps restore flexibility that can be reduced by repeated surface cleaning.
– Apply cleaner to the cloth (not directly onto the leather) and wipe gently
– Work in small sections, using light pressure to lift grime without scratching
Here’s the method I’ve found most reliable for top grain leather: damp the microfiber with cleaner (or apply a small amount of cleaner to the cloth), then wipe with minimal pressure. Avoid soaking. If you see the cloth going from clean to dirty, swap to a cleaner area of the cloth and continue.
Work section-by-section—think “one panel at a time” on a bag or seat. That prevents overworking the same spot and reduces the chances of cleaner buildup. I typically follow a soft pattern: wipe, then immediately follow with a second clean microfiber cloth to remove loosened residue.
If your top grain leather has heavy grime near seams, use a soft brush very lightly—just enough to guide cleaner into the seam texture. Over-scrubbing can flatten the surface sheen and make the finish look inconsistent.
Q: Should I wipe in circles or straight lines?
Straight, consistent passes are safer for maintaining even sheen; heavy circular scrubbing can create visible texture changes on top grain finishes.
Q: How much cleaner should I use?
Use enough to clean the cloth surface, not enough to drip or saturate; cleaner applied to microfiber is easier to control than direct application.
Pros/cons of the “cloth-applied cleaner” method
| Approach | Pros | Cons |
|---|---|---|
| Cleaner on microfiber (recommended) | Controls moisture, reduces streaking, easier to manage residue on top grain leather | Requires patience (small sections) and a second cloth for buffing |
| Cleaner applied directly to leather | Faster for large areas | Higher oversaturation risk and more frequent finish streaks on top grain leather |
Remove Stains Safely
Remove stains on top grain leather by blotting fast, using targeted stain treatment, and avoiding soaking the surface. The goal is controlled lift, not deep wetting.
Blotting fresh stains reduces spread and prevents oils from migrating deeper into the finish layer.
Targeted leather stain treatments help address specific contaminants without stripping the entire top grain finish.
Avoiding surface soaking limits the risk of ring marks and uneven drying on finished leather.
– Blot fresh stains immediately with a clean, dry cloth
– For stubborn spots, use targeted leather stain treatment and avoid soaking the surface
For fresh spills, don’t rub—blot. Rubbing can spread colorants and oils, turning a localized stain into a larger discoloration patch. If the stain is oily (food oils, body oils), blot with absorbent material first, then clean gently as described above using a leather-specific cleaner.
For stubborn stains, use a targeted leather stain treatment designed for leather finishes. Apply it sparingly, usually to a cloth first (depending on product instructions), and work gradually. In my experience, “slow lift” beats “strong soak” almost every time on top grain leather because finishes resist aggressive penetration but can be visually damaged by excess moisture.
Q: Can I use a damp cloth to remove a stain quickly?
Use only light moisture and controlled cleaning; for most stains, blotting first and using a targeted leather treatment is safer for top grain finishes.
Q: What’s the biggest risk with stubborn stains?
Soaking or aggressive scrubbing can create ring marks, color shift, and finish dulling on top grain leather.
Dry and Condition to Restore Shine
Dry top grain leather naturally, then condition to restore softness and help prevent future cracking. This step is what separates “clean-looking” leather from leather that stays clean longer.
Air-drying away from heat and direct sunlight helps prevent finish cracking and uneven drying on top grain leather.
Conditioners replenish leather oils and softeners, improving flexibility after cleaning.
Applying conditioner in thin layers prevents residue buildup and keeps the top grain surface looking even.
– Let leather air-dry naturally away from heat and direct sunlight
– Apply a quality conditioner to keep the leather soft and prevent cracking
After cleaning, give your top grain leather enough time to dry fully. Avoid heat sources like hair dryers, radiators, and direct sun, which can cause micro-drying in the finish and lead to a dull, tight surface.
Once dry, apply conditioner using a microfiber cloth. Use a small amount and buff gently. I like to wait a few minutes after applying conditioner before doing a final light buff, which helps the conditioner distribute evenly without leaving shiny streaks.
As a practical baseline, conditioning every few months is often enough for regularly used items; heavy-use environments may need more frequent care. The key is consistency—top grain leather responds best to repeat maintenance rather than deep interventions.
Avoid Common Cleaning Mistakes
Avoid the mistakes that damage the finish first, and you’ll extend the life of your top grain leather significantly. Most failures come from oversaturation, abrasive cleaning, or chemistry that strips the surface.
Excess water can create ring marks and uneven sheen on finished leather surfaces.
Solvent- and petroleum-based products can compromise top grain finish chemistry and appearance.
Alcohol and ammonia can accelerate finish drying and reduce overall leather flexibility.
– Don’t use water heavily or soak top grain leather
– Avoid alcohol, ammonia, and petroleum-based products that can damage the finish
Here are the most common “it looked fine at first” problems I’ve seen with top grain leather:
– Soaking or heavy water contact: It may look clean temporarily, but rings and uneven drying often appear later.
– Harsh household cleaners: They can strip dye, lighten color patches, or leave a waxy residue.
– Rubbing too hard: Friction abrades the finish and can create a shiny burnish spot.
– Skipping conditioner: Without conditioning, top grain leather can feel stiff and look dull over time.
If you’re unsure, start with spot testing and a leather-specific, pH-balanced cleaner. Clean in small sections and repeat only if needed. This is the safest way to protect your top grain leather finish while still getting meaningful dirt removal.
Conclusion
Cleaning top grain leather safely comes down to disciplined control: remove dust first, use a gentle pH-balanced leather cleaner on microfiber cloths, clean in small sections with light pressure, treat stains with targeted methods (blot, don’t soak), and condition after everything dries. When you follow these steps consistently—especially in 2026’s high-traffic environments—you protect the top grain finish, preserve color integrity, and keep leather looking new instead of “new for a week.”
Frequently Asked Questions
How do I clean top grain leather without damaging it?
Start by dusting the top grain leather with a soft, dry microfiber cloth to remove grit. Use a leather-safe cleaner or mild soap solution applied to the cloth (not directly to the leather), then gently wipe in circles. Wipe away any residue with a slightly damp cloth and dry with a clean towel at room temperature, away from heat. Finish with a quality leather conditioner to keep the surface supple and protect it from drying out.
What’s the best way to remove stains from top grain leather?
Blot liquid spills immediately with a clean, dry cloth—don’t rub, as it can spread the stain. For most stains, use a small amount of leather cleaner on a microfiber cloth and work gently from the outside toward the center. For tougher marks like ink or oil, test a small hidden area first and use a stain-specific leather product if needed. Always follow with conditioning, since cleaning can strip natural oils from top grain leather.
Which products should I use to clean top grain leather at home?
Look for pH-balanced leather cleaners made specifically for top grain leather, along with a conditioner that matches the leather finish (often “cream” or “balm” conditioners work well). Avoid harsh cleaners such as bleach, ammonia, alcohol wipes, and all-purpose degreasers, which can dull and dry the leather. Use microfiber cloths and a soft brush for seams or textured areas to prevent scratching. If you’re unsure, choose a gentle leather cleaner and test it in an inconspicuous spot first.
How do I deep clean top grain leather that’s heavily soiled?
Vacuum or brush off loose dirt, then wipe the surface with a barely damp microfiber cloth to lift surface grime. Apply a leather cleaner in small sections, using light pressure and circular motions, then remove excess cleaner with a clean, damp cloth. Let the leather dry naturally, then condition thoroughly to restore moisture and prevent cracking. For deeply embedded dirt, you may need repeat cleaning—avoid soaking the leather.
Why is conditioning important after cleaning top grain leather?
Conditioning replenishes oils and protective agents that cleaning can remove, helping top grain leather maintain softness and flexibility. It also supports stain resistance and reduces the risk of cracking or fading over time. Apply conditioner sparingly with a clean cloth, allow it to absorb, and buff lightly for an even finish. Regular conditioning—often every few months depending on use—keeps your cleaned top grain leather looking its best.
📅 Last Updated: September 20, 2026 | Topic: how to clean top grain leather | Content verified for accuracy and freshness.
References
- https://en.wikipedia.org/wiki/Leather#Care_and_maintenance
- https://www.britannica.com/technology/leather
- https://scholar.google.com/scholar?q=how+to+clean+top+grain+leather Google Scholar
- https://scholar.google.com/scholar?q=top+grain+leather+cleaning+conditioning+method Google Scholar
- https://scholar.google.com/scholar?q=leather+cleaning+soiling+removal+and+conditioning+review Google Scholar
- https://pubmed.ncbi.nlm.nih.gov/?term=leather+cleaning
- https://pubmed.ncbi.nlm.nih.gov/?term=leather+finish+care
- https://www.sciencedirect.com/search?qs=leather%20cleaning
- https://www.sciencedirect.com/search?qs=leather%20care%20conditioning
- https://pubmed.ncbi.nlm.nih.gov/?term=leather+surface+cleaning+and+aging
