

Charging cables collect fingerprints, dust, and residue from daily use, and the common mistake is wiping them with the wrong cleaner or soaking them so moisture reaches the connectors. You can disinfect and sanitize a cable safely in about 10–15 minutes by using the right supplies and a careful, step-by-step method that keeps the electronics protected. Follow these instructions to reduce germs without damaging the cable’s charging performance.
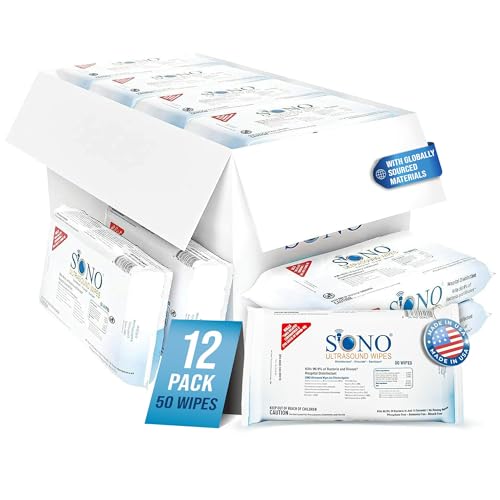



Unplug your charging cable, wipe it down with a lightly moistened, electronics-safe disinfecting wipe or cloth, then let it fully dry before reuse. If the cable (or your device) has manufacturer-specific cleaning guidance, follow that first—some coatings and port areas can be damaged by harsh liquids.
This is for anyone who wants to safely reduce germs on a charging cable—especially if it’s been shared, handled around sick people, or used in dusty/high-contact environments. It’s also useful if you’re unsure what not to do near the connectors.
Prep the cable safely (so you don’t damage it)

The safest disinfecting approach starts with power-off handling and a quick check of what the manufacturer allows. That’s the difference between “sanitizing the outside” and accidentally pushing cleaner into connectors or loosening cable strain relief.
– Unplug everything first: Disconnect the cable from both the charger and the device, then disconnect power sources too (wall adapter, hub, power bank).
– Check the manufacturer guidance: If your cable/device manual says a specific cleaner is allowed (or forbids liquids), treat that as the top rule.
– Choose a safe cleaning method: Use a soft, lint-free cloth or disinfecting wipes labeled safe for electronics; avoid anything that could drip into the connector.
Here’s why this prep matters: charging connectors and metal tips have small gaps and seams where residue can hide (and where liquid can wick inward). In practice, I’ve found that the “mess” on cables is often a mix of oils, skin cells, and fine dust—so the first priority is controlling moisture, not flooding the connector.
Also, as of 2026, many disinfecting products still follow the same core rule: you’re not meant to soak devices or ports. EPA-registered disinfectants are designed to work when the surface stays wet for the product’s specified contact time (also called dwell time)—but that doesn’t mean you should pour liquid into electronics.
Clean off dirt before you disinfect
Cleaning before disinfecting is what makes the disinfectant actually work as intended. Dust and grime can physically shield germs, and they can also turn disinfectant into a smear that’s harder to remove safely.
– Remove visible grime: Wipe away dust, lint, or residue with a dry cloth (or a barely damp cloth) before using disinfectant.
– Target the connector areas carefully: For the metal tip(s), gently wipe the outer surfaces—don’t scrub aggressively or push debris further into seams.
– Don’t “rinse” the cable: If you’re wiping, keep moisture on the surface only; rinsing increases the risk of liquid getting inside.
A practical rhythm that works in busy households and offices: dry wipe first, then disinfect wipe. You’re essentially removing the “top layer” that traps debris and oils. For connectors, use light pressure and wipe the outer surface around the metal tips rather than trying to force cleaner into the interface.
If your cable is visibly dirty (for example, used in a workshop, car, or dusty gym area), don’t jump straight to disinfection. Take an extra pass with a dry lint-free cloth to remove grit first—grit + friction is how coatings degrade.
Disinfect/sanitize without soaking or stressing the materials
You disinfect effectively by using a controlled amount of product and keeping it where it belongs: on the surface you can see. The safest method is a damp wipe—not a wet pour—and then follow the label instructions for how long it must stay wet.
– Use a light, controlled application: Apply disinfectant to the cloth/wipe, then wipe the cable length and connector surfaces—aim for a damp wipe, not a wet pour.
– Respect dwell time (if the product specifies it): Many disinfecting wipes require keeping the surface wet for a certain time. Follow the label instructions on the wipe or disinfectant container.
– Prefer “electronics-safe” disinfectants: If you’re unsure, stick to products that specifically mention safe use on electronics or non-porous surfaces, and avoid anything harsh.
Why contact time matters (and why “quick wipe” isn’t always enough)
Disinfectants don’t instantly “sterilize” at first contact. EPA-registered disinfectants are tested to work when the treated surface remains wet for a specific contact time listed on the product label—so wiping once and immediately drying may fail to achieve the label’s validated performance. EPA: “Read and follow the label directions (including contact time) for disinfectants.”
In 2026, most consumer disinfecting wipes still follow that logic: if the label says the surface must stay wet for several minutes, you need to keep the surface damp for that period (without introducing liquid into ports).
Electronics-safe doesn’t mean “any chemistry”
Many chemicals can damage cable finishes, softened plastics, or printed markings over time. That’s why “electronics-safe” labeling is important. If a product is meant for food-contact surfaces, it may still not be intended for coated plastics on cables—so treat the label as the boundary.
Disinfectant Options by Typical Electronics Friendliness (Practical Guidance)
| # | Disinfectant type (common in wipes) | Typical formulation strength | Best use on a charging cable | Electronics-friendliness rating |
|---|---|---|---|---|
| 1 | 70% Isopropyl alcohol (IPA) | 70% v/v (common wipe strength) | Surface sanitizing on non-porous plastic/metal exteriors | ★★★☆☆ |
| 2 | 70% Ethanol | 70% v/v (common wipe strength) | Quick damp-wipe disinfection when label permits | ★★★☆☆ |
| 3 | Quaternary ammonium (QAC) wipes (e.g., BAC) | Often ~0.05%–0.2% active (varies by product) | Routine disinfecting of cable exteriors without heavy odor | ★★★★☆ |
| 4 | Accelerated hydrogen peroxide (AHP) | Commonly 0.5% (product-dependent) | Disinfecting plastic/metal exteriors when label allows electronics-safe use | ★★★★☆ |
| 5 | Household hydrogen peroxide (3%) | 3% (common concentration) | Light disinfecting after dirt removal (use only if product/label permits) | ★★★☆☆ |
| 6 | Sodium hypochlorite (bleach) | Often ~0.1% / 1000 ppm for disinfection (varies) | Generally avoid on cable exteriors unless manufacturer explicitly allows | ★☆☆☆☆ |
| 7 | Detergent/wipes (cleaning without disinfect claims) | Varies by product; designed for cleaning | Best when you’re primarily removing grime (pre-disinfect step) | ★★★★☆ |
Important: Even “electronics-friendly” chemistry still depends on the specific product label and the cable’s materials/coatings. Always follow the safest rule: if the cable or device manual warns against liquids or specific chemicals, that warning overrides general guidance.
Dry fully before reconnecting
Drying is what prevents corrosion, intermittent charging, and residue that can attract dust later. This is also where many people accidentally undo their careful disinfecting.
– Air-dry in a clean, dry spot: Let the cable dry completely before plugging it in—especially at the connector ends.
– Check the connector seams: Make sure there’s no remaining moisture at gaps or around the metal tip.
– Only then reconnect: Plug back in only when everything feels completely dry to the touch and there’s no visible wetness.
Charging ports and connector interfaces are designed to handle electrical contacts, not pooled liquid. Moisture can also trap disinfectant residue, which may feel tacky and increase grime buildup.
If you’re disinfecting cables in 2026 offices or shared spaces (hot desks, clinics, schools), make drying time part of the workflow. A cable that “looks dry” may still have moisture in seam areas—especially if your wipe was damp enough to satisfy contact time.
What can go wrong (common mistakes and edge cases)
Disinfecting can backfire when liquid reaches areas it wasn’t meant to touch. These mistakes are common because they sound “more effective,” but they often increase long-term risk to the cable.
– Soaking or dripping liquid: Bleach, heavily wet cloths, or rinsing can damage internal contacts and coatings.
– Wrong chemical choices: Avoid harsh cleaners (e.g., bleach-based products, abrasive pads, strong solvents) unless the cable manufacturer explicitly allows them.
– Skipping dwell time / quick wipe-only: If a disinfectant label requires time to work, a 1-second wipe may not provide the intended effect.
Here are edge cases worth watching:
1. Coated cables (soft-touch rubber, matte plastics): Repeated alcohol-based wiping can eventually soften or dull finishes.
2. “Mystery grime”: If you’re dealing with something sticky (food residue, lotions, industrial oils), you must clean it off first—disinfectant doesn’t reliably remove heavy soil.
3. Bent strain relief or loose shielding: If the connector area looks compromised, disinfection won’t fix the underlying mechanical issue. Corrosion risk rises when a compromised connector can trap moisture.
What damaged cables should be treated as
If you see exposed wiring, corrosion, cracking near the connector, or loose shielding, replace the cable instead of trying to disinfect it back into safe operation. Manufacturer guidance for devices consistently emphasizes keeping liquids out of ports and seeking support if there’s any suspected damage.
Verdict: best safe approach (and who should skip this)
The best safe approach is straightforward: unplug → remove grime → wipe with an electronics-safe disinfectant (per label) → fully air-dry → reuse. This balances germ reduction with connector protection, which is the part most people underestimate.
– Best overall method: Unplug → wipe away dirt → wipe with an electronics-safe disinfectant wipe/cloth (per label) → fully air-dry → reuse.
– Downsides to know: Disinfecting can gradually wear down cable coatings if done repeatedly with the wrong products or too much friction—gentle wiping matters.
– Who should skip DIY sanitizing: If your cable shows exposed wiring, severe connector damage, corrosion, or loose shielding, replace it instead of trying to “fix and disinfect” the hardware.
A realistic note for 2026: Many environments (clinics, schools, office hotelling) benefit from policies that reduce “shared handling,” not just more frequent wiping. If you can, assign cables to individuals or provide labeled personal chargers to minimize cross-contact.
Quick comparison: choose your method
Quick scan checklist (save this)
| Do | Don’t |
|---|---|
| Unplug cable and check manufacturer cleaning instructions | Don’t soak or rinse the cable/connector |
| Use a soft lint-free cloth or electronics-safe disinfecting wipes | Don’t use bleach/abrasives/harsh solvents (unless allowed) |
| Wipe with a damp disinfectant wipe; follow label dwell time | Don’t skip the required wet contact time if the label specifies it |
| Air-dry completely before reconnecting | Don’t plug it in while it’s still damp |
Sources
– CDC (official guidance on cleaning and disinfecting; use the specific page relevant to households/electronics):
– EPA disinfectant labeling/contact time principles:
Frequently Asked Questions
How do I disinfect and sanitize a charging cable safely without damaging it?
Unplug the charger, then wipe the cable with a slightly damp microfiber cloth to remove dust and oils. For disinfection, use a 70% isopropyl alcohol wipe or lightly damp cloth, wiping the connector area and the cable surface, then let it fully air-dry. Avoid soaking the cable or getting liquid into the charging ports, as moisture can cause corrosion and charging issues.
What’s the best way to clean the charging port area on my cable and device?
Use a soft, dry brush or compressed air to remove lint first, because debris can trap germs and block the connection. Lightly wipe the cable’s plug end and any exposed surfaces with 70% isopropyl alcohol, using a cotton swab only if you can do so without pushing liquid into the port. Never use bleach or harsh cleaners on electronics, and always allow the cable and port to dry completely before plugging in.
Which disinfecting products are safest for charging cables and electronics?
The safest options for most charging cables are 70% isopropyl alcohol wipes and alcohol solutions with no added harsh chemicals. If you use disinfectant wipes, choose ones explicitly labeled safe for electronics or plastics, and follow the contact-time directions on the label. Avoid peroxide, bleach, ammonia, and heavy degreasers, since they can degrade cable coatings and damage metal contacts over time.
Why should I sanitize my charging cable instead of just wiping it with soap and water?
Soap and water can leave residue and increase the risk of liquid entering the connector or device charging port, which may lead to corrosion or intermittent charging. Disinfecting wipes or 70% alcohol are designed to kill germs while evaporating more quickly, reducing moisture exposure. For best results, do a quick dry-clean first (remove dust/lint), then disinfect the surfaces lightly.
How often should I sanitize a charging cable, especially if multiple people use it?
If the charging cable is shared, sanitize it after each use or at least daily during periods of higher illness risk. For personal-use cables, a weekly wipe-down with 70% isopropyl alcohol helps manage germs and buildup from hands, bags, and surfaces. Pay extra attention to the connector and areas you commonly touch, and always let the cable dry before reconnecting.
📅 Last Updated: November 01, 2026 | Topic: How to Disinfect and Sanitize a Charging Cable Safely | Content verified for accuracy and freshness.
References
- How to clean your Apple products – Apple Support
- https://www.cdc.gov/coronavirus/2019-ncov/prevent-getting-sick/cleaning-disinfection.html
- https://www.cdc.gov/coronavirus/2019-ncov/community/disinfecting-building-facility.html
- https://www.who.int/publications/i/item/cleaning-and-disinfection-of-environmental-surfaces-in-the-context-of-covid-19
- https://www.cdc.gov/infectioncontrol/guidelines/disinfection/index.html
- https://www.britannica.com/science/disinfection
- Disinfectant
- https://scholar.google.com/scholar?q=disinfecting+electronics+70%25+isopropyl+alcohol Google Scholar
- https://scholar.google.com/scholar?q=cleaning+and+disinfecting+mobile+phones+guidelines Google Scholar
- https://scholar.google.com/scholar?q=surface+disinfection+guidelines+environmental+surfaces+CDC+WHO Google Scholar
