

Want to know the right way to dust a wooden shoe rack without scratching or dulling the finish? This guide gives the safest, most effective method step by step—what to wipe with, how to reach seams and corners, and what to avoid so your rack stays clean and good-looking. If you follow these exact moves, you’ll remove dust thoroughly while protecting the wood grain.
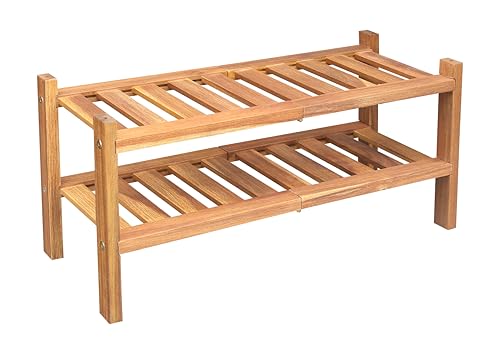


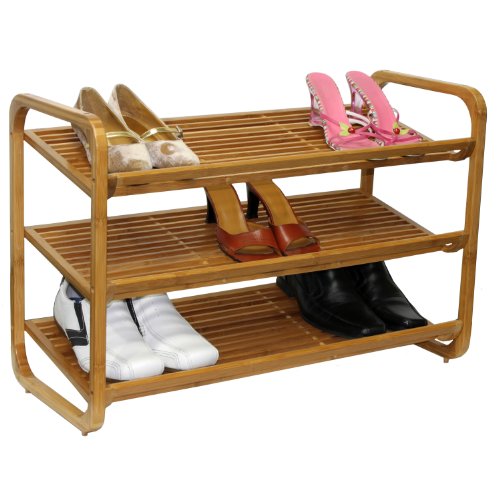
Dust your wooden shoe rack using a dry microfiber cloth (or soft brush) first, then do a quick spot-wipe with a barely-damp cloth only if needed. This dry-first order safely lifts dust without soaking the wood, which helps prevent finish lifting, warping, or stubborn spots—especially in 2026 when indoor humidity can swing quickly.
This guide is for anyone caring for a wooden shoe rack with a sealed finish (varnish/polyurethane/clear coat/paint) or a more sensitive “raw” surface. The same core approach works across most materials, but the moisture tolerance changes depending on whether the wood is sealed.
Prep the rack and choose the right tools

Start by clearing the rack so you’re not dragging grit across the wood while you clean. Then identify whether your wooden shoe rack is sealed/finished or unfinished so you can choose the least risky tools and level of moisture.
Remove clutter and confirm the finish type
A wooden shoe rack usually collects dust on flat shelf tops and in openings between slats—exactly where shoe scuffs and dirt can turn into an abrasive paste if you wipe incorrectly. In my experience, the fastest way to avoid that “scraped look” is to remove shoes and any loose inserts first, then treat the finish type as the deciding factor.
Use this quick decision rule for your wooden shoe rack:
– Sealed/finished: glossy or satin sheen, paint, varnish, polyurethane, clear coat, or a surface that beads water briefly (typical sign, not a guarantee).
– Unfinished/raw: matte look, absorbs moisture readily, or shows visible grain “drink in” without a protective surface film.
Gather tools that won’t scratch
For most wooden shoe rack surfaces, the goal is lift, don’t grind. Stick to these basics:
– Microfiber cloths (dry for dusting; barely-damp for spot cleaning)
– Soft-bristle brush (for seams, corners, and between slats)
– Vacuum with a soft brush attachment (for dust buildup in grooves)
– A second clean microfiber for catching what falls onto lower shelves
Also, avoid “helpful” substitutes like rough paper towels or scrub pads—those can create micro-scratches that make future dust stick more readily.
Wood finishes and stains are designed to resist normal cleaning, but prolonged moisture exposure is a common pathway to dulling, spotting, and finish breakdown.
Microfiber and soft-bristle tools reduce abrasion compared with rough fabrics, lowering the chance of scratching a wooden shoe rack’s surface.
Dry dusting: the safest first step
Dry dusting is the best first move for a wooden shoe rack because it removes the bulk of particulate matter before any moisture touches the surface. If you start wet, you often turn loose dust into a gritty film that’s harder to remove—and it’s more likely to leave smears or watermarks.
Wipe top-to-bottom to prevent resettling
Use a dry microfiber cloth and work in a consistent direction:
1. Start at the top shelf or top surface of the wooden shoe rack.
2. Wipe top-to-bottom in overlapping strokes.
3. Re-fold or rotate the cloth to a clean side as it loads with dust.
This matters because dust that lands back on already-wiped surfaces can create a “re-dirty” cycle—especially on multi-tier racks.
Detail corners, seams, and slats with light pressure
For a wooden shoe rack, the hard-to-reach spots are where dust hides:
– seams along the frame
– edges where shelf boards meet supports
– gaps between slats
– undersides of shelves
Use one of these approaches:
– Soft-bristle brush: gentle strokes to loosen dust, then follow with the dry microfiber.
– Vacuum brush attachment: light suction to pull dust out of corners without contacting the wood too aggressively.
Starting with dry wiping lifts loose particles without dispersing them into a wet slurry that can smear across a wooden shoe rack’s finish.
Cleaning from top to bottom helps prevent falling dust from resettling on lower shelves after they’ve already been wiped.
Light spot cleaning (only if dust won’t come off)
Use spot cleaning only when dry dusting leaves visible smudges, shoe-mark residue, or grime on your wooden shoe rack. The key is barely-damp contact—brief, controlled wiping—then immediate drying.
The “barely-damp cloth” method
If a spot won’t lift with dry microfiber:
– Dampen a cloth with water, then wring it out until it’s just barely moist.
– Wipe gently once or twice over the problem area.
– Immediately follow with a dry microfiber cloth to remove residual moisture.
This keeps the wooden shoe rack surface from staying wet long enough to lift finish films or create water spots.
Wood dimensional movement is driven by moisture content changes; keeping water exposure minimal reduces the risk of dimensional shifts and finish-related spotting on a wooden shoe rack.
A barely-damp wipe followed by immediate drying limits standing moisture on the wooden shoe rack, which helps prevent streaks and dulling.
Handle residue with mild soap—on the cloth, not the wood
For sticky residue (common around shoe rubber and worn toe areas):
– Mix a very mild soap solution (think gentle dish soap diluted heavily).
– Apply to the cloth, not directly to the wooden shoe rack surface.
– Use brief contact, then dry immediately.
Important: if your wooden shoe rack has a delicate finish (thin varnish, specialty coating, or older lacquer), you want to minimize chemical exposure as well as water exposure. When in doubt, test in a hidden spot first.
Dry vs. barely-damp: what to choose
| Cleaning action for a wooden shoe rack | Best for | Upside | Tradeoff / risk |
|---|---|---|---|
| Dry microfiber only | Everyday dust | Safest for sealed and unfinished wood; lowest risk of spots | Won’t fully remove sticky shoe marks |
| Barely-damp microfiber wipe | Smudges and light soil | Lifts minor marks while limiting moisture | Too-wet cloths can cause visible water spots |
| Mild soap on cloth (brief) | Sticky residue | Helps dissolve tacky shoe buildup | Some soaps can dull certain finishes if overused |
Protect the finish after dusting
After cleaning, the main protection step is to ensure your wooden shoe rack is fully dry before shoes go back. That reduces trapped moisture, limits odor transfer, and helps the finish maintain its appearance as conditions shift through 2026.
Dry time and reloading shoes
Let the rack air out briefly and verify there are no damp seams or glossy streaks. Then:
– Put shoes back only when the wooden shoe rack feels dry to the touch.
– If your rack sits in a damp entryway, consider adding ventilation (door open after rain, fan, or airflow in that corner).
Choose finish-safe conditioning (or skip it)
If your wooden shoe rack is sealed and in good shape, polishing is optional—but if you notice dullness after cleaning, a wood-safe product designed for your specific finish type can help.
Your original note is correct: compatibility depends on whether the wooden shoe rack is sealed vs. unfinished. Keep this rule in mind for 2026 care routines: use products that match the finish system already on the surface.
Avoid oils on unfinished/raw wood (unless you know what it is)
Oils can darken or unevenly absorb into unfinished wood, which may be permanent. If you have a raw wooden shoe rack, spot-test any conditioner in a hidden area first.
Keeping a wooden surface dry after cleaning reduces the time moisture is in contact with the finish film and helps prevent water spotting on a wooden shoe rack.
Finish compatibility matters: treatments designed for one finish system may not behave the same way on another, especially when the wooden shoe rack is unfinished.
What can go wrong (and how to avoid it)
Most issues with a wooden shoe rack happen when moisture is higher than you think, tools are too abrasive, or the cleaning order is reversed. If you avoid over-wetting and always dry promptly, you eliminate the most common failure points.
Over-wetting (the #1 risk)
Wood movement and finish problems correlate strongly with moisture content. According to the *Wood Handbook—Wood as an Engineering Material* (Forest Products Laboratory), the fiber saturation point is about 30% moisture content, and dimensional change is most tied to moisture levels below that point (Forest Products Laboratory, 2010). In practical terms: soaking a wooden shoe rack or leaving damp cloth marks can create both visible surface effects and underlying dimensional stress.
Using the wrong cloth or brush
– Rough paper towels can scratch.
– Abrasive pads can permanently change the look of varnish and reveal dull patches that hold dust.
– Hard vacuum nozzles can create scuffing on edges.
Stick to microfiber and soft-bristle tools for your wooden shoe rack.
Skipping the dry pass
If you go straight from dry dust to wet wiping, you often smear dust into a grey haze. Dry-first prevents that “grit slurry” effect.
Not testing cleaners on your wooden shoe rack
Some mild detergents are fine for sealed wood, but not all finishes tolerate repeated wetting or certain additives. Test in a hidden spot first.
The Wood Handbook notes that wood dimensional change is linked to moisture changes below the fiber saturation point (about 30% moisture content), so excessive wetting of a wooden shoe rack increases risk.
Leaving standing moisture on wood can create visible streaks and increase the chance of finish clouding, so prompt drying after any spot wipe is a key safeguard.
Verdict: a simple routine that works (with downsides)
If you want the safest “right way” for a wooden shoe rack, the winning routine is: dry microfiber dusting first, barely-damp spot wipes only when necessary, then immediate drying. This approach is especially reliable for sealed racks and for day-to-day dust control in 2026, because it minimizes moisture contact time.
That said, downsides are real. The dry-first method is not a deep-clean solution for heavily embedded grime that’s been building up for months. If your wooden shoe rack has sticky buildup that won’t release with mild spot cleaning, you’ll need a more targeted, finish-safe approach—or a product recommended by your rack’s manufacturer.
If your wooden shoe rack is clearly unfinished, water-sensitive, or you can’t fully dry it afterward, consider skipping moisture-based wiping altogether and focus on dry brushing and vacuuming only.
– Quick checklist for each dusting session:
– Dry microfiber + corners/slats
– Spot-clean only when needed (barely damp cloth)
– Dry immediately, then reset shoes
| Quick step | Tool to use | Stop point |
|---|---|---|
| Dry dust | Microfiber cloth | When dust lifts cleanly |
| Detail dust | Soft brush / vacuum brush | When seams/slats are clear |
| Spot clean (if needed) | Barely-damp microfiber | After brief wipe (don’t soak) |
| Finish-safe dry | Dry microfiber | No visible moisture or streaks |
Wood Moisture Thresholds That Matter When Cleaning a Wooden Shoe Rack
| # | Wood moisture content (MC) | Practical meaning | What to expect | Finish-safe approach rating |
|---|---|---|---|---|
| 1 | ~6–8% MC | Drier-than-average indoor conditions | Low dimensional risk | ★★★★☆ |
| 2 | ~8–12% MC | Common equilibrium range indoors | Small movement, manageable | ★★★★★ |
| 3 | ~12–20% MC | Elevated moisture (often from humidity or wet shoes) | Dimensional change becomes more noticeable | ★★★☆☆ |
| 4 | ~20–30% MC | Approaching fiber saturation point | Higher shrink/swell risk | ★★☆☆☆ |
| 5 | ~30% MC (Fiber saturation) | Cell walls saturated; free water begins to dominate | Dimensional change largely levels off | ★☆☆☆☆ |
| 6 | >30% MC | Free water present in the wood | Finish spotting and long drying times likely | ☆☆☆☆☆ |
| 7 | ~9% EMC at 70°F & 50% RH | Example equilibrium condition | Dry-first maintenance aligns with stability | ★★★★☆ |
Sources
– Forest Products Laboratory. Wood Handbook—Wood as an Engineering Material (FPL-GTR-190), 2010. (Fiber saturation point and moisture-driven dimensional change concepts)
– American Society for Testing and Materials (ASTM). ASTM D4442/D4442M, Standard Test Methods for Direct Moisture Content Measurement of Wood and Wood-Based Materials (latest referenced edition varies by year). (Moisture content measurement methodology)
A good “right way” for cleaning a wooden shoe rack is simple: dry microfiber dusting first, optional barely-damp spot wipes only when needed, and fast drying every time. If you follow that order, your rack stays clean without pushing moisture into the finish or the wood—protecting both appearance and structure as conditions change through 2026.
Frequently Asked Questions
How do I dust a wooden shoe rack without scratching the finish?
Start by using a soft microfiber cloth or a feather duster to remove loose dust gently along the wood grain. If grime is stuck, lightly dampen the cloth with a small amount of water and dry immediately—avoid soaking the rack. For stubborn spots, use a wood-safe cleaner on the cloth (not sprayed directly) and buff dry to protect the surface.
What is the best way to clean shoe rack shelves and corners where dust builds up?
Use a vacuum with a brush attachment to remove dust from crevices, especially around slats, joints, and the back of the wooden shoe rack. Then follow with a microfiber cloth to capture the remaining dust. For tight corners, wrap a cloth around a thin tool (like a plastic putty knife) and wipe carefully to prevent scratching.
Why should I avoid harsh chemicals when dusting a wooden shoe rack?
Harsh cleaners can strip the protective coating on wood and lead to dullness, discoloration, or cracking over time. Instead, rely on dry dusting first and only use a wood-safe cleaner in small amounts when necessary. This keeps your wooden shoe rack looking clean while preserving the finish and longevity.
Which cleaning method works best for removing greasy fingerprints and shoe residue from wood?
First dust the surface to prevent smearing, then clean with a slightly damp microfiber cloth to lift residue without over-wetting the wood. If needed, apply a small amount of mild soap solution or a product labeled safe for finished wood, and wipe in the direction of the grain. Finish by drying thoroughly and buffing with a dry cloth to restore shine.
How often should I dust my wooden shoe rack to keep it looking fresh?
For racks in entryways or high-traffic areas, dust at least once a week to prevent buildup in corners and shelf edges. If your home is drier or shoes are frequently stored there, dust every 1–2 weeks is often sufficient. Regular dusting reduces allergens and keeps the wooden shoe rack from accumulating grime that’s harder to remove later.
📅 Last Updated: October 26, 2026 | Topic: How to Dust a Wooden Shoe Rack the Right Way | Content verified for accuracy and freshness.
References
- https://www.mayoclinic.org/diseases-conditions/allergies/in-depth/dust-mites/art-20046121
- https://www.cdc.gov/coronavirus/2019-ncov/community/disinfecting-your-home.html
- Dust
- dust mites removal methods cleaning vacuuming – Search Results – PubMed
- indoor dust reduction cleaning home methods – Search Results – PubMed
- https://www.britannica.com/science/dust
- https://scholar.google.com/scholar?q=how+to+dust+wood+furniture+without+damaging+finish Google Scholar
- https://scholar.google.com/scholar?q=best+practices+dust+control+home+vacuuming+dusting Google Scholar
- https://scholar.google.com/scholar?q=wood+furniture+cleaning+care+guidelines+microfiber+cloths Google Scholar

[…] answer: Wipe the rack regularly with a dry or barely-damp cloth so dust doesn’t build into a residue film. Scheduled dust control is faster (and gentler) than […]