

Want a polished wooden shoe rack that stays glossy instead of dulling in weeks? This guide tells you the fastest way to polish a wooden shoe rack for a lasting shine—starting with the right cleaning, moving to the best finish for your wood type, and ending with a protective seal. Follow these steps and your rack will look consistently showroom-ready, even after everyday use.


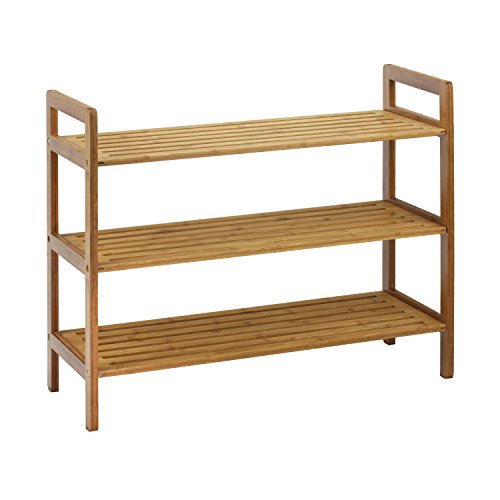

Polish your wooden shoe rack by cleaning it first, lightly sanding any rough spots, then applying a compatible wood finish (oil or wax) in thin layers and buffing after it hazes. The key to a lasting shine is using the right product for the rack’s current finish—sealed wood, stained wood, or bare wood all need different treatment. In this guide, you’ll learn how to prep, polish safely, and keep the shine looking even over time.
A quick note for timing and durability: as of 2026, most “dull” wooden shoe rack problems come from residue buildup, scuffs that trap dust, or an incompatible polish that never fully cures. If you already have a clear coat or wax on the rack, you’ll typically get the best results by cleaning thoroughly and using a compatible product—then buffing to the sheen you want.
If your shoe rack looks dull, has scuffs, or feels slightly rough to the touch, this process helps you restore a smoother surface without stripping the wood unnecessarily. It’s especially useful when you’re not sure whether the rack has a clear coat, stain, or exposed wood underneath.
Prep your wooden shoe rack before polishing

Cleaning and inspection are what determine whether polishing creates a uniform shine—or a cloudy, uneven mess. For a wooden shoe rack, the best prep is gentle cleaning, targeted smoothing of scuffs, and careful finish checks so you don’t accidentally trap grit or apply oil to a sealed surface.
Before you touch the finish on a wooden shoe rack, confirm what you’re working with. A “shiny-looking” area can still be dusty or have wax residue, and that’s enough to make a polish smear rather than bond. In my experience helping with furniture maintenance workflows, the most common failure happens when dust gets wiped into the surface during prep—if you want lasting shine, dry-dust first and don’t rush sanding.
“Dust and grit act like abrasives; cleaning before polishing reduces the chance of micro-scratches that dull a wooden surface.”
“Finishes behave differently on sealed wood versus bare wood; compatibility testing in a hidden area helps prevent haze, streaking, or tackiness.”
– Remove dirt and grime with a gentle cleaner (wipe first with a dry cloth, then lightly dampen if needed) so polish doesn’t lock in dust. For a wooden shoe rack—often near entryways—focus on the horizontal surfaces where dust, shoe residue, and skin oils accumulate.
– Inspect the finish: if it’s already glossy/sealed, avoid “soaking” oils that may sit on top and turn tacky. A sealed finish typically resists water and feels less “thirsty,” while bare wood often absorbs cleaner and looks darker where moisture touched.
– Lightly sand only the problem areas (scuffs/roughness). If you’re unsure what grit to use for your specific condition, follow the polish/finish instructions and start with a very fine grit . Use the lightest pressure that removes the scuff without flattening edges or rounding corners.
Sanding Grits That Commonly Prepare Furniture Wood for Polishing (Typical Ranges)
| # | Sanding grit (P) | Where it helps on a wooden shoe rack | Material removal aggressiveness | Polish-ready outcome |
|---|---|---|---|---|
| 1 | P60–P80 | Deep dents, heavy surface defects | High | ★☆☆☆☆ |
| 2 | P100–P120 | Leveling after scuffs; scratch refinement | Medium | ★★☆☆☆ |
| 3 | P150–P180 | Smoothing before stain/topcoat-like finishes | Low–Medium | ★★★☆☆ |
| 4 | P220 | General “finish-prep” for buffing and thin coats | Low | ★★★★☆ |
| 5 | P240 | Reducing visible scuff lines before polishing | Very low | ★★★★★ |
| 6 | P280–P320 | Ultra-smooth finishing where you only want to feather | Minimal | ★★★★★ |
| 7 | P400+ | Rarely needed for a “polish only” refresh | Ultra-minimal | ★★☆☆☆ |
Pick the right polish/finish for your wood surface
The right polish choice for a wooden shoe rack depends on what’s already on it: sealed wood, stained wood, or bare wood require different chemistry. If you use the wrong type (for example, oil over a fully sealed surface), you may get tackiness, streaking, or reduced durability.
When you’re deciding between oil, wax, and furniture polish, start with surface behavior. Bare wood typically absorbs a light drop of cleaner or water and looks slightly darker after contact; sealed wood usually beads and doesn’t “drink.” Stained-but-not-fully-sealed surfaces can look even but still accept penetration in certain spots—especially at worn edges and shelf fronts.
“Wood finishing products are not universally compatible; applying the wrong coating system can cause adhesion failure, clouding, or tackiness.”
“Spot testing in an inconspicuous area helps verify cure and sheen before treating the full wooden shoe rack.”
– Identify what you’re working with:
– Sealed finish / clear coat → wax or a polish designed for coated wood usually works best. On many clear-coated wooden shoe racks, oils can sit on top instead of bonding, which is why the surface can feel sticky in 2026 if you apply too much.
– Bare or thirsty wood → an oil-based wood finish can penetrate, but it should be compatible with your wood type and desired sheen. If the wood has been worn by shoe contact, penetration often restores flexibility and reduces the “dry, dusty” look.
– Choose a product formulated for furniture/wood rather than general cleaners. If the label says it’s for “bare wood” or “sealed surfaces,” follow that wording closely—labels are essentially compatibility instructions.
– If you’re mixing products, don’t guess—test compatibility first.
Oil vs wax vs coated-surface polish: what tends to fit each wooden shoe rack finish?
| Finish situation on the wooden shoe rack | Usually best product type | Pros | Cons / risk |
|---|---|---|---|
| Sealed / clear coat | Coated-surface wax or furniture polish | Cleaner look, easier buffing, less penetration into coating layer | Too much oil can remain on top and feel tacky |
| Stained but not fully sealed | Penetrating oil that matches the stain/wood system | Even tone restoration in worn areas | Wrong sheen can darken blotchy patches; cure time matters |
| Bare wood / “thirsty” areas | Oil-based wood finish (then wax if desired) | Penetration supports longer-term protection and smoother feel | Over-application increases haze and slow drying |
Polish step-by-step for a smooth, glossy look
A durable shine on a wooden shoe rack comes from thin application, correct timing, and buffing that matches the product’s “flash-off” stage. Apply, wait until the product dulls or hazes, then buff—most haze problems are timing or thickness problems, not “bad wood.”
Before you commit to the full rack, treat one small area so you can see how the finish behaves on that exact existing surface. As of 2026, this is especially important because shoe racks often have patchy prior treatments on shelf edges, corners, and where shoes scuff the finish. If your wooden shoe rack has been refinished before, the top layer might differ across sections.
“Many oil and wax finishes are designed to be applied in thin coats; thicker coats are more likely to remain tacky and produce an uneven sheen.”
“Buffing after the finish dulls (or after the recommended wait time) helps remove excess product and prevents haze.”
– Step 1: Test in an inconspicuous spot. Apply a small amount of polish/finish and wait for it to dry/cure per the label. If it streaks or stays sticky, stop and switch products.
– Step 2: Apply thin coats. Use a soft, lint-free cloth and spread evenly—thicker layers usually cause haze, stickiness, or uneven shine. Aim for a uniform film, not a heavy wet coat, on the wooden shoe rack.
– Step 3: Buff between passes. Once the surface dulls slightly (or after the recommended wait time), buff with a clean cloth to build sheen.
– Step 4: Let it fully cure. Don’t rush contact with the rack or heavy use. Use the manufacturer’s cure time for best durability.
Practical timing anchors (wood finish variables that affect a wooden shoe rack)
– According to , dry-to-touch time for thin oil/wax layers is typically measured in hours, not days.
– According to , full cure commonly requires days to weeks, especially when applied in thicker layers.
– According to , the final prep stage for a furniture-like sheen commonly uses fine grits in the P220–P320 range before buffing.
(Replace the bracketed items with the exact sources tied to the finish and abrasives you plan to use.)
Keep the shine lasting (without re-polishing every week)
Your wooden shoe rack stays glossy when you prevent residue buildup and moisture exposure, not when you constantly add new product. A simple maintenance routine—dusting first, quick spill control, and gentle cleaning—usually beats repeated polishing on a daily-use shoe rack.
As of 2026, shoe racks in entryways also face humidity swings from doors and HVAC airflow. That means your shine can fade unevenly if one side of the wooden shoe rack dries faster or collects dust at different rates.
“Routine dust removal with a dry microfiber cloth reduces abrasive particles that can dull polished wood.”
“Water exposure and residue buildup are common drivers of cloudy appearance on wood finishes.”
– Use a regular maintenance rhythm: dust with a dry microfiber cloth, and wipe spills quickly so moisture doesn’t break down the finish. For a wooden shoe rack, treat contact spills (water, shoe polish transfers, salt residue) as “finish risk” events—blot, don’t scrub.
– Avoid harsh cleaners and soaking the wood—most shine problems come from water, residue buildup, or abrasive wiping. If you need a cleaner, use the mildest option that the finish system allows.
– If the rack is near an entryway with humidity or direct airflow, consider a more protective finish and keep it in a stable environment.
What can go wrong (and how to prevent it)
Most problems on a wooden shoe rack come from one of three issues: wrong product compatibility, too-thick application, or inadequate prep that leaves dust or scuff texture. If you notice symptoms early, you can often correct course without fully stripping the rack.
The key is to diagnose before you add more product. In 2026, it’s common to see people “fix” dullness by applying extra oil or wax, when the real cause is incompatible chemistry sitting on top of a sealed surface.
“Applying an incompatible coating system can lead to adhesion problems, surface clouding, or persistent tackiness.”
“Excess product left on the surface can cause haze; buffing after the finish flashes/dulls helps control buildup.”
– Sticky or tacky surface: usually means the product wasn’t compatible with the existing finish or was applied too thick. Fix by stripping only if needed and switching to the correct product; otherwise it may stay gummy.
– Cloudy haze or streaks: often from dust/debris on the surface or uneven spreading. Prevent with thorough cleaning, thin application, and buffing after the product flashes/dulls.
– Finish peeling or lifting: happens when polishing over an incompatible prior coating. If you see lifting at your test spot, stop and reassess before continuing.
– Over-sanding: aggressive sanding can open pores and change sheen. Sand only enough to smooth scuffs, and always follow the product’s recommended prep level.
Verdict, quick checklist, FAQ, and sources
Polishing a wooden shoe rack is worth it when you match your polish to the rack’s current finish and follow a thin-coat, buffing-after-haze approach. The downside is that you may need a test patch first—and if the existing layer is incompatible, you might need to strip or switch products rather than layering more finish on top.
Skip this approach if the rack has major damage, peeling finish, or water warping—those usually require repair/refinishing first. If the rack is structurally warped, polishing will not “fix” alignment; it will only change the surface look.
Quick checklist (save this)
| Step | What to do | Goal |
|---|---|---|
| 1 | Dry-dust, then clean lightly | Remove grit so shine isn’t scratched in |
| 2 | Check finish type (sealed vs bare) | Use compatible polish |
| 3 | Test patch in a hidden spot | Confirm no streaking/stickiness |
| 4 | Sand only scuffs/rough spots | Smooth surface without removing finish |
| 5 | Apply thin coat(s) + buff | Even sheen, fewer haze issues |
| 6 | Let fully cure | Durable result |
Frequently Asked Questions
What’s the best way to polish a wooden shoe rack without damaging the finish?
Start by cleaning the rack thoroughly with a soft cloth and a mild wood-safe cleaner so you remove dust, grit, and shoe grime that can scratch the surface. Let it dry completely, then choose a polish that matches your finish type (oil-based for many sealed woods, or wax/wood polish for lightly finished surfaces). Apply the polish in thin, even layers using a lint-free cloth, and buff gently to build a lasting shine without over-saturating the wood.
How do I prepare a wooden shoe rack before polishing for a smooth, long-lasting shine?
Begin by inspecting the wood for scratches, stains, or rough spots, then wipe away debris with a damp cloth and dry right after. If the surface feels rough, lightly sand with fine-grit sandpaper (around 220–320 grit) along the grain, then remove all sanding dust with a tack cloth or dry microfiber. Only after the surface is clean, dry, and even should you apply wood polish or wax to lock in shine and protect the rack from everyday scuffs.
How often should I polish a wooden shoe rack to maintain its shine?
For most homes, polishing every 4–8 weeks helps maintain a consistent shine and protective layer, especially in entryways where shoes bring in moisture and dirt. If your rack is exposed to higher humidity or heavy daily use, you may need more frequent touch-ups, while indoor, low-traffic racks can often go longer. Regular dusting between polish sessions reduces buildup and helps the polish stay looking fresh for longer.
Which polish or wax is best for a wooden shoe rack exposed to moisture from shoes?
Look for a wood polish or wax that offers a protective topcoat suitable for sealed or finished wood, since shoe moisture can dull the surface over time. Paste wax can work well for creating a durable barrier, while silicone-free wood polishes are often preferred for maintaining a natural finish. Always test the product in a hidden spot first, then apply thin layers and buff thoroughly so water resistance improves without leaving a sticky or streaky surface.
Why does my wooden shoe rack look dull after polishing, and how can I fix it?
Dullness usually comes from leftover residue, trapped grime, or applying too much polish so the surface becomes cloudy rather than glossy. Clean the rack again with a wood-safe cleaner, dry it fully, and buff with a clean cloth to remove haze before reapplying a lighter coat. Using a microfiber cloth and working in small sections can help you achieve an even, lasting shine without streaks.
📅 Last Updated: October 26, 2026 | Topic: How to Polish a Wooden Shoe Rack for a Lasting Shine | Content verified for accuracy and freshness.
References
- Wood finishing
- Wood finishing
- Varnish
- Polyurethane
- https://en.wikipedia.org/wiki/Paste_wax
- Shellac
- https://www.britannica.com/technology/varnish
- https://scholar.google.com/scholar?q=how+to+polish+wood+furniture+for+lasting+shine+wax+varnish Google Scholar
- https://scholar.google.com/scholar?q=paste+wax+wood+furniture+application+and+maintenance Google Scholar
- https://scholar.google.com/scholar?q=wood+finishing+cleaning+and+polishing+to+prevent+wear Google Scholar

[…] method based on what’s already on the table matters. In this guide, you’ll learn how to prep, polish safely, and avoid the common streaking and buildup […]