

You slide into your car after wearing dark jeans, wipe a spot on the leather seat, and a faint blue transfer spreads along the seam. You can stop that before it happens by creating a protective barrier and cleaning spills correctly—this takes about 30–45 minutes and requires a microfiber cloth, a leather-safe cleaner, and a compatible leather conditioner or sealant. Start with a quick test on a hidden area, then build the protection layer where dye is most likely to rub.
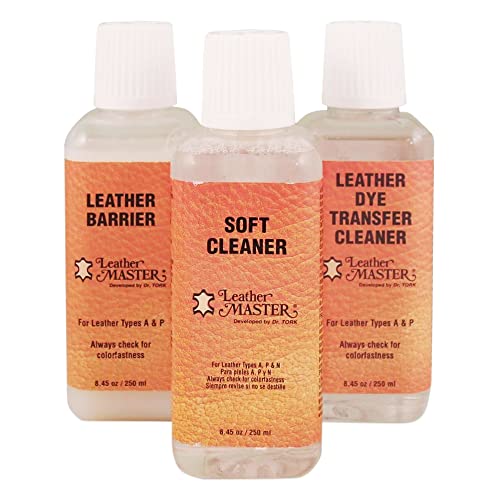



Preventing dye transfer on car leather seats is mostly about two things: keeping the leather finish well-conditioned (so it resists friction) and adding a leather-specific barrier (so loose pigment can’t easily embed). Dye transfer usually happens when colored fabrics (like dark jeans) rub against leather that’s dry, unprotected, or recently cleaned with the wrong product. The fastest way to reduce it is to keep the leather conditioned and add a barrier that’s designed for leather, then wash/clean safely when transfer starts. This guide walks you through prevention, what to do if dye appears, and the common mistakes that make staining worse.
If your car has light-colored leather (white, beige, tan) or you frequently carry passengers wearing dark clothing, this is for you. It’s also helpful if you’ve already noticed fading or “shadow” marks from jeans, towels, or seat covers.
Act Fast When You See Dye Transfer

Act fast—fresh dye is usually still loose enough to lift from the surface rather than permanently bind to the finish. In 2026, that “first few minutes” approach is still the biggest difference between a removable mark and a persistent one on car leather seats.
Before you do anything, remember that leather color and “transfer resistance” depends on the finish layer (topcoat) and the condition of the surface. When dye rubs in, it can act like a pigment stain that lives partly on the topcoat and partly in micro-texture, so aggressive scrubbing tends to worsen the spread.
– Blot (don’t rub) to lift loose pigment from the surface before it sets into the finish.
– Stop the source of transfer temporarily (swap clothing, remove seat covers that shed dye, avoid harsh friction).
– Do a small, hidden test of any cleaner or conditioner first, since leather finishes vary.
Why blotting beats rubbing (on car leather seats): Rubbing increases contact pressure and friction, which helps pigment move deeper into the finish and spreads color across a larger area. If you catch it early and blot, you’re working with surface pigment instead of trying to “chase” an embedded stain.
A practical workflow I recommend (and use as a repeatable routine for car leather seats) is: blot with a clean microfiber cloth, pause to check the cloth for color transfer, then move to a fresh section of the cloth. If dye still transfers after two or three gentle blot cycles, you’re already past “surface only,” and you’ll need a more cautious cleaning step.
Clean Safely Without Removing the Leather Finish
Clean cautiously—your goal is to remove transfer without stripping the protective topcoat that helps resist future staining. Most “general purpose” cleaners reduce the leather’s surface integrity, which can increase how quickly dyes bind to car leather seats.
Leather finishes are often designed to handle daily wear, but they’re not all compatible with the same cleaning chemistry. If you’ve recently cleaned your seats with something unknown, dye marks can reappear faster because the finish may be softened or partially removed. This matters even more for light leather, where contrast makes shallow staining obvious.
– Use a leather-appropriate cleaner and follow the label—especially if your seats have a protective topcoat.
– Avoid harsh household cleaners, heavy degreasers, and “general purpose” wipes that can strip or soften the finish and make staining easier.
– After cleaning, let the leather dry fully before conditioning or applying any protective layer.
What “finish-safe” means in practice: When you clean leather, you’re trying not to disturb the protective surface film (the “topcoat”). If the topcoat is compromised, dye transfer accelerates because the surface is more absorbent and friction-related pigment embedding becomes easier.
Quick conditioner vs. protector decision table (pros/cons)
| Approach | What it does best | Pros | Cons / limitations |
|---|---|---|---|
| Conditioner | Reduces friction and drying | Helps the leather stay supple; lowers the “grab” that lets denim/pigment transfer | Too much can create tackiness or uneven sheen on car leather seats |
| Leather-safe protector/barrier | Resists staining and color transfer | Adds a protective layer that makes pigment easier to remove before embedding | Must cure properly; incorrect products can interfere with certain topcoats |
The key for car leather seats is balance: conditioning reduces friction; protecting reduces pigment bonding. If you do only one, you’ll still see marks—just more slowly.
Condition Leather to Reduce Friction and Absorption
Conditioning is the “friction control” step for car leather seats. A well-maintained finish holds up better to repeated contact from jeans, dark towels, and bag straps.
Dry leather behaves differently from conditioned leather: it tends to grab onto fabric and it’s more likely to allow pigment to sit on the surface long enough to stain. By restoring suppleness, conditioner helps reduce those micro-grabs that start the transfer process.
– Keep leather moisturized with a conditioner that’s compatible with your seat type (some leathers are sealed; others are more porous).
– Apply conditioner evenly and lightly—too much can cause tackiness or uneven sheen that attracts dirt.
– If you’re not sure which conditioner matches your leather, confirm with your owner’s manual or the leather-care guidance for your upholstery.
How to apply without creating new problems: Use a clean applicator (often a microfiber pad or soft cloth), apply thinly, and buff out any excess. Uneven application can create a shiny or tacky patch. On car leather seats, those patches can become “dirt magnets,” which then makes cleaning more frequent—and cleaning too often is how many finishes get damaged over time.
A helpful 2026 rule: if you can feel stickiness after conditioning, you used too much. The surface should feel normal—supple, not wet.
Also consider UV and heat exposure. Research summaries consistently show UVA and UVB fall into different bands (for example, UV-A is typically cited around 315–400 nm and UV-B around 280–315 nm), and sunlight can accelerate finish degradation, which increases dye transfer sensitivity on car leather seats NASA (2024). If your car bakes in the sun, conditioning and protection schedules should be more conservative.
Add a Barrier/Protector Designed for Leather
A leather-safe barrier is what turns dye transfer into something you can often clean off rather than something that bonds into the finish. For car leather seats, this is the “stain resistance” layer that works alongside conditioning.
Not every protectant is equal. Generic fabric sprays are formulated for textiles and can soften or discolor leather topcoats. A proper leather protector is meant to support the finish without turning the surface into a greasy film.
– Look for a leather-protecting product intended to help resist staining and color transfer (not a generic fabric spray).
– Apply in thin layers and allow proper curing time as directed, so the barrier bonds rather than staying greasy.
– Reapply on a schedule based on use and exposure (sun, heat, and frequent contact speed up wear).
How to apply correctly (and why curing matters): Thin layers reduce streaking and help the protector form a more even barrier. If you skip curing time and immediately sit on the treated area, you can trap friction-generated pigment under an incompletely formed film—exactly what you’re trying to prevent.
From a chemical standpoint, heat can accelerate the kinds of processes that make stains “set.” As a general chemistry rule of thumb, many reaction rates increase by about a factor of ~2 for every 10°C rise (a Q10-style behavior commonly described in science education) OpenStax Chemistry (2020). That doesn’t mean you’ll instantly stain at a specific temperature, but it does explain why hot cars often produce worse dye marks on car leather seats.
Prevent Dye at the Source (Clothing, Seat Covers, Transfers)
The most reliable prevention step is to reduce incoming dye and reduce rubbing points before they ever meet the leather. If you control what touches your car leather seats (clothing, covers, and bag placement), you reduce both pigment transfer and abrasion.
Denim and dark synthetics can shed loose dye, especially when new. Even when “most” dye stays in the fabric, enough pigment can remain loose to transfer under friction. For light leather, the contrast makes even small amounts visible.
– Treat the “incoming dye” problem: wash dark clothes to reduce loose dye before long rides, and consider avoiding brand-new jeans.
– Watch for transfer from seat covers, towels, and bag straps—some materials shed color even when they look clean.
– Reduce rubbing points: keep clothing dry, avoid rough seams pressing into the same spot, and encourage passengers to sit naturally rather than sliding.
Seat covers: choose for colorfastness, not just appearance. Many covers look dark but won’t bleed; others bleed during normal movement. If you often carry passengers, you’ll get more consistent results by using covers only after you verify they don’t transfer dye to a hidden leather area.
Data table: colorfastness tests that matter for “jeans to leather” transfer
| # | Rubbing/transfer-related method | What it evaluates | Why it maps to car seats | Practical relevance |
|---|---|---|---|---|
| 1 | AATCC 8 | Colorfastness to crocking (rubbing) | Directly tests dye rub-off under controlled friction | ★★★★★ |
| 2 | ISO 105-X12 | Colorfastness to rubbing | Focuses on textile-to-surface dye transfer under rub conditions | ★★★★☆ |
| 3 | ISO 105-X16 | Colorfastness to crocking of dry-wet combinations | Helps predict transfer when leather contact involves moisture | ★★★☆☆ |
| 4 | AATCC 116 | Colorfastness to light | Indirect: fading can make transfers more visible over time | ★★☆☆☆ |
| 5 | ISO 105-B02 | Colorfastness to artificial light | Indirect: affects dye stability more than friction transfer | ★★☆☆☆ |
| 6 | ASTM D5051 | Textile colorfastness to crocking (rubbing) | Direct friction-transfer relevance for fabric shedding | ★★★★☆ |
| 7 | AATCC TM8 (rubbing variants) | Rubbing fastness variants within crocking tests | Useful for selecting seat covers that won’t rub off | ★★★☆☆ |
This isn’t about “testing your leather at home,” but it helps you evaluate seat covers and fabrics. When you see rubbing/crocking test references, you’re dealing with the same failure mode that causes denim-on-car-leather transfer.
What Can Go Wrong (Common Mistakes & Edge Cases)
Even with good habits, dye transfer can still happen—especially if the leather finish is already compromised. The difference is whether the next action improves your odds or accelerates staining on car leather seats.
Most worsening outcomes come from friction and chemistry mistakes: scrubbing while pigment is loose, stripping protective films, or using the wrong protectant. If you’ve already got “shadow” marks, you’re often dealing with pigment that has partially entered surface pores or adhered to a softened finish.
– Rubbing stains with a towel: friction can spread pigment wider and push color deeper into the finish.
– Over-cleaning: stripping the protective layer can make future dye transfer much more likely.
– Using the wrong “protector”: some products are meant for vinyl or fabric and can discolor or interfere with leather topcoats.
– Spot-treating without patch testing: leather can lighten or darken in only the treated area.
– Heat and sunlight before treatment: warming the leather (from direct sun or heaters) can worsen how dye “sets,” so let seats cool before you apply anything.
Edge cases to watch:
– Suede/nubuck-like leather: These surfaces are more forgiving to “brushing” but are less predictable for liquid cleaners—use manufacturer guidance.
– Previously dyed/updated interiors: If your vehicle’s interior has been refinished, product compatibility can change. Car leather seats that were re-coated may react differently to standard conditioners.
– Frequent short trips: Leather stays exposed, but you may never let products fully cure between uses; inconsistent curing can reduce barrier performance.
If your upholstery uses a specialty coating, follow the owner’s manual. In 2026, many brands still vary by model year and leather treatment type, and the safest route is always to match the correct finish approach.
Verdict / Tip + Quick Checklist Table
If you want the most reliable results, focus on conditioning + a leather-safe barrier, then remove the friction and dye sources. If your leather is severely cracked, peeling, or the finish is already compromised, start with the product guidance from your upholstery manufacturer or a detailer who works with your specific leather finish—DIY attempts may create uneven color.
Downsides / who should skip this approach:
– Skip DIY treatments if the leather is damaged, delaminating, or the finish is peeling—spot repairs can look patchy.
– Be cautious if your seats have specialty coatings (or if the owner’s manual advises against protectants).
– If you’re unsure what finish your seats use, patch testing is essential; otherwise, you may create a visible sheen difference.
Quick Scan Checklist (Save + Use)
| Situation | What to do first | What to avoid |
|---|---|---|
| You notice fresh blue/black marks | Blot gently; stop the source | Don’t scrub or grind pigment in |
| After cleaning, marks keep appearing | Condition leather; apply a leather-safe protector | Don’t rely on generic cleaners/wipes |
| Dye shows only on certain seams/sitting spots | Reduce friction points; check clothing seams | Don’t repeatedly spot-treat the same area without patch tests |
| Seats look dry/tacky | Let leather fully settle; use compatible conditioner | Don’t add more product immediately |
| You used an unknown product before | Let the area dry; then proceed with patch-tested care | Don’t keep stacking treatments without checking compatibility |
Frequently Asked Questions
What’s the best way to prevent dye transfer from clothes onto car leather seats?
Start by separating dyed items (jeans, dark shirts, new garments) from leather until they’ve been washed a few times, since fresh fabric dye is the most likely to transfer. Use a leather-safe barrier like a clean, fitted seat cover or a breathable cloth layer when you expect repeated contact. Regularly wipe and condition your leather to keep it protected and less absorbent, reducing dye penetration.
How do you stop jeans dye from rubbing onto leather car seats?
Keep the denim dry and “pre-test” it by rubbing a hidden area of the seat with a small section of the fabric before regular use. Wash new jeans with cold water and consider washing them separately to remove excess dye, then dry in a way that minimizes bleeding. You can also use a barrier such as a thin seat protector or steering wheel/seat pad to prevent direct friction between denim and leather.
Why does dye transfer happen so easily on leather car seats, and how can you reduce it?
Dye transfer usually occurs because leather can absorb pigment through friction and moisture, especially if the leather’s protective finish is worn or if the dye in clothing hasn’t been set. Keeping leather moisturized with a quality leather conditioner helps maintain a stable surface and reduces the chance that dye will soak in. Vacuum and wipe regularly so you remove oils and residues that can increase staining likelihood.
Which leather cleaner and protectant should you use to minimize staining and dye transfer?
Choose a pH-balanced, leather-specific cleaner that won’t strip the protective oils or finish, then follow with a dedicated leather protectant designed to repel dirt and reduce penetration. Look for products labeled safe for your leather type (aniline, semi-aniline, or protected leather) to avoid discoloration or finish damage. Always patch-test in an inconspicuous area and apply in thin, even layers for consistent protection.
What immediate steps should you take if dye transfer already started on your car leather seats?
Act quickly: blot the area gently with a clean, damp microfiber cloth and avoid rubbing, which can spread pigment deeper into the leather. Use a leather-safe cleaner or diluted leather upholstery cleaner, working slowly and changing cloths as needed to lift dye. Once the transfer is gone (or reduced as much as possible), condition the spot with a leather conditioner to restore moisture and help prevent future dye transfer.
📅 Last Updated: November 06, 2026 | Topic: How to Prevent Dye Transfer on Your Car Leather Seats | Content verified for accuracy and freshness.
References
- dye transfer leather color bleeding – Search Results – PubMed
- Colour fastness
- Leather
- Upholstery
- Textile
- Dye
- Stain
- https://scholar.google.com/scholar?q=preventing+dye+transfer+on+leather+car+seats+upholstery Google Scholar
- https://scholar.google.com/scholar?q=color+transfer+leather+cleaning+conditioning+preventing+bleeding Google Scholar
- https://scholar.google.com/scholar?q=textile+colorfastness+dye+bleeding+mechanisms+prevention Google Scholar

[…] This step-by-step approach takes about 20 to 30 minutes, using a few household basics plus a leather-safe cleaner and conditioner. Follow the sequence carefully—blot, test, clean, then condition—so the stain […]