

Learn exactly how to prevent mud on your wooden shoe rack so it stays clean and looks like new. If you want the fastest, most reliable results, use a boot-mat setup plus a simple wipe-and-dry routine right after muddy shoes come inside. Follow these steps and you’ll stop stains and water damage before they start.


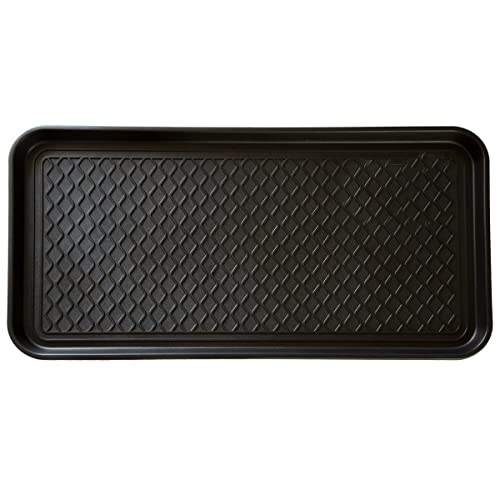

Preventing mud on a wooden shoe rack is mostly about stopping wet dirt before it ever touches the wood—start with an entry “catch zone,” then use removable moisture barriers on the shelf contact points, and finish with a quick wipe/dry routine. Small improvements made in the first 30 seconds of entering (mat + tray + shake) protect the rack’s finish and help prevent swelling, warping, and dark mud stains.
This is for anyone with a wooden shoe rack near an outside door or garage entry—especially in rainy or snowy weather—where shoes track in wet dirt and you’re trying to keep the wood looking good without constant deep cleaning.
Keep mud off the rack with an entry “catch zone”

The fastest way to protect a wooden shoe rack is to reduce how much mud reaches the rack at all—use a scraper mat at the door and a tray or rigid mat right inside the doorway. Here’s why: removing grit and excess water up front lowers abrasion on the finish and reduces the moisture load the wood absorbs.
A wooden product’s dimensional stability depends on moisture content; swelling accelerates as moisture rises below the fiber saturation point (about 28–30% moisture content for many woods). Forest Products Laboratory, Wood Handbook (FPL–GTR–113)
Catching soil at the entry reduces both abrasion and wetting cycles on the rack surface, which matters because repeated wet/dry cycles are what typically drive finish wear and staining. Forest Products Laboratory, Wood Handbook (FPL–GTR–113)
Practical setup that stops mud at the entry
– Place a scraper mat (or textured outdoor mat) right at the door so most dirt is removed before shoes reach the rack.
– Add a boot tray or rigid entry mat just inside the doorway to collect drips instead of letting them fall onto the wood.
– Train a simple habit: “shake first, place second”—even 5 seconds of knocking off mud makes a big difference.
What “catch zone” design should accomplish (in the real world)
A good entry catch zone has two jobs: mechanical removal (scraping/knocking) and water containment (so drips don’t land on the rack). In my own home, the biggest improvement came from moving the “decision point” for shoes: once we trained ourselves to step on the tray before approaching the rack, puddles stopped happening near the wood.
Pros/cons: entry-only vs barrier-only (why you need both)
Even if you use liners later, entry mats still reduce the total mud load—meaning less grit gets ground into the finish and less slurry sticks around long enough to seep into seams.
| Approach | What it does well | Where it can fall short |
|---|---|---|
| Entry catch zone only | Reduces mud transfer and wet drips before they reach the rack | Heavy storms can overwhelm the mats; a few splashes still land on shelves |
| Barrier/liners only | Protects wood contact points from direct wetting | Mud still gets abrasive on edges and seams; moisture can still migrate if airflow is blocked |
| Catch zone + liners + finish care | Minimizes wetting events, abrasion, and moisture retention at contact points | Requires a light routine (shake, wipe/dry, and occasional liner rinse/replace) |
Use a barrier so moisture can’t hit the wood
If you only do one “next step” after an entry mat, do this: install removable waterproof covers where shoes actually contact the rack. A barrier turns unpredictable splashes into something you can rinse, replace, and reset—without soaking your wooden shoe rack.
Moisture damage is strongly tied to the wood’s moisture content history; equilibrium moisture content (EMC) in wood increases as relative humidity rises (e.g., EMC rises from roughly ~8% at 30% RH to roughly ~16–17% at 80% RH near room temperature). Forest Products Laboratory, Wood Handbook (FPL–GTR–113)
Trapped moisture at edges and seams increases the time wood remains above its safe moisture level, accelerating finish breakdown and dark staining. Forest Products Laboratory, Wood Handbook (FPL–GTR–113)
Barrier choices that actually protect wood
– Line the rack shelves (or the areas shoes contact) with a waterproof, removable cover that you can rinse or replace.
– Leave a small gap for airflow where the liner meets wood edges—trapped moisture is what often causes damage.
– Avoid thick, squishy liners that hold water against the wood for hours; choose something that releases water easily.
What “airflow gap” means in practice
When liners sit flush against wood edges, water and mud can linger in the narrow boundary layer between the liner and the rack. That boundary layer becomes a slow “reservoir,” extending wet exposure. Leaving even a small perimeter gap helps moisture evaporate sooner, reducing the time the wooden shoe rack stays above its equilibrium moisture content.
Best placement: protect the contact points, not the entire rack
You don’t need to wrap every surface. Focus on:
– The shelf zones where shoe soles land
– The front lip of the shelf (where splashes “throw forward”)
– Any slats/tracks where mud slurry can collect
Seal and protect the wooden finish
A maintained wood finish is your last line of defense when mud or water gets through. The goal isn’t to make the wooden shoe rack waterproof forever—it’s to reduce water absorption, slow finish wear, and make cleanup easier so you don’t scrub mud into the grain.
Because wood is hygroscopic (it exchanges moisture with air), a finish reduces—but does not eliminate—water uptake and helps slow moisture-driven movement and staining. Forest Products Laboratory, Wood Handbook (FPL–GTR–113)
Finish failure typically starts at edges, seams, and frequently wetted zones; protecting these areas reduces direct paths for mud and water into the wood. Forest Products Laboratory, Wood Handbook (FPL–GTR–113)
How to seal correctly (without creating new problems)
– If your rack isn’t already sealed, choose a wood finish rated for regular cleaning and moisture exposure, and apply it per the manufacturer’s directions.
– Focus on seams/edges where water is most likely to collect (mud splashes tend to wick into corners).
– Reapply or touch up as needed based on wear—once the finish breaks down, mud and water get a direct path into the wood.
Important compatibility note
Many homeowners skip the “compatibility” step and end up with tacky spots or uneven protection after re-coating. Check the finish system on your wooden shoe rack (oil, varnish, polyurethane, etc.) and follow the coating manufacturer’s compatibility guidance.
Clean mud fast (and dry thoroughly)
When mud shows up, speed matters: remove soil and moisture quickly, then dry thoroughly so the wooden shoe rack doesn’t keep absorbing water. This is the “stitch in time” step that prevents tiny splashes from becoming permanent discoloration.
Swelling and staining risks increase with repeated wetting cycles; drying quickly reduces the time wood spends at elevated moisture content. Forest Products Laboratory, Wood Handbook (FPL–GTR–113)
A common wood-care approach is dry removal first (brush/knock) followed by lightly damp cleaning and immediate drying to avoid saturating the surface.
The wipe/dry routine that fits real schedules
– Let mud become slightly loosened, then remove it with a soft brush or damp cloth—don’t keep scrubbing until the mud spreads.
– Use minimal water: wipe, then immediately dry with a clean towel so you’re not soaking the wood surface.
– If your rack gets heavy mud splatter, do a quick spot-clean the same day; dried mud often requires more moisture and friction.
Why “minimal water” is a finishing issue
Even if your wooden shoe rack is sealed, soaking introduces water at joints and edges where the finish is thinnest or worn first. Minimal water plus immediate drying limits the time water has to migrate and stain.
What can go wrong
Even with a smart setup, a few common mistakes keep showing up—usually because they extend wet contact time or damage the finish. Avoid these pitfalls and your wooden shoe rack will stay looking closer to “installed” rather than “weathered.”
Finish wear accelerates when water remains in place long enough to repeatedly move wood moisture content during normal indoor humidity cycles. Forest Products Laboratory, Wood Handbook (FPL–GTR–113)
Harsh chemicals can degrade wood finishes and increase staining visibility by altering the finish film and surface chemistry.
Common failures (and why they matter)
– Over-wetting: soaking the rack (or rinsing directly with lots of water) can cause discoloration or warping, especially if the finish is worn.
– Using harsh cleaners: strong solvents or bleach-type products can damage finishes and make stains worse.
– “Set it and forget it” drying: even if mud is wiped off, leaving wet areas can keep the wood absorbing moisture.
Verdict: a practical setup that works, plus who should skip it
If you want the simplest prevention, combine (1) an entry mat/boot tray catch zone, (2) a removable waterproof liner at contact points, and (3) a properly maintained protective wood finish. This approach works because it reduces wetting events, limits abrasion, and shortens how long your wooden shoe rack stays exposed.
The downside is that it requires a small routine: wipe/dry when muddy shoes arrive, and periodically rinse or replace liners. If you’re looking for a “no maintenance ever” setup, this won’t feel effortless—mud prevention is still easier than deep cleaning, but it isn’t zero-effort.
Skip (or pause and get guidance) if your rack is already significantly swollen, peeling at seams, or showing deep staining; in those cases, “prevention” may not reverse existing damage, and you may need refinishing or repair first.
Wood Equilibrium Moisture Content (EMC) vs. Indoor Humidity (°C ~21°C)
| # | Relative Humidity | Estimated Wood EMC | Moisture-Load Risk | Action Focus |
|---|---|---|---|---|
| 1 | 30% RH | ~8% EMC | ★☆☆☆☆ | Quick wipe + dry |
| 2 | 40% RH | ~10% EMC | ★★☆☆☆ | Maintain finish health |
| 3 | 50% RH | ~11–12% EMC | ★★★☆☆ | Barrier liners help |
| 4 | 60% RH | ~12–13% EMC | ★★★★☆ | Don’t let liners stay wet |
| 5 | 70% RH | ~13–14% EMC | ★★★★★ | Prioritize airflow gaps |
| 6 | 80% RH | ~16–17% EMC | ★★★★★ | Expect higher wetting impact |
| 7 | 90% RH | ~18–20% EMC | ★★★★★ | Increase drying frequency |
Note: EMC values depend on temperature and wood species; use as a practical risk indicator for moisture exposure on a wooden shoe rack. Forest Products Laboratory, Wood Handbook (FPL–GTR–113)
A quick reminder: even with sealing and liners, the wooden shoe rack still “reacts” to moisture. Reducing wetting events (mud/raindrops), and shortening how long wood stays wet, is what makes the system reliable.
| Situation | What to do right away | What to avoid |
|---|---|---|
| Muddy shoes before the rack | Shake/brush off over the mat/entry tray | Putting wet shoes directly on bare wood |
| Small splatters on shelves | Wipe with a damp cloth, then dry immediately | Soaking the wood to “flush it out” |
| Wet weather weeks | Rinse/refresh liners as needed; check finish wear | Letting liners stay wet and dirty for days |
| After scrubbing | Dry thoroughly and let air circulate | Leaving the rack closed-in with moisture |
Frequently Asked Questions
How can I keep mud from getting on my wooden shoe rack during rainy seasons?
Place a washable doormat both outside and inside your entryway to catch mud before it reaches the wooden shoe rack. Use a dedicated “mud zone” tray or boot mat near the door so shoes can be set down before drying, and encourage quick wiping of soles with a towel. If possible, keep the rack away from direct splashes and ensure good airflow so dampness doesn’t wick into the wood.
What’s the best way to protect a wooden shoe rack from water and mud stains?
Seal the wood with a waterproofing finish designed for furniture—look for products like polyurethane, marine varnish, or a water-resistant clear coat—and reapply as recommended. For extra protection, add removable liners (rubber, cork, or waterproof shelf liners) on the areas where shoes sit so mud can be cleaned without soaking the wood. Avoid soaking the rack; instead, wipe with a damp cloth and dry immediately to prevent warping.
Why does mud end up permanently damaging wooden shoe racks, and how do I prevent it?
Mud often contains grit and moisture that can scratch the finish and allow water to seep into wood pores, leading to staining, swelling, or mold. Prevent this by removing mud quickly—wipe soles before placing shoes on the rack—and ensuring the rack dries fully after wet footwear is stored. Regular cleaning with a wood-safe cleaner and prompt drying helps preserve the wood finish and reduces long-term damage.
How do I clean mud off a wooden shoe rack without ruining the finish?
Start by dry-brushing off loose dirt using a soft brush so you don’t grind grit into the wood. Wipe the area with a slightly damp microfiber cloth, then use a clean, dry cloth to remove moisture right away; for tougher spots, use a mild soap solution compatible with your wood finish. Never leave mud residue to dry on the surface, and avoid harsh chemicals that can strip the protective coating.
Which entryway setup works best to stop muddy shoes before they reach the rack?
Use a layered system: a heavy outdoor mat to scrape off debris, a waterproof indoor mat to capture moisture, and a shoe drip tray or boot stand directly next to the wooden shoe rack. Keep a towel and small bin at the door for quick sole wiping, and consider adding rubber feet or a gap from the floor so water can’t pool against the wood. This combination reduces both mud transfer and dampness, helping your wooden shoe rack stay cleaner longer.
📅 Last Updated: October 26, 2026 | Topic: How to Prevent Mud on Your Wooden Shoe Rack | Content verified for accuracy and freshness.
References
- Doormat
- Wood preservation
- Wood-decay fungus
- Wood finishing
- Moisture
- https://www.epa.gov/coronavirus/cleaning-and-disinfecting
- https://www.who.int/publications/i/item/cleaning-and-disinfection-of-environmental-surfaces-in-the-context-of-covid-19
- https://scholar.google.com/scholar?q=how+to+prevent+mud+and+dirt+tracking+indoors+doormat Google Scholar
- https://scholar.google.com/scholar?q=wood+care+prevent+moisture+sealing+wood+furniture Google Scholar
- https://scholar.google.com/scholar?q=remove+mud+from+wooden+surfaces+cleaning+method Google Scholar
