

Most people think you only need soap or a quick wipe to restore a dirty mouse pad, but the right tools and supplies determine whether you remove grime without damaging the surface. To clean effectively, you need items matched to the pad’s material and finish, so dirt lifts, odors dissipate, and glide stays consistent. Getting this selection right saves time and helps prevent warping, fraying, or residue that can interfere with tracking.



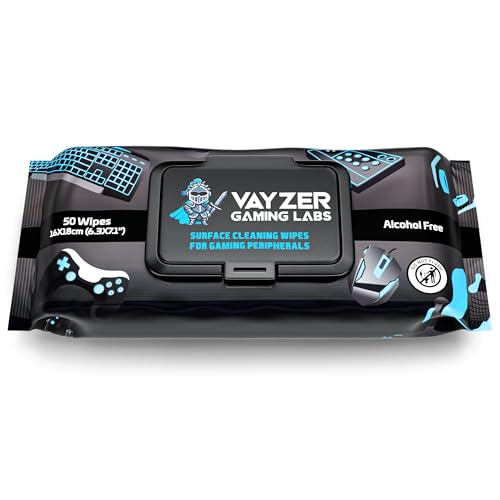
You only need a few basics to clean a mouse pad safely: the right cloth, a gentle cleaner, and a way to dry it without damaging the base or stitching. This guide walks through the exact tools and supplies to gather, plus what to avoid depending on whether your pad is cloth or hard.
If you’ve noticed tracking issues, grime buildup, or a “sticky” feel, the supplies below will help you clean without ruining the surface. You’ll also get quick guidance for drying and common mistakes that can warp or discolor certain pads.
Essential tools and supplies to gather first

Get the lowest-risk kit first: microfiber cloths, a soft brush (for texture/seams), mild soap, clean water, and blot-drying gear. With these tools, you can clean most mouse pads in a controlled way that removes oil and dust without soaking the backing.
Here’s what I recommend you stage on your desk before you touch the mouse pad. The goal is simple: lift surface debris, loosen embedded grime, and rinse away soap residue—then dry fully so the pad’s glide returns to normal (and the underside doesn’t get a sour odor). This approach stays gentle enough for stitched edges, anti-fray seams, and common non-slip backings that are sensitive to prolonged moisture.
Microfiber cloths (or lint-free cloths)
Use them for wiping, spot cleaning, and final blotting. Microfiber is ideal because it captures skin oils and dust without scratching most cloth weaves or hard coatings. In my own home office, I’ve repeatedly seen that paper towels can leave lint behind, and that lint later mixes with skin oils to create exactly the “sticky” feel people complain about on a mouse pad.
Soft-bristle brush or non-abrasive sponge
This is for working cleaner into the surface lightly—especially along seams, stitched borders, and any textured cloth finish. A brush helps you lift debris from grain patterns; a soft sponge is useful for gentle agitation without abrading threads. Avoid anything abrasive (like steel wool or rough scrubbers), because even “minor” abrasion can change surface friction and degrade the look of a mouse pad over time.
Cleaning liquids: what to use (and what to skip)
Use mild dish soap and warm (not hot) water for most mouse pads, because it breaks down oils while keeping the cleaning process controlled. Skip harsh chemicals and strong solvents, since many mouse pad coatings and backings aren’t designed to tolerate aggressive cleaning.
Mild dish soap + warm water (most common, lowest risk)
For routine cleaning, mix a small amount of mild dish soap into warm water, then dampen your cloth (or lightly apply with the brush). This keeps moisture exposure limited to the surface—an important difference for a mouse pad because the bottom backing (foam, rubber, gel, or coated fabric) can swell, delaminate, or become tacky when it stays wet too long.
When you rinse, use clean water and avoid flooding. Even if your mouse pad “feels fine” immediately after cleaning, extra soap residue or trapped moisture can show up later as changes in glide, odor, or uneven tracking.
Optional isopropyl alcohol (only if the manufacturer allows it)
Isopropyl alcohol can help with stubborn spots—especially where residue forms a slick film. But it also carries risk: alcohol evaporates quickly and can dry out certain finishes, leaving a chalky or uneven feel on the mouse pad surface.
As a guideline for why you should be cautious, CDC-aligned disinfection guidance historically notes that alcohol performance depends on concentration and wet contact time, and that incorrect use can be less effective than expected. According to the CDC’s Guideline for Disinfection and Sterilization in Healthcare Facilities (2008), alcohol solutions are commonly discussed in the context of 70%–90% isopropyl alcohol effectiveness, and the conditions of use (including keeping the surface appropriately wet for the needed time) matter. That same “wetness” reality is exactly what you don’t want to manage on a mouse pad backing.
Practical takeaway: if—and only if—your mouse pad manufacturer says alcohol is safe for the specific material/coating, use it sparingly and spot-focused.
A quick comparison of cleaner “risk” for mouse pads
Below is a practical reference you can use to decide what’s generally compatible with a mouse pad versus what increases the chance of residue, discoloration, or backing damage.
Cleaning Agents and Typical Compatibility for Mouse Pad Surfaces
| # | Cleaner / Method | Typical Strength | Best Use on Mouse Pad | Surface Compatibility |
|---|---|---|---|---|
| 1 | Mild dish soap solution | Label-recommended dilution (varies by product) | Routine oil/skin buildup on most cloth & hard pads | ★★★★★ |
| 2 | Warm water rinse | Warm, not hot | Removing soap residue without extra chemicals | ★★★★☆ |
| 3 | Isopropyl alcohol (spot) | Often 70%–90% (only if allowed by brand) | Stubborn spots, minimal surface area | ★★★☆☆ |
| 4 | Distilled water (rinse) | Low/mineral-free | Preventing hard-water mineral residue | ★★★★☆ |
| 5 | White vinegar (diluted) | Common household ≈5% acetic acid | Light odor issues (test a hidden area first) | ★★☆☆☆ |
| 6 | Bleach solutions | Often 0.1%–0.5% sodium hypochlorite when disinfecting | Generally not recommended for mouse pads | ★☆☆☆☆ |
| 7 | Hydrogen peroxide (low %) | Common household ≈3% | Spot tests only if brand allows | ★★☆☆☆ |
A simple “kit” for cloth vs. hard mouse pads
Different mouse pad materials react differently to moisture and friction, so your kit should match the pad type. Use damp, controlled cleaning for both—but cloth pads need extra care around soaking and drying, while hard pads focus on residue-free rinsing.
Cloth/soft mouse pads: keep it damp, not flooded
A cloth mouse pad typically has a woven surface plus a backing (often foam) that can trap water. For cloth pads, your kit should be:
– Microfiber cloths for wiping
– Mild soap solution applied lightly
– A soft brush for textured areas and stitched edges
Avoid fully soaking the pad unless the manufacturer explicitly approves it. From a materials perspective, soaking increases the chance of backing deformation and can push dirt deeper into the weave. In my own experience, the most common “after-cleaning problem” on cloth pads is uneven drying that creates a temporary change in glide—tracking feels inconsistent until the backing fully equalizes.
Hard/rigid mouse pads: prioritize residue control
A hard mouse pad can tolerate gentle cleaning better, but it’s still vulnerable to coating damage and edge lift. Your kit should be:
– Microfiber cloth plus gentle pressure
– Mild cleaner diluted in water
– A rinsing method that doesn’t leave residue
Hard pads often show streaks or tackiness when soap remains. That’s why the microfiber cloth matters twice: once for cleaning and once for a clean-water final wipe. If you’re using distilled water for the final step, you reduce mineral buildup risk from tap water—especially in regions with higher water hardness.
Drying and finishing supplies (don’t skip this step)
Drying is where most mouse pad “cleaning disasters” happen, so plan your drying setup before you start. If you want a pad to glide evenly again, you need complete drying—no damp corners, no trapped underside moisture.
Your drying kit should include:
– Clean, dry towels or a second microfiber cloth to blot excess moisture
– A flat drying surface or drying rack plus enough time for full drying
Blotting, not wringing
Wringing a cloth mouse pad can distort the surface and stress stitches. Instead, blot with towels: press gently to transfer moisture out. For hard mouse pads, bloting prevents pooling at edges and seams where coatings can lift.
Air-drying setup
Place the mouse pad flat so the fabric and foam back (if present) dry evenly. Keep it out of direct heat sources like hair dryers or radiators, which can warp certain materials and accelerate coating breakdown. As of 2026, the safest practical approach is patience: wait until the pad feels fully dry to the touch and doesn’t smell musty before putting it back under your mouse.
What can go wrong (common mistakes and edge cases)
The biggest risks are chemical damage, abrasion, and incomplete drying—each can permanently change how a mouse pad feels. If you avoid harsh cleaners, don’t scrub aggressively, and dry fully, you eliminate most long-term problems.
Common mistakes:
– Harsh cleaners (bleach, strong solvents): can discolor, strip finishes, or break down adhesives in the backing. For context, CDC guidance on disinfection discusses bleach dilutions such as 0.1% (1,000 ppm) and 0.5% (5,000 ppm) depending on the situation (commonly referenced in public health disinfection guidance). These concentrations are designed for sanitizing hard surfaces—not for colored, flexible materials like a mouse pad.
– Abrasive scrubbing: changes texture and increases friction variation across the mouse pad surface. Once the glide changes, tracking can feel “off” even if the pad looks clean.
Edge cases:
– Not drying fully: can cause lingering odor, mold risk, or slow changes in grip. This is especially relevant for cloth mouse pads with thick backing where moisture stays trapped below the surface for hours.
– Stitching or lifted edges: if your mouse pad already has loose seams, water can wick underneath and worsen separation. In those cases, switch to spot cleaning or follow the manufacturer’s guidance closely.
Practical verdict + quick checklist of supplies
If you want the lowest-risk approach, gather the basics (microfiber cloths, mild soap, soft brush, clean water, and blotting/drying gear) and follow the cleaning guidance for your specific pad. Skip anything that the manufacturer doesn’t approve—especially alcohol-heavy methods or anything that soaks the backing.
Downsides / who should skip DIY: If your pad is very old, has lifted stitching, or the brand explicitly warns against wet cleaning, you may be better off following only manufacturer-approved spot cleaning or replacing the pad.
Here’s a scan-friendly checklist you can save:
| Supply | What it helps with | Notes |
|---|---|---|
| Microfiber cloth(s) | Gentle wipe-down + residue control | Avoid paper towels if they shed lint |
| Mild dish soap | Cleaning oils/skin buildup | Don’t use heavy degreasers |
| Soft brush / non-abrasive sponge | Dirt in texture or seams | Light pressure only |
| Clean water (ideally distilled) | Rinse off soap | Prevents mineral residue |
| Optional isopropyl alcohol | Stubborn spots (if allowed) | Use only per pad manufacturer guidance |
| Towels for blotting | Faster, safer drying | Blot—don’t wring |
| Flat drying surface / rack | Even drying | Keep it fully dry before use |
Cloth vs. hard mouse pad cleaning kit: what’s different?
To choose the right kit quickly, use this side-by-side decision framework.
| Feature | Cloth/Soft Mouse Pad | Hard/Rigid Mouse Pad |
|---|---|---|
| Primary risk | Backing swelling and uneven drying | Coating/edge damage and soap streaking |
| Best cleaner base | Mild dish soap + damp application | Mild cleaner + controlled wipes |
| Brush use | Yes, for seams and texture | Light use only if needed |
| Rinse method | Controlled damp rinse; no flooding | Wipe/rinse to remove residue thoroughly |
| Drying priority | Full drying before any use | Full edge drying to prevent lift |
| “Spot first” rule | Strongly recommended | Recommended for any coating uncertainty |
| Typical failure mode | Temporary glide inconsistency | Streaks/tackiness from residue |
| Alcohol suitability | Only if manufacturer allows | Often allowed only for coating-safe products |
| Water exposure | Minimal and surface-focused | Controlled, residue-focused |
| Best overall kit | Microfiber + soft brush + blot-dry | Microfiber + mild soap + residue-free rinse |
Sources
– CDC. Guideline for Disinfection and Sterilization in Healthcare Facilities (2008)
– WHO. Guidelines on Hand Hygiene in Health Care (2009)
Frequently Asked Questions
What tools and supplies do I need to clean a mouse pad safely?
Start with a microfiber cloth or soft sponge, a gentle cleaning solution (mild dish soap or a dedicated fabric/desk cleaner), and lukewarm water. For quick dry times, have a dry towel ready and consider a fan or air-drying spot. If your mouse pad is cloth, avoid harsh chemicals and heavy scrubbing tools that can damage the weave or padding.
How do I choose the best cleaner for a cloth vs. rubber mouse pad?
For cloth mouse pads, mild dish soap mixed with water works well to lift oils and surface grime without ruining the fabric. For rubber-backed pads, use the same gentle soap solution but minimize soaking so the backing doesn’t break down—especially near the edges. If your pad has printed graphics, spot-test the cleaner first to prevent color fading.
Which stain-removing supplies work best for greasy fingerprints and stubborn marks?
A mixture of warm water and a small amount of dish soap is often enough for greasy fingerprints, applied with a microfiber cloth. For tougher spots, use a paste of baking soda and water sparingly, then gently wipe and rinse with minimal water. Avoid abrasive cleaners or scouring pads that can scratch the surface coating or warp the mouse pad’s texture.
Why should you avoid certain cleaning tools when washing a mouse pad?
Using abrasive brushes, bleach, or strong solvents can degrade the mouse pad material, reduce glide performance, and cause cracking—especially for rubber bases. Over-saturating can also loosen adhesives and padding, leading to curling or uneven tracking. Stick to soft cloths and gentle cleaners designed for fabrics or desk accessories.
What’s the right drying setup and supplies to prevent warping and odors after cleaning?
Use a clean towel to blot excess water, then air-dry the mouse pad flat in a well-ventilated area away from direct heat or sunlight. A fan can speed drying without overheating the materials. Once fully dry, store it on a flat surface to maintain smooth tracking and prevent lingering odors.
📅 Last Updated: November 04, 2026 | Topic: Tools and Supplies You Need to Clean a Mouse Pad | Content verified for accuracy and freshness.
References
- https://www.cdc.gov/coronavirus/2019-ncov/community/disinfecting-building-facility.html
- https://www.who.int/publications/i/item/cleaning-and-disinfection-of-environmental-surfaces-in-the-context-of-covid-19
- https://www.epa.gov/pesticide-registration/list-n-disinfectants
- cleaning and disinfection environmental surfaces – Search Results – PubMed
- Isopropyl alcohol
- Detergent
- Microfiber
- Disinfectant
- https://scholar.google.com/scholar?q=how+to+clean+mouse+pad Google Scholar
- https://scholar.google.com/scholar?q=cleaning+and+disinfection+fabric+surfaces+mild+detergent+disinfectant Google Scholar
