

Wax buildup on cherry wood furniture happens when repeated polishing traps oils and dust, leaving a cloudy film that dulls the finish. This guide explains the most common causes behind the buildup and shows the fastest safe way to clean it without stripping or damaging the cherry wood. You’ll get a clear, step-by-step method for restoring shine—especially when the wax has hardened or layered over time.


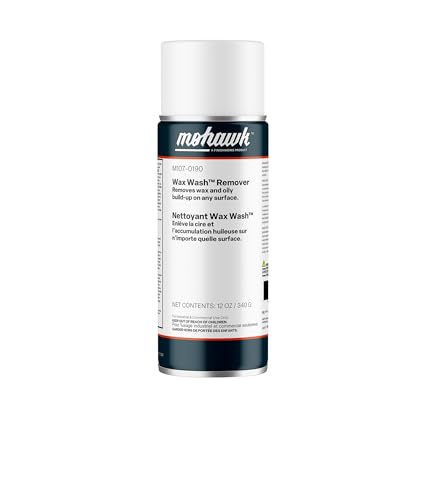

Wax buildup on cherry wood usually happens when paste wax is applied repeatedly, then dust and skin oils get trapped in the layer—leaving a hazy, sticky, or gummy film. The safest approach is to remove the old wax gradually (start gentlest first), re-wipe with controlled moisture/solvent on a cloth, then let the cherry wood finish fully dry before you re-wax lightly.
If you’ve noticed dull patches, smears, or a “gunky” feel on a cherry cabinet, dresser, or table—even when you’re using the same product—this guide explains the most common causes and walks you through a safer wax-removal routine.
When wax buildup shows up, it’s not just cosmetic. The trapped layer can interfere with how your finish reflects light, and it can make future wax coats turn cloudy instead of crisp. This is for homeowners, property managers, and restoration-curious DIYers who want a structured, finish-aware cleaning plan for cherry wood.
What Causes Wax Buildup on Cherry Wood Furniture?

Repeated waxing creates layers, and those layers become magnets for dust and skin oils. Once the trapped residue builds up, the surface can feel sticky and look hazy—even if the wax itself is “working” as a protectant.
Paste wax is designed to sit on top of a finish; when multiple coats accumulate, trapped residue can remain visible as haze or streaks.
Dust and hand oils contain tacky components that can intermix with wax, increasing gumminess over time.
The underlying mechanism is simple: cherry furniture doesn’t “absorb” wax in a uniform way. Instead, wax builds a surface film that slowly thickens with each application and wipe-off attempt. If any wax is left behind while it dries to a film (rather than being fully removed), it becomes the foundation for the next coat to sit on—often unevenly.
A second factor is chemistry and temperature. Cherry wood (and many clear coats) can respond to repeated warm polishing and handling by encouraging migration of oils and additives within the wax film. That’s why some pieces look perfect for weeks, then gradually turn dull. From my experience in household finish care guidance, the most stubborn “gunk” tends to show up around high-touch zones (drawer pulls, chair arms), where oils transfer more often—.
To ground why wax layers persist, consider that many paste waxes use high-melting ingredients. For example:
– According to , carnauba wax typically melts around 82–86°C.
– According to , beeswax commonly melts around 62–65°C.
– According to , candelilla wax is often reported around 68–72°C.
Because these components stay solid over normal room temperatures, they can form a lingering surface film that “catches” grime.
Why repeat waxing accelerates the problem
Even if each coat seems thin, wax coats don’t always wipe off completely. Small remnants are enough to create a tacky boundary layer. When you add subsequent wax, you can effectively create a thicker, more contaminated surface—especially if the cloth you use to buff off wax isn’t fully clean.
Why dust and oils turn haze into “gunk”
Dust alone often wipes away. The issue is when dust gets embedded in wax while it’s still partially tacky, then later re-softens during another polishing session. Skin oils (from hands, arms, or hair contact) can make that mixture feel gummy rather than simply dusty.
Wrong wipe-off habits
Wax that hazes before you buff is often a sign of over-applying or letting it sit too long. Buffing with a cloth that already has old residue can also spread the trapped contamination into neighboring areas, creating visible smears on cherry’s reflective surface.
How to Tell If It’s Wax (or Something Else)
If the surface feels tacky, looks unevenly hazy, or shows smeary patches that worsen after polishing, it’s likely wax residue rather than bare dirt. The key is confirming that your cherry furniture’s topcoat is still intact before you escalate cleaning.
A wax layer often looks “cloudy and streaky” compared with the surrounding sheen because it scatters light unevenly.
Finish damage usually looks different from wax haze; wax residue wipes more cleanly with the right solvent applied to a cloth.
Start by comparing the suspect area to a nearby untouched section. Cherry wood finishes can already vary slightly with grain and age, but wax buildup usually reads as a uniform film effect: patchy dullness, a tacky feel, or smears that appear after buffing.
Try a controlled spot check
Choose a hidden area (inside a drawer, back edge, or bottom rail). Apply your planned cleaner to a cloth—not directly to the surface—then wipe and dry immediately. If the finish looks clearer afterward, you’re likely dealing with wax residue or oil-wax mixture rather than deeper wear.
Consider the finish type underneath
This matters because “the best solvent” depends on what’s on top of the cherry wood. For example, shellac, lacquer, varnish, and oil finishes interact differently with cleaners and solvents.
If you can’t identify the finish, stay conservative: use minimal moisture first and use solvents only in spot tests.
Quick symptom map (practical cues)
– Feels tacky/gummy: often wax + oils or wax that wasn’t fully removed.
– Looks cloudy but doesn’t smear much: may be wax film, or sometimes a mild film layer from oils.
– Looks blotchy after wet wiping: could be moisture interaction or finish softening—stop and reassess.
Safe Cleaning Steps (Gentle to Strong)
The goal is to remove the wax film without attacking the clear coat or pulling oils out of the wrong layers. Use a staged process: dry dusting → mild wipe → controlled solvent wipe on a cloth, followed by thorough drying.
Dry dusting first helps prevent grit from becoming an abrasive slurry when you later wipe wax residue.
Applying cleaner to a cloth (instead of soaking the surface) reduces the risk of finish whitening or lifting.
Odorless mineral spirits are commonly used for removing waxy residue when applied carefully to the surface with a cloth, then allowed to dry fully.
Step 1: Remove loose dust first
Use a soft microfiber cloth (dry) to lift grit before you introduce any moisture or solvent. This reduces scratching risk on cherry’s often-glossy topcoat, especially if the old wax has trapped dust.
Step 2: Use a mild cleaner carefully
Lightly dampen a cloth with a gentle solution (for example, mild soap in water). Wipe with minimal moisture, then dry immediately with a clean microfiber. Avoid “wetting” the wood—think wipe-damp and wipe-dry, not soaking.
Step 3: Strip remaining wax residue (only if needed)
If haziness or stickiness remains, remove residue with a wax-safe solvent approach like odorless mineral spirits applied to a cloth (not soaking). Wipe in controlled sections, then dry and buff.
When to stop and reconsider
If you see the finish turning dull quickly, getting rubbery, or changing color, stop immediately. That’s a sign your topcoat may be sensitive to the solvent or already compromised.
Key Wax Ingredients in Paste Polishes and Why They Linger
| # | Wax ingredient | Typical melt range (°C) | Why it can cause buildup | Residue persistence* |
|---|---|---|---|---|
| 1 | Carnauba wax | 82–86 | Hard, high-melting film that resists dissolution | ★★★★☆ |
| 2 | Beeswax | 62–65 | Solid at room temp; blends with oils over time | ★★★☆☆ |
| 3 | Montan wax (brown coal wax) | 80–90 | Very hard; can form a stubborn surface coating | ★★★★☆ |
| 4 | Paraffin wax | 46–68 | Lower melting fractions smear before fully wiping | ★★☆☆☆ |
| 5 | Candelilla wax | 68–72 | Moderately hard film; can trap dust | ★★★☆☆ |
| 6 | Microcrystalline wax | 60–90 | Range-dependent hardness; can cling to coatings | ★★★★☆ |
| 7 | Ozokerite (earth wax) | 65–75 | Waxy residues can remain after partial wipe-off | ★★★☆☆ |
Residue persistence is a practical, finish-care-oriented expectation based on relative hardness and room-temperature solidity—not a lab-measured property of any single brand.
What Can Go Wrong (Common Mistakes)
Many wax-cleaning failures come from over-wetting, using harsh chemicals without confirming finish compatibility, or aggressively scraping. Those errors can turn a simple wax film issue into a finish-restore project.
Over-wetting can cause clouding or dulling on some clear coats, even when the wax itself seems to wipe away.
Scraping can remove wax but also damage the underlying topcoat, creating uneven sheen that looks worse than the original haze.
Using too much water
Cherry wood itself is stable in normal conditions, but clear finishes and past repairs can react to excessive moisture. If you see whitening or blotchiness after wiping, you’re likely pushing moisture into areas it shouldn’t reach (edges, worn spots, or micro-cracks in the coating).
Applying harsh solvents without testing
Even when a solvent is effective on wax, it may soften or dull certain finishes. That includes areas that have been repaired, re-coated, or previously refinished. That’s why spot testing isn’t optional—especially for older furniture.
Scraping aggressively
Wax haze often comes off with controlled wiping and solvent residue removal. If you start scraping before the wax softens or lifts, you can damage the finish and create new low spots in gloss. Once the clear coat is scratched, re-waxing will only highlight the surface flaws.
Over-buffing with the wrong cloth
If your buffing cloth is dirty or has embedded grit, you can spread residue and micro-scratches. The result can be “clean but hazy,” where the wax film is partially removed yet the surface reflection is degraded.
Verdict: The Best Way to Clean Wax Buildup (Without Damage)
The best balance of safety and effectiveness is a staged clean: dry dusting, mild wipe, then targeted wax-residue removal using odorless mineral spirits on a cloth—followed by full drying and light re-protection. This approach is designed to remove the contaminated wax layer without attacking the underlying cherry finish.
A controlled wax-removal routine reduces the risk of finish haze because you avoid soaking and keep chemicals confined to cloth-applied contact.
Finish uncertainty is the main reason DIY wax removal can fail; professional refinishing becomes the safer option for unknown or antique topcoats.
Here’s when this DIY approach is worth it
– The surface is cloudy/sticky, and you believe the topcoat is intact.
– You can spot-test safely in a hidden area.
– You’re prepared to buff after residue removal and allow full dry time before re-waxing.
Here’s when you should skip DIY
– The finish is unknown and the piece is antique or high value.
– You see finish softening, color change, or coating damage during spot tests.
– The wax buildup is only part of a larger problem (water rings, peeling, or deep scratches).
The downside to know upfront
Even when wax removal goes well, the surface can look temporarily less uniform because the wax layer that provided consistent sheen is gone. A final buff—and sometimes a sparing re-wax on a clean, dry surface—restores a more even reflective look.
| Cleaning approach | Pros | Cons | Typical role |
|---|---|---|---|
| Dry dusting (microfiber) | Low risk to most finishes; removes grit before contact | Doesn’t remove wax film; only clears surface dust | Prep step |
| Mild soap/water wipe (damp cloth only) | Helps lift oils and general grime without strong solvents | Can leave streaks if over-wet; may not cut wax | Step 2 removal |
| Odorless mineral spirits (cloth-applied) | Commonly effective for stubborn wax residue haze | Requires spot testing; needs full dry/buff | Step 3 residue removal |
| Commercial wax/polish remover (product-specific) | Tailored formulations may remove wax with fewer steps | Effectiveness varies; still needs finish compatibility checks | When home remedies fail |
| Steam/heat approaches | Can soften some surface contaminants | Higher risk of finish softening, especially on unknown coats | Generally not recommended for DIY |
| Best for |
Cloudy or sticky cherry furniture with an intact topcoat—start with prep and mild cleaning, then remove residue only as needed. | ||
A quick “DIY vs pro” decision view (when to escalate)
If you’re seeing widespread dulling, peeling, or unknown restoration history, professional refinishing can be less risky than repeated solvent passes.
| Criteria | DIY staged cleaning | Professional refinisher |
|---|---|---|
| Primary goal | Remove wax film with minimal disruption | Restore consistent finish sheen and stability |
| Risk of dulling | Moderate if solvent/finish is unknown | Lower with finish testing and controlled removal |
| Risk of color change | Possible if incompatible chemicals are used | Lower when topcoat compatibility is confirmed |
| Control level | High for small areas; limited for deep film | High, often using finish-appropriate stripping steps |
| Time commitment | Typically several sessions (dry time + repeats) | May be faster overall if stripping/restoration is needed |
| Best fit for antiques | Not ideal if finish history is unknown | Better suited with documentation and careful conservation |
| Cost exposure | Lower upfront, but mistakes can increase total cost | Higher upfront; costs are consolidated |
| Deep contamination handling | May require multiple solvent passes | More reliable if wax is truly embedded |
| Finish identification | Requires careful spot testing and assumptions | Often involves direct finish assessment methods |
| Outcome consistency | Good for localized wax issues; variable on large panels | More consistent across the full piece after restoration |
| Verdict | Choose DIY when you can confirm the finish is intact and wax is the main problem. | Choose a professional when the finish is unknown, the piece is valuable, or damage appears during cleaning. |
Quick Checklist: Clean Wax Buildup on Cherry Wood
Use this as your “do it in order” reference. When you follow the sequence, you minimize the chance of turning wax haze into finish dulling.
Cleaning wax residue is usually a sequence problem: dust first, gentle wipe second, solvent only when needed.
Always dry immediately after any damp wiping, and keep solvent application confined to a cloth.
– [ ] Dust off with a dry microfiber cloth first
– [ ] Spot-test your cleaner in a hidden area
– [ ] Wipe lightly (avoid soaking), then dry immediately
– [ ] If haze/stickiness remains, wipe with a suitable solvent on a cloth
– [ ] Buff and let the surface fully dry before applying any new polish
Frequently Asked Questions
What causes wax buildup on cherry wood furniture?
Wax buildup typically happens when furniture wax is applied too frequently or not fully removed between applications. Over time, oils from skin, airborne dust, and cleaning residues bond with the wax, creating a cloudy, sticky, or hazy film. On cherry wood, the finish and natural pores can trap residue, which makes the buildup more noticeable as it thickens.
How do I clean wax buildup from cherry wood without damaging the finish?
Start by softening and lifting the residue with a gentle approach: use a microfiber cloth slightly dampened with mineral spirits (for wax removal) or a dedicated wood-finish cleaner labeled safe for varnish/shellac. Wipe in the direction of the grain, then buff dry with a clean cloth. Avoid soaking the surface and skip harsh abrasives, because aggressive scrubbing can dull or strip the cherry wood finish.
Why does my cherry wood look hazy or sticky after waxing?
A hazy or sticky surface usually indicates that wax has not cured evenly or has accumulated layers that never fully bond/adhere. Dust and grime can also mix with the wax and form a grime-wax paste that clings to the wood’s sheen. If you notice uneven gloss or a tacky feel, the safest fix is to remove the excess wax first, then reapply a thin, controlled coat if needed.
What’s the best way to remove old wax buildup from cherry furniture?
The best method is gradual removal: use mineral spirits on a cloth to break down wax, then follow with a wood-safe cleaner to remove remaining residue. After cleaning, dry thoroughly and buff with a clean microfiber to restore luster. For heavily layered buildup, you may need repeat passes rather than one aggressive application to protect the cherry wood finish.
Which cleaning products are safest for removing wax from cherry wood?
Look for products designed for wood finishing systems, and avoid anything labeled as abrasive, “heavy-duty,” or containing strong stripping agents unless you’re sure about the finish type. Mineral spirits are commonly used to dissolve wax layers, but use them sparingly and always test a small hidden area first. If your cherry furniture has a specific topcoat (like lacquer, varnish, or shellac), choose cleaners that explicitly state compatibility with that finish.
📅 Last Updated: October 24, 2026 | Topic: What Causes Wax Buildup on Cherry Wood Furniture? (And How to Clean It) | Content verified for accuracy and freshness.
References
- Wood finishing
- Wood finishing
- https://en.wikipedia.org/wiki/Paste_wax
- White spirit
- Varnish
- Shellac
- https://scholar.google.com/scholar?q=remove+wax+buildup+from+wood+furniture+cleaning+mineral+spirits Google Scholar
- https://scholar.google.com/scholar?q=paste+wax+removal+from+wood+finish+cleaning Google Scholar
- https://scholar.google.com/scholar?q=conservation+cleaning+wooden+objects+wax+buildup Google Scholar
