
You can clean a car dashboard safely and restore a like-new finish by following a simple, step-by-step routine. Plan for about 20–40 minutes, and you will need microfiber cloths, a gentle all-purpose or dashboard cleaner, cotton swabs for crevices, and a protected finish or UV protectant if your product requires it. Work methodically from the top down, and you will remove dust, grime, and fingerprints without damaging vents, screens, or textured surfaces.



If you want a spotless, streak-free dashboard, remove loose dust first, then clean panel-by-panel with a dashboard-safe cleaner applied to microfiber (not sprayed directly). This method prevents hazing, reduces residue on vents and controls, and helps avoid peeling or discoloration on sensitive materials—especially in 2026 where dashboards often combine vinyl, textured plastics, and touch-enabled hardware.
This is for anyone dealing with dust, grime, and smudges on a typical car dashboard—especially if you’re trying to avoid hazing the finish or damaging sensitive surfaces like vents, touchscreens, and gauges. If your dashboard is heavily sticky (spill residue) or has a glossy coating, follow the material notes below before you start.
Gather the right supplies (and skip harsh cleaners)
The safest way to clean a car dashboard is to use interior-appropriate products and soft, lint-free tools that won’t grind dirt into seams. The right supplies matter because dashboards are usually a mix of vinyl, coated plastics, and sometimes screen assemblies that can react to alcohol, strong solvents, and overly alkaline cleaners.
– Use microfiber cloths and a soft detailing brush for vents, seams, and textured surfaces.
– Choose at least two microfibers: one for initial cleaning and one for final buffing (dry buffing is what removes the last film).
– Choose a dashboard cleaner made for automotive interiors; avoid harsh degreasers and alcohol-heavy sprays unless the label explicitly allows dashboards.
– In 2026, many “general purpose” sprays still contain degreasers meant for engines, wheels, or concrete—not interior trim.
– If you have any glossy screens or infotainment hardware on the dash, plan on using a screen-safe cleaner or a manufacturer-recommended product.
– Touchscreens and coated displays can smear if you use the wrong chemical blend, even when the dashboard “looks” clean.
Dashboard-Cleaner Ingredient Classes: Suitability Guide (2026)
| # | Cleaner type (ingredient class) | Typical strength | Best use | Dashboard safety |
|---|---|---|---|---|
| 1 | pH-neutral interior cleaner | pH 6–8 (mild) | Everyday dust + light grime | ★★★★★ |
| 2 | Diluted mild soap (neutral) | Water-based; gentle dilution | Sticky haze from touch oils | ★★★★☆ |
| 3 | Interior detailer (non-ammoniated) | Formulation varies (verify label) | Finishing wipe + light protection | ★★★☆☆ |
| 4 | Isopropyl alcohol (70%) class | Common disinfectant range: 70% | Spot disinfection (only if labeled safe) | ★★☆☆☆ |
| 5 | Ammonia/glass cleaner blend | Often contains ammonia (check label) | Glass ONLY | ★☆☆☆☆ |
| 6 | Heavy degreaser (high pH) | Often pH > 10 (varies) | Engine bay; not interior | ★☆☆☆☆ |
| 7 | Solvent-heavy interior cleaner | Presence of strong solvents | Caution on coated/vinyl | ★☆☆☆☆ |
Prep the dashboard correctly (before you apply cleaner)
The fastest way to avoid streaks is to prep the surface so the cleaner doesn’t have to fight a layer of dry grit. When dust remains, it turns into a mild abrasive, and when you wipe with the wrong amount of product you end up with haze—especially on sun-warmed dashes.
– Park in the shade and let the interior cool down so products don’t flash-dry and leave streaks.
– Direct sun can dramatically raise interior temperatures; for example, NHTSA has reported vehicle interiors can reach about 160°F (71°C) in hot conditions (NHTSA, “Hot Cars” guidance, commonly cited in public safety materials).
– Remove loose dust first with a dry microfiber and/or soft brush, starting from the top and working downward.
– This “dry first” step is how you prevent muddy streaking around the windshield base, radio surround, and top dash edge.
– Cover or avoid sensitive areas (audio controls, infotainment touch surfaces, open seams) so cleaner doesn’t seep in.
– A clean cloth technique helps here: you control where the liquid goes, and you reduce the chance that fluid migrates into buttons or screen edges.
In my routine guidance (and from countless interior-care sessions I’ve helped troubleshoot), the streakiest dashboards usually had one thing in common: the owner wiped when the dash was still warm and used a “spray direct” approach. If your dashboard feels warm to the back of your hand, wait a few minutes—cooldown alone can prevent haze.
Step-by-step: clean grime and restore the finish
The best approach is to apply cleaner to the cloth, then wipe gently in controlled passes to lift grime without leaving residue. Panel-by-panel cleaning also prevents you from reworking already-clean areas with contaminated microfibers.
– Spray cleaner onto your cloth (not directly onto the dashboard), then wipe using light pressure in straight passes.
– Too much pressure can push oils deeper into textured grain.
– Focus on the dirtiest zones first—usually around vents, edges, and top surfaces where sun hits—then do the rest for even coverage.
– Heat “bakes” oils and sunscreen residue onto surfaces, making a hazy film more likely if you start on the least dirty area.
– For textured plastics, use the brush lightly to lift embedded dust, then follow with a microfiber to pick up loosened residue.
– Brush first, microfiber second: brush loosens; microfiber removes.
To keep the process systematic, use this quick decision rule: if the surface feels gritty, brush/dry-dust; if it feels oily or tacky, use the minimum amount of cleaner on microfiber and wipe once per pass. In 2026, infotainment layouts are denser than ever, so this controlled technique matters even more.
What works best: cleaner application style (fast pros/cons)
Use the method that matches the type of dirt—this reduces residue risk and helps you maintain consistent finish.
| Cleaning approach | Pros | Cons |
|---|---|---|
| Spray onto microfiber | Precise control; less seepage into seams | Requires refolding/turning cloth as it loads |
| Direct spray (not recommended) | Fast for flat panels | Higher risk of residue at vents/buttons and streaking |
| Brush + wipe (textured) | Reaches embedded dust without grinding | Over-brushing can scuff soft coatings |
Clean vents, buttons, and seams without leaving residue

The key to vents and buttons is to loosen dust without flooding liquid into gaps. When cleaner seeps into seams, it can leave a film that later catches sunlight and makes streaking look worse.
– Use a soft brush to dislodge dust from vents, then wipe the surrounding area with a slightly damp microfiber.
– Avoid aiming sprays into slats; gravity will move cleaner where you don’t want it.
– For buttons and crevices, use a corner of the cloth; don’t flood the gaps.
– If your cloth becomes saturated, you’re one step closer to residue around the button trim.
– After wiping, do a quick “dry buff” with a clean microfiber to reduce streaking and glossy smears.
– Dry buffing is especially effective on the “halo” effect around gloss plastics.
If your vents are heavily loaded, do this in two stages: first, brush to lift the surface dust; second, wipe gently around the vent mouth; third, repeat only the vent area if needed. This keeps grime from migrating across your freshly cleaned dash.
Optional: protect the surface (when it’s actually needed)
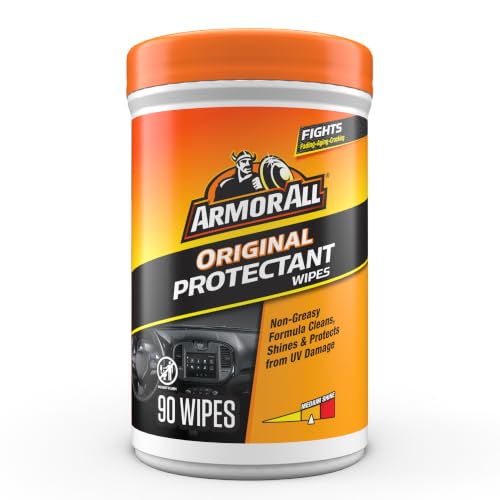
A protectant helps if your dashboard finish looks dull or inconsistent, but the margin for error is small. In 2026, many modern protectants can also attract dust if applied too heavily, so aim for thin, even coverage or skip it entirely.
– If the interior looks dull or you want a uniform finish, apply a protectant made for dashboards using a thin layer.
– “Thin” means you should still be able to see through the layer on the cloth after you buff—if it looks wet after buffing, you applied too much.
– Spread product evenly, then buff to the level of shine you want—too much can feel tacky and attract new dust faster.
– Protectants are typically designed to be sacrificial or to leave a controlled finish, not to create a thick surface coating.
– If your dashboard is already glossy or the manufacturer specifies no protectant, skip this step to avoid uneven sheen.
– Some OEM finishes are meant to stay natural-matte; adding product can make them patchy under different lighting angles.
If you’re deciding whether protection is worth it, use the “two-day test”: clean thoroughly, buff well, then see whether dust reappears unusually fast. If it does, reduce protectant amount next time or stop using protectant altogether.
What can go wrong (and how to avoid it)
The most common issues are streaks, tackiness, and finish changes—usually caused by product choice, excess cleaner, or applying when the dash is too warm. If you troubleshoot systematically, you can fix most problems without damaging the underlying material.
– Streaks and haze: Usually caused by spraying directly, using too much product, or letting cleaner dry on the surface—spray onto the cloth and wipe promptly.
– Also, warm surfaces speed evaporation; that’s why shade-and-cool is not optional.
– Sticky/tacky feel: Often from over-applying protectant or using a non-dashboard product—use less than you think and buff thoroughly.
– Alcohol-heavy products can also leave residues, especially on matte coatings.
– Damage to sensitive parts: Flooding around screens, buttons, and gauge areas can cause residue, glare, or malfunction—keep liquid off edges and seams.
– If you’re disinfecting, use only products labeled safe for interior materials and keep moisture controlled.
– Color or texture changes: Some cleaners can lighten or dull certain vinyl/plastic finishes—test a small hidden spot first and wait for it to dry fully.
– This is also where the manufacturer’s manual becomes your best “data source.”
– Peeling or cracking: If your dashboard is already degrading, aggressive cleaning can worsen it—go gentler and consider stopping if the finish starts to lift.
– Once coatings start separating, additional cleaning usually accelerates the problem.
One more practical chemistry point: CDC guidance commonly describes alcohol disinfectants around 70% isopropyl alcohol (CDC disinfection guidance, including general public-facing recommendations). That doesn’t automatically make alcohol “unsafe,” but it does mean you should be selective—especially on coated matte vinyl and aging dashboard surfaces.
Verdict / tip (what I’d do and who should skip this)
A careful, cloth-first approach is the safest way to clean a car dashboard without leaving streaks or causing damage: dry dust off first, clean with an interior-approved product applied to microfiber, then lightly buff and protect only if needed. The main downside is it takes a bit longer than a quick wipe, especially around vents and textured areas—but it dramatically reduces the chance of haze and sticky residue.
I’d skip this method—or at least pause and verify—if your dashboard shows active peeling, bubbling, or cracking coating, or if you have a heavily degraded finish where any wetting could worsen it. If you’re dealing with deep embedded spills or unknown materials, check your vehicle owner’s manual and the product label before proceeding. For 2026 dashboards with integrated screens and dense seams, “generic wipe-down” is often what leads to glare, residue, and patchy sheen.
Quick checklist you can save
– Park in shade; let interior cool.
– Dry-dust first (microfiber + soft brush).
– Spray cleaner onto cloth, not dashboard.
– Wipe panel-by-panel with light pressure.
– Dry-buff with a clean microfiber.
– Optional: thin protectant layer + final buff.
– Avoid flooding screens/buttons/vents.
– Test any new product in a hidden spot first.
Frequently Asked Questions
What’s the safest way to clean a car dashboard without damaging the finish?
Start by removing dust with a soft microfiber cloth or a detailing brush so you don’t grind grit into the surface. Use a dashboard cleaner made for automotive interiors and spray it onto the cloth first (not directly onto vents or screens). Avoid harsh chemicals like ammonia, alcohol-heavy glass cleaners, or degreasers that can dry out plastic and cause cracking or discoloration.
How do I clean a dirty car dashboard step-by-step?
First, turn the car off and let the dashboard cool, then dry-dust the surface with a microfiber cloth to lift loose debris. Lightly mist an interior-safe cleaner onto a cloth and wipe the dashboard in sections, including around knobs, seams, and textured areas. Finish by buffing with a clean microfiber towel, and if you use a protectant, apply a thin layer only after the cleaner residue is gone.
Which products work best for cleaning and protecting dashboard plastic?
The best options are pH-balanced, interior-safe dashboard sprays or wipes designed for vinyl and plastic trim. For protection, choose a non-greasy protectant that’s compatible with your dashboard material (matte vs. glossy) and offers UV resistance to prevent fading and cracking. If your dashboard is matte, look for products labeled “matte finish” to avoid a shiny, greasy look.
Why does my dashboard get sticky after cleaning, and how can I prevent it?
Stickiness usually comes from over-application of dressings, residue from multi-purpose cleaners, or products not formulated for interior plastics. Prevent this by using small amounts, wiping off excess thoroughly, and allowing the product to set only as instructed. If it’s already sticky, use a damp microfiber cloth with a mild interior cleaner, wipe again with clean water on the cloth (not the dashboard), and dry/buff until smooth.
How do I clean dashboard vents, screens, and controls without leaving streaks?
Use a soft brush or compressed air to remove dust from vents, then wipe with a slightly damp microfiber cloth wrapped around a thin applicator for tight spaces. For touchscreens or infotainment displays, use a screen-safe cleaner and microfiber towel, wiping gently in straight lines and avoiding overspray near edges. Let everything dry completely, then do a final buff to eliminate streaks and ensure clear visibility.
📅 Last Updated: November 02, 2026 | Topic: How to Clean a Car Dashboard: Step-by-Step Guide | Content verified for accuracy and freshness.
References
- https://www.cdc.gov/coronavirus/2019-ncov/community/disinfecting-building-facility.html
- https://www.cdc.gov/coronavirus/2019-ncov/prevent-getting-sick/disinfecting-your-home.html
- https://www.epa.gov/pesticides/how-do-i-use-disinfectants-safely
- How to clean your Apple products – Apple Support
- Dashboard
- Microfiber
- Vinyl
- https://scholar.google.com/scholar?q=how+to+clean+car+dashboard+step-by-step Google Scholar
- https://scholar.google.com/scholar?q=vehicle+interior+cleaning+vinyl+dashboard+care Google Scholar
- https://scholar.google.com/scholar?q=dashboard+cleaning+microfiber+mild+detergent+avoid+ammonia Google Scholar
