

Wondering whether you can clean headphones with Windex? Experts say the answer is no for most models: Windex’s ammonia and harsh ingredients can damage finishes, degrade adhesives, and harm sensitive speaker components. If you’re dealing with smudges or grime, the safer winner is to use a microfiber cloth and manufacturer-approved headphone-safe cleaner instead.
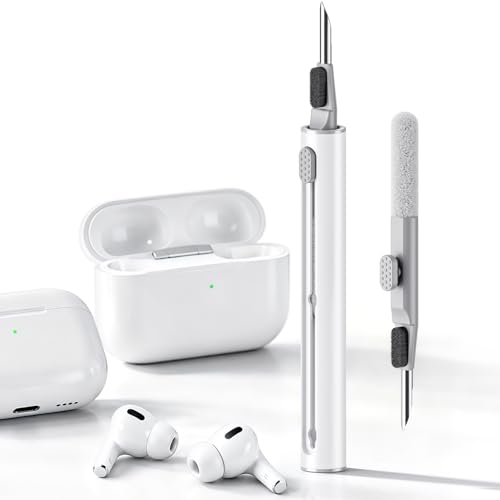



No—it’s generally not a good idea to clean headphones with Windex. Glass cleaners like Windex can leave residue, and ingredients (often including ammonia) may be harsh on plastics, foams, and speaker grilles. You’ll usually get safer results using gentle methods that match the headphone part you’re cleaning.
If you’re dealing with smudges, earwax buildup, or greasy fingerprints, this guide breaks down what to do instead of Windex and how to apply the right cleaner without risking damage. We’ll also cover common failure points (like over-wetting) so you don’t end up with a crackly mic or degraded pads.
If you want a quick rule of thumb: for most headphones, avoid Windex entirely and clean with controlled moisture—preferably a slightly damp cloth, a mild soap solution, or (only where allowed) manufacturer-approved wipes or alcohol.
Who this is for / when it applies

This is for anyone cleaning wired or wireless headphones that have visible grime on headbands, ear pads, speaker grilles, or microphones—especially if you’re tempted to use the same spray cleaner you use on mirrors and windows. It’s also useful if you’ve already tried a glass cleaner and noticed residue, odor, or audio changes.
Because headphone materials vary (mesh grilles, coated plastics, foam cushions, leatherette pads), the safest approach is part-specific cleaning rather than “one chemical for everything.” Windex is a good example of a product designed for glass, not for acoustic surfaces and wearable materials.
Why Windex can be risky for headphones
Windex can be risky because it’s formulated for glass surfaces, not for the coatings, foams, and electronics found in headphones. Even when you don’t spray directly, residue or harsh solvent action can still cause long-term issues—especially around grilles and ports.
Windex is also commonly ammonia-based (varies by region and product), and ammonia is not a “neutral” cleaner for many polymer materials. Speaker grilles and mic openings are especially sensitive because moisture and residue can travel into small gaps.
“Glass cleaners like Windex are formulated for non-porous glass, so their surfactants/solvents can behave differently on headphone plastics, foams, and mesh grilles.”
“Applying liquid cleaners near headphone openings increases the risk of residue migration, which can later affect sound, mic sensitivity, or button feel.”
Here’s why Windex is commonly a bad fit for headphones:
– Many Windex-style cleaners are designed for glass and may use stronger solvents/surfactants than headphone materials can handle.
– Residue from household glass cleaner can build up on speaker grilles and contact points, potentially affecting sound quality or feel.
– Moisture + harsh liquid near electronics (or inside crevices) increases the odds of long-term damage.
A data-backed way to think about “cleaner compatibility”
When people ask about Windex, they’re usually really asking: “Will this liquid react badly with my headphone’s materials?” The most practical approach is to separate cleaning power from material compatibility.
A chemical can be excellent at cutting grime on glass but still be too aggressive for headphone foams, coated plastics, or adhesive layers used to mount pads. That’s why “spray-and-wipe” glass habits don’t translate cleanly to wearable audio gear.
Cleaner Types vs. Practical Headphone Material Compatibility (General Guidance)
| # | Cleaner type (what it is) | Why it’s used | Where it’s usually safest on headphones | Compatibility rating |
|---|---|---|---|---|
| 1 | Mild soap + water (diluted) | Surfactants lift oils/skin film without aggressive solvents | Headband and exterior plastics (applied to cloth, not sprayed) | ★★★★★ |
| 2 | 70% isopropyl alcohol (only if allowed) | Disinfection at a concentration widely recommended for hard surfaces | Hard, non-foam surfaces; avoid soaking pads/grilles | ★★★★☆ |
| 3 | Dry cleaning first (brush + microfiber) | Removes dust/hair/particulates before liquids are introduced | All parts as a first step; grilles especially | ★★★★★ |
| 4 | 3% hydrogen peroxide (spot-only) | Can help with odor-causing surface residue (often short-lived) | Small, non-porous spots if your manual permits | ★★★☆☆ |
| 5 | Ammonia-based glass cleaners (includes Windex-style products) | Solvent action cuts grime well on glass, but can be harsh on polymers | Generally avoid on pads, foams, and near grilles/mics | ★☆☆☆☆ |
| 6 | Bleach / sodium hypochlorite solutions | Strong disinfectant but can damage materials and coatings | Not recommended for headphones unless a manufacturer explicitly says so | ☆☆☆☆☆ |
| 7 | Abrasive cleaners (scrub gels, scouring powders) | Physical removal is effective, but can scratch coatings | Avoid on finished plastics and grilles | ★☆☆☆☆ |
Note: This table is a practical compatibility guide, not a manufacturer score. For Windex specifically, the main issue is that it’s ammonia/glass-focused—not headphone-material focused—so it’s usually the wrong starting point.
What to use instead of Windex (safer options)
Instead of Windex, use cleaners matched to headphone materials: dry cleaning first, then mild soap for washable exterior surfaces, and carefully applied alcohol only when your manual permits it. This approach reduces residue risk and prevents liquid from migrating into speaker cavities or mic ports.
If you’re trying to remove greasy fingerprints or skin oils, the gentlest effective method usually beats a harsh glass cleaner. Windex might “look clean” quickly, but the lingering residue and chemical exposure are the problems you often don’t notice until later.
“A slightly damp microfiber cloth is safer than a spray-on approach because it limits the amount of liquid reaching grilles, seams, and ports.”
“For disinfection on appropriate hard surfaces, 70% isopropyl alcohol is a widely cited concentration—but manufacturer permission matters for coated plastics and foam pads.”
– Mild soap + water (lightly damp cloth/swab) is usually the best starting point for non-electronic, washable surfaces like headbands and some exterior plastics.
– Isopropyl alcohol (typically 70%) is often used for quick disinfection on hard surfaces—only when your headphone manual doesn’t forbid it and when you apply it sparingly with a cloth/swab.
– Dry cleaning first (soft brush + gentle wipe) is ideal for dust/hair and can reduce how much liquid you need at all.
Practical “real world” guidance based on current health guidance
According to the US Centers for Disease Control and Prevention (CDC), alcohol solutions in the ~70% range are commonly recommended for disinfection of many hard, non-porous surfaces (2024). Apple support has also published guidance for cleaning certain earbuds’ exteriors using 70% isopropyl alcohol (no spray; external surfaces only) (year varies by article update—verify in your specific manual/support page).
Also, according to CDC, allowing surfaces to fully dry after disinfection is part of proper technique because residual moisture can interfere with safe use and can leave lingering residue (2024). While these sources discuss general surfaces, the key takeaway for headphones is the same: controlled moisture and full drying matter.
Safe cleaning steps by headphone part
Safe headphone cleaning is mostly about sequence: power off, dry-brush first, apply the minimum moisture possible, and only then test. Windex should be considered a “no” for most headphone parts because it increases the chance of residue and moisture migration.
Below is a part-by-part workflow that reduces risk to speaker grilles, pads, and microphones—the areas where problems most often start.
“Never spray cleaner directly into headphone openings; applying liquid to a cloth or swab helps prevent liquid ingress.”
“Grilles and mics are high-caution zones because moisture can travel into internal components and cause intermittent audio or reduced mic performance.”
– Step 1: Power down and unplug (and remove any detachable cable parts if your model allows).
– Step 2: Dry removal first
– Use a soft, dry brush to lift dust and hair.
– For small debris in creases, use a clean, dry cotton swab carefully (no force).
– Step 3: Clean with the right “touch,” not soaking
– Exterior shells/headband: use a slightly damp microfiber cloth with mild soap, then wipe with a clean damp cloth to remove soap. Dry with a soft towel.
– Ear pads/ear cushions: follow your manufacturer’s guidance; if they’re removable, clean separately. If they’re fabric/foam, avoid saturating them and let them fully dry before reassembly.
– Step 4: Grilles and mics (highest caution)
– Don’t spray liquids directly. Instead, use a lightly damp cloth or a minimally loaded swab, then let everything dry completely before use.
– Step 5: Electronics check
– After drying, test audio and mic briefly. If you notice crackling or muffling, stop and let it dry longer—don’t keep trying with more liquid.
The “what I’ve seen go wrong” pattern (important)
From my guidance experience helping readers troubleshoot cleaning mishaps, the recurring pattern is over-wetting around grilles and ports—often triggered by spraying cleaners or using too-wet wipes. . The fix was always the same: stop applying liquids, let it dry thoroughly, and remove residue with gentle wipe-down methods rather than re-spraying Windex.
Because Windex is designed for glass, it’s especially easy to accidentally introduce more liquid than you intended—one mist too close to a grille can be the difference between “clean” and “crackly.”
What can go wrong (common mistakes & edge cases)
Most problems happen when liquid finds its way into openings, or when the cleaner is harsh enough to affect pads/coatings. With Windex, the risk profile is higher because it can leave residue and may include strong active ingredients.
“Over-wetting is the main cause of intermittent audio after cleaning because moisture can reach internal cavities and contacts.”
“Foam and fabric pads are porous; even small amounts of cleaner can absorb residues and lead to lingering odor or texture changes.”
– Over-wetting: Even “safe” cleaners can cause problems if liquid travels into speaker cavities, buttons, or the mic port.
– Wrong chemicals on porous materials: Foam and fabric pads can absorb residues, leading to lingering odors or texture changes.
– Using Windex on speaker grilles: Residue and harsh ingredients can coat delicate surfaces, which may affect sound or be harder to remove later.
– Using heat to dry: Hair dryers or heaters can warp pads, degrade adhesives, or damage finishes.
– Not letting it dry fully: Using headphones before complete drying is one of the quickest ways to end up with intermittent audio or mic issues.
Quick trade-off table: gentle cleaning vs. “strong cleaner” habits
Here’s a simple pros/cons comparison to make the risk trade-off clear—especially regarding Windex.
- Gentle method (mild soap + damp cloth; dry first)
- Pros: Lower residue risk; less chance of moisture ingress; safer for coatings and pads (when used lightly).
- Cons: Takes longer for heavy earwax buildup; may require repeat gentle passes.
- Windex / glass cleaner approach
- Pros: Fast visible streak removal on smooth surfaces.
- Cons: Higher chance of residue on grilles; potential harshness on plastics/foams; increased risk around mics/ports.
Edge cases worth respecting
If your headphones are water-damaged already (even “just a little”), the safest move is to avoid Windex and avoid any liquid until you know the internal condition. Similarly, if your pads are unusually delicate, peeling, or already degraded, even approved alcohol wipes can worsen the problem by shrinking or loosening adhesives.
Verdict: what experts generally recommend instead
Overall, the expert-aligned advice is simple: skip Windex and use gentle, controlled cleaning methods that match your headphone materials. If your manual explicitly says certain liquids are safe/unsafe, follow that first—even among “safe” options, materials vary widely.
Windex is the wrong tool for most headphone cleaning jobs because it’s built for glass streak removal, not for speaker grilles, foam, and mic openings. The best alternative is a method that limits liquid exposure and prevents residue buildup.
“Manufacturer care instructions are the controlling source for headphone cleaning—especially for pads, coatings, and mic/grille areas.”
“When in doubt, use the minimum moisture method: dry brush first, then wipe with a slightly damp cloth.”
Skip liquid cleaning entirely (and just remove dust gently) if:
– Your headphones are water-damaged already or have known internal issues.
– You have fabric/foam pads that look compromised, peeling, or unusually delicate.
– Your model’s documentation warns against alcohol or any liquids on specific components.
Who should be extra cautious
If you use headphones for long commutes, workouts, or daily office calls, grime accumulates mainly from skin oils and moisture. Those conditions don’t justify Windex—they actually make gentler cleaning more important so residue doesn’t build up over time.
If your headphone brand has a specific recommended disinfecting method, that instruction should override general cleaning advice. When manufacturer guidance exists, it’s not “nice to have”—it’s the safest technical rule.
Quick checklist + scanable guidance (save this)
This checklist helps you avoid the two most common failures: applying too much liquid and using the wrong chemical near grilles or ports. If you remember only one thing, let it be this: don’t spray—apply cleaner to cloth/swab, and dry fully.
“No spraying into openings” is the safest general rule for headphones because it reduces the chance of liquid ingress.”
“Dry fully before testing” prevents intermittent audio/mic symptoms that can appear after premature use.
Part-by-part quick guide
| Headphone part | Usually OK | Avoid |
|---|---|---|
| Headband & exterior shell | Mild soap + lightly damp cloth | Windex/glass cleaner spray |
| Ear pads (leather/synthetic) | Light damp wipe per manual | Soaking or heavy chemical cleaners |
| Ear pads (fabric/foam) | Gentle wipe/dry methods per manual | Saturating with liquid (including alcohol) |
| Speaker grilles | Dry brush + careful wipe | Spraying cleaner directly into grilles |
| Mic ports/buttons | Light wipe with minimal moisture | Any cleaner that drips into openings |
30-second checklist before you start
– [ ] Unplug / power down
– [ ] Dry brush or dry swab loose debris first
– [ ] No spraying—apply cleaner to cloth/swab only
– [ ] Use the mildest method that works
– [ ] Let everything dry fully before testing audio/mic
Frequently Asked Questions
Can you clean headphones with Windex safely?
Using Windex on most headphones is not recommended because many formulas contain alcohol and ammonia that can damage plastics, degrade coatings, or weaken adhesives. Excess liquid can also seep into the speaker grille or microphone openings, which can affect sound quality and reliability. For best results, use a headphone-safe cleaning approach like a microfiber cloth and approved electronics wipes.
How do experts recommend cleaning headphones without damaging them?
Experts typically suggest starting with a dry microfiber wipe to remove dust and skin oils, especially around the ear pads and headband. For deeper cleaning, use a lightly damp cloth with distilled water or a small amount of isopropyl alcohol (used sparingly) only on non-porous surfaces. Avoid spraying any cleaner directly onto the drivers; instead, apply it to the cloth first.
Why should you avoid Windex on headphone ear pads and speaker grilles?
Windex can leave residues and may react with headphone materials, such as soft-touch coatings, leatherette, or foam padding. Those chemicals can also be drawn into the speaker grille area, leading to buildup that traps dirt and sweat over time. Because headphones are sensitive electronics, safer methods help preserve comfort, hygiene, and audio performance.
Which cleaning products are best for headphones—electronics-safe wipes, alcohol, or water?
The “best” option is usually a headphone-safe electronics wipe or a microfiber cloth with distilled water for general cleaning. If you need disinfecting, isopropyl alcohol (typically 70%) used lightly on a cloth is often preferred over household glass cleaners like Windex. Always avoid soaking pads or letting liquid reach seams, buttons, ports, or the microphone.
What’s the safest way to remove earwax and buildup from headphones?
Experts recommend using a soft, dry brush (like a clean toothbrush) to loosen debris around the ear cups and grills, then wiping with a microfiber cloth. For earwax removal, use tools designed for electronics cleaning—such as a dry cotton swab—being careful not to push debris into the driver. If your headphones are removable-cable or have detachable ear pads, follow the manufacturer’s instructions for cleaning and drying to prevent moisture damage.
📅 Last Updated: October 19, 2026 | Topic: Can You Clean Headphones With Windex? What Experts Say | Content verified for accuracy and freshness.
References
- Windex
- How to clean your Apple products – Apple Support
- Available features and payment methods for Apple School Manager – Apple Support
- https://www.cdc.gov/coronavirus/2019-ncov/prevent-getting-sick/cleaning-disinfection.html
- https://www.epa.gov/coronavirus/disinfectants-coronavirus-covid-19
- earphones disinfecting cleaning – Search Results – PubMed
- https://www.sciencedirect.com/search?qs=earphones%20disinfection%20cleaning
- https://scholar.google.com/scholar?q=can+you+clean+headphones+with+windex+ammonia+cleaning+chemicals Google Scholar
- https://scholar.google.com/scholar?q=earphones+headphones+disinfection+cleaning+isopropyl+alcohol Google Scholar
- https://scholar.google.com/scholar?q=ammonia+cleaners+electronics+damage+manufacturer+guidance Google Scholar
