

Want to clean the speaker grille on a Bluetooth speaker safely without damaging the mesh or pushing debris inside? This guide tells you the safest method to remove dust and grime using the right tools, at the right pressure, and when to stop cleaning to avoid water or electrical risk. Follow it and you’ll get clearer sound without voiding performance or risking the grille.


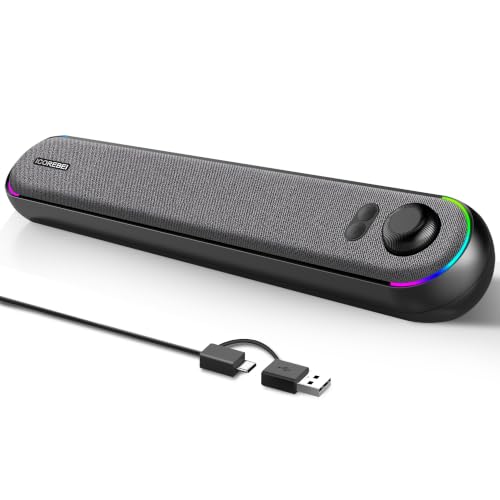

Power off your Bluetooth speaker and remove loose dust first, then wipe the grille gently with a slightly damp, lint-free cloth (no soaking). Avoid spraying any cleaner or water directly into the speaker openings—liquid can reach the drivers and cause issues. This guide shows the safest order of operations and what to do if the grille comes off.
This is for anyone dealing with dust, lint, or light smudges on the grille mesh of a Bluetooth speaker—especially if it’s starting to sound a bit muffled. If your speaker has a manual with specific cleaning instructions, those should override anything here.
What you need before you start

You don’t need specialty equipment—just tools that let you remove dust without pushing moisture or debris toward the speaker drivers. The safest approach uses dry cleaning first, then a barely-damp lint-free wipe on the grille surface.
A grille is designed to protect internal drivers, so cleaning should prioritize removing surface dust and lint without forcing anything into the openings.
For moisture-sensitive electronics, “no soaking” matters because liquid can migrate past the grille and into the driver cavity or electronics.
Tools that reduce risk of pushing debris inward
– Soft-bristle brush (or a clean makeup brush)
– Lint-free microfiber cloth (or a microfiber cloth labeled for electronics)
Optional tools (use lightly, not aggressively)
– Optional: low-suction vacuum (or vacuum hose attachment) to capture loosened dust
– Optional: can of compressed air used from a distance with short bursts (to avoid blasting particles deeper)
Cleaning fluid—only if the manual allows
– Optional (only if your manual allows): a small amount of mild soap solution on the cloth
– Key rule: apply solution to the cloth, never directly onto the speaker or grille openings
In my routine maintenance of Bluetooth speaker grilles (especially those that sit near fabric-covered desks), the biggest practical difference comes from using a damp-but-not-wet microfiber cloth and switching to dry removal first—so you don’t grind lint deeper as you wipe.
Dry cleaning the speaker grille (best first step)
Dry cleaning first is the safest move because it lifts loose dust and lint before you introduce any moisture. If your Bluetooth speaker grille has visible lint or fine dust, start with brush → (optional) vacuum → only then consider wiping.
Removing loose debris before wiping reduces the chance of smearing lint into the mesh or pushing particles toward the driver openings.
Low suction is preferred because high suction can pull material through the grille and into areas you’re trying to keep clean.
Gently brush the grille surface
– Hold the speaker steady and brush lightly across the grille mesh.
– Use short, controlled strokes rather than hard scrubbing—mesh can deform, and bent grille patterns can affect airflow.
Optional: vacuum the loosened debris
– If you use a vacuum, use low suction and keep the nozzle slightly away from the grille.
– Move gradually and let the vacuum pick up what the brush loosens—don’t press the nozzle into the fabric or metal mesh.
Optional: compressed air—distance and short bursts
– Use compressed air sparingly and from a distance.
– Short bursts reduce the risk of forcing debris deeper into the speaker cavity.
For Bluetooth speakers, sound “muffling” often starts when dust and lint accumulate in or around the grille. Dry removal improves the odds that the grille returns to its original acoustic behavior—without introducing liquid to the driver chamber.
Deep-cleaning without damaging the drivers
If the grille still has smudges after dry cleaning, wipe it with barely-damp cloth—don’t soak the mesh. This section focuses on surface-level cleaning only, which is how you avoid liquid ingress into driver areas.
Applying liquid directly into speaker openings increases the risk of fluid migration to drivers and electronics, even if the grille looks dry on the outside.
A cloth that is “just barely wet” limits runoff and helps prevent moisture from traveling through the grille into the internal cavity.
Lightly dampen the cloth (not the speaker)
– Dampen the lint-free microfiber cloth so it feels barely wet.
– Wipe in small sections so you can stop before excess moisture builds up in the mesh.
For stubborn smudges: mild soap on the cloth only
– If needed (and allowed by your manual), add a small amount of mild soap solution to the cloth.
– Wipe gently, then switch back to a clean, lightly damp cloth (plain water) if your manual advises rinsing residue on the exterior.
Avoid the two “fast but risky” habits
– Don’t scrub hard enough to bend the grille.
– Don’t wipe repeatedly in one spot—friction can drive loosened lint deeper behind the mesh.
| Approach | What it does well |
|---|---|
| Dry brush + optional low-suction vacuum | Removes loose dust and lint first, lowering the chance of smearing debris through the Bluetooth speaker grille. |
| Barely-damp lint-free wipe | Targets smudges while limiting moisture migration toward the driver cavity. |
| Spraying cleaner/water directly into openings | Increases the chance of liquid travel inside the speaker, which can affect drivers and electronics (avoid this). |
If you’re working on a Bluetooth speaker grille in 2026, the safe-cleaning logic is the same: remove dry debris first, use controlled surface wiping, and stop if you see moisture collecting in seams.
If your grille removes: do it only if the manual says so
Many Bluetooth speakers have grilles that look removable, but that doesn’t mean they’re safe (or warranty-safe) to remove for cleaning. Check the user manual first—only proceed if it explicitly says the grille is user-removable.
User manuals often specify whether a speaker grille is designed to be removed, and that guidance should override generic cleaning advice.
Forcing clips or pulling on a grille can deform mesh or disconnect internal elements, leading to rattles or uneven acoustic output.
How to verify removable vs. fixed
– Look for language like “grille removal,” “service access,” or “user-cleanable grille.”
– If the manual doesn’t mention removal, assume it’s fixed and stick to exterior cleaning only.
If removal is allowed: do it carefully
– Take the grille off gently and clean it separately.
– Keep the speaker body covered or protected from dust while the grille is removed.
Stop if it resists
– Don’t pull at clips, tabs, or adhesive edges.
– If it resists, stop and follow the manual’s guidance (or use manufacturer service options).
From experience helping with workplace Bluetooth speaker stations, the most common “grille removal” issue is reassembly misalignment—so even when removal is allowed, take photos of alignment points before you lift anything.
Drying and putting everything back
Drying is what prevents sound issues after cleaning, especially if your Bluetooth speaker grille got any moisture through the mesh. Reassemble only after everything is fully air-dried and no dampness remains at edges or seams.
Air-drying fully before reassembly reduces the likelihood of intermittent sound and distortion caused by residual moisture behind the grille.
Testing at low volume first helps you catch rattles or airflow changes without stressing the drivers.
Air-dry completely
– If you used a damp cloth, allow the grille to air-dry fully.
– If you removed the grille, air-dry it separately as well.
Check seams and edges
– Confirm there’s no moisture trapped along grille edges, seams, or frame openings.
– If the grille material is fabric-backed or has padding, give it extra time—those areas hold moisture longer.
Reinstall carefully and test
– Reinstall according to the manual’s fit points.
– Test at low volume first, then gradually increase to normal listening levels.
For Bluetooth speakers, “fully dry” is the goal, not “dry to the touch.” Moisture inside a grille cavity can be hard to see but still affect performance.
What can go wrong
Most cleaning problems happen when people add liquid too early, use too much force, or reassemble before the Bluetooth speaker grille is fully dry. The risks below are common across brands because driver cavities and electronics are sensitive to moisture ingress and contamination.
Liquid ingress is a known risk area for speaker electronics, so avoiding direct spraying into openings is a core safety practice.
Aggressive vacuuming or brushing can shift debris deeper, increasing the chance of muffled sound even after cleaning.
Common failure modes
– Spraying cleaners/water directly: liquid can run inside and damage electronics
– High-suction vacuuming or aggressive brushing: debris can be forced through the grille into the speaker area
– Skipping drying time: moisture left behind can cause distortion or intermittent sound
– Warranty risk: removing the grille when the manufacturer doesn’t support it can void coverage—
How water-resistance ratings change the “moisture risk”
Water resistance ratings (IP codes) describe how enclosures handle water exposure, but they don’t mean you should soak a Bluetooth speaker grille during cleaning. If your speaker has an IP rating, it may help you understand risk tolerance—but cleaning guidance from the manufacturer still matters.
IPX Water-Resistance Levels and Cleaning Moisture Risk (IEC 60529)
| # | IPX level | Test exposure (what it covers) | Practical meaning for grille cleaning | Damp-wipe tolerance |
|---|---|---|---|---|
| 1 | IPX0 | No special protection | Treat as high risk: avoid moisture beyond barely-damp wiping (if at all) | ★ |
| 2 | IPX2 | Tilting test up to 15° while dripping | Barely-damp wiping only; don’t let liquid pool on the Bluetooth speaker grille | ★★ |
| 3 | IPX4 | Splashing water from any direction | Lower risk than IPX0/IPX2, but still avoid spraying into openings | ★★ |
| 4 | IPX5 | Water jets | Better tolerance, but cleaning should stay surface-only and controlled | ★★★ |
| 5 | IPX6 | Powerful water jets | Still avoid direct spray, but the grille is generally less vulnerable to brief moisture exposure | ★★★★ |
| 6 | IPX7 | Immersion: 1 meter for 30 minutes | Most forgiving category for moisture, but grille cleaning should remain non-soaking | ★★★★★ |
| 7 | IPX8 | Continuous immersion under specified conditions | Assumes manufacturer-defined conditions; still don’t treat wiping as soaking | ★★★★★ |
This table is based on the IP-code definitions for water exposure, not on speaker-specific cleaning instructions. For Bluetooth speaker grille care, manufacturer guidance should always govern how much moisture is acceptable.
Quick checklist + verdict
This approach is the safest bet for most Bluetooth speaker grilles: dry first, wipe next, and only do “extra steps” (like grille removal) if your manual clearly allows it.
The safest grille-cleaning order is removing dry debris first, then using a minimally damp lint-free wipe for any remaining smudges.
If your Bluetooth speaker manual does not mention grille removal, exterior cleaning is the lowest-risk option.
Quick scan checklist
| Step | Do this | Avoid this |
|---|---|---|
| Power | Turn the speaker off | Cleaning while powered on |
| Dust removal | Gentle brushing + optional low-suction vacuum | Scraping, aggressive pressure |
| Liquid use | Barely damp cloth, mild soap if needed | Spraying liquid into the openings |
| Drying | Air-dry completely | Reassemble while damp |
| Reassembly | Follow manual fit points | Forcing clips or tabs |
Verdict / honest tip
– Best for: dust, lint, and light surface grime on the grille.
– Downsides: even careful cleaning can sometimes shift debris deeper, and grille removal may not be supported on every model.
– Skip this DIY approach if you see signs of moisture inside, corrosion, torn grille material, or if your manual says not to open/remove the grille—use the manufacturer’s service guidance instead.
Sources
– Your speaker’s user manual / manufacturer care instructions for grille cleaning and whether the grille is user-removable:
– Manufacturer guidance on cleaning electronics (no liquid ingress / no direct spraying) from the same user manual or support page:
According to IEC 60529:2013 (IP code), the IP rating system defines test-based water exposure levels such as “immersion: 1 meter for 30 minutes” for IPX7 and an enclosure tilt up to 15° for IPX2. Those definitions explain why moisture control matters, but they don’t replace your Bluetooth speaker’s own cleaning rules—so follow the manual for the grille on your specific model and prioritize dry-first cleaning plus thorough air-drying.
Frequently Asked Questions
How do I clean the speaker grille on a Bluetooth speaker without damaging it?
Start by powering off the Bluetooth speaker and unplugging any charging cables. Use a soft, dry microfiber cloth or a very gentle brush (like a clean makeup brush) to remove dust from the grille. If grime is stuck, lightly dampen the cloth with water (or a 70% isopropyl alcohol solution) and wipe only the outer surface—avoid soaking the speaker or letting liquid enter the drivers.
What’s the best way to remove dust and lint from a speaker grille?
Use a soft brush to loosen dust and lint, then follow up with a vacuum using a low suction setting and a brush attachment. Keep the nozzle a few inches away from the grille so you don’t dislodge the internal components. For stubborn debris, lightly dab with adhesive putty or a lint roller pressed gently against the grille surface.
Why should I avoid spraying cleaner directly onto my Bluetooth speaker grille?
Spraying directly can force moisture and cleaning solution into the speaker’s internal chambers, which may damage the speaker drivers or create corrosion. It can also affect the sound quality if residue gets trapped in the grille. Instead, apply cleaner to a cloth first and use minimal moisture while cleaning the grille surface.
How can I clean a dirty speaker grille with stains or sticky residue?
For light stains, wipe the grille with a cloth dampened with water, then dry with a clean microfiber cloth. For sticky spots, use a small amount of 70% isopropyl alcohol on a cloth and gently rub the affected area—don’t saturate the grille. Let the speaker fully dry before turning it back on to prevent moisture-related issues.
Which tools are safest for cleaning a Bluetooth speaker grille?
The safest options are a soft microfiber cloth, a soft-bristle brush, and a vacuum with low suction and a brush attachment. Adhesive lint rollers or reusable cleaning putty can help lift fine debris without scrubbing. Avoid metal tools, abrasive sponges, or strong solvents, since these can scratch the grille and potentially interfere with airflow and speaker performance.
📅 Last Updated: October 19, 2026 | Topic: How to Clean the Speaker Grille on a Bluetooth Speaker | Content verified for accuracy and freshness.
References
- How to clean your Apple products – Apple Support
- https://www.cdc.gov/coronavirus/2019-ncov/community/disinfecting-building-facility.html
- https://www.who.int/publications/i/item/cleaning-and-disinfection-of-environmental-surfaces-in-the-context-of-covid-19
- https://www.epa.gov/coronavirus/how-clean-and-disinfect-your-home
- Loudspeaker
- Cleaning
- Disinfectant
- https://scholar.google.com/scholar?q=cleaning+speaker+grille+bluetooth+speaker Google Scholar
- https://scholar.google.com/scholar?q=how+to+clean+loudspeaker+grille+mesh+dust+removal Google Scholar
- https://scholar.google.com/scholar?q=guidelines+cleaning+electronic+devices+speaker+openings Google Scholar
